How to Update Web Application Directly to Windows Azure Web Role without Redeploying Azure Package
The deployment of the solution package to Windows Azure is time consuming (I have observed in practice 10-15 minutes). The new features introduced in Azure SDK 1.3 onwards enable alternative for deployment (more precisely update) of the Azure Web Role. Essentially, the idea is to leverage IIS Remote Management feature and Web Deploy. This means that you can update the Web Role within seconds without having to redeploy Azure solution.
Ryan Dunn has packaged the Web Deploy as an Azure plug-in. He also documented the required configuration process in his blog. You simply download the plug-in and configure it with Windows Azure SDK.
I have followed his blog but had difficulty in getting the Web Deploy to work. I have then found another blog from Wade that explains that some firewalls disallow SSL traffic on any port other than 443. So the solution is to map 443 to the port 8172. Now how to do it and where? – the original source does not make it explicit.
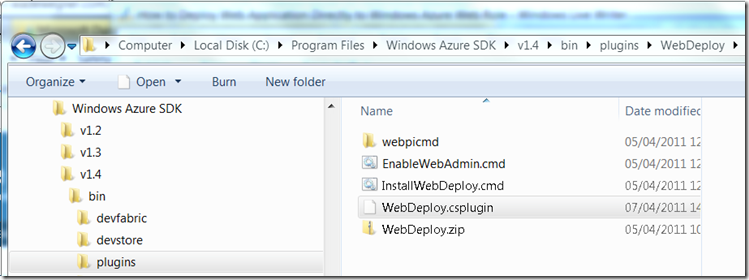
Locate the WebDeploy.csplugin in C:\Program Files\Windows Azure SDK\v1.4\bin\plugins\WebDeploy
Run the Notepad in elevated mode (as Admin) and open this file. Locate the InputEndpoint element and change port attribute as show below.
That is it. The next step is to deploy the solution package into the Web Role. Yes it takes still 15 minutes but now because of the Azure WebDeploy plugin we can use update the role once it becomes ready.
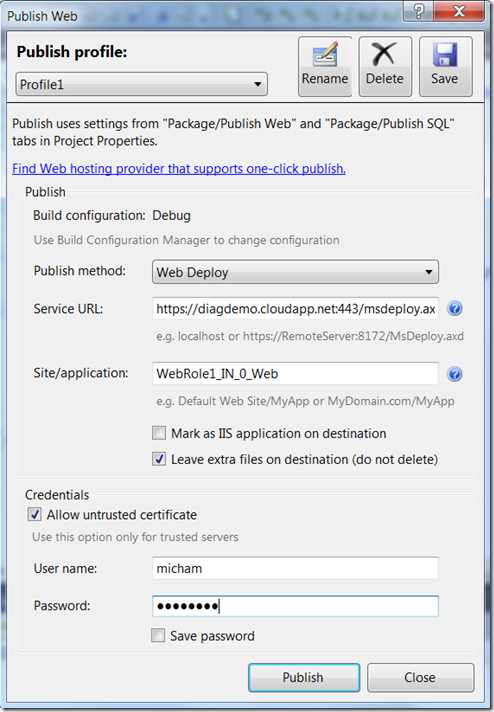
From Visual Studio I can now right click the web application project (associated to Web Role project) and select Publish. The configuration varies from the one described in Ryan Dunn blog.
The update of the WebRole with the web site project that Visual Studio created by default is really fast it took in my case less than 2 seconds.
This is great, but I will need to do more tests on more complex projects to see to which extent this approach is practicable.


