Visual Studio 2012 and Debugger .NATVIS files – what can I do with them?
In Visual Studio 2012 , Visual Studio native debugger introduces a new type visualization framework that allows customizing the way Visual Studio displays native types in debugger variable windows (watch, locals, data tips etc.). It supersedes the autoexp.dat file that has been used in earlier versions of Visual Studio and offers xml syntax, better diagnostics, versioning and multiple file support. Component authors can use this framework to create visualization rules for their types making it easy for developers to inspect them during debugging.
Visualizers for native types are specified in .natvis files. A natvis file is simply an xml file (with a .natvis extension) with its schema defined in <VSINSTALLDIR>\Xml\Schemas\natvis.xsd. Visual Studio ships with a few natvis files in <VSINSTALLDIR>\Common7\Packages\Debugger\Visualizers folder. These files contain visualization rules for many common types and can serve as examples when writing visualizers for new types.
Not trying to provide all the details about .natvis files (as it is a topic for entire separate blog/article), I will rather try to demonstrate briefly the flexibility and power of the framework that can be used beyond simplistic visualization of data.
Let’s pretend that you have your own data type:
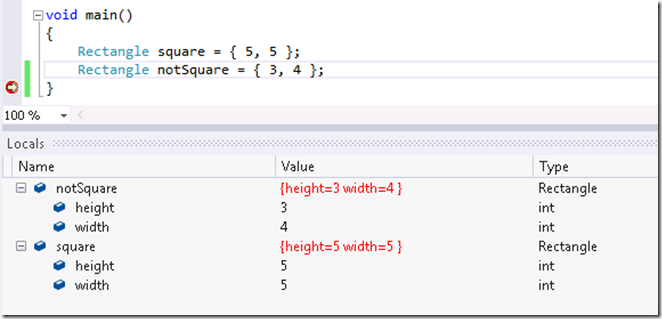
When you look at variables of this type in debugger Watch, Locals or Auto window, you see the expected data:
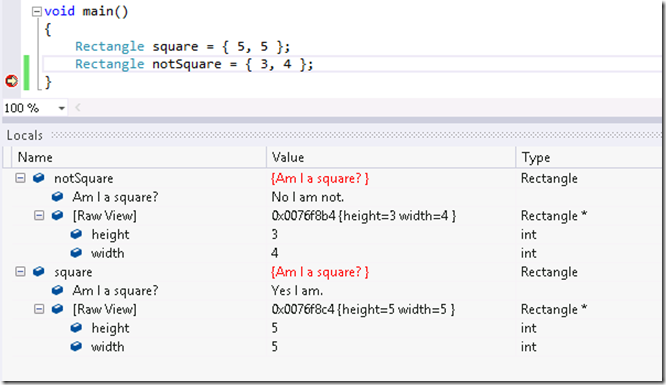
Now copy the below XML snippet into the file with extension .natvis, and place it in %USERPROFILE%\My Documents\Visual Studio 11\Visualizers\. Besides many different ways to display your types in friendly ways, you can create synthetic expansions:
mytypes.natvis:
<?xml version="1.0" encoding="utf-8"?>
<AutoVisualizer xmlns="https://schemas.microsoft.com/vstudio/debugger/natvis/2010">
<Type Name="Rectangle">
<Expand>
<Synthetic Name="Am I a square?"
Condition="height==width">
<DisplayString>Yes I am.
</DisplayString>
</Synthetic>
<Synthetic Name="Am I a square?"
Condition="height!=width">
<DisplayString>No I am not.
</DisplayString>
</Synthetic>
</Expand>
</Type>
</AutoVisualizer>
And now your visualization is richer and allows you to see not only raw data of your objects, but also some post-processing of it (which can be very handy, especially if you are dealing with complicated data types that require some non-trivial evaluation).
Enjoy!
Update: more data on this subject is available here: https://code.msdn.microsoft.com/Writing-type-visualizers-2eae77a2


