Creating a DNS Server in Azure IaaS
Scenario
I have multiple Azure Infrastructure-as-a-Service (Iaas) Virtual Machines (VMs) running under multiple Cloud Services, within one Virtual Network. I need these VMs to resolve each other based on hostname as well as be able to resolve public websites.
If these VMs were all running in one cloud service, they would be able to resolve each other using Azure Name Resolution. However, for a variety of reasons, I need to run them in separate Cloud Services, which prevents me from using this.
https://msdn.microsoft.com/en-us/library/windowsazure/jj156088.aspx
This leaves me with three options:
- Use host files to record the names of each VM
- Use an existing external DNS server
- Create a DNS server
In this article, we'll explore the third option. Note this article may seem fairly basic to people who have a good understanding of infrastructure, but hopefully it will help people who don't.
Note: Azure AD is quite different from Windows AD and does not provide any functionality for DNS.
Azure Setup
To simulate this scenario, I have the following Azure setup…
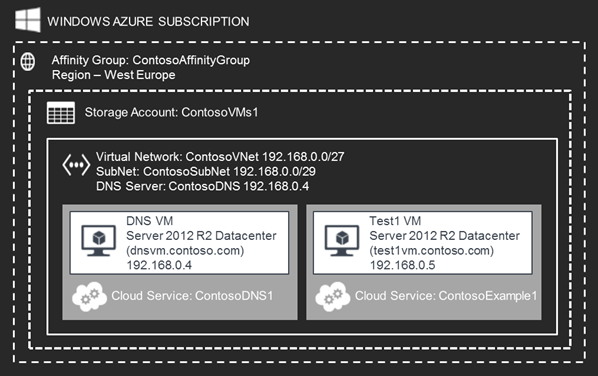
Note, I actually have multiple VMs similar to Test1, each running in their own cloud service, but for simplicity I have just shown the DNS VM and another example VM.
Configuring DNS Virtual Network
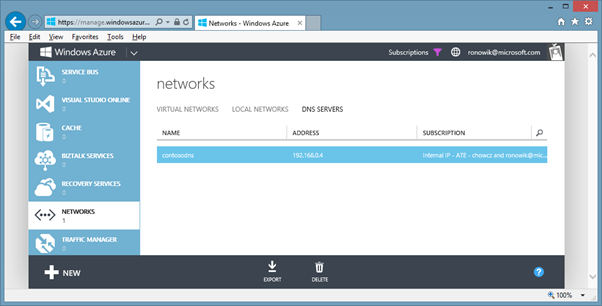
If this is not already configured (as per the above scenario), go the Azure Management Portal and set a DNS server to the IP of your DNS VM.
Configuring DNS Server
To add the DNS server role, remote onto the Virtual Machine you intend to use for DNS and launch Server Manager. From this, launch the "Add Roles and Features Wizard" and do the following:
- Before You Begin Screen: Click Next on the first screen
- Installation Type Screen: Select the "Role-Based or Feature Based Installation" radio button. Click next.
- Server Selection Screen: Select your local server (DNSVM) then click Next.
- Server Roles Screen: Check the "DNS Server" tick box. When prompted to "Add features that are required for DNS Server? " click "Add Features" (ensure the management tools checkbox is also checked). Click Continue then click Next.
- DNS Server Screen: Click Next.
- Confirmation Screen: Click Install.
- Results Screen: View the results page to confirm installation has been successful, then click Close.
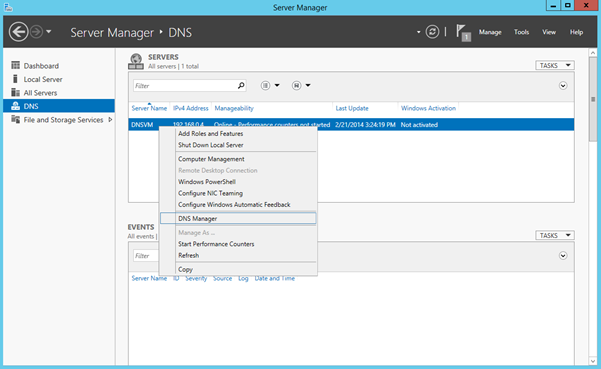
Once the DNS role is installed, to configure bring up the DNS Manager (in Server Manager, click DNS from the left hand pane, select your local server, right click and select DNS Manager)
Within DNS manager, you now need to create a forward lookup zone. This is the domain name on which all of your servers are referenced. In my example, I'm going to use contoso.local (local is to denote that the domain name is just pertinent to the virtual network, and not a public domain name – you could use whatever domain name you like however).
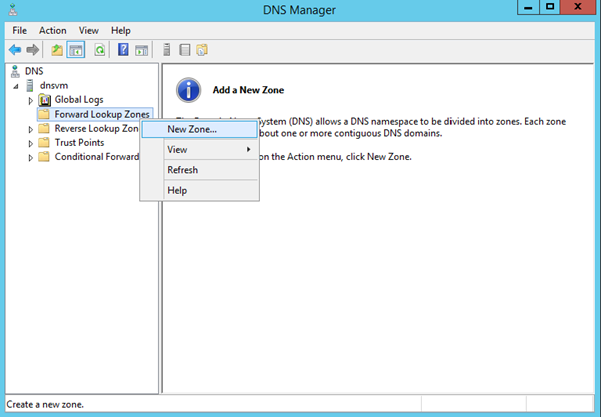
In the new zone wizard…
- On the first screen, click Next
- Select the type of zone to be a "Primary Zone" click Next
- Set the zone name to be your domain (e.g. contoso.local). Click Next
- Accept the defaults on the "zone file" screen, click Next
- IMPORTANT: On the dynamic update screen, ensure that the radio button for "Allow both nonsecure and secure dynamic updates" is checked. This is so new VMs can automatically register. Click Next.
- Review the settings and click Finish.
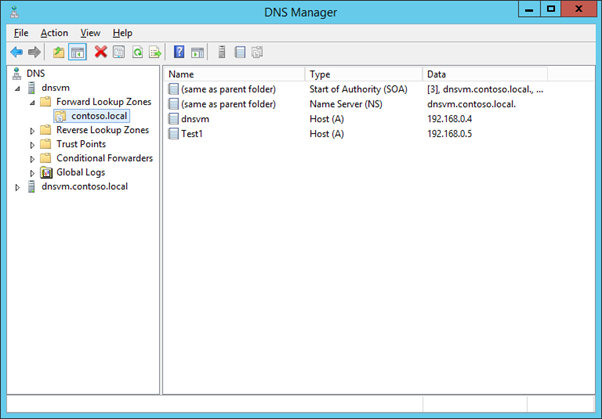
You should end up with the following

Setting the DNS Suffix on all VMs
The final configuration step is to ensure that all VMs (including the DNS VM) use a DNS suffix that matches your new forward lookup zone.
From the Server Manager, click "Local Server" in the left hand pane, then click the "Computer Name" link to launch the In the System Properties dialog.
- In the System Properties dialog, click Change
- In the subsequent "Computer Name / Domain Changes" dialog, click the More button.
- Finally set the DNS suffix to match the forward lookup zone (created on your DNS server). Click Ok to close dialog boxes and allow the machine to reboot.
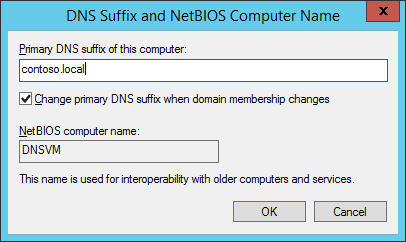
Repeat on every Virtual Machine.
Verify Everything's Worked
To verify everything's worked, remote onto the DNS VM and launch the DNS Manager. Expand your forward lookup zone. You should see all of your VMs under this (the VMs would have automatically registered as we set our zone to "Allow both nonsecure and secure dynamic updates")
Finally, on each machine, launch a command prompt and run NSLookup against the other VMs in your network as well as a publicly facing website. These should now successfully resolve.
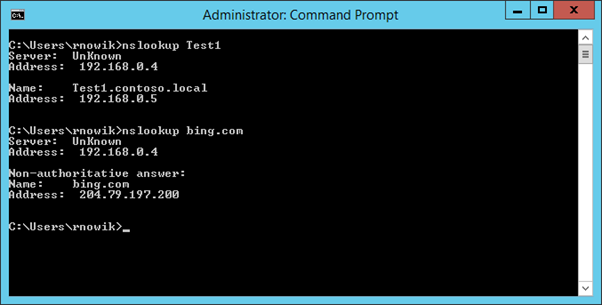
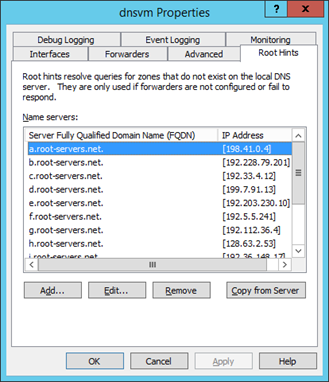
Footnote: By default, root hints are configured on the DNS server. This means you can resolve external sites also with no further action:
Written by Rob Nowik