Word 2007 as a blog editor
Word 2007 is an excellent blog editor you can use towards blogs in SharePoint. No worries about uploading pictures you like to add to your blog post. Use Word as you normally do, and then publish it to the blog of your preference.
This is how you do it:
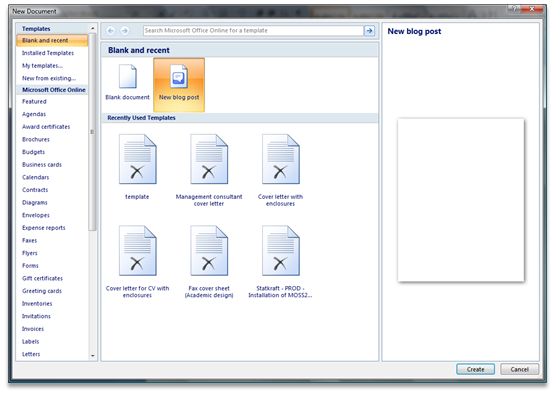
Choose Office button / New and select “New blog post”:
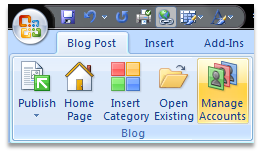
The first time, you also have to add your blog account. Click on “Manage Accounts”
Click New and choose “SharePoint blog”:

Click Next and type (or copy) in the URL to your blog:
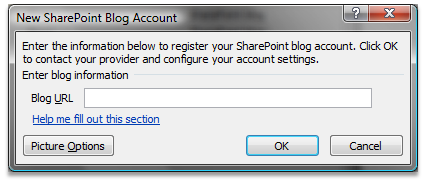
(Example of an url to your blog My site: https://sharepoint/personal/[username]/Blog)
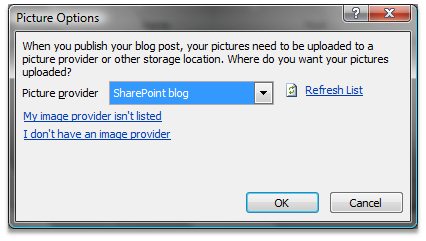
Click on the button “Picture Options” and make sure you select SharePoint blog as your picture provider.
After you have done this “one time configuration” and set up your account, you can now choose which blog your want to publish to:

(In my example I have created four blog accounts, and I’m choosing to publish to Blog1, which happens to be my blog at My site).
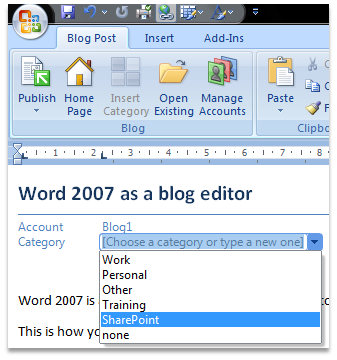
When you have chosen the blog you want to publish to, the categories are also available for you to choose:
As you can see, I have added pictures (screenshots) to my blog post. This was done by just pasting screenshots into my Word document.
You can, of course, use new functionality like SmartArt in your blog post as well.

The last step is to click on the “Publish” button (top left corner).
Good luck!