Exploring the AutoScale feature in Windows Azure Websites
We recently released a whole lot of updates for Windows Azure platform and one of those updates, is the addition of date based AutoScale scheduling support (set different rules on different dates).
In this blog post we will go over the concepts of auto scale, configuring your website to AutoScale in and out thus saving you operations cost.
Note: AutoScale feature is currently in preview and must be used only for testing purpose. All preview features do not have SLA and are supported through forum.
What is Windows Azure AutoScale?
Let’s say you run a website that sells flowers and its known pattern that traffic to your website increases during Mother’s day, Valentine’s Day etc. Before Windows Azure AutoScale feature was available you had to manually increase the instance count of your websites to be able to efficiently handle the increased load. You had to then again manually decrease the instance count after that peak.
Now with Auto Scale you have the ability to Scale in or out automatically by defining a set of rules.
Windows Azure AutoScale Facts
- AutoScale feature in Windows Azure Websites is available in Standard mode only.
- Ability to AutoScale is supported only for instance count currently.
Enable Windows Azure AutoScale
Before you can start using AutoScale ensure that your website is running in Standard mode.

- Login to your Windows Azure Account.
- Click WEB SITES and then click the NAME of the website on which that you want to configure AutoScale.

3. Click SCALE and then click set up schedule times.

4. In Set up schedule times dialog box under SPECIFIC DATES enter the details in each textbox as per the prompt.
Note: This is the date and time when you want to increase the instance count. At the END TIME your instance count will be automatically reduced to the previous default value.

5. After adding the details, click the tick button at the bottom of Set up schedule times dialog box.
6. From the EDIT SCALE SETTINGS FOR SCHEDULE dropdown choose the NAME you entered in the previous step(in this case it is Diwali).

7. Drag the INSTANCE COUNT slider towards the right to increase the instance count.
8. Click SAVE button on command bar at the bottom, after choosing the required the INSTANCE COUNT.
9. You will received a similar notification under the command bar.

Your AutoScale automation task is saved and your instance will automatically scale out during the defined date and time.
Access AutoScale Operation Logs
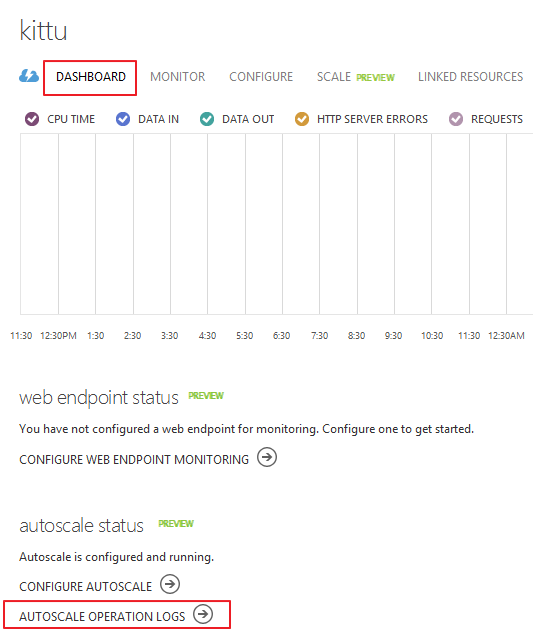
You can access the AutoScale operations logs from Dashboard of your website in Windows Azure.
- Login to your Windows Azure Account.
- Click WEB SITES and then click on the NAME of the website for which you want to view the AutoScale logs.
- Click DASHBOARD then click AUTOSCALE OPERATION LOGS
4. Here you will see all the AutoScale operation logs.
Note: You can adjust the date and time, to query the logs relevant to that particular time frame.
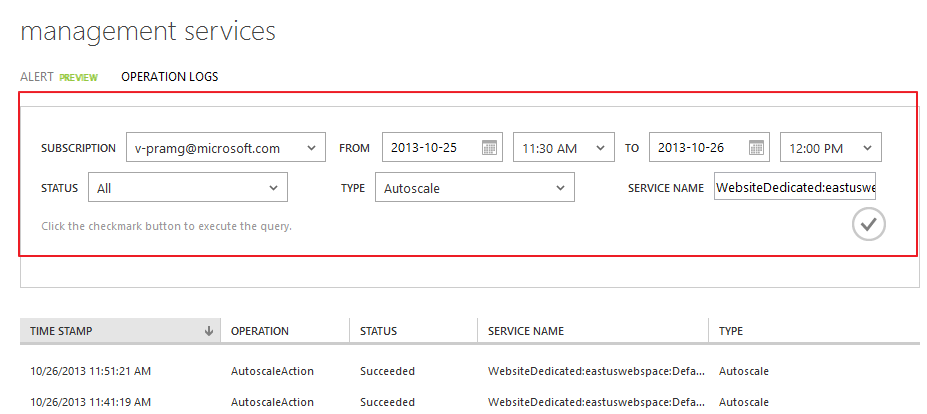
5. Choose a particular log by clicking on it, then click Details on the command bar to see more information of the selected operation.

Hope this information was informative!!
If you don’t already have a Windows Azure account, you can sign-up for a free trial and start using the Windows Azure Websites and AutoScale features today.