How to use the MAP tool to perform a Server Consolidation Analysis
The MAP tool does a very good job of Inventorying and assessing environments. MAP also does a great job at collect performance data on servers and make consolidation recommendations.
Step 1. Choose the Machines to collect performance data and begin the data collection
In the MAP tool select a database and go to the Server Virtualization section on the left side of the app.
Under the Server Virtualization section there is a steps to complete section if you have performed an inventory the collect inventory step will have a green check mark next to it. If you have not performed an inventory this blog posts details how to do that. https://blogs.msdn.com/b/markm/archive/2015/02/17/inventorying-sql-servers-with-the-microsoft-assessment-and-planning-toolkit-map.aspx
Select the Collect Performance Data step
in this screen you are asked if the target machines are Windows and or Linux and you are asked to enter an end date and time.
When collecting data it is important to catch peaks in resource usage so collect performance data for a long enough amount of time to catch the spikes in resource consumption.
The next screen is where you will tell the MAP tool which machines to collect performance data. If you have performed an inventory then you can select machines from the machines the MAP tool found in the inventory, or you can create a list of machines as a text file and let MAP read the text file to get the machine names.
You will then be asked for credentials to use to collect performance data from these machines.
Once you have completed this wizard, performance data collection will begin. It is important not to exit the MAP tool for the duration of the performance collection which also means you can't log out for the duration of the performance data collection. In the event the MAP tool is stopped or the machine is rebooted, you can repeat the above steps and the MAP tool will give you the option to append to the performance data already collected or start over. Just append to the data collected and let it continue to run.
Step 2. Create hardware configuration
The next step is to define you hardware architecture and set up some parameters to use for guest placement.
Select the step Create Hardware Configuration, you will see the following screen
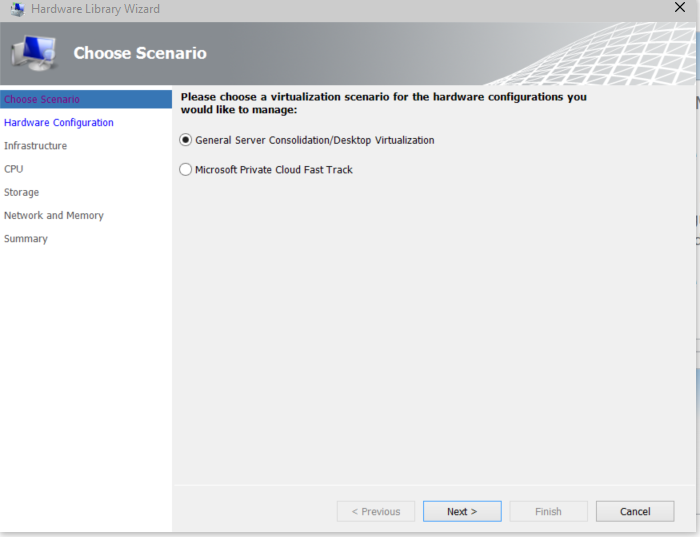
Choose if you want to define your own hardware specifications.
If you have a specific host in mind, or would like to run multiple what if scenarios choose the General Server Consolidation/Desktop Virtualization option.
If you are going to use one of the pre-determined Microsoft Fast Track architectures then choose the Fast Track option.
Next you will see a screen that will allow you to choose a hardware configuration. The MAP tool includes some samples configurations or you can create your own.
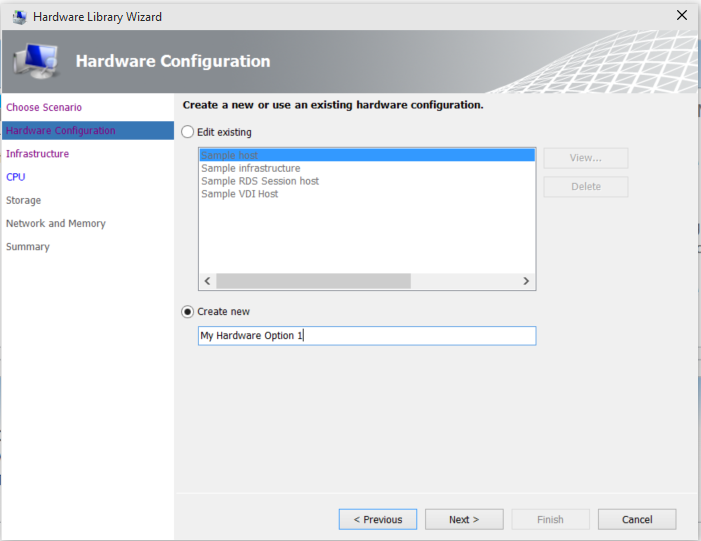
This is where you will define your hardware architecture. Once you have created a hardware architecture it will show up in the list exiting hardware architectures.
The next screen allows you to create an infrastructure. If you have a predefined infrastructure this is where you can enter details about that infrastructure. For the purposes of this blog we will skip this part and define our hardware architecture.
The next screen is where you will select a CPU architecture. Select the Manufacturer and Model of the CPU you will use in your target host and the tool will fill in details about that CPU.
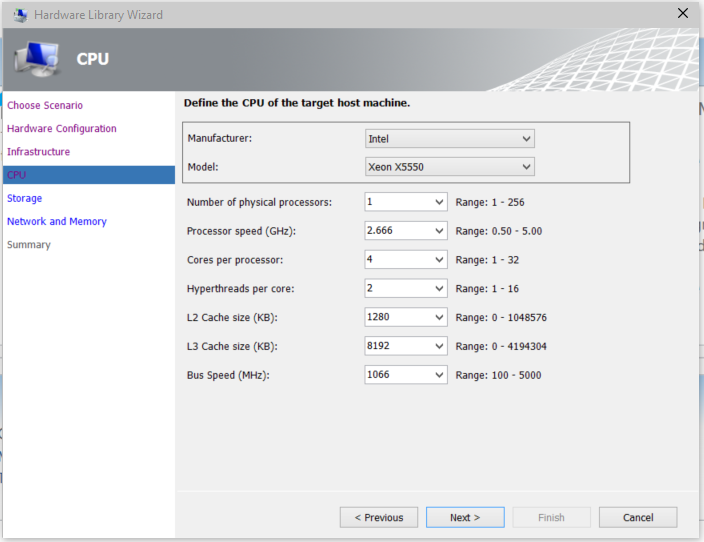
You will need to select the number of processors and you have the ability to adjust any of the values if they do not match what you will use as a host.
Next you will enter information about the storage available to the host and you will enter how much memory and max network speed for the host.
Step 3. Run the Server Consolidation Wizard
Now you will run the consolidation wizard and generate reports.
Choose the step Run the Server Consolidation Wizard
The wizard will ask you about the virtualization technology you will use. All of the options are for Hyper-V and vary by version and service pack. If you are using another vendors hypervisor you can still continue with this wizard. Just chose one of the Hyper-V 2012 options and check with your hypervisor manufacturer for comparison to Hyper-V.
The next screen will ask you which Host configuration you want to use. Select the one you just created.
Note: It's easy to create several host configurations and re-run this wizard for each one to do some What-If analysis.
The next screen is asking you to specific utilization settings. By default all values are set to 100%. This will completely max out a host before placing machines on another host. In most cases 80% utilization will give you maximum guest placement with some room left for spikes in performance.
The next screen is similar to the screen in the performance collection wizard asking which guest you want to place on your host configuration. You can let MAP present you will a list of machines it has collected performance data or you can provide a list.
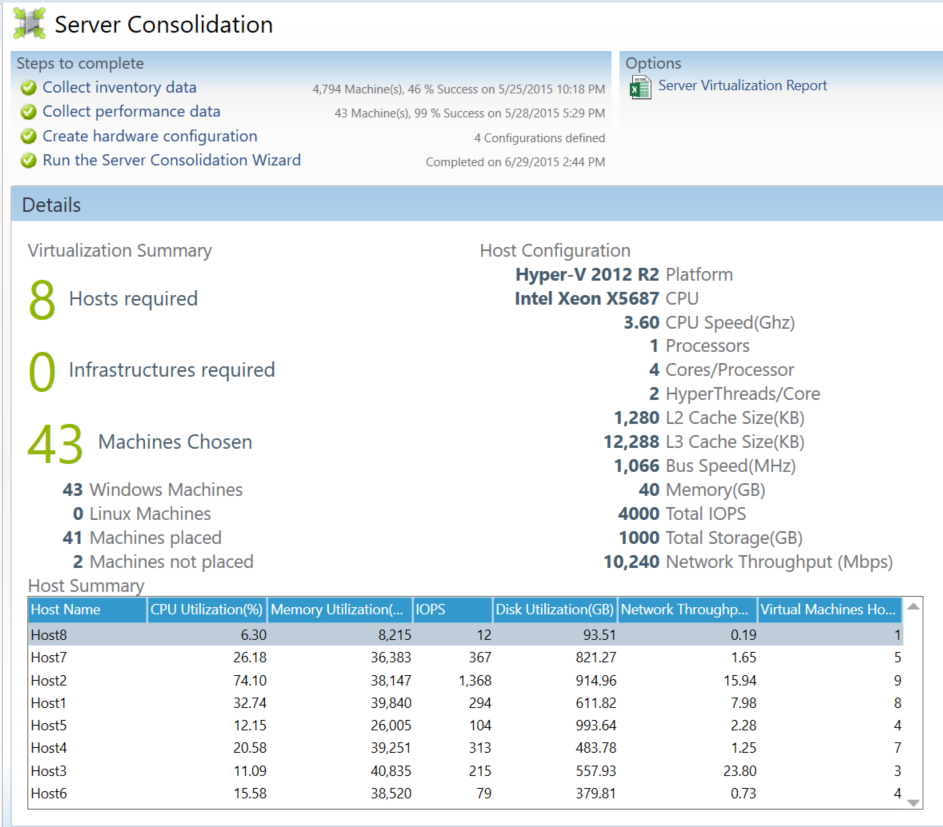
Once the Wizard runs the Server Virtualization screen in the MAP tool updates and shows you the number of hosts and guests.
Click on the Server Consolidation under the Scenarios section.
This page describes summary information about the hosts and in the upper right hand corner under Options there is a report you can generate that will list individual Host / Guest placement.