How to connect to your Azure Account using a Management Certificate in PowerShell
In my last blog post https://blogs.msdn.com/b/markm/archive/2014/12/15/getting-started-using-powershell-for-azure.aspx I showed you how to connect to Azure using the add-azureaccount command which brought up an interactive sign in screen.
In this blog post I will show you how to connect to azure using a management certificate allowing you to execute your PowerShell jobs with no user dialog.
The first step is to create an X.509 certificate and upload it to Azure. There are two methods of doing this. The first is with the makecert utility which is included in the Windows SDK. The second method is to use Internet Information Services Manager to create the certificate.
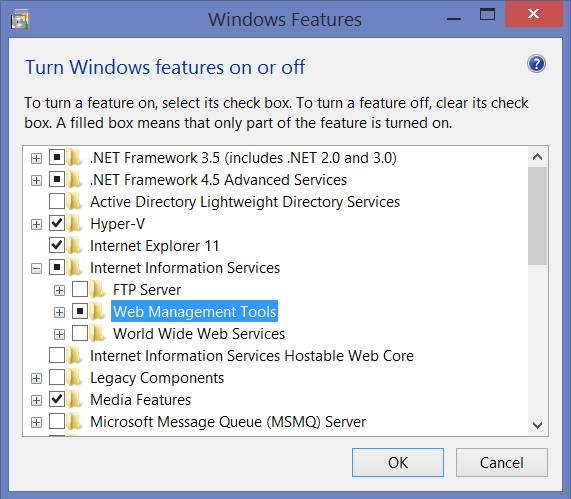
I will cover the second option, using Internet Information Services Manager. If you don't have Internet Information Services Manager installed on your computer you can add it in Control Panel > Programs and Features > Turn Windows Features on or off > Internet Information Services. By default selecting this will select Web Management Tools and World Wide Web Services. We only need the Management Tools to create an X.509 certificate, deselect World Wide Web Services if you do not want web services running on your computer.
Once you have the Web Management Tools installed you can create a certificate to use for connecting to your Azure Subscription.
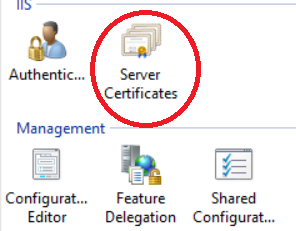
Open the Web Management Tools by typing IIS in Search and selecting Internet Information Services (IIS) Manager. Once open, select Server Certificates
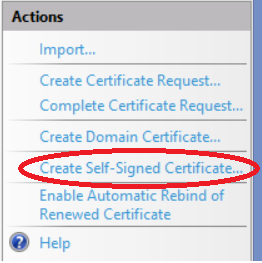
Next select create a self signed certificate in the actions pane and choose a name.
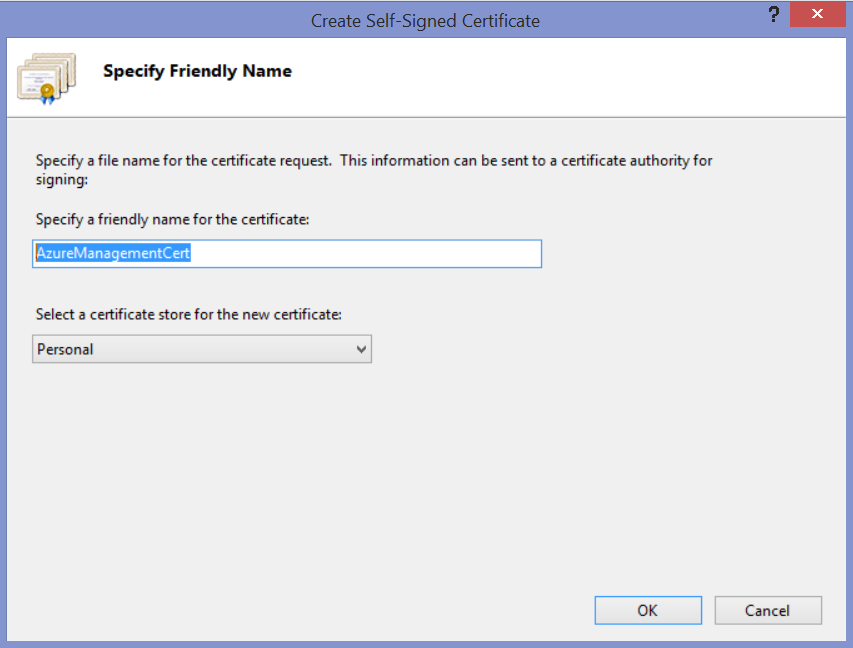
Select Personal for the Certificate Store
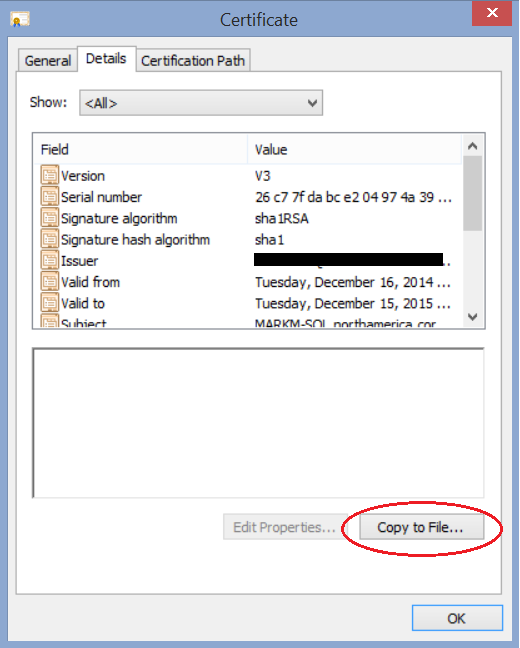
Once the Certificate is created, double click on it to bring up it's properties. On the Details tab click on Copy to file. This will bring up the Certificate Export Wizard
Once the Wizard has started, click next at the welcome screen
Select Do not export the private key and click next
Select DER Encoded Binary X.509 (.CER)
Provide a file name and click Next then click Finished.
You now have a file containing your certificate that can be uploaded to your Azure Subscription.
Login to your subscription and go to the Management Portal.
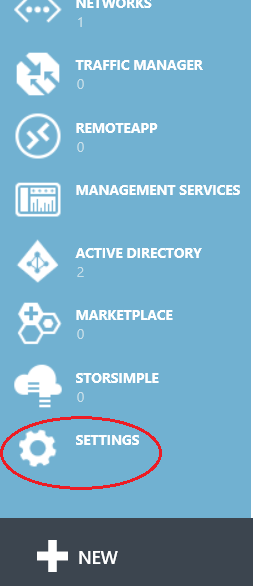
On the left side of the screen scroll all the way to the bottom and select Settings.
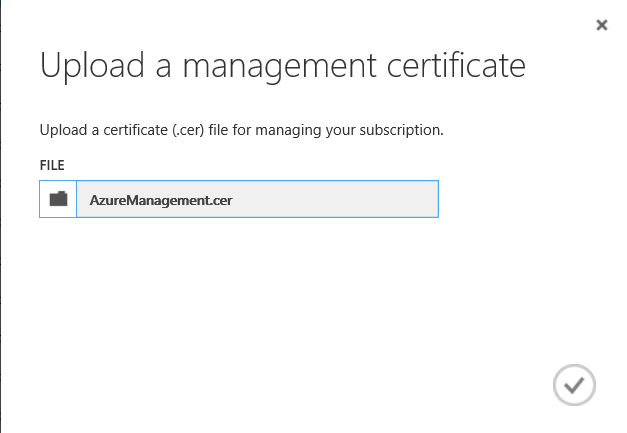
Select the Management Certificates Tab and click on upload
Browse to your certificate and click on the check box.
Now your certificate is uploaded and ready to use.

The name of the certificate will be the computer name that you used to create the certificate.
Now you are ready to connect to your Azure Subscription within PowerShell.
First you will need to define 3 variables.

$SubscriptionID is the value indicated on the Management portal as Subscription ID
$ManagementCert is the value returned by the function Get-Item.
cert\currentuser\my\ points to your personal certificates on your computer and the value is the Thumbprint of the certificated indicated in the Management portal as Thumbprint. (is also available in the properties of your certificate in the details TAB.)
$SubscriptionName is the name of your Scubscription indicated in the Management portal as Subscription.
Next you will need to Set and Select your subscription.

Set-AzureSubscription -SubscriptionName $SubscriptionName -Certifacte $ManagementCert -SubscriptionID $SubscriptionID
Select-AzureSubscription -SubscriptionName $SubscriptionName
You are now connected to your Azure Subscription in PowerShell programmatically and can begin executing PowerShell commands to manage, provision and de-provision resources.
Once your job has completed you can disconnect from your subscription using the following command.
remove-azuresubscription -SubscriptionName $SubscriptionName