Workflow Tips (Part II - Collect Feedback)
This blog posting applies to Microsoft Office SharePoint Server 2007.
Collecting feedback from a user as part of a workflow is easily configurable out of the box, but may not be quite intuitive at first pass. Here’s a simple explanation of how to get values back from the user as part of a workflow step, then use those values in your workflow for making further decisions.
Add “Collect Data from a User” Activity
Add an activity to your workflow to Collect Data from a User. You will configure three values for this activity: Data, User and TaskID.
Configuring the Data is a fairly straightforward wizard. One twist is that the Description you enter on the first screen of the wizard is what appears on the submission page of the form that collects the data, so put any explicit instructions here, not just a general description.
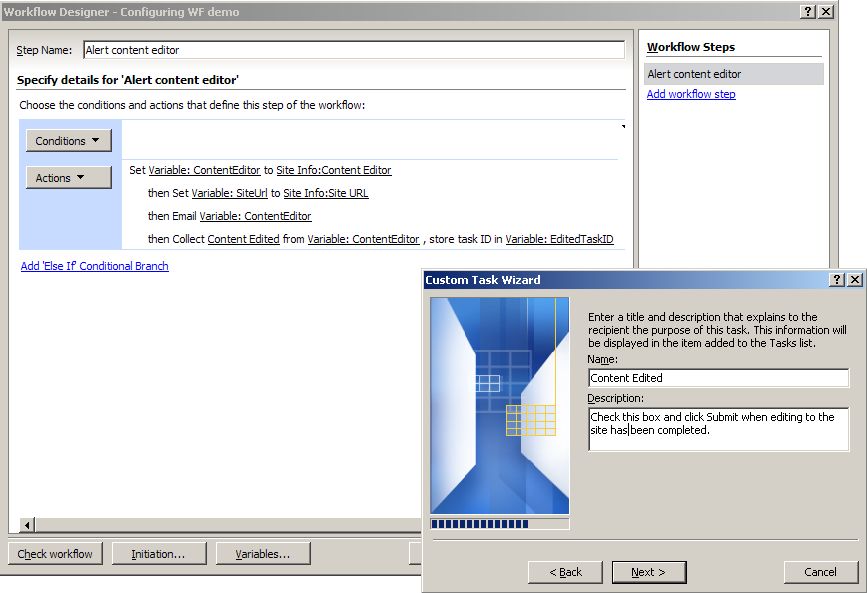
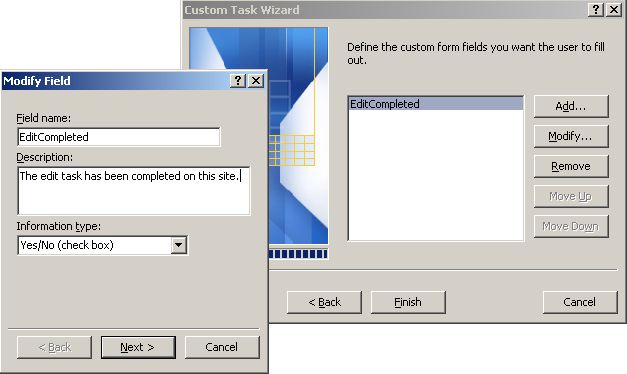
Then on the second screen of the wizard for Data, enter the name and type of field you would like to collect.
Configuring the User is easy: use the variable you created in Part I of this tip that contains the identity of the workflow participant.
Finally, the Task ID is the key to the task that the user edited, so that you’ll be able to get at it to collect the data the user submitted. So just enter a name that is meaningful to you for this, such as EditedTaskID.
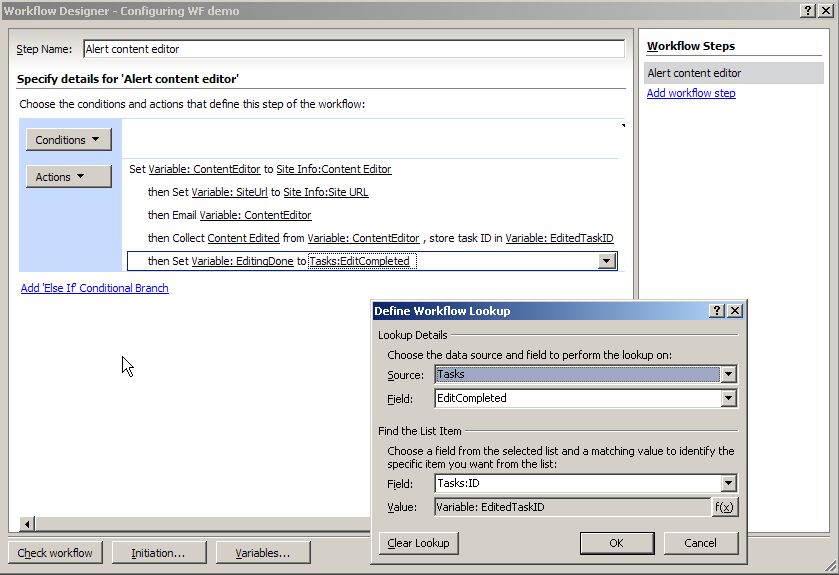
Add Another Activity
At this point, the data that the user submitted is available to you, but it may not be clear how to get at it in order to use it in another activity. We’ll use a Set Workflow Variable activity as an example, and it’s also a best practice because the workflow now makes it clear where data is coming from and it can be reused more easily.
Add a Set Workflow Variable activity to your workflow and create a new variable name to store your value in. Then click the value placeholder to open a wizard, and enter the following values.
- Source: the task list the workflow is attached to. If more than one task list shows up, choose the one that contains the custom field you configured in the second step. When you choose this list, the wizard will expand to present more choices.
- Field: choose the custom field you configured in the second step.
- Field: choose the ID field of the task list.
- Value: choose the task ID variable you created in the second step.
This says “Retrieve the Custom Data field from the Tasks list for the entry whose ID equals the ID of the task the user edited.”
At this point, you have retrieved data from the user for this step of the workflow and can use it to make further workflow decisions.