Sharing Folders in Azure
When multiple instances of an application need to share data in Azure they typically use Azure Storage or SQL Azure. Some legacy applications were written to use Shared Folders to exchange information between instances or in producer/consumer scenarios. Porting these applications to Azure present a challenge since Azure doesn’t natively support Shared Folders.
One option is to rewrite parts of the legacy application to directly use Azure Storage instead of Shared Folders. This is the ideal way of migrating an application to the cloud. Your application will get all benefits of cloud storage, such as infinite storage and automatic replication, but more importantly I/O will be distributed in the cloud which can give some applications a significant performance boost.
Rewriting legacy applications is not always possible. You can still move these legacy applications to the cloud as-is but it requires some understanding of Azure to setup the environment correctly.
Enabling Shared Folders
The default Azure environment is locked down to reduce security exposure of each role. A role can only use the ports specified in the role definition, and that includes the ports needed for Shared Folders to work. The first step in enabling Shared Folders is to define two internal endpoints:
<Endpoints>
<InternalEndpoint name="NetBIOSSession" protocol="tcp" port="139" />
<InternalEndpoint name="SMB" protocol="tcp" port="445" />
</Endpoints>
Keep in mind there is a limit to the number of endpoints a role can define. Currently a single role can define up to 5 endpoints.
Defining the required endpoints is not enough for SMB to work properly. The firewall must also be configured to enable file sharing. It can be done with this command:
netsh firewall set service type=fileandprint mode=enable profile=Current
These changes will allow SMB between roles but sharing folders will not be possible yet. The reason is the user account roles execute as – the SYSTEM account. Because your role is running under SYSTEM a new account must be created for all shared folder operations. You can use any programmatic way of creating an account, I like to use PowerShell for this purpose. The following script creates an account, it uses two variables set elsewhere $netuser and $password, for the account name and password, respectively.
# Create a user to manage shared folders
$server = "WinNT://" + $env:computername + ",computer"
$computer = [ADSI] $server
$newUser = $computer.Create("user", $netuser)
$newUser.put("Description", "Owner of shared folders in Azure")
$newUser.SetPassword($password)
$newUser.SetInfo()
All that is left is for the shared folder to be created. You must grant the required permissions to the account previously created for the share to be accessible remotely. The simplest way to share a folder is via the net share command. When you grant access to an account via net share you don’t automatically give permissions to access the local directory being shared so you will also need to grant the appropriate permissions to the local directory. Here is a PowerShell function that grants full permissions to a local folder to the $netuser account and creates a network share for this account to use:
function share_folder($folder, $label) {
$acl = get-acl $folder
$accessRule = New-Object System.Security.AccessControl.FileSystemAccessRule($netuser,"FullControl","Allow")
$acl.SetAccessRule($accessRule)
set-acl -path $folder -AclObject $acl
$full_perm = "/GRANT:" + $netuser + ",FULL"
net share $label`=$folder "$full_perm"
}
These commands must be executed with elevated privileges hence they must be in a startup task. The sample project at the end of this post has all these scripts bundled in the solution to demonstrate how to create and use shared folders.
Allocating Space
You should create all folders intended for sharing in the C: drive where you will find the bulk of the free disk space for a role.
You must also choose a virtual machine size with enough local disk space to support your application. This page lists the VM sizes and the amount of local storage in each one - https://msdn.microsoft.com/library/ee814754.aspx
Using Shared Folders
All Azure VMs accessing network drives must have the same network configuration applied, i.e. endpoints defined and firewall rules updated. They must also have the account created with the exact same credentials as the file server(s).
Before a shared folder can be used it must be discovered. Unfortunately it is not possible to use network discovery in Azure. To make matters worse both IP addresses and hostnames are dynamically assigned by Azure at each deployment. Some strategy is needed to make this possible.

Creating two separate roles makes the discovery simple. A “File Server Role” containing a single instance can be discovered through the Azure runtime API.
var fileServer = RoleEnvironment.Roles["FileServerRole"].Instances[0];
var ipaddress = fileServer.InstanceEndpoints["SMB"].IPEndpoint.Address;
The discovery logic can be added to the Application Role’s OnStart() and made available to the application logic via environment variable or injected in the application configuration before it is launched. Alternatively the file server(s) could write their IP address(es) to an Azure Table or Blob at start up. Each client would look up servers in the well-known storage location at startup. I will use the two-role configuration as an example for the rest of this post, all concepts should apply regardless of deployment topology.
Azure roles are started as services. The best practice for services is not to mount shared drives but Instead use UNC paths. Assuming the drive letter your application uses is configurable you should change it for the UNC path constructed using the IP address discovered through the Azure runtime API. So instead of X:\ your application should be configured with \\10.x.x.x\.
The last piece of the puzzle is the credentials your application uses to access the network drive. By default it will be using SYSTEM but it needs to authenticate with the file share using the account created at startup time otherwise it will be denied access. The programmatic way to switch identities is impersonation, you can read more about it here https://msdn.microsoft.com/en-us/library/aa376391(VS.85).aspx. Using impersonation from C# is easy but it takes multiple steps. Instead of showing the entire code here you can download the sample solution below to see how it works.
Sample Project
This solution puts it all together, it demonstrates the file sharing and access to the network drive. It is available here: https://cid-76556b7fc951f312.office.live.com/self.aspx/Public/SharedFolder.zip
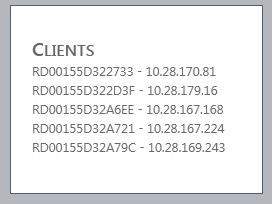
The File Share Role is a Web Role so you can have some visual feedback for how it works. Navigating to the default page for the project will present you with a list of all clients' names and IP addresses. What's interesting is how this list is created - each instance in the Application Role writes a single file to the shared drive in the format hostname-IP address. The page simply lists of all files in the shared folder.
The point of this solution is to demonstrate sharing and accessing network drives. If you create additional tests post your results in the comments. I am sure I/O results will be popular.
I used ExtraSmall VMs in the solution. If you didn't sign up for the beta you will have to change the VM size to at least Small.
Final Thoughts
It does takes some effort to make Shared Folders work in Azure. Most if not all of it is boilerplate code that can be added to any Role as startup logic.
The main drawback of this approach is the single point of failure in the File Server Role. Worse yet, if something happens to that single instance or Azure needs to move it to another physical host all data will be lost. One way to solve this problem is to use Azure Drive and share a folder from it. This way all data will be persisted in Azure Storage and in case of a server failure or relocation no data will be lost.