Feedback: Creating chaos with render-to-texture
I had heard that XNA does render-to-texture a bit differently from native DirectX, so I spent some time playing with that part of the API tonight. Not surprisingly, it was designed in a nice clean manner and it was a snap to use.
In case you're not familiar with render-to-texture, the basic idea is to direct the output of the rendering pipeline to a texture map, rather than to the back buffer. You can then do further processing on the texture before eventually making its contents visible to the user. A few scenarios that come to mind are:
- If you're rendering a scene of a room containing a television, you could render the scene shown on the television to a texture, then apply that texture when rendering the television
- If you want to do high dynamic range rendering, you can render your scene to a texture that holds a wide dynamic range of color per pixel, then use a special pass to transfer this image to the back buffer, often with flare and bloom effects
- Some shadow rendering algorithms involve rendering the scene to a texture to help determine what points are in shadow
- Motion blur and depth of field effects can be created by rendering the scene to one or more textures (sometimes at lower resolution), then using a special shader to apply the blur
- If you want to have a persistent canvas to draw on, rather than having to redraw the entire scene every frame, render-to-texture can accommodate that
- If you want to do 2D image processing effects on the GPU, render-to-texture of a fullscreen quad is the best way to do it
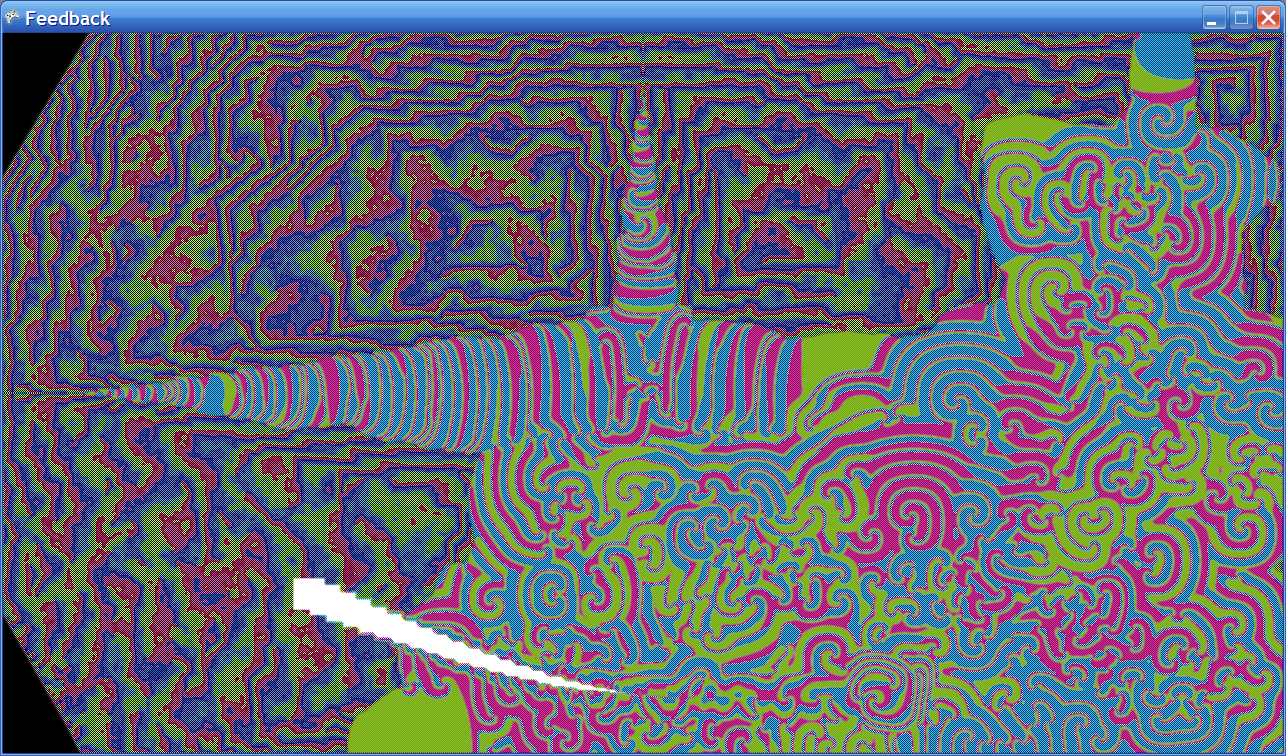
The last scenario is the closest to what I ended up doing for this sample. The idea is to render a very simple scene (a white square, controllable by the user) to a texture. Then, transfer the image from that texture to a second texture, using a pixel shader to do an "interesting" technique. Finally, render a quad containing the second texture to transfer the image to the back buffer.
Why bother with a second texture, vs. just transferring the first texture to the back buffer? Well, because on the next frame, we will start, not with a blank scene, but with the second texture. Render the white square onto that texture, then use the "interesting" shader to transfer the image to the first texture, then transfer the first texture to the back buffer. In the next frame, start with the first texture, and so on.
This means that the image processing pass not only impacts the white square, but the result of the last frame's image processing pass. One frame's output becomes the next frame's input, as in the mathematical Game of Life. Like holding a microphone up to a speaker which is amplifying the output of the microphone...we get feedback. (Though hopefully not as annoying as a shrieking microphone!)
After playing around with some shader code, I came up with one that gives a really nice result. When the white square hits the initial black field, the blackness turns into a fast-cycling, angular chunks of color, mainly red, green, and blue. But when the white square interacts with this color field, it produces a much more stable pattern of magenta, yellow, and cyan that swirls about in a very wave-like manner. The white square creates ripples through the more stable pattern, without changing its character much. A picture's worth a thousand words, though you're really not seeing the full effect unless you see it animating.
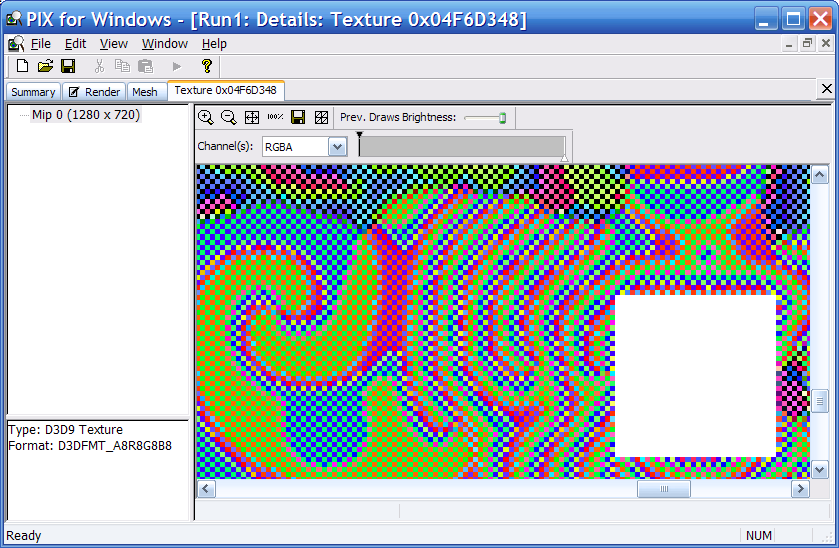
I used PIX to take a closer look at the texture -- it's very checkered:
Here's the shader code:
float4 MyPS( float2 tex : TEXCOORD0 ) : COLOR0
{
float4 sample0;
float4 sampleW;
float4 sampleE;
float4 sampleS;
float4 sampleN;
float4 color;
// Sample the texture in 5 places
sample0 = tex2D(samp, float2(tex.x, tex.y));
sampleW = tex2D(samp, float2(tex.x - dx, tex.y));
sampleE = tex2D(samp, float2(tex.x + dx, tex.y));
sampleS = tex2D(samp, float2(tex.x, tex.y - dy));
sampleN = tex2D(samp, float2(tex.x, tex.y + dy));
// Combine the samples in an interesting way
color = sampleW * 0.35 + sampleE * 0.35 + sampleS * 0.35 + sampleN * 0.35 - sample0 * 0.40;
// If we overflow, shift colors
if( color.r > 1 )
color.g = (color.r - 1);
if( color.g > 1 )
color.b = (color.g - 1);
if( color.b > 1 )
color.r = (color.b - 1);
return color;
}
There's one important thing to note when using a fullscreen quad to transfer an image from one texture to another. In Direct3D 9, the screenspace coordinate (0, 0) is the center of the top-left pixel, but the texture coordinate (0, 0) is the top-left corner of the top-left texel. In order to get things to line up and transfer cleanly, you need to shift the vertex coordinates up and left by half a pixel. This article probably explains it better than I can. That's the little bit of trickiness that is going on in my MakeQuadMesh() function. If I remember correctly, you don't need to do this shift in Direct3D 10.
Have fun with the code (which weighs in at whopping 8,951 bytes compressed -- don't hurt yourself picking that one up). To run it, you'll need a display adapter that supports PS model 2.0. You can move the white square with either the Xbox 360 controller's left stick or the keyboard's arrow keys.
-Mike