Ask Learn
Preview
Please sign in to use this experience.
Sign inThis browser is no longer supported.
Upgrade to Microsoft Edge to take advantage of the latest features, security updates, and technical support.
Note
Access to this page requires authorization. You can try signing in or changing directories.
Access to this page requires authorization. You can try changing directories.
Azure Virtual Machine Scale Sets (VMSS) is a group of virtual machines (VMs) that has identical software running on them. They are great for running workloads which require high scalability and availability. It provides a great option to run a workload which needs identical virtual machines (VMs). Common example of such a workload is a stateless web front-end or web API. It provides a good balance between IaaS and PaaS model by allowing to perform infrastructure operations such as remote desktop connection to individual VM or instance and provisioning other platform components such as virtual network (VNet), Load Balancer, Public IP address, etc.
Just like virtual machines, VMSS can use either Windows or Linux as it's OS.
ASP.Net Core 2.0 is an open-source and cross-platform .NET framework for building modern web applications. It provides a unified platform for building web UI and APIs. It can help author applications that can be hosted on IIS, Nginx, Apache or Docker. This flexibility makes it an ideal choice for creating applications that can be hosted on Azure.
This post covers creating and running a ASP.Net Core 2.0 web application running on Windows VMSS. It covers common issues and their resolutions encountered in getting ASP.Net Core 2.0 applications deployed to VMSS.
Sample application code is available at github location - https://github.com/Mahesh-MSFT/VMSSDemo
VMSS supports 2 main deployment options. They are –
Many developers are already familiar with VM Extension approach for post-production operations on individual VMs. It offers a great automation experience using tools such as DSC, Chef and Puppet. This same experience can be extended to VMSS as well.
Creating a custom VM image is the most elaborative experience compared to creating a VM extension. This approach mostly used by IT teams to create "golden copies" of specialized software and ticking a checkbox in their BCDR checklist.
Choosing an option makes a difference in how quickly or slowly scaling can be performed. For example, if an VM extension is created, for every new VM that is added in VMSS, needs to wait before it becomes available to take traffic for extension to get provisioned and become active. This makes scaling operation taking longer. On the other hand, although creating a custom image can be arduous task, creating a new VM with custom image and adding it to scaleset is very fast.
This post uses Custom VM Image option to create a new VM using that image and adding it to scaleset.
ASP.Net Core 2.0 has an impressive list of features that makes a web application richer. This post uses Razor Page Handler feature to display the current web server name by making a AJAX call. This ties back nicely with VMSS where this application will be running on all the VMs making up the VMSS. It will be simply displaying web server name that is serving the page.
To create a ASP.Net Core 2.0 application, click File à New in Visual Studio. I am using Visual Studio 2017 in this post, but equivalent steps can also be used in other editors like VSCode.
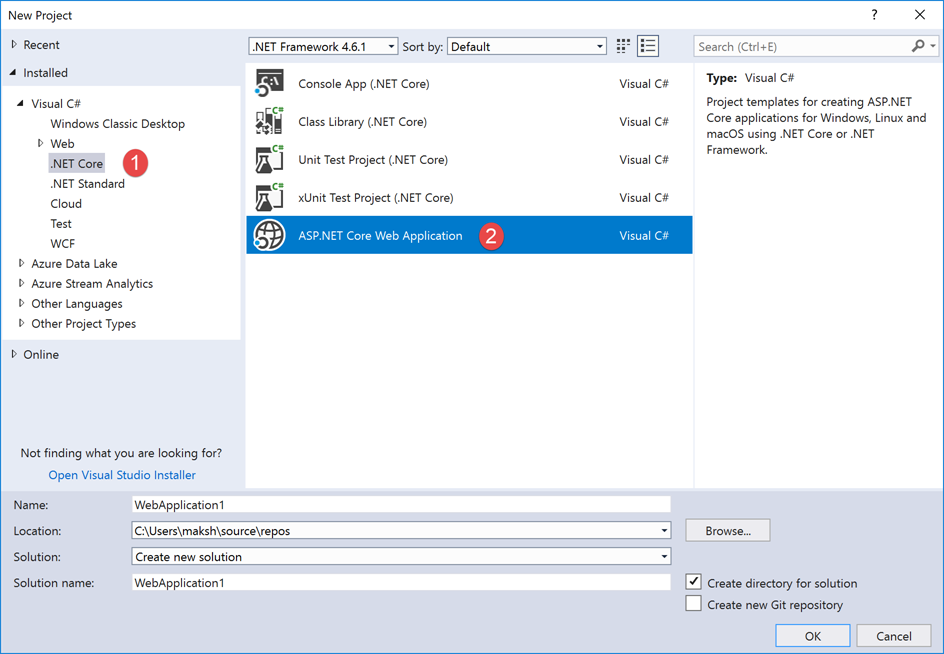
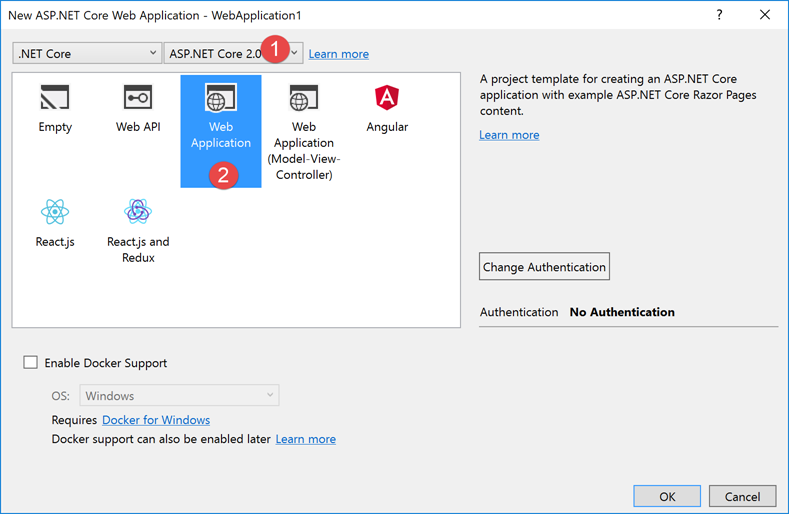
In subsequent dialog box, choose ASP.Net Core 2.0 as the framework and select "Web Application" as template.
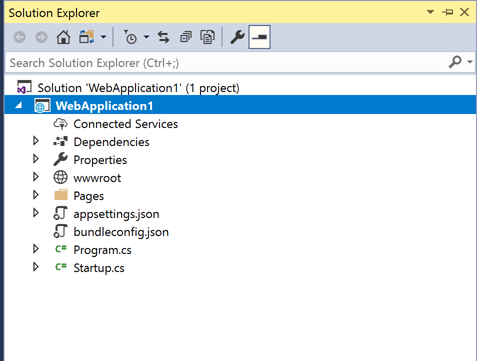
Resulting application will have a structure as outlined in "Solution Explorer" window below.
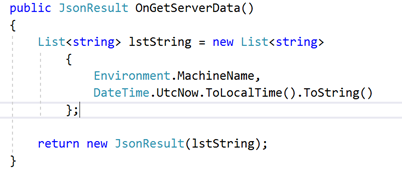
In the Index.cshtml, I add a AJAX call to OnGetServerData function. 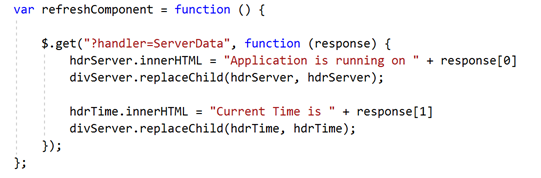
To add interactivity to page, I call this function every second using Javascript.

Server function OnGetServerData simply returns name of web server and current timestamp.
When running locally, application loads with home page like below.

Deploying any application to Azure should be automated using CI/CD workflow. This helps to improve availability as there is no manual intervention involved. For deploying a ASP.Net Core 2.0 application to VMSS, there are following main steps involved.
This post will cover how each of the above steps is automated using Visual Studio Team Services (VSTS). All of these steps can be automated equally easy using other CI/CD tools such as Jenkins or TeamCity.
VSTS offers a pre-packaged build step for ASP.Net Core application as highlighted below.
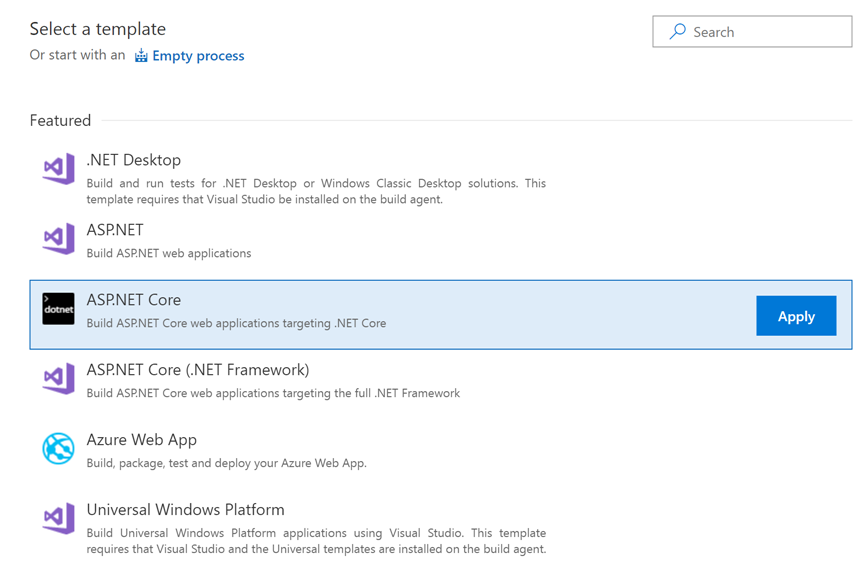
This template provides a standard 4 step process as shown below to build and publish the application.

This step starts to prepare destination server. This post shows how to provision IIS server. However, there are similar steps that can be used to provision other web servers such as Nginx or Apache.

There are 2 components needed to be installed for IIS on Windows servers.
Following powershell script illustrates automating both steps. Note that download path and installable file name will change over the time. Script below uses download path and installable filename as of Feb-18.

Earlier, step "Build web application and package it" will create a deployment package in the form of a single zip file. This zip file can be deployed on IIS server using WebDeploy. Powershell script to download installable and installing it as shown below.

When deploying web application using WebDeploy, it gets deployed as a "Virtual Directory" and should be converted to a "Web Application". Script below shows how to do that.

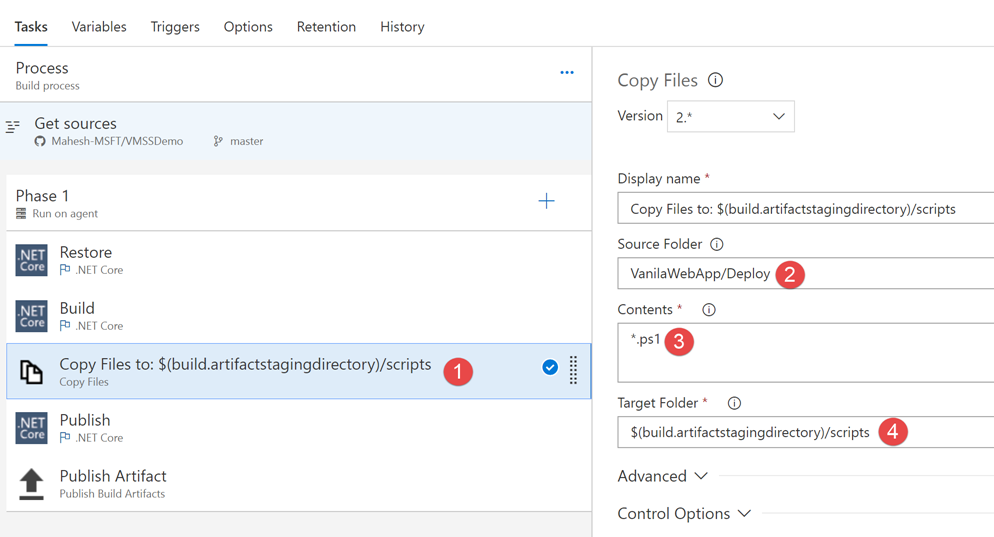
A consolidated script to automate steps discussed in earlier section is available here. It's to be checked-in as part of source code for use in build process. Updated build pipeline looks like as shown below. Note that A copy file task copies script from source code/folder to artifactstagingdirectory which is finally published as build output in "Publish Artifact" Step.
After Build artifacts are generated, it's time to deploy them VSTS offers a "Azure Virtual Machine Scale Set Deployment" task that can pick up build artifacts and deploy them on VMSS.

This task uses Packer template. After adding this task, configure it as shown below.

Key values to be configured are –
This task uses the Packer template configured in above step. It adds few more parameters as discussed below.
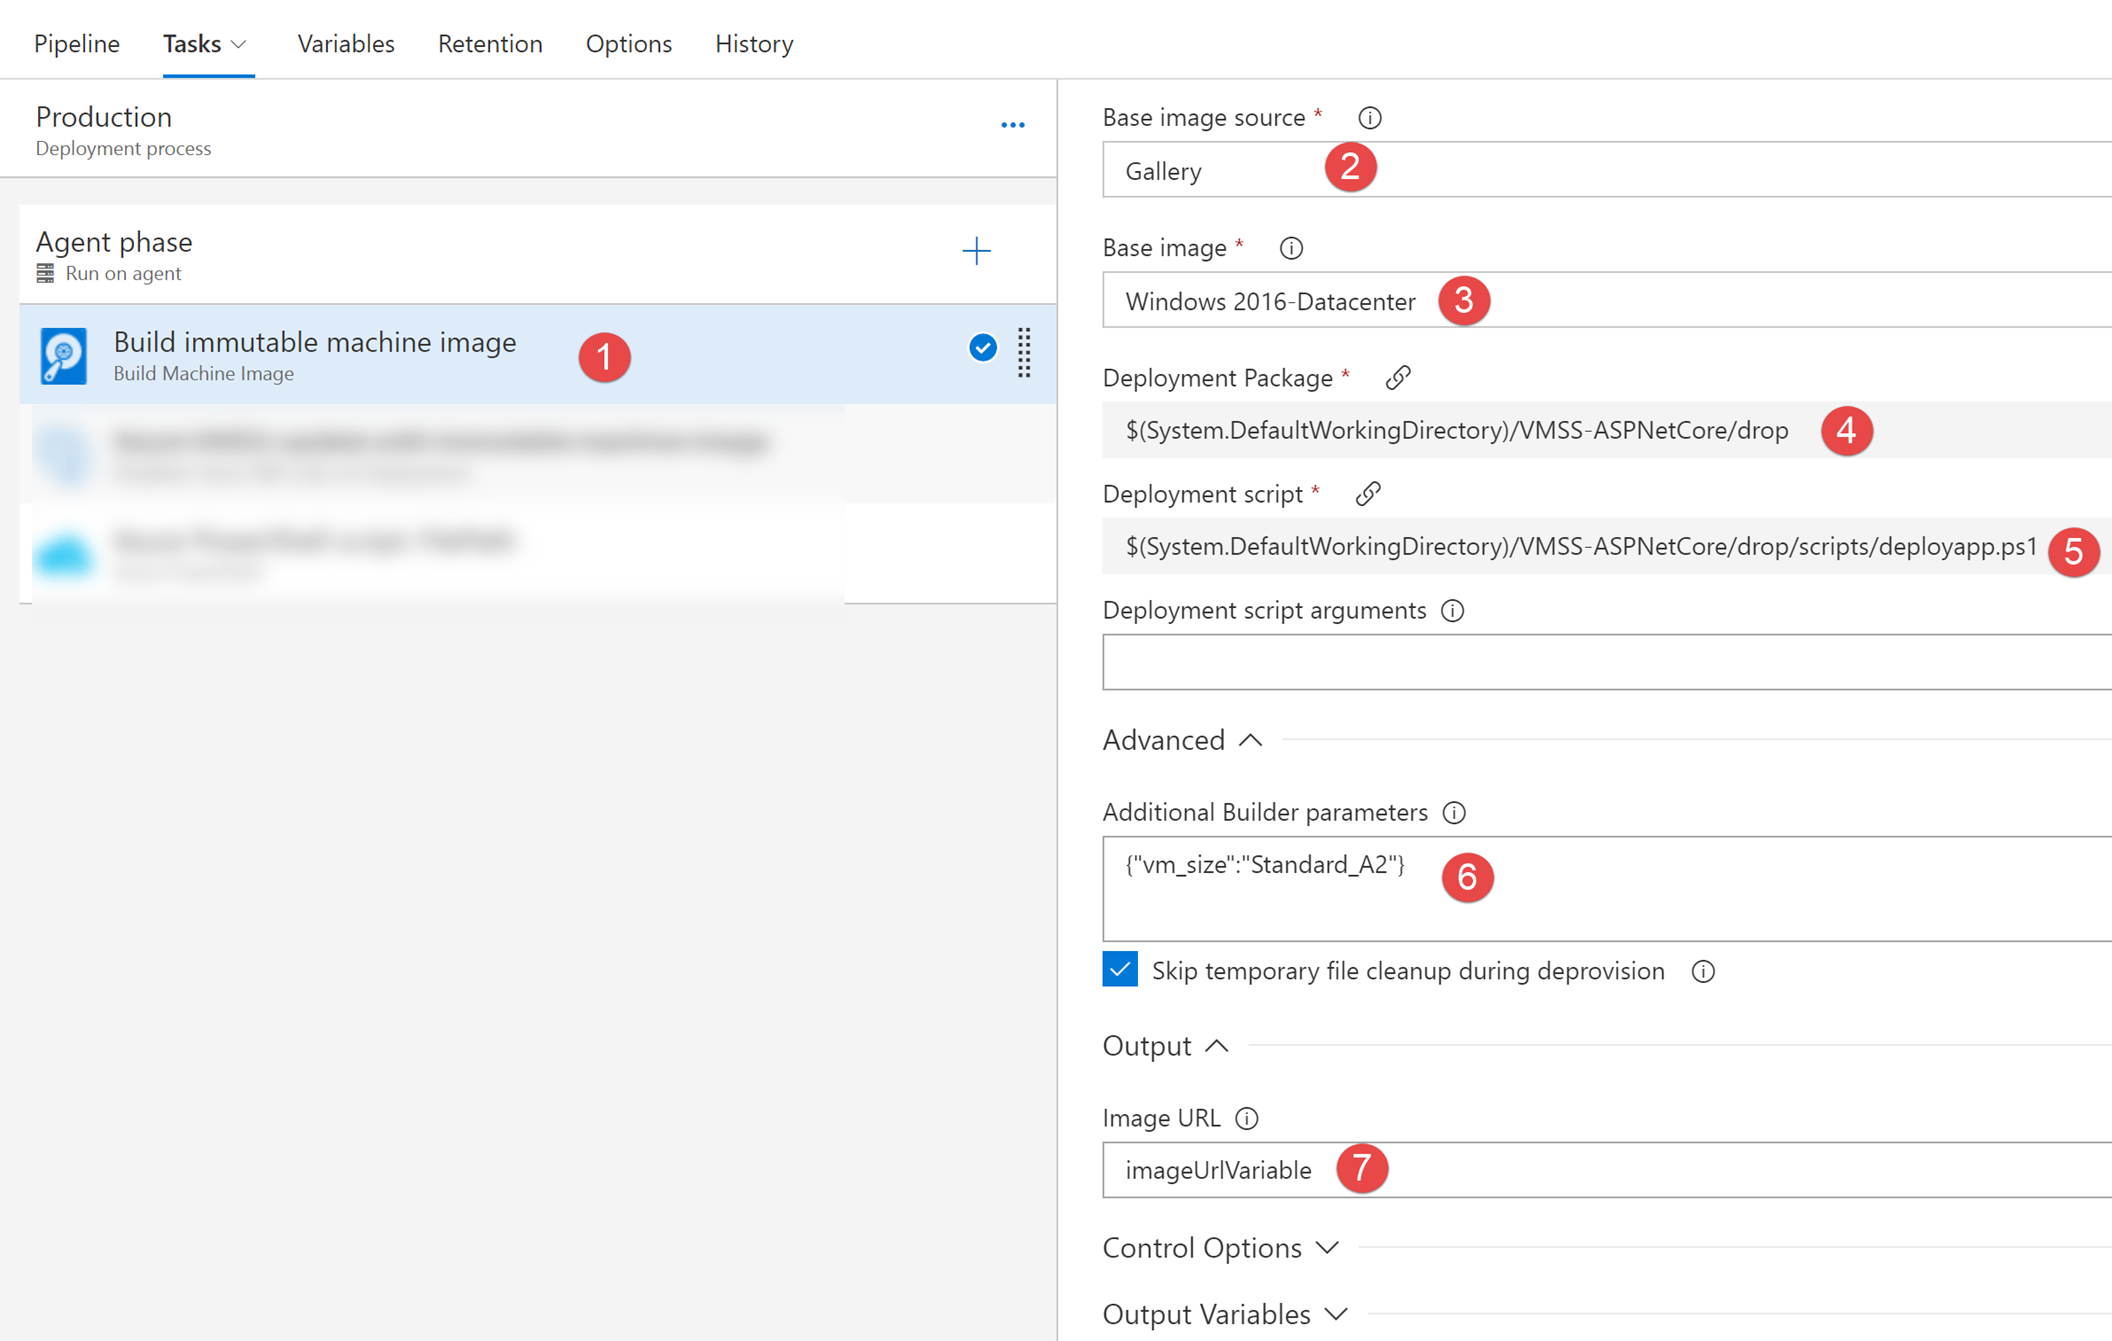
Key parameters to be configured are discussed below.
Once the immutable image is created in above step, a script can be invoked to either create or update VMSS. Script is available in source code (createorupdatevmss.ps1).
This script in essence calls following powershell cmdlets –

Key parameter value above is "Script Arguments". Apart from resource location and resource group name, image URL which holds the image location is passed as an argument.
When this script finishes running, a VMSS is created if it didn't exist before or is updated with new image if it existed already.
Below are some common troubleshooting techniques to overcome issues that may surface with approach described above.
Packer does most of the processing to create images. Without a proper debugging assistance, it's a problem to identify what is happening and potentially going wrong.
Image below shows how it's possible to enable Packer logging.

Some common examples of issues that can be captured by enabling Packer logging are –
To identify exact error description, download Build or Release log file and search for "error" word.
Ensure that the storage account used to hold the VMSS image is of type "General Purpose".

Ensure that when you run above script, VMSS (with MarketPlace image) is not created beforehand using portal. Approach described above works with VMSS created using custom image. If you start with a pre-created VMSS using MarketPlace image, you'll get following error.
scaleset The property 'uri' cannot be found on this object. Verify that the property exists and can be set
Approach explained above uses VSTS hosted agent. This is default VSTS agent. Note that this agent has a default timeout setting of 30 mins. Creating a VMSS image and applying it to a new or existing image can easily take more than 30 mins. Depending upon, at what point build or release process times out, you may encounter following error.


A workaround is to manually run the last script by passing parameter values.
vmsscreateorupdate.ps1 CreateOrUpdateScaleSet -loc '<your azure region>' -rgname '<your rg>' -imageurl "<your Image VHD Location"
Please sign in to use this experience.
Sign in