Ask Learn
Preview
Ask Learn is an AI assistant that can answer questions, clarify concepts, and define terms using trusted Microsoft documentation.
Please sign in to use Ask Learn.
Sign inThis browser is no longer supported.
Upgrade to Microsoft Edge to take advantage of the latest features, security updates, and technical support.
Note
Access to this page requires authorization. You can try signing in or changing directories.
Access to this page requires authorization. You can try changing directories.
If you have an Azure VM that was created using the Azure Resource Manager (ARM) stack you can now easily resize the OS or the data disk within the Azure Portal. Of course, you can also use PowerShell but way too easy using the GUI.
1. Navigate to the Virtual Machine (VM) that you would like to resize the disk(s).
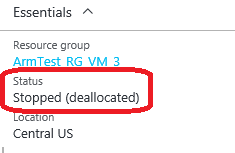
2. Shutdown the VM from the Azure portal. Make sure it's completely shutdown (de-allocated)
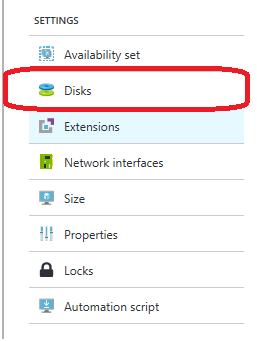
3. Select 'Disks' in the Settings blade.
4. Select the OS/Data disk that you would like to resize.
5. On the new blade, enter the new disk size (1023GB or 1TB max per disk).
Note: The below screenshot shows OS disk resize which has Host Caching set to Read/Write. For data disk it's ideally set to none.
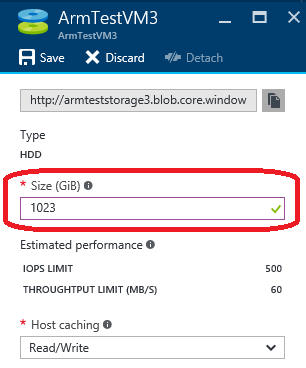
6. Hit 'Save' on top.
7. Start the VM back again.
That's it! You can login to the VM and check that you have the new selected size for the disk(s).
DISCLAIMER: The above blog posting is provided “AS IS” with no warranties and confers no rights.
Ask Learn is an AI assistant that can answer questions, clarify concepts, and define terms using trusted Microsoft documentation.
Please sign in to use Ask Learn.
Sign in