Installing Microsoft Antimalware extension in Azure Gov't VM using PowerShell
Microsoft Antimalware for Azure Virtual Machines is a real time protection that will monitor the VM's to detect and block malwares. You can read more about Microsoft Antimalware here.
Please follow the below steps to enable the Antimalware extension for Azure Gov't VM. You will need to use Azure PowerShell to enable the extension. You can download Azure PowerShell module from here.
- Login to your Azure Gov't subscription
Add-AzureAccount -Environment AzureUSGovernment
- Set the correct subscription as current
Select-AzureSubscription -SubscriptionId " <Paste your subscription ID> "
- Save the below as a JSON template. For example, AntimalwareConfig.JSON
{
"AntimalwareEnabled": true,
"RealtimeProtectionEnabled": true,
"ScheduledScanSettings": {
"isEnabled": true,
"day": 1,
"time": 120,
"scanType": "Full"
}
}
- Then run the below script
$serviceName = " <Cloud Service Name> "
$vmName = " <VM Name> "
Get-AzureVM –ServiceName $serviceName –Name $vmName | Set-AzureVMMicrosoftAntimalwareExtension `
-AntimalwareConfigFile " <Path to the JSON file> "| Update-AzureVM 
5. You can view the extension info by running the below command
Get-AzureVM –ServiceName $serviceName –Name $vmName | Get-AzureVMMicrosoftAntimalwareExtension 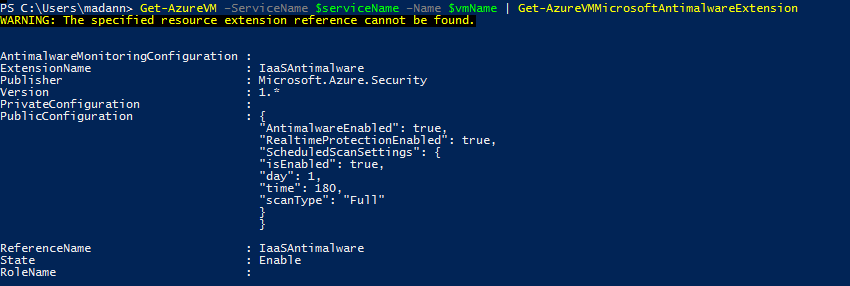
You can read more about Set-AzureVMMicrosoftAntimalwareExtension cmdlet here. You can modify the config file as mentioned in the documentation.
DISCLAIMER: The above blog posting is provided “AS IS” with no warranties and confers no rights.