Resizing Azure VM OS or Data Disk
Are you running out of space on the OS or data disk of your Azure VM? Here is a simple way to resize the OS or the data disk. Resizing of the disk is done using Azure PowerShell. If you don’t have Azure PowerShell on your local machine, then you can follow the documentation to install Azure PowerShell in your local machine and connect to your Azure Subscription.
Note: I have tested this for VM's running Windows OS only but not Linux. Also keep in mind that once you run the command to resize the disk it is irreversible. You will NOT be able to shrink the disk. In addition, this applies only to V1 VM's created using Azure Service Manager (ASM). If you like to resize disks for Azure Resource Manager (ARM), see my blog @ Resize Azure Resource Manager (ARM) VM OS & Data disk using Azure Portal
Few things to ensure before performing shutdown/de-allocation of the VM:
- Make sure you don’t have any data in the Temporary D-Drive in the VM as the data will be lost since it’s a non-persistent drive.
- You will lose the VIP (Public IP) if this is the only VM in the cloud service. If you need to preserve the VIP, then you can either reserve the VIP or add a test VM in the same cloud service before shutting down the VM that you would like to resize the disks.
- I highly recommend that you take back up copies of the disk prior to executing any command to resize the disk incase something goes wrong.
Resizing OS disk:
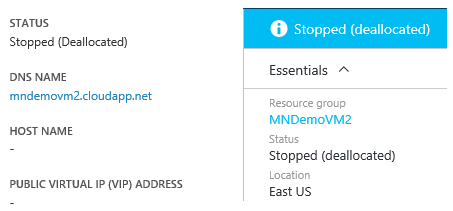
- Shutdown (de-allocate) the VM from the Azure portal. Check VM's dashboard to make sure it says Deallocated (See screenshots below)
On the classic portal: On the new portal:
- Once the VM is completely de-allocated, then launch Azure PowerShell and connect to your Azure subscription.
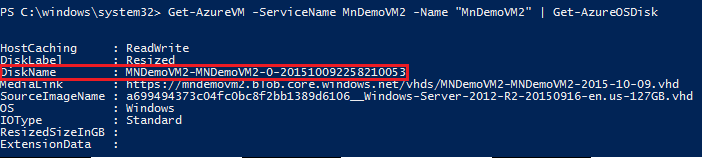
- Then, you will need to collect the OS disk info that you want to resize. Use the command below to output the OS disk details.
Get-AzureVM -ServiceName "<Cloud Service Name>" -Name "<VM Name>" | Get-AzureOSDisk
For example:
Get-AzureVM -ServiceName MnDemoVM2 -Name "MnDemoVM2" | Get-AzureOSDisk
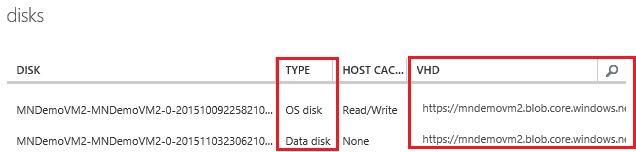
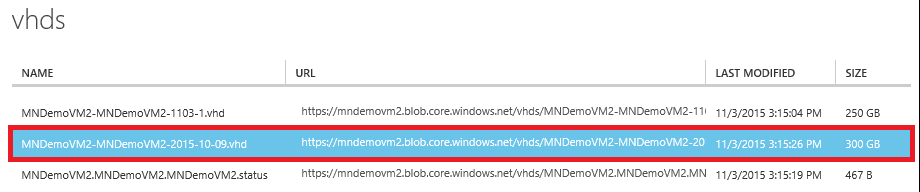
- If you want to see the current size of your disk, you can either connect to your VM and check or you can check from the portal. To check in the portal, go to the dashboard of the VM and take a note of the VHD path from the disk section in the dashboard (See screenshot below). Then, go to the storage account of that VM and navigate to container where that VHD is located. You will see the size of the disk in the last column of that table.
VHDs Path:
Before Resize:
- Next, run the below command with the OS disk name you have acquired from step-3 to resize the disk.
Update-AzureDisk -DiskName "<OS Disk Name>" -Label Resized -ResizedSizeInGB 400
Note: Azure allows you to have a OS or Data disk up to 1TB (1023 GB) for each disk.
For example:
Update-AzureDisk -DiskName "MNDemoVM2-MNDemoVM2-0-201510092258210053" -Label Resized -ResizedSizeInGB 400

- Now, go back to the same container where the VHD is and you can see the size of the VHD has changed to 400 GB.

- Once you verify that the disk has been resized, start the VM from the portal and connect to the VM.
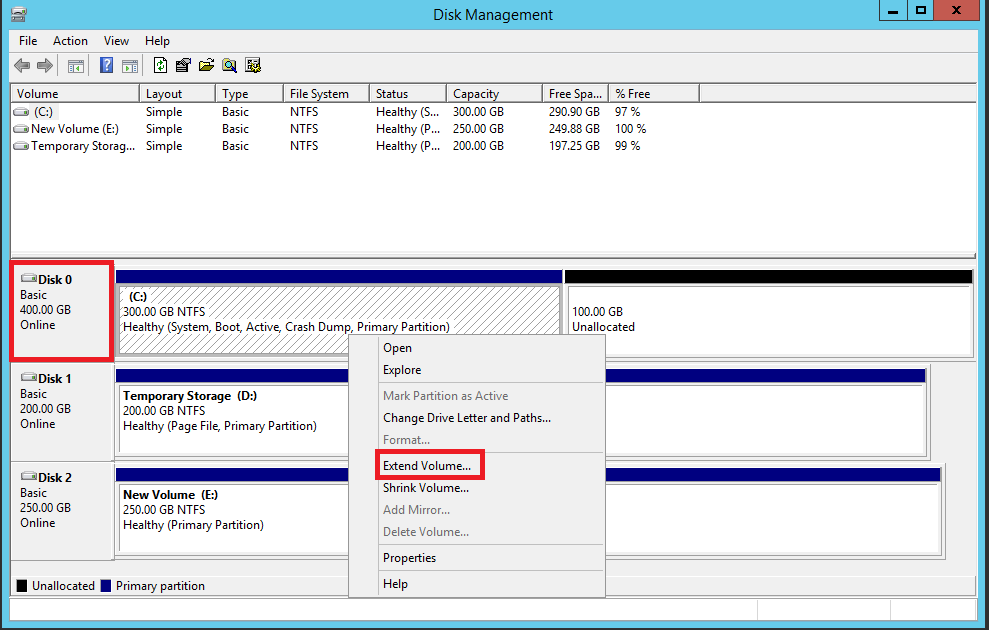
- After you login to the VM, go to Disk Management. You will notice that the disk size has changed to 400 GB now. Right-click on the volume and select 'Extend Volume'. Follow the on-screen steps to extend the volume.
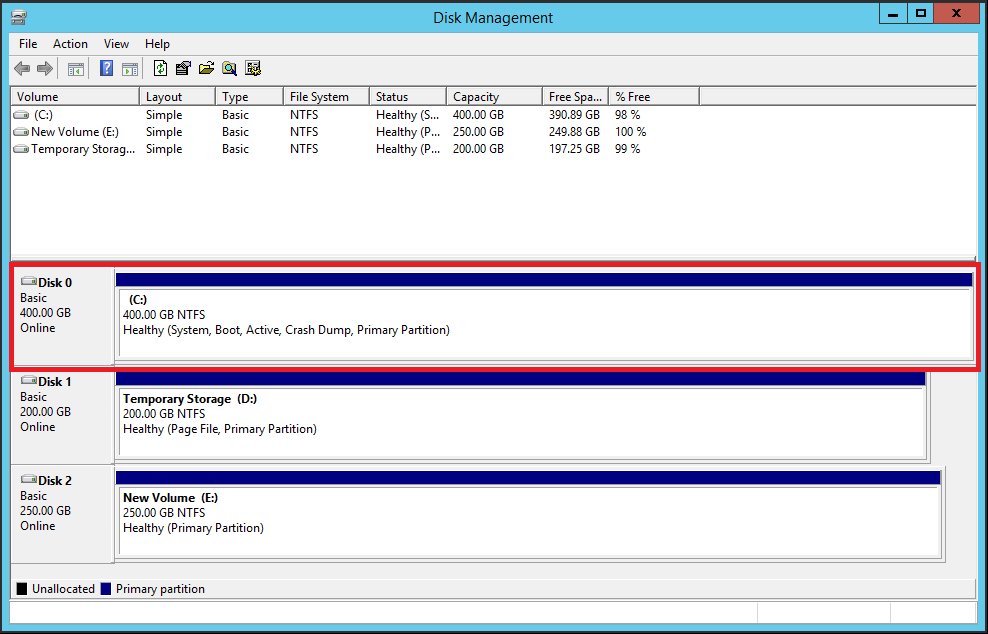
After Extending the volume:
*********************************************************************************************************************************************************************
Resizing Data disk:
- The process to resize the data disk is same except the command you run in Azure PowerShell is slightly different.
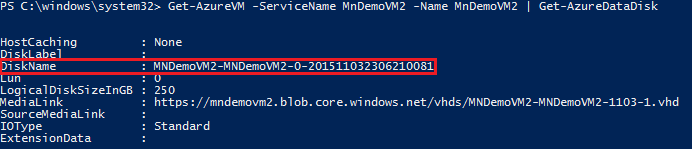
- Run the below command to collect the data disk info to resize.
Get-AzureVM -ServiceName "<Cloud Service Name>" -Name "<VM Name>" | Get-AzureDataDisk
For example:
Get-AzureVM -ServiceName MnDemoVM2 -Name "MnDemoVM2" | Get-AzureDataDisk
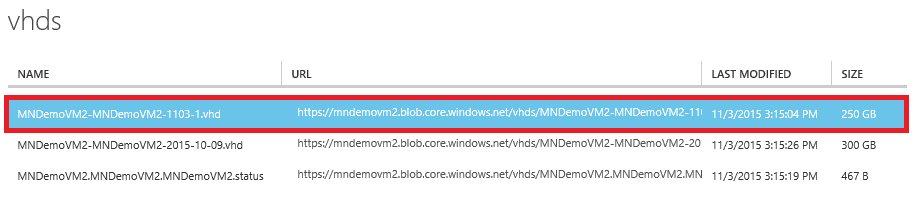
- Check the size of the data disk before resizing.
Before Resize:
- Next, run the below command with the data disk name you have acquired from step-3 to resize the disk.
Update-AzureDisk -DiskName "<Data Disk Name>" -Label ResizeDataDisk -ResizedSizeInGB 500
Note: Azure allows you to have a OS or Data disk up to 1TB (1023 GB) for each disk.
For example:
Update-AzureDisk -DiskName MNDemoVM2-MNDemoVM2-0-201511032306210081 -Label ResizeDataDisk -ResizedSizeInGB 500

- Now, go back to the same container where the VHD is and you can see the size of the VHD has changed to 500 GB.

- Once you verify that the disk has been resized, start the VM from the portal and connect to the VM.
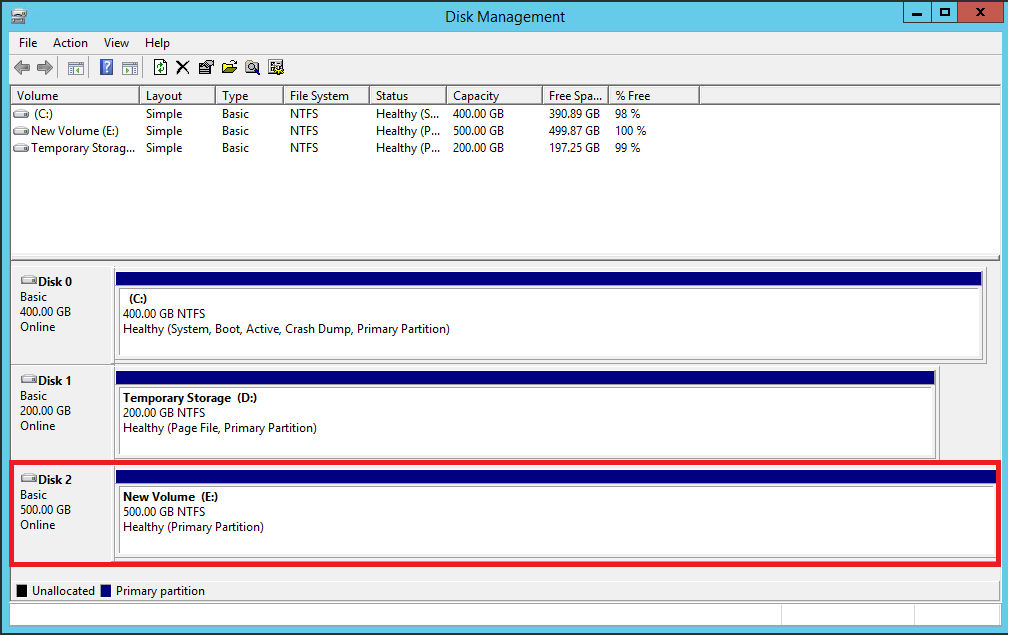
- After you login to the VM, go to Disk Management. You will notice that the disk size has changed to 500 GB now. Right-click on the volume and select 'Extend Volume'. Follow the on-screen steps to extend the volume.
I hope this post helped you resolve your OS or Data disk resizing issue. Please feel free to comment if you have any additional questions.
DISCLAIMER: The above blog posting is provided "AS IS" with no warranties and confers no rights.