Azure Redis Cache on ASP.NET Core
 The use of cache can increase application performance by storing strategic data in memory instead of having to obtain data for every request. Often, getting information from external resources, as database or services, can degrade application response time.
In this post, I'll show how to use the Azure Redis Cache to enable the use of cache on distributed servers, allowing the cache to be shared to more than one server. Azure Redis uses the open source framework Redis to implement the distributed cache.
To illustrate the use of Redis I will use the MyAppOnCloud application, created in post Publishing ASP.NET Core on Azure, where I published an ASP.NET Core application to three datacenters.
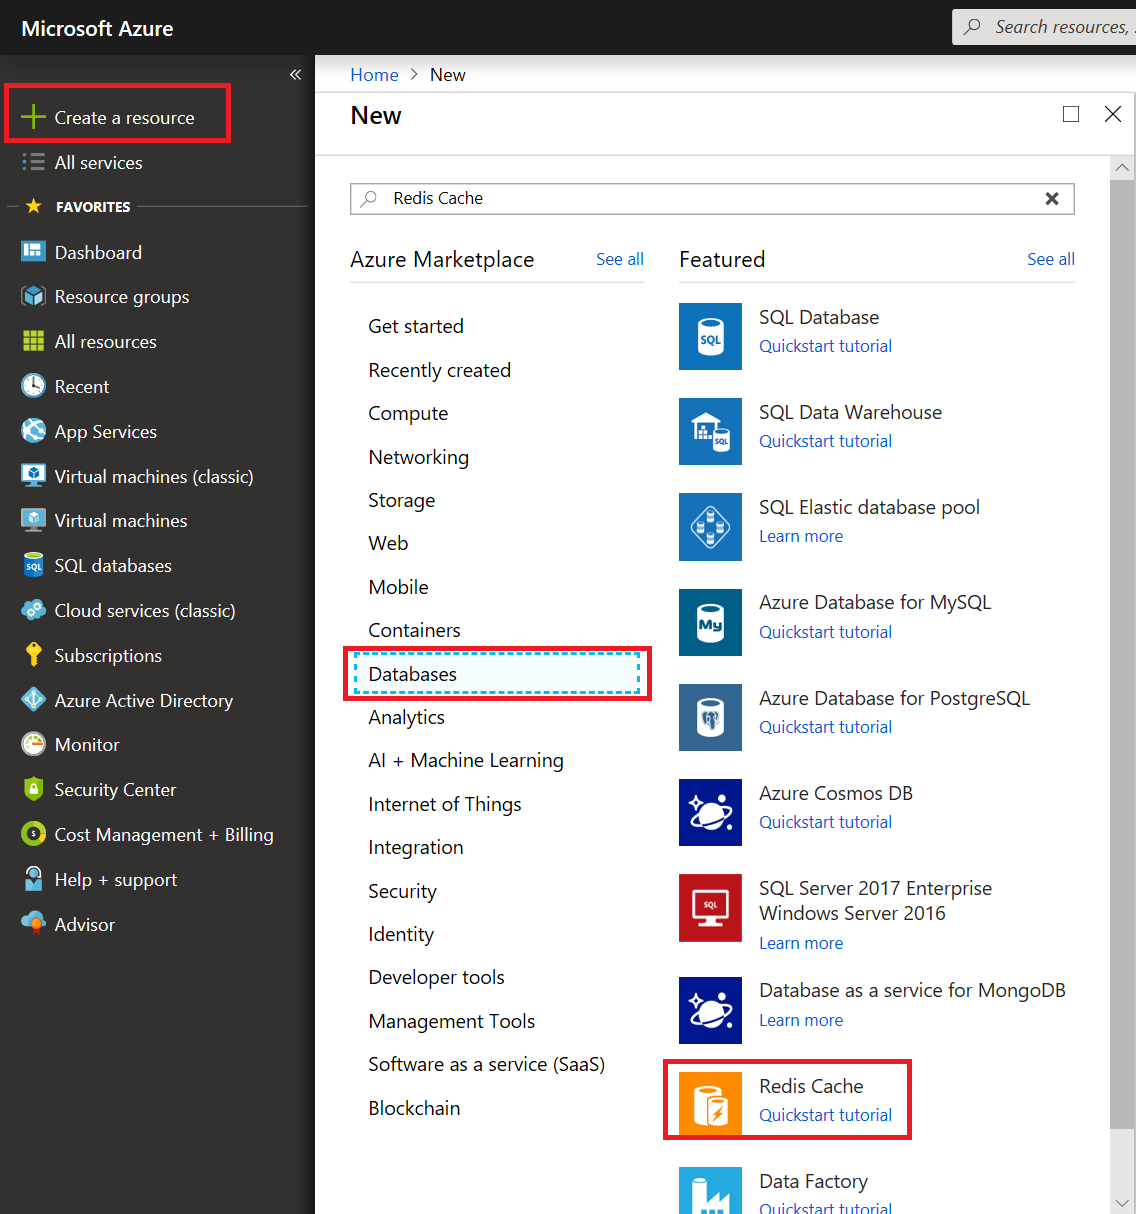
The first step is to create the cache service. In Portal Azure , you need to create a new Redis Cache as instructed in the following image:
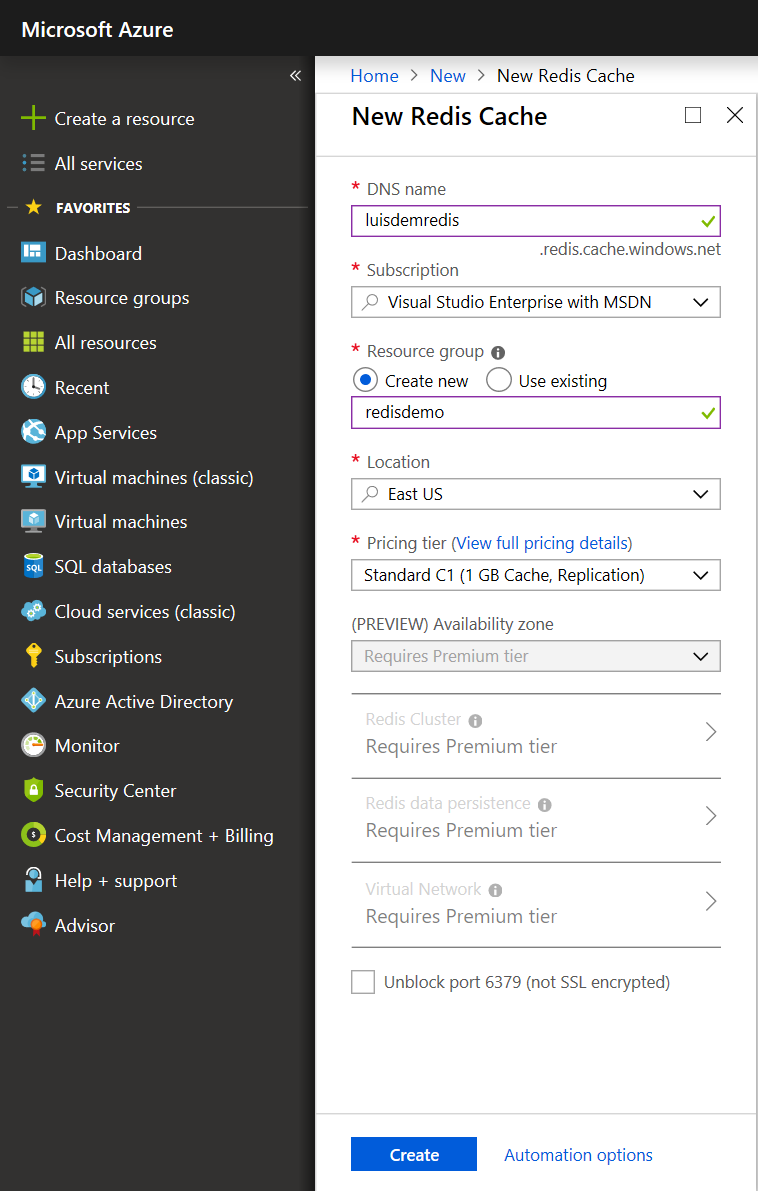
At the "New Redis Cache" blade, you need to provide the name of the cache that will compose the DNS, choose the signature, the resource group, the data center, the consuming plan and click on the Create button, as:
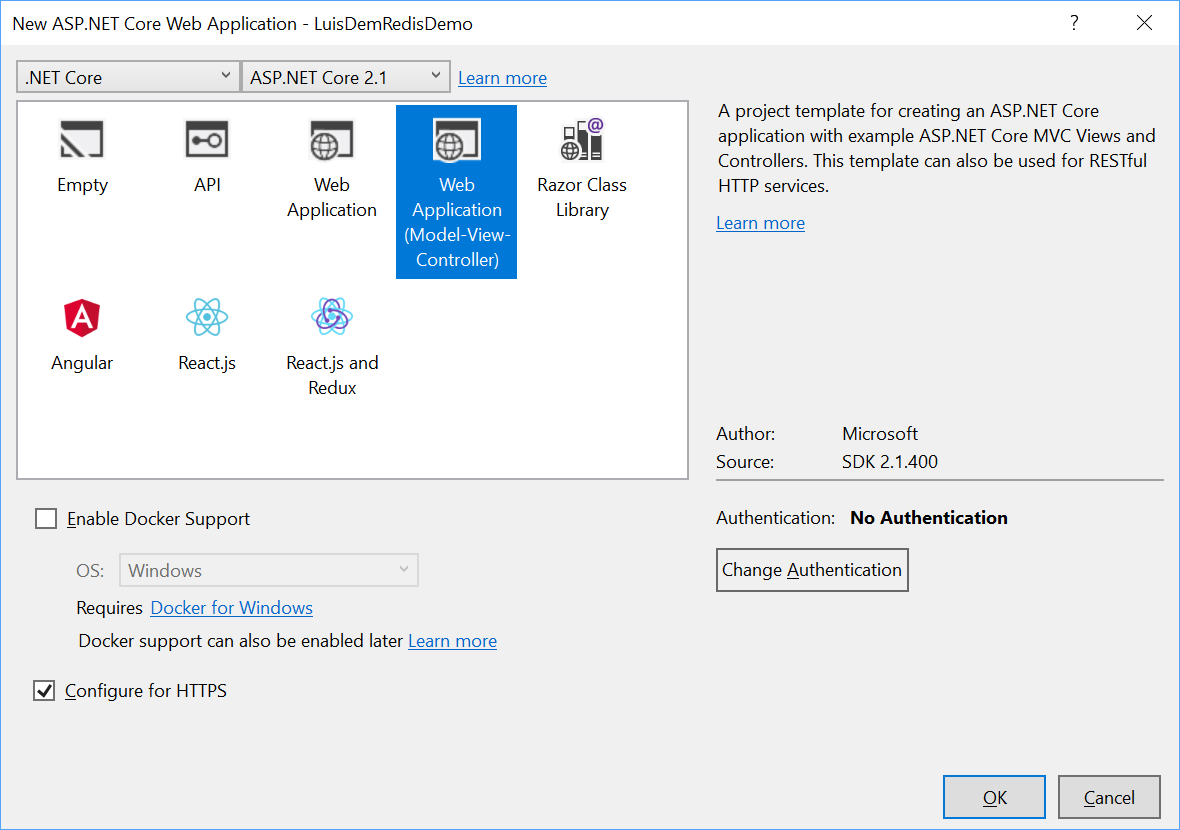
The next step is to create the ASP.NET Core solution using Visual Studio 2017:
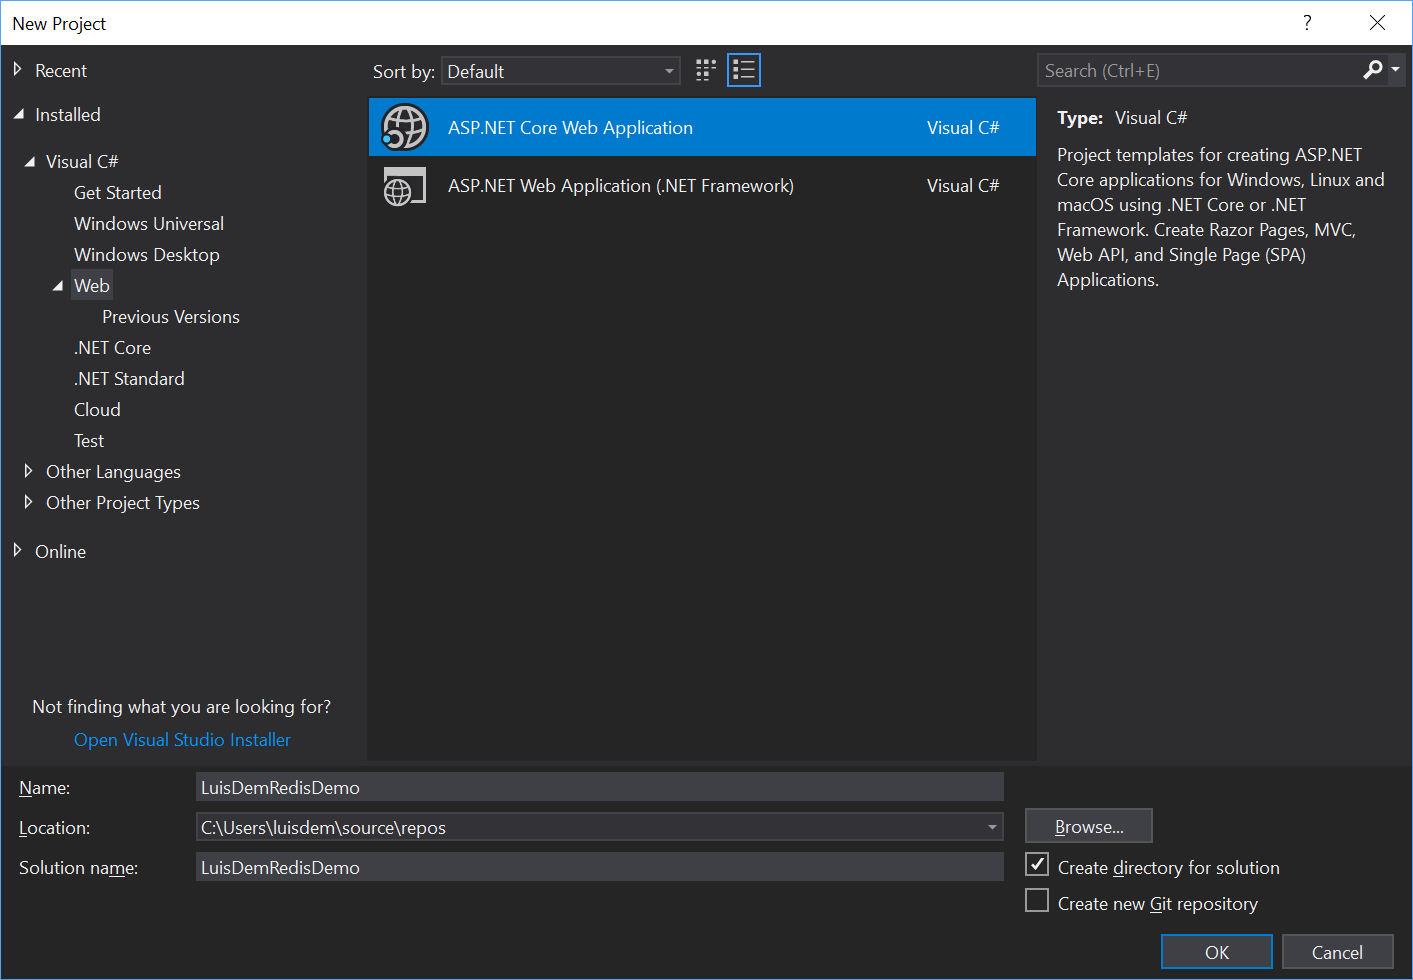
I choose MVC template, but feel free to use any template of your preference.
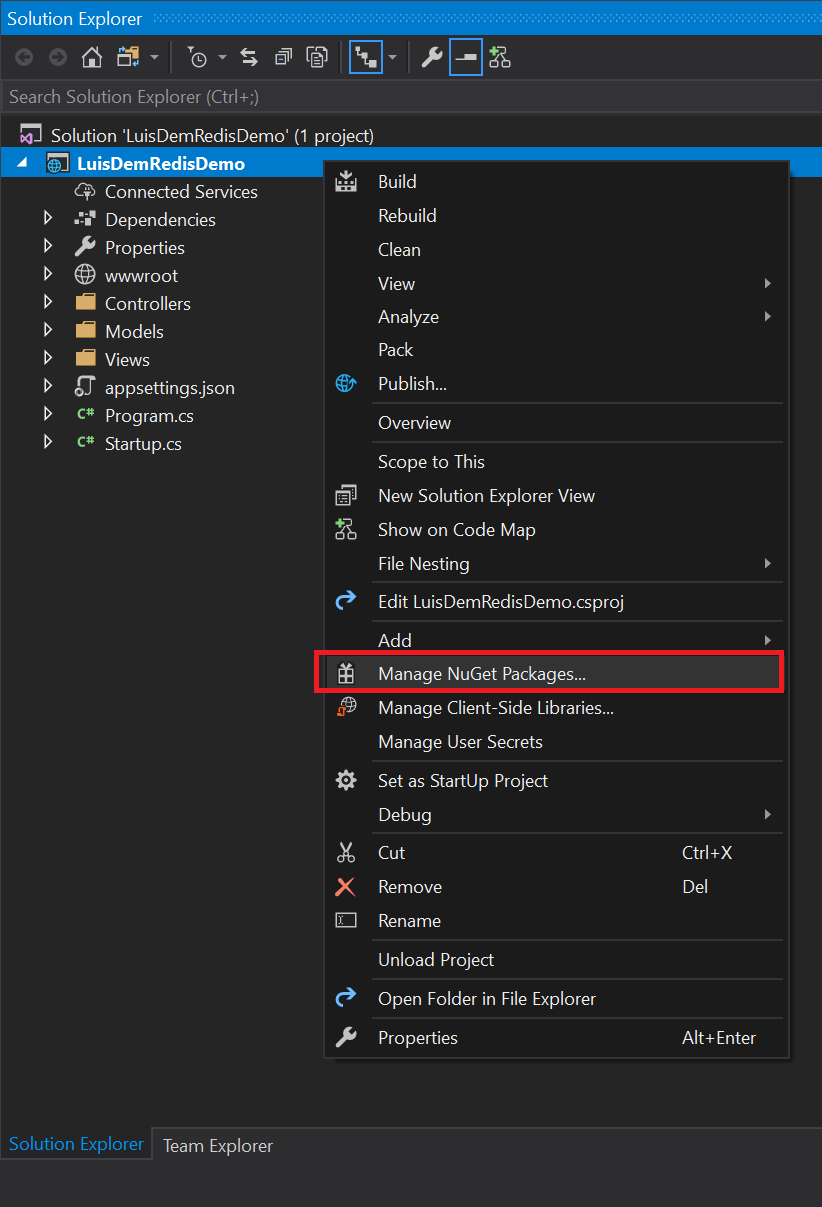
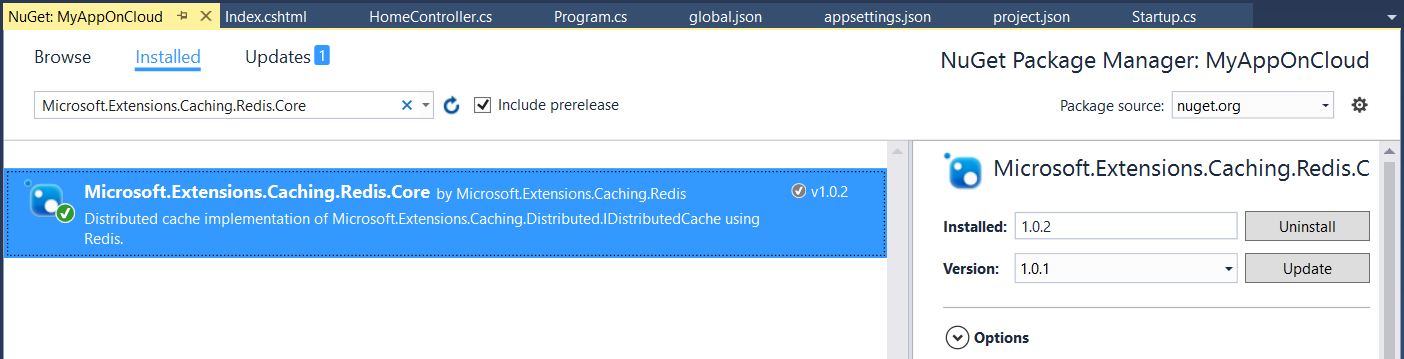
The first step is to add the reference of the NuGet package Microsoft.Extensions.Caching.Redis to the application. This reference can be added via NuGet Package Manager:
Select browse and check the include prerelease option:

Now, we need to add the following code to the ConfigureServices method of the startup.cs class to configure the access to the cache Redis service.
     services.AddDistributedRedisCache(option =>
         {
             option.Configuration = Configuration.GetConnectionString("RedisConnection");
             option.InstanceName = "master";
         });
The AddDistributedRedisCache method, it is used to configure the service and it allows us to use the RegisCache via dependency injection (DI) in every part of the code that expects an instance object that implements the interface IDistributedCache. This association is performed by the services variable of the IServiceCollection type. I will illustrate this concept at the time of cache consumption further in this post.
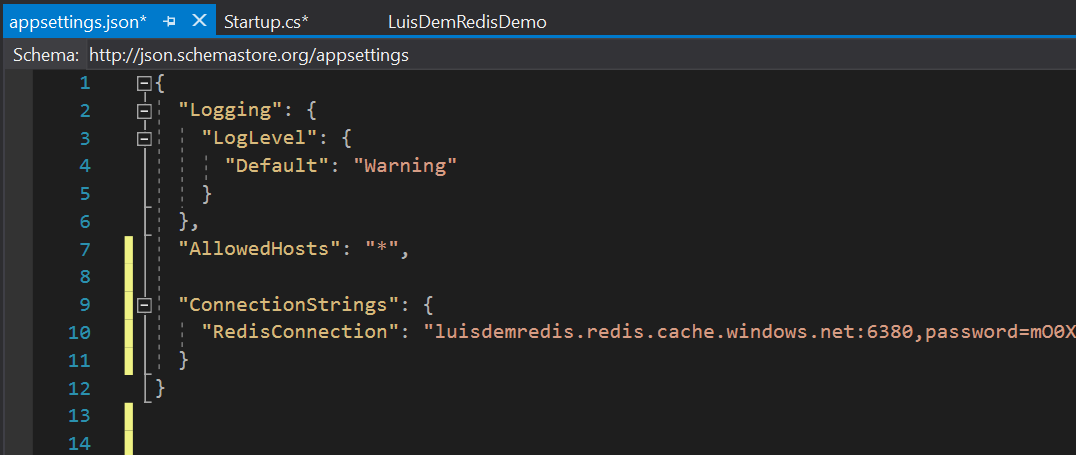
Observe that the connection setup with the Azure Redis service is obtained by RedisConnection configuration key. In this case, I added the key in appsettings.json file as:
"ConnectionStrings": {
"RedisConnection": "luisdemredis.redis.cache.windows.net:6380,password=mO0Xp…"
}
The follow image shows the full file:
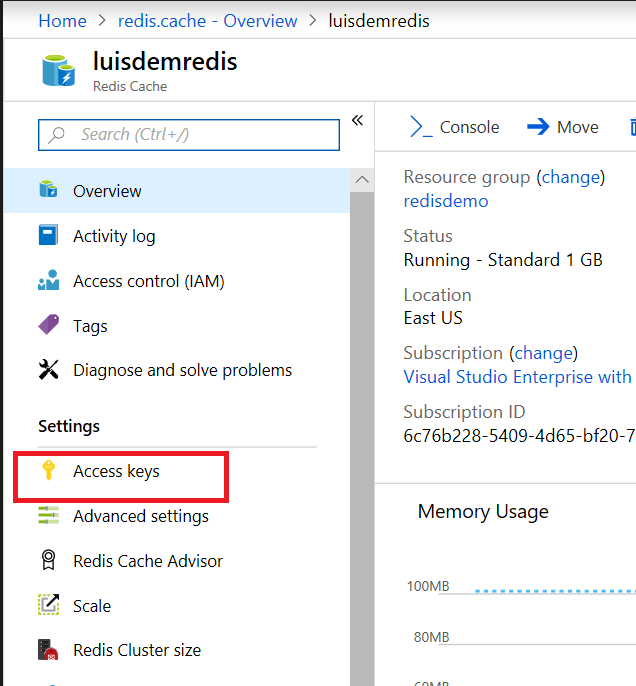
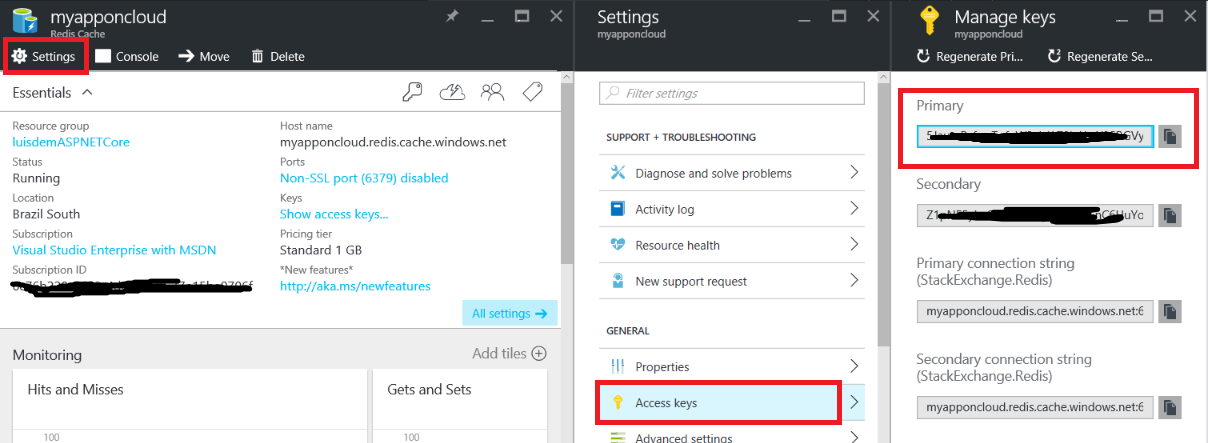
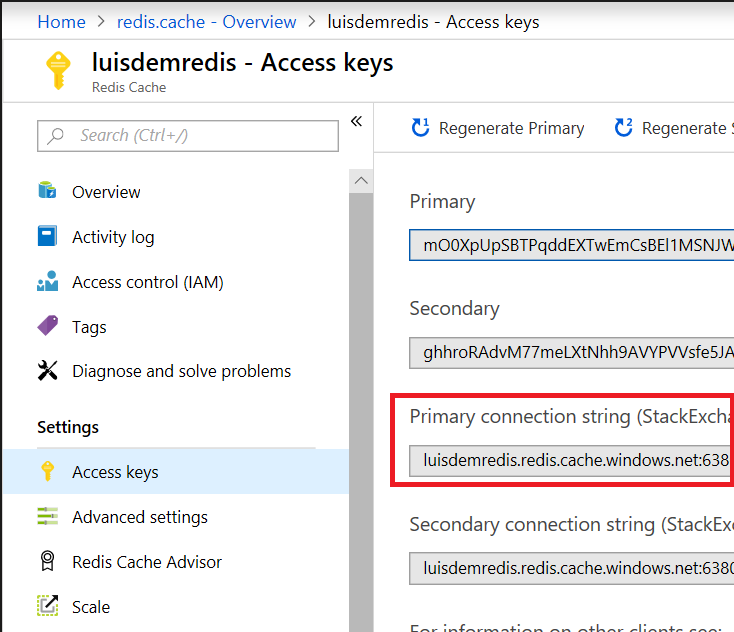
To get the value of RedisConnection, you must go to Azure Portal and click on the settings of the Redis Cache service and click on the Access Key item:
Copy the primary key value, as shown:
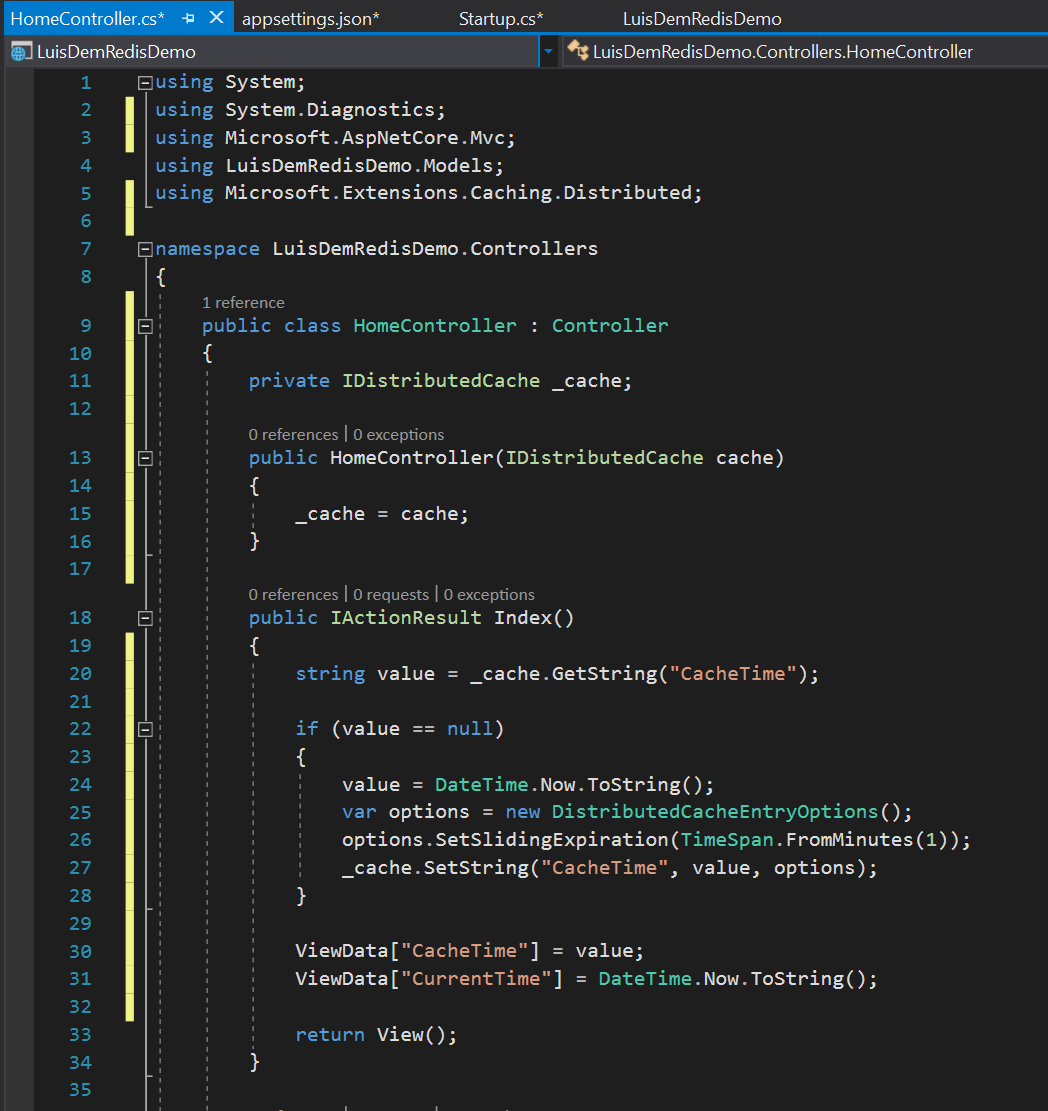
After setting the Redis service, I will implement the cache in HomeController class. Because the cache service has been added in DI container, now the Redis cache class (RedisCache) can be consumed anywhere in the application through dependency injection (DI).
I will add a constructor to the HomeController class to receive the instance of the object that implements the interface IDistributedCache. In this case, this instance is the RedisCache class that was configured through AddDistributedRedisCache method in the startup class.
private IDistributedCache _cache;

public HomeController (IDistributedCache cache)
{
     _cache = cache;
}
To exemplify the use of the cache, I will add the following code to the Index method to get the value of the "Time" key from the cache. If the value does not exist in cache, a value will be added to the cache:
 public IActionResult Index()
        {
            string value = _cache.GetString("CacheTime");

            if (value == null)
            {
                value = DateTime.Now.ToString();
                var options = new DistributedCacheEntryOptions();
                options.SetSlidingExpiration(TimeSpan.FromMinutes(1));
                _cache.SetString("CacheTime", value, options);
            }

            ViewData["CacheTime"] = value;
            ViewData["CurrentTime"] = DateTime.Now.ToString();

            return View();
        }
Follows the image with the code above:
The next step is to change the Index page (Views / Home / Index.cshtml) to get the value returned from the cache. As I added the value of the cache in a ViewData, I just need to use it in the page as follows:
<h2>Azure Redis</h2>
<ul>
<li>Value read from cache is: </li>
@ViewData["CacheTime"]
</ul>
<br />
<ul>
<li>Current value is:</li>
@ViewData["CurrentTime"]
</ul>
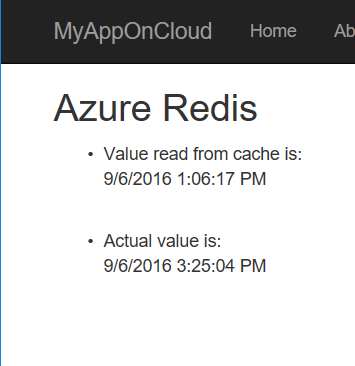
Note that the view now shows the values of the cache and the current time obtained by the application:
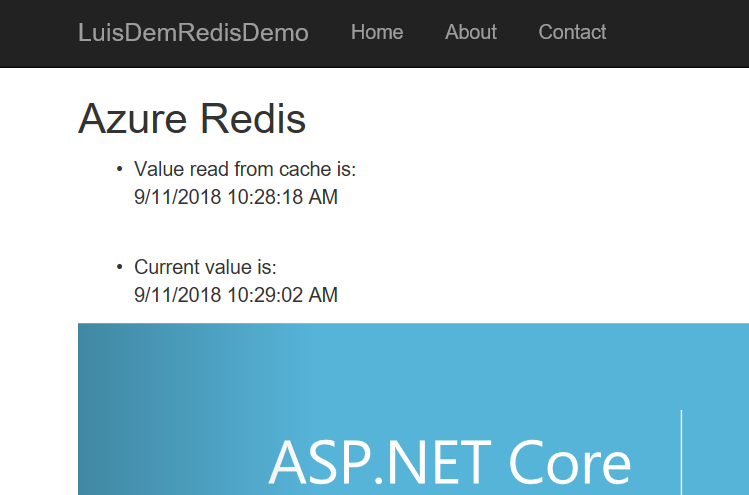
Note the result of using the cache after updating the application in three data centers that I mentioned at the beginning of the post:

I hope you enjoyed.
More information on:
References:
Azure: Redis Cache, Disaster Recovery to Azure, Tagging Support, Elastic Scale for SQLDB, DocDB
Working with a distributed cache
Azure Redis Cache 101 - Introduction to Redis