Create TFS 2010 Reports for upgraded Team projects.
Step #1: Export the MSF Agile\CMMI 5.0 process templates to a folder. In my examples the process template is downloaded in the following folders:
C:\MSF for Agile Software Development v5.0
C:\MSF for CMMI Process Improvement v5.0
Instructions to download process templates are available here.
Step #2: Prepare the Reports Manager Site to host the new reports for the team project
Example:
For a team project name A, browse the reports uri which would host the reports for the team project A. An example of this uri would be:
General Syntax:
https://<reportservername>/Reports/TfsReports/<CollectionName>/A
Example:
https://localhost/reports/tfsReports/defaultcollection/A
Note: For Server 2008\2008 R2, you would need to browse the reports site in an elevated IE browser window.
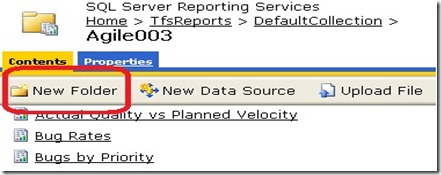
Create a new folder, by clicking on “New Folder” option, in the https://localhost/reports/tfsReports/defaultcollection/A site and call it “Old Reports”.
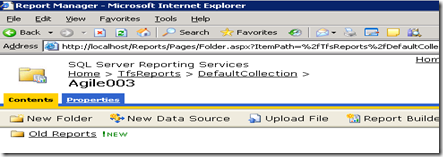
Move the existing rdl files to the newly created folder. You can click on “Show details” option. Doing so will enable you to select multiple reports & move them to the “Old Reports” folder in a single operation. Click “Hide Details” after moving the reports. The reports site for the team project A would look like this:
Step #3 Upload new reports
To add reports
1. Click Start, right-click Visual Studio, and then click Run as administrator.
2. Create a file, and copy and paste the following code into it:
<?xml version="1.0" encoding="utf-8"?>
<Project xmlns="ProjectCreationSettingsFileSchema.xsd">
<TFSName>CollectionURI</TFSName>
<LogFolder>LogFolderName</LogFolder>
<ProjectName>TeamProjectName</ProjectName>
<AddFeaturesToExistingProject>true</AddFeaturesToExistingProject>
<ProjectReportsEnabled>true</ProjectReportsEnabled>
<ProjectReportsForceUpload>true</ProjectReportsForceUpload>
<ProjectSiteEnabled>false</ProjectSiteEnabled>
<ProcessTemplateName>ProcessTemplate</ProcessTemplateName>
</Project>
3. Replace the placeholder attributes with values that meet your project criteria.
4. To upload the most recent versions of the reports that are provided in the process template, specify true for the ProjectReportsForceUpload tag.
<ProjectReportsForceUpload>true</ProjectReportsForceUpload>
5. Save the file as an XML file.
6. Run the File.BatchNewTeamProject command, and specify the file that you saved in the previous step.
7. To verify that the reports are available, from Team Explorer, expand your team project node, expand  Reports, and then expand Bugs, Build, Project Management, or Test.
8. Double-click a report that you want to view.
To run the team project batch file command
1. On the View menu, click Team Explorer.
2. On the View menu, point to Other Windows, and then click Command Window.
3. In the Command Prompt window, type the following command, specifying the path and file name of the file that you saved earlier in this topic. For example, type the following command:
File.BatchNewTeamProject C:\File.xml
4. To determine the outcome of running the command, view the contents of the log file. This file is written to the location that you specified for LogFolderPathName in the File.xml file.
Review the messages in the log file to determine whether the command was successful. If error messages occur, correct the parameters, and rerun the command.
Post deployment Issues:
Issue#1: Reports will throw error about missing columns or datasets.
Fix:
1. Create new team projects with MSF Agile 5.0 & MSF CMMI 5.0 based templates.
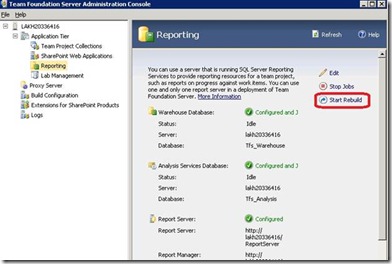
2. Rebuild the warehouse dbs from Tfs Admin Console->Application Tier->Reporting->Start Rebuild option:
3. Verify reports to check for any outstanding errors.


