Migrating SharePoint to a new box
Team Foundation Server 2008 a.k.a. Orcas (& TFS 2005 as well) provides you the capability to leverage a remote SharePoint deployment to host the team project portals. I will talk about here on the steps to migrate SharePoint from one box to another from a TFS point of view.
So think about a scenario where you have an existing SharePoint deployment on the Application Tier or another box which is integrated with TFS & you want to move this SharePoint instance to a new box & you want TFS to talk to this new instance for SharePoint things. To do so follow these steps:
Step 1. Identify the current SharePoint instance which is working with TFS.
To do this open a command prompt window & change to the Tools folder in your TFS installation directory & run the following command:
TfsAdminUtil.exe ConfigureConnections /View
A sample output would be:
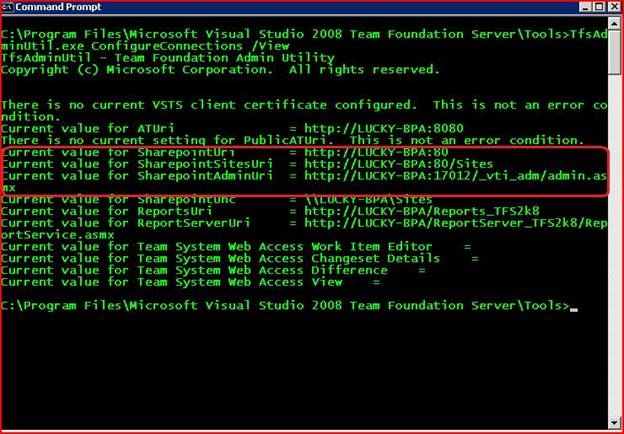
In the output notice the value for SharePointAdminUri. This is the central admin site’s url for the source SharePoint instance with which TFS is configured to work with presently. Note the value for the SharePointUri. This is the web application that is presently hosting your team portals.
Note the values for ReportsUri & ReportServerUri. These would be required during step #5.
Open a new IExplore window & browse the source central admin site as https://<machinename>:<port number>
Where machine name & port number are the one’s reported in the output of the command for the SharePointAdminUri.
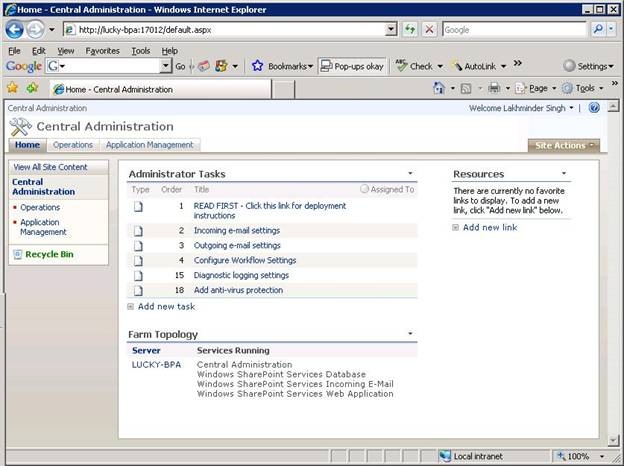
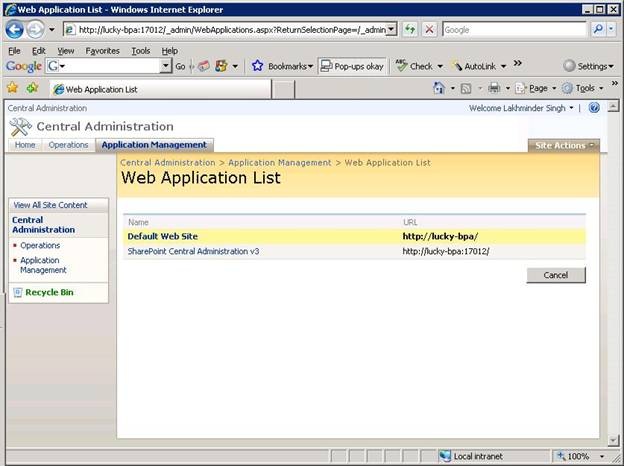
So with the central admin site open, we need to go to the Application Management tab. In the Application Management tab, under SharePoint Web Application Management select Web application list to open the Web Application List page. Click the web application which is listed as the value of SharePointUri in the output of the TFSAdminUtil ConfigureConnections /View command. The objective here is that we want to know the name of the content database for the web application that is hosting the TFS team portals & the database server that is hosting it.
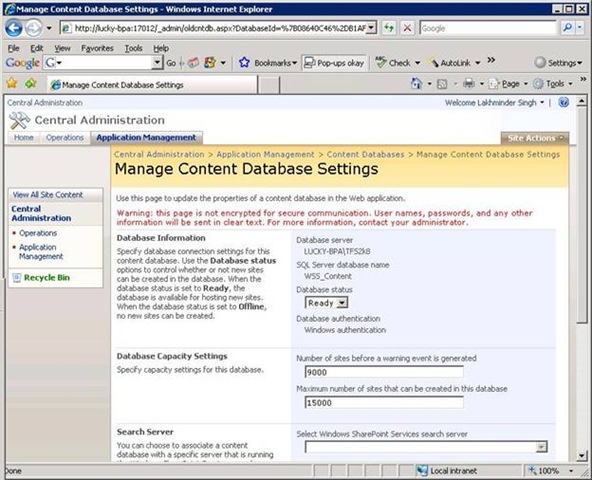
With the correct web application selected, click Application Management-> SharePoint Web Application Management->Content Databases to open the content databases web page. Click the content database which is shown in the list to open the Manage Content Database Settings web page.
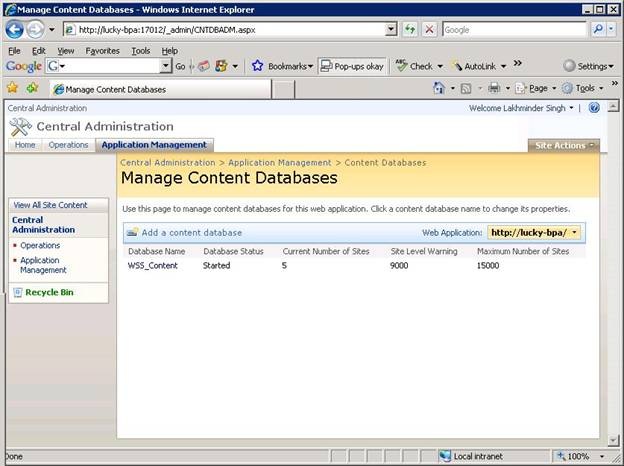
On the Manage Content Database Settings web page, note the name of the Database Server & the name of the content database.
At this point we have identified the following:
a. The Source SharePoint Central Admin Site Url & the Web Application url hosting the team portals for TFS.
b. The name of the content database that contains the project portals.
c. The SQL Server instance hosting the content database.
Step 2. Take a backup of the content database from the SQL Server instance which we figured out in Step# 1. Please refer to https://msdn.microsoft.com/en-us/library/ms253070.aspx for procedures to take a backup.
Once you have taken a backup of the correct content database you should restore the content database to the SQL Server instance that will host the SharePoint databases for the target SharePoint instance.
If the target SharePoint instance will be using the same SQL Server instance as that of the source SharePoint instance, you should restore the database on the SQL Server instance with a different name.
General instructions for SQL Database backup & recovery process are available at https://msdn.microsoft.com/en-us/library/ms177429.aspx.
Note: If you are using/decide to use a different SQL Server instance for the target SharePoint instance (other than the SQL instance which is hosting your TFS databases & source SharePoint databases) , the TFS Service account should have a login created for it in the SQL Server instance & should be granted the DbCreator & SecurityAdmin Fixed Server Roles in the SQL instance. A more appropriate statement is, ensure that the account which will be the identity account for the application pool of the web application that will be hosting the team project portals has a login in SQL & has the DbCreator & SecurityAdmin Fixed Server Roles granted to the login.
At this point we have restored the content database to a SQL Server instance & we will consume this database as the content database of the web application for TFS on the target SharePoint instance.
For simplicity sake I call the restored database as “ WSS_Content”
Step 3. It’s time to move over to the target SharePoint instance. On the target SharePoint Instance the first thing that we need to do is to create a new web application. Typically I expect the default web site on the target box to be in an un-extended state & we want to extend the default web site with SharePoint.
You always have the option of extending any un-extended & available physical site in IIS on the target box with SharePoint or create a new web application from within the Central Administration site itself, & use this web application for hosting the TFS Project portals.
To extend the Default Web Site with SharePoint, launch the central administration site on the target SharePoint instance and:
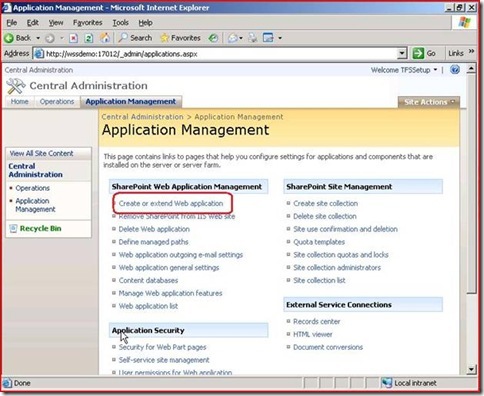
1. Click Application Management tab in WSS 3.0 Central Administration site.
2. In Application Management tab, under SharePoint Web Application Management, click Create or extend Web application.
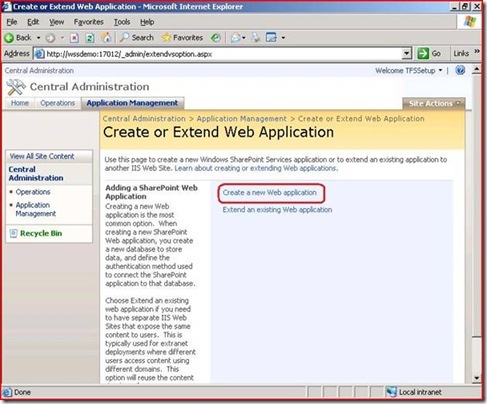
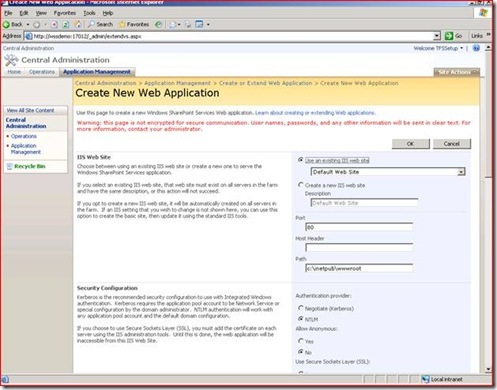
3. In the Create or Extend Web application page, click Create a new Web application.
4. In Create New Web Application page, select Use an existing IIS web site & select Default Web Site in the drop down list. In Application Pool settings, ensure that Create a new application pool option is selected & give TFSWSS30 as the name of the new application pool. Ensure that Configurable option is selected & give the Domain\TFSService account as the service account for the application pool. Ensure that Restart IIS automatically is selected. In the Database Server give the SQL Server instance name for TFS 2008. Give WSS_Content_Temp as the Database Name. Click OK to create the new web application with the default web site extended in WSS 3.0.

Step 4: Attach the content database restored in Step #2 to the new web application
Open a command prompt window & change to the folder %Program Files%\Common Files\Microsoft Shared\web server extensions\12\BIN. Delete the temporary content database using the command:
stsadm –o deletecontentdb –url https://<AppTierName> –databasename WSS_Content_Temp
To attach the WSS_Content database to the default web site run the following command:
stsadm –o addcontentdb –url https://<AppTierName> –databasename WSS_Content
Note: The content database was restored with the name WSS_Content in Step #2. Use should use the name which you had given for the content database during the restore process in Step #2.
Step 5: Install TFS 2008 Extensions for WSS
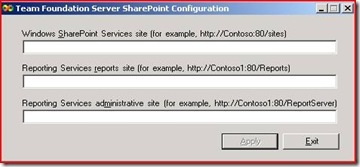
Install TFS 2008 extensions for SharePoint 3.0 from <TFS Installation Location>\wssext folder by running the setup.exe. At the end of installation, after you have clicked Finish, you would be prompted with the dialog box for the WSS 3.0 web part configuration.
Provide the https://TargetSharePointMachineName/sites as the WSS site
Provide the uri which we noted for ReportsUri in step#1 for the reports site. eg: https://lucky-bpa/Reports_TFS2k8
Provide the uri which we noted for ReportServerUri before ReportService.asmx in step#1 for the report server uri . For Eg: https://lucky-bpa/ReportServer_TFS2k8
Click Apply.
Click Exit.
Step 6: Update TFS to use the new target SharePoint Instance
To do this open a command prompt window & change to the Tools folder in your TFS installation directory & run the following command:
TfsAdminUtil.exe ConfigureConnections /SharePointUri:https://<targetSharepointmachinename>:80 /SharepointSitesUri:https://<targetSharepointmachinename>:80/Sites /SharePointAdminSiteUri:https://<targetSharepointmachinename>:17012/_vti_adm/admin.asmx /SharePointUNC:\\<targetSharepointmachinename>\Sites
Note: Substitute the port number values in the above command with the port numbers that are applicable on the target SharePoint Instance.