Getting started with Lab Management – VS2010 RC (Part 1)
We had a previous walkthro that shows lab management in action with VS2010 Beta2. This walk thru is an update of the same walkthru but using the RC bits. Between Beta2 and RC, the lab management product has had a lot of improvements, especially in the getting started path. This post is an attempt to showcase these changes. I have also repeated the content of the 4 part series again, to keep the post readable in isolation. Folks who have had a chance to read the previous walkthru, please excuse the repetition.
Lab management is a new addition to the Visual Studio family with VS2010. The product uses virtualization to build and manage labs in the dev / test environment. The promise of the product is three fold.
- Using virtualization, machine utilization and hardware costs of managing labs will be much better than building out and maintaining physical labs.
- Increased productivity of the dev/test team – various surveys indicate that test members spend 30 – 50% of their time in setting up their test bed and getting it ready for testing. The product leverages the virtualization to vastly reduce the cost of this bootstrap. Leveraging the rich snapshot / restore models, it allows you to set up a pristine base environment (group of VMs) and then start your testing from there. When you consider the permutations of configurations typical test teams need to test, this will be a huge productivity enhancer.
- Consistent feedback on the quality of the builds – the lab management solution allows you to configure your daily build system to build the product, deploy the application on an environment and execute tests on them. Effectively, this completely automates the daily BVT (Build Verification Tests) setup and provides a strong feedback on the state of quality of the daily builds.
Lab management also nicely plays along with the other VS2010 value propositions like rich data collection for bugs (snapshot the environment). For a developer, it is easy to debug a bug reported on a particular build (restore to the snapshot of the environment for that build) or to do smoke testing of his changes across various test configurations. For a tester, the environment is also a good starting point for exploratory testing, easily venturing into various corners of the product with the knowledge that a tester could always reach back a well known state.
Enough intro. This blog post series will walk you through the automation of the end-to-end workflow using a simple calculator web service and unit tests for the same. At the end of the post, we would see the automated workflow where triggering a build will build an app, deploy it to a VM, run tests on it and report results.
While this example does not use multiple VMs in an environment, the same experience is applicable for multi-tier app testing as well. We can extend the application under test to cover various topologies (from traditional backend / frontend to software NLB to VMs spanning multiple trust boundaries)
Prereqs:
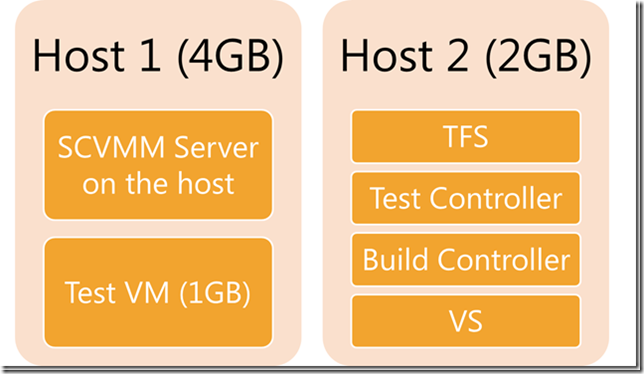
- One x64 hypervisor enabled machine with 4GB RAM that can act as hosts for the test VMs, as well as the SCVMM server. Note that SCVMM requires to be installed on a machine joined to domain and needs live connection to the domain for authentication. So this cannot be your roaming laptop.
- Note that the server should be running x64 OS
- Hardware-assisted virtualization and hardware-assisted data execution protection are enabled in the BIOS (if you changed them now, turn off the power of the machine and restart them). This post explains how to verify these settings in bios.
- Hypervisor server role is installed
- One x86/x64 machine (2GB RAM) that can run TFS, VS and the build and test controllers for managing distributed build and test.
- New for RC, a service account credentials (domain account name and password). We use this credential for the agent when it communicates with the test controller, TFS and the build drop location.
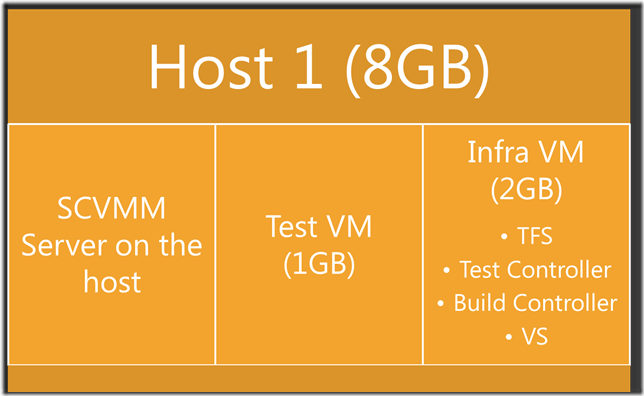
Representing the host configurations pictorially, you can configure your systems to be in either of the configurations below.
Software downloads:
- Visual Studio 2010 Team Foundation Server: here
- Visual Studio 2010 Team Agents RC: here
- Visual Studio 2010 Ultimate: here
- System Center Virtual Machine Manager 2008 R2 RTM: here
- VM creator tool: here
- Windows Server 2008 R2 vhd: here (only needed if you do not have a server VM for OS VMs)
As part of the walk through we will
- Configure SCVMM which is the management hub for virtual machines and the test VM (this post)
- Install and configure TFS, the controllers to manage build / test and lab (Part 2)
- Build the application under test in VS (Part 3)
- Use the virtual lab we built out to automate the build / deploy and test experience (Part 4)
Install and configure SCVMM Server:
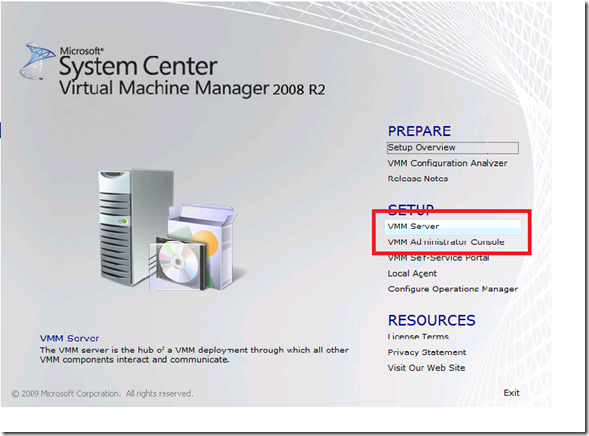
On the hypervisor machine (in my case varadademo.fareast.corp.microsoft.com), install both the SCVMM server and the Administrator console. The lab product uses SCVMM as the hub for driving all the VM related operations.
I have done the default installation. As part of the install, I had VMM install SQL Server Express.
VMM installs a SQL server that requires to be updated with some security patches. Use Windows Update to pick up the latest patches for VMM and SQL Server and reboot the machine after the updates are installed.
Launch the admin console, pair to localhost:8100
Select Add host and add the host machine (the same machine where I am running SCVMM)
Add test VM to the host:
Copy the Win2k8 R2 vhd you downloaded before to the library share and create a VM (Remember to set the VM memory to be 1GB). Join the VMs to domain, giving it right computer names, and any other typical setup you might want on the VM. (Windows update to pick up the latest patches).
In a single host setup (with 8GB configuration), you can host the test VM and the TFS VM on the same host. In this case, make two copies of the VHD and deploy them to the same host. A future post explains how to build out the test VM (and TFS VM as well if you are configuring in a 8GB setup)
Configure the Test VM:
In our example, we will use the test VM as a web server to host our app and test it via unit tests. So let us make sure that ASP.NET is configured. To keep the walk through simple, we will just install all the web server components. Logon to the test VM, and from a elevated command prompt,
|
The above might take a few minutes.
The following is new for RC. In this step, we provision the VM to be lab ready from with in the virtual machine. As part of the process, the new VMPrep (click here for more documentation ) tool installs the build / test and lab agent on the VM. We first start with a share that has the downloaded isos expanded. So inside the AgentInstaller directory, we have the files from the agent install iso (not the iso, but the flat file hierarchy inside the iso) and the same is the case with the TFSInstaller directory.
|
Now from an elevated command prompt inside the VM run,
|
This process takes a while as it installs latest .NET framework, reboots, installs the agents and such. The command takes the current user password to allow for re-logon again.
We now have a active VM that can be used by the lab software to create test environments. At this point, you could also do any other prerequisite that your system under test might have. In this case, we wanted a web server, and thus we ended up doing nothing more than configuring the web server.
In the next blog in this series, we will work on configuring the VM that will act as the TFS server, the build and test controllers and VS machine.


