Developing with Kinect for Windows v2 on a Mac
With the launch of the Kinect for Windows v2 public preview, we want to ensure that developers have access to the SDK so that you can start writing Kinect-based applications. As you may be aware, the Kinect for Windows SDK 2.0 public preview will run only on Windows 8 and Windows 8.1 64-bit systems. If you have a Windows 8 PC that meets the minimum requirements, you’re ready to go.
For our Macintosh developers, this may be bittersweet news, but we’re here to help. There are two options available for developers who have an Intel-based Mac: (1) install Windows to the Mac’s hard drive, or (2) install Windows to an external USB 3.0 drive. Many Mac users are aware of the first option, but the second is less well known.
First, you need to ensure that your hardware meets the minimum requirements for Kinect for Windows v2.
Due to the requirements for full USB 3.0 bandwidth and GPU Shader Model 5 (DirectX 11), virtualization products such as VMWare Fusion, Parallels Desktop, or Oracle VirtualBox are not supported. If you’re not sure what hardware you have, you can find out on these Apple websites:
- Mac notebooks (MacBook Air or Pro)
- Mac desktops (iMac or MacPro)
Installing Windows on the internal hard drive of your Intel-based Macintosh
We’re going to focus on getting Windows 8.1 installed, since this is typically the stumbling block. (If you need help installing Visual Studio or other applications on Windows, you can find resources online.)
Apple has provided a great option called Boot Camp. This tool will download the drivers for Windows, set up bootable media for installation, and guide you through the partitioning process. Please refer to Apple’s website on using this option:
- Boot Camp Support
- Boot Camp: System requirements for Microsoft Windows operating systems
- Boot Camp: Frequently asked questions about installing Windows 8
Alternative to installing Windows on your primary drive
Boot Camp requires Windows to be installed on your internal hard drive. This might be impractical or impossible for a variety of reasons, including lack of available free space, technical failures during setup, or personal preferences.
An alternative is to install Windows to an external drive using Windows To Go, a feature of Windows 8 and 8.1 Enterprise. (Learn more about this feature in Windows 8.1 Enterprise.)
In the section, Hardware considerations for Windows To Go, on Windows To Go: Feature Overview, you can find a list of recommended USB 3.0 drives. These drives have additional security features that you may want to review with your systems administrators, to ensure you are in compliance with your company’s security policies.
Getting started with Windows To Go
- You will need the following to proceed:
- Existing PC with USB 3.0 that has Windows 8/8.1 Enterprise installed (the “technician computer”)
- USB 3.0 flash or external hard drive
- Windows 8/8.1 Enterprise installation media (CD or ISO)
- Windows 8/8.1 product key
You will need to log in as the administrator. Start the Windows to Go tool, press Win-Q to start the search, and enter Windows To Go:
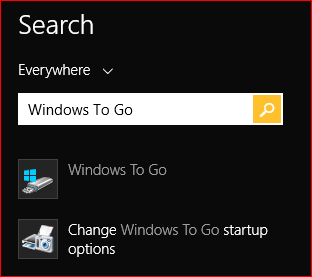
Launch the Windows To Go application from the list. From the main application window, you will see a list of the attached drives that you can use with the tool. As shown below, you may be alerted of USB 3.0 drives that are not Windows To Go certified. You can still use the drive but understand that it might not work or could have an impact on performance. If you are using a non-certified USB 3.0 drive, you will have do your own testing to ensure it meets your needs. (Note: while not officially supported by Microsoft, we have used the Western Digital My Passport Ultra 500 GB and 1 TB drives at some of our developer hackathons to get people using Macs up and running with our dev tools on Windows.)
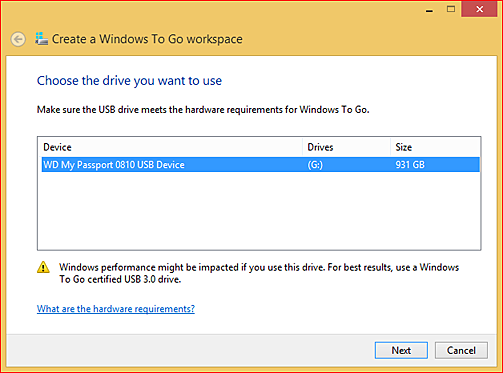
Select the drive you wish to use and click Next. If you have not already done so, insert the Windows 8.1 Enterprise CD at this time. If you have the .ISO, you can double-click the icon or right-click and select Mount to use it as a virtual drive.

If you do not see an image in the list, click the Add search location button and browse your system to find the DVD drive or mounted CD partition:
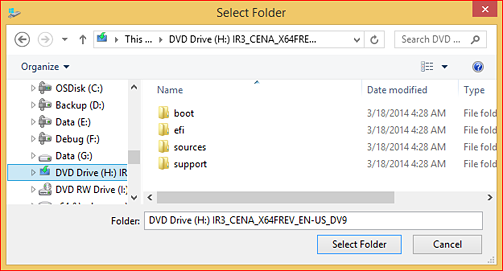
It should now appear in the list, and you can select it and click Next.
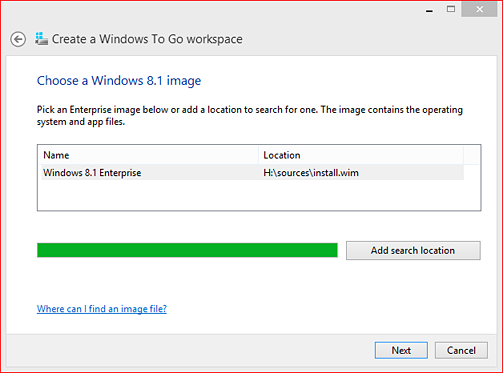
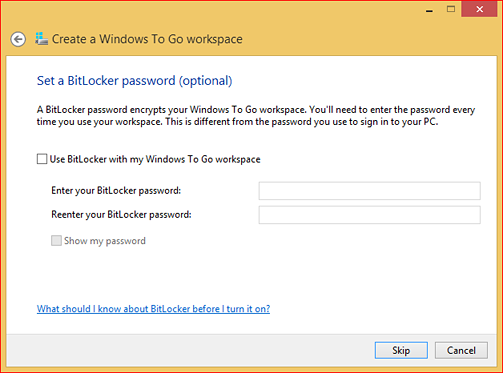
If you need or wish to use BitLocker, you can enable that now. We will Skip this.
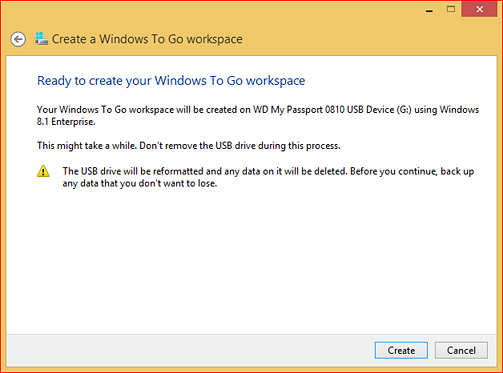
The confirmation screen will summarize the selections you have made. This is your last chance to ensure that you are using the correct drive. Please avail yourself of this opportunity, as the Windows To Go installation process will reformat the drive and you will not be able to recover any data that is currently on the drive. Once you have confirmed that you are using the correct drive, click Create to continue.
Once the creation step is complete, you are ready to reboot the system. But first, you’ll need to download the drivers necessary for running Windows on Macintosh hardware from the Apple support page, as, by default, Windows setup does not include these drivers.
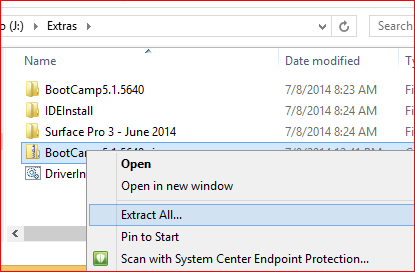
I recommend that you create an Extras folder on your drive and copy the files you’ll need. As shown below, I downloaded and extracted the Boot Camp drivers in this folder, since this will be the first thing I’ll need after logging in for the first time.
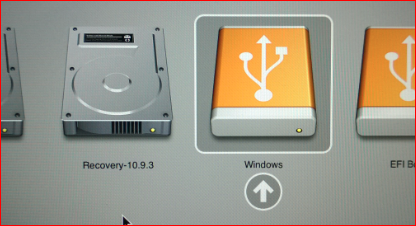
Disconnect the hard drive from the Windows computer and connect it to your Mac. Be sure that you are using the USB 3.0 connection if you have both USB 2 and USB 3.0 hardware ports. Once the drive is connected, boot or restart your system while holding down the option key. (Learn more about these startup key shortcuts for Intel-based Macs.)
During the initial setup, you will be asked to enter your product key, enter some default settings, and create an account. If your system has to reboot at any time, repeat the previous step to ensure that you return to the USB 3.0 workspace. Once you have successfully logged in for the first time, install the Boot Camp driver and any other applications you wish to use. Then you’ll have a fully operational Windows environment you can use for your Kinect for Windows development.
Carmine Sirignano
Developer Support Escalation Engineer
Kinect for Windows
Key links