Improve UX with Rich Menus for your LINE Bot
Happy New Year!
Months ago, LINE released new UX feature, Rich Menus. You can find the overview here. Yes the feature was there from the first place, but now you can do the following.
- Create up to 10 rich menus, with 20 actions for each menu.
- Assign any rich menu to a user.
This is powerful and you can switch the menu depending on context such as if the user is new to the bot or if you have special offer during some period depending on user age, gender, etc.
Rich Menus Manager
First thing first. You need to create your own rich menus. API is available but you may prefer GUI to do it. There is a tool for you.
Prerequisites
The tools runs on Node.js and npm. so install them. And I recommend using Chrome browser as I only tested the tool against Chrome only.
Install
1. Install the package with following command.
npm install –g line-richmenus-manager
If you use macOS, then run the following command.
sudo npm install –g line-richmenus-manager
2. Once the tool installed, run the following command to run it.
line-richmenus-manager –port:3000
If you omit the port, it runs on 3000. Use sudo for macOS.
3. Open Chrome and access to https://localhost:port
4. Enter Channel Access Token and click OK. If you already have rich menus, it will list them.
Create Rich Menu
You can easily create the rich menu.
1. Click [+] on top menu.
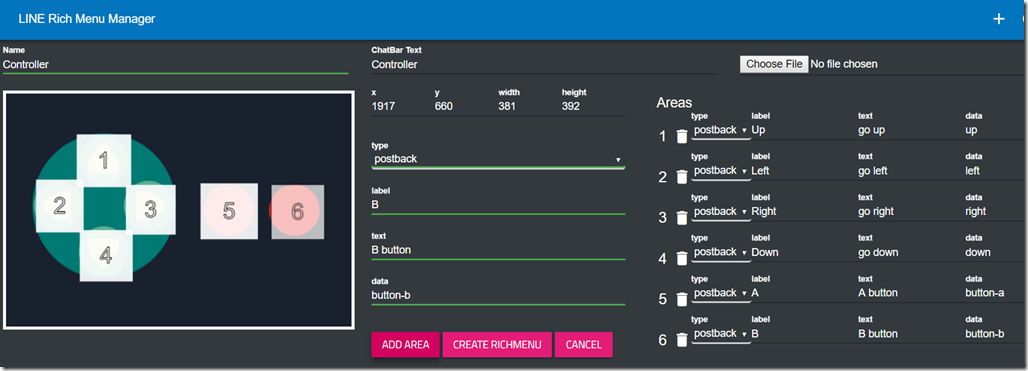
2. Enter Name and ChatBar Text.
3. Click Choose File to select file. The file should be Size: 2500x1686 or 2500x843 pixels of PNG or JPEG. Once you select valid image, it will be loaded.
4. Use mouse to draw rectangle on the image. You can redo as much as you want, or tweak the value in x/y/width/height directly to do pixel level adjustment.
5. Select type and enter necessary data, then click “Add Area”.
6. You can easily identify where the area mapped to the image by referring to the image.
7. Use delete icon to delete the area if you want to re-add, or you can still change the values after you added the area.
8. Once you completed all the areas, click CREATE RICHMENU.
See the detail
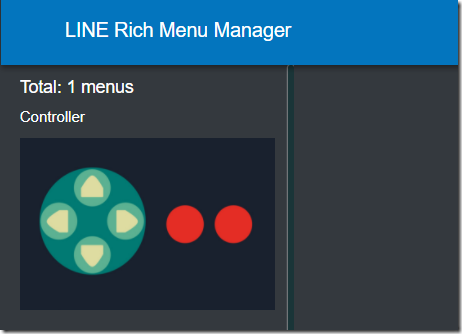
Once you created the rich menu, you can select a rich menu to see the detail.
1. Select newly added Rich Menu from the list. If you don’t see the list, then click recycle icon on the menu.
2. You see the detail on the right pane.
3. If you want to delete it, click DELETE RICH MENU.
4. You can LINK/UNLINK to the user from here, too. Click LINK or UNLINK button, then enter UserID.
Find a rich menu linked to a user
If you want to know which rich menu current the user is linked to, you can search it.
1. Click Search icon on the top menu.
2. Enter UserId to look for and hit Enter.
Update the Channel Access Token
In case you want to update the token, follow the steps below.
1. Click Gear icon on the top menu.
2. Enter Channel Access Token.
Okay, that’s it! Now you can check if the rich menu actually linked to the user by using real device or simulator.
Check the rich menu with LINE Simulator
Install the simulator
If you don’t know the tool yet, refer to this article for detail.
Simulator the Rich Menu
1. Once you start the simulator, click Rich Menu icon.
2. Then you see the rich menu. You can play with it as well. Click the area you assigned to.
3. In this case, as I create area as postback, it does postback and text message.
Summery
Rich Menu is a great differentiator to improve UX. Try them and please let me know what you have achieved with them!
Ken


