Git and Visual Studio 2017 part 2 : Saving your solution
In previous article, we started Git repository. In this article, let’s see how Visual Studio add and commit your solution.
Adding items
What will happen when we add items such as class file into the project? Let’s try.
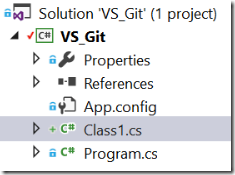
1. Right click the project and add class file called “Class1.cs”
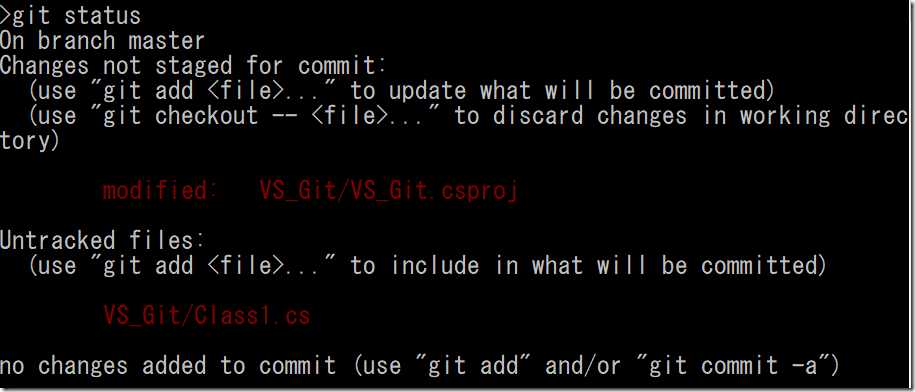
2. In Solution Explorer Class1.cs has[+] icon, which indicates the file is added but not tracked. VS_Git project has red check icon, which indicates tracked and modified. Open command prompt and run ‘git status’, too. As .csproj file once tracked, Git sees the change and says its modified but not staged. The newly added Class1.cs, on the other hand, marked as untracked file.
Stage items
We already know that ‘git add’ will stage them. I use Visual Studio this time.
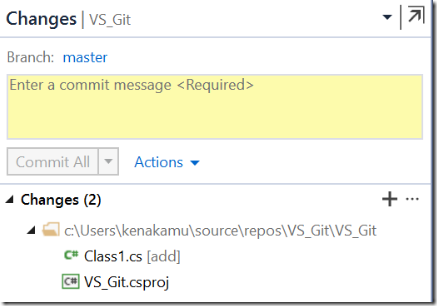
1. Right click the project and select Source Control | Commit. This won’t commit the change but navigates you to Changes pane.
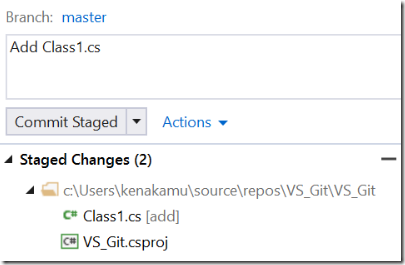
2. You see there are two changes.
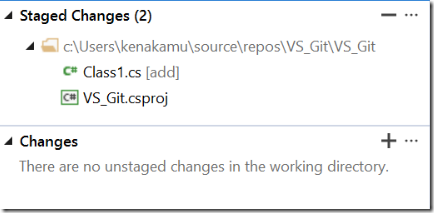
3. Click [+] button in Stages area will “stage” these changes. You can do it one by one by right click each item.
4. Then you see items are moved to Staged area. Run ‘git status’ to double check it. By clicking [-] or from right click context menu, you can un-stage items.
Commit items
Finally, time to commit.
1. Enter commit message and click “Commit Staged”.
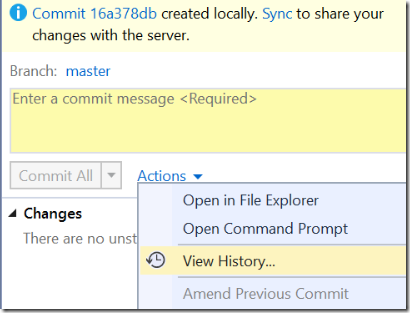
2. You see SHA1 hash for the commit as a result. Ignore ‘Sync’ thing at the moment. Click “Actions” and select “View History”.
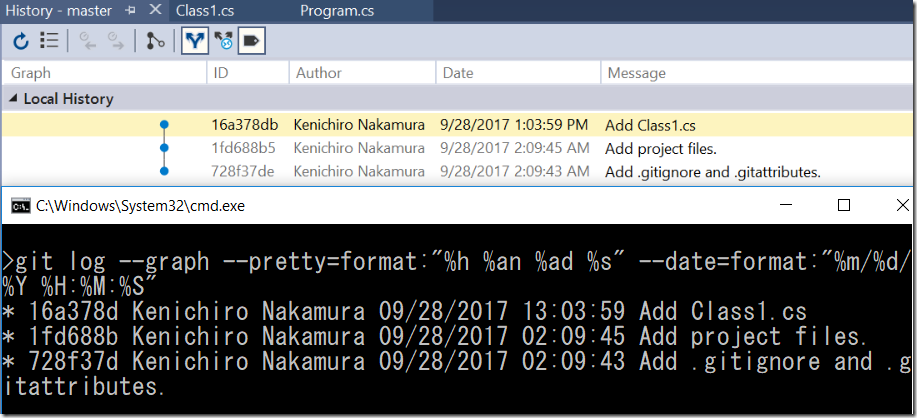
3. History is equivalent to ‘git log’ command. Run ‘git log --graph --pretty=format:"%h %an %ad %s" --date=format:"%m/%d/%Y %H:%M:%S"’ to compare the result.
Commit variations
There are several commit variations.
commit -a -m
This is quite normal workflow then using VS, that you directly commit by skipping staging items.
1. Add another class “Class2.cs”, and select commit from context menu same as you did above.
2. Enter commit comment and click “Commit All”. This will issue ‘git commit -a -m’ command.
3. Check history.
The amend option is important when you forget to add some changes to previous commit. By using this you can add those changes as part of previous commit.
1. Add another class “Class3.cs” and select commit from context menu same as you did above.
2. Enter commit comment. Click “Actions” and select “Amend Previous Commit”. This immediately issue ‘git --amend’ command.
3. View log to see if it worked as expected.
Once thing to note is that you see SHA1 hash value is different from previous commit. This is because commit object has been updated thus it becomes different object.
Summary
git add, commit and log are very straight forward, so I guess this was a bit easy. I will go deeper in the next article by explaining how to reset and restore. Go to next article.
Ken

