Using the Azure API Management REST API as workaround to RBAC functionality
If you are using Azure API Management today, you might have noticed the service is only available in the previous Azure management portal. While support in the newly GA’s portal is coming, this does mean that one of the features that the new portal exposes, namely Role Based Access Control (RBAC) is not yet available.
While working on a recent API Management implementation at a customer, they were looking to activate RBAC so that their admin users for the API Management service would not require any admin rights on the Azure portal itself. API Management contains a concept of Publisher Portal, which is where the admins do their work of customizing the exposed APIs.
First reaction was to explain to the customer that they would have to wait for this feature to become available. But after a discussion with my colleagues in the product team, they explained a workaround that would enable me to help the customer right away. It just requires leveraging the REST API and a little coding to get the job done.
Azure API Management has a REST API to do administrative tasks. This API exposes things like the Tenant, Users and Groups, Products, Reports and more. It is there to help you automate parts of your API Management tenant configuration and working. One of the entities that are exposed through the REST API is a User. Within this entity, there is one very interesting method to help us with our problem, namely generateSsoUrl.
Let’s review that. According to the documentation:
This operation retrieves a redirection URL containing an authentication token for signing a given user into the developer portal.
The above actually also applies to the Publisher portal, which can use the same access token, however the user for which you need the token needs to be an admin user. This is done by leveraging the User ID 1. The API Management setup this concept of user 1 being the admin, because they wanted something simple to bridge between now and the moment RABC will be baked in. So, exactly what we need!
Setting up our RBAC workaround
Here’s the tasks we will execute to get this working:
1. Configure Azure API management account to enable the REST API and setup the access token.
2. Setup a development environment with Visual Studio 2015 and Azure SDK 2.8.
3. You need Admin access to your Azure subscription, and make sure you have service administrator level to the Azure AD domain you want to use.
4. Create a web app (ASP.NET) that validates whether the current user is member of a pre-defined Azure AD group. If yes: generate a Login link with an access token to the Azure API Management account.
5. Deploy the application to Azure, to an App Service Web App.
6. Leverage or create a custom Azure AD group to hold the members with Admin rights to the Azure API management account.
7. Setup Authorization/Authentication feature in the Azure Web App to validate the user.
Configure Azure API Management account
In this portion, we assume you already have an account created. Go to the publisher portal of your account, browse to Security and activate Enable API Management REST API checkbox. Wait for a confirmation the action is successful.
Now configure and make a note of the access token. Scroll to the bottom of the page and configure an expiry date for your token. For testing, choose at least a date later than today. This token can later be changed, just make sure it is then copied to the App settings if that happens.
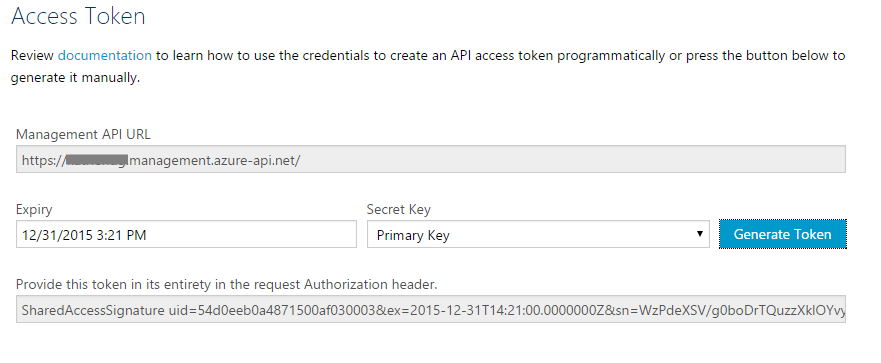
Write down the SharedAccessSignature as we’ll need it later. You won’t be able to see it once you leave this page.
Azure AD: Retrieving the right Group ID
This step can also be done at the end, but if you want to have more settings automated through the ARM resource deployment, then get the ID for your group before creating the first deployment.
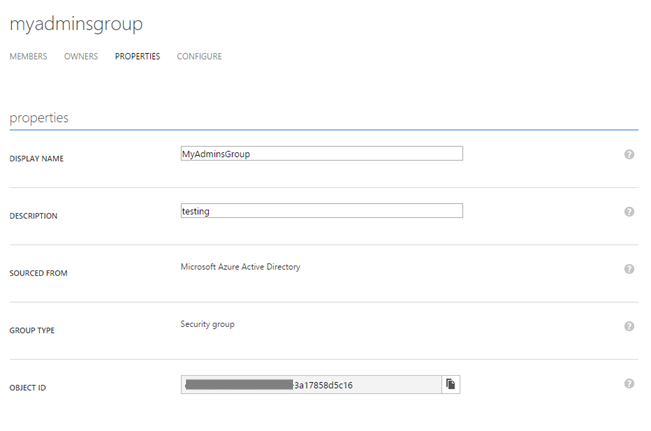
Navigate to your Azure AD using the Azure Management Portal, click Groups. Go to the Configure tab and copy the Object ID. You will need this ID in the deployment step. If you skipped this step in Visual Studio, you can still edit its value through the Web App’s Application Settings pane.
For this setup to function, you need to make sure your test users are actually members of the Group above.
Creating the ASP.NET Web app
We’ll use ASP.NET app with just one page that shows a login box for entitled users, and a default message for those that are not. You can review the sample code in this GitHub repo.
Nothing of a sophisticated web app, just something to get the point across in this post.
A few elements relevant to review:
[Authorize]
public class HomeController : Controller
We leverage the Authorize attribute to make sure the page does not process without the user being authenticated.
Next, a utility class is used to interact with the API Management REST API, and use the generateSsoUrl action.
string
requestUrl = string.Format("{0}/users/{1}/generateSsoUrl?api-version={2}", baseUrl, "1", API_VERSION);
using (HttpClient httpClient = newHttpClient())
{
var request = new HttpRequestMessage(HttpMethod.Post, requestUrl);
request.Headers.Authorization = new AuthenticationHeaderValue("SharedAccessSignature", sharedAccessSignature);
HttpResponseMessage response = await httpClient.SendAsync(request);
response.EnsureSuccessStatusCode();
string responseBody = await response.Content.ReadAsStringAsync();
return responseBody;
}
We leverage the Authorize attribute to make sure the page does not process without the user being authenticated.
Next, a utility class is used to interact with the API Management REST API, and use the generateSsoUrl action.
publicActionResult Index()
{
var claimsPrincipal = Thread.CurrentPrincipal asClaimsPrincipal;
ViewBag.HasAccess = false;
if (claimsPrincipal != null)
{
Claim groupApimAdmin = claimsPrincipal.Claims.FirstOrDefault(
c => c.Type == "groups" && c.Value.Equals(groupToValidate, StringComparison.CurrentCultureIgnoreCase));
if (null != groupApimAdmin)
{
ViewBag.HasAccess = true;
}
}
return View();
}
Deploying the app to Azure
We’ve also created a Cloud Deployment project in Visual Studio to help us with the deployment of the application to Azure. The Cloud Deployment project uses Azure Resource Management JSON template to create the web app, an App Service Plan and set the Application Settings we require for our app to function.
Note: Before deploying though, make sure you have a Storage account created through the portal, as the Cloud Deployment Project requires this to temporarily copy the deployment contents.
This needs to be a Storage account using the Resource Manager deployment type – see more here https://azure.microsoft.com/en-us/documentation/articles/resource-manager-deployment-model/
In the Visual Studio project, the Cloud Deployment project already has a reference to the web application, this will build and generate a webdeploy package.
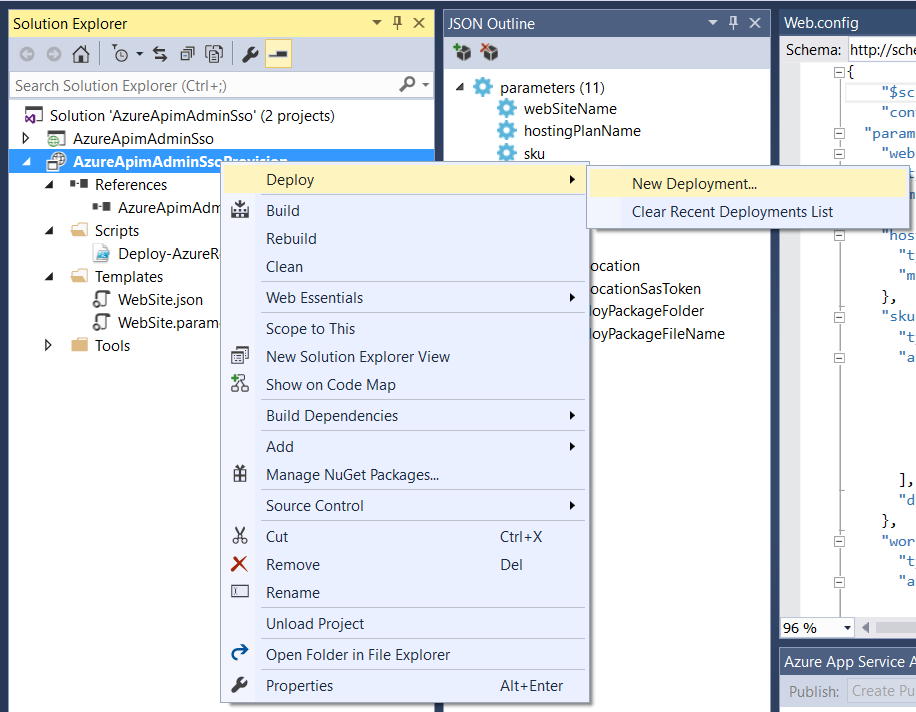
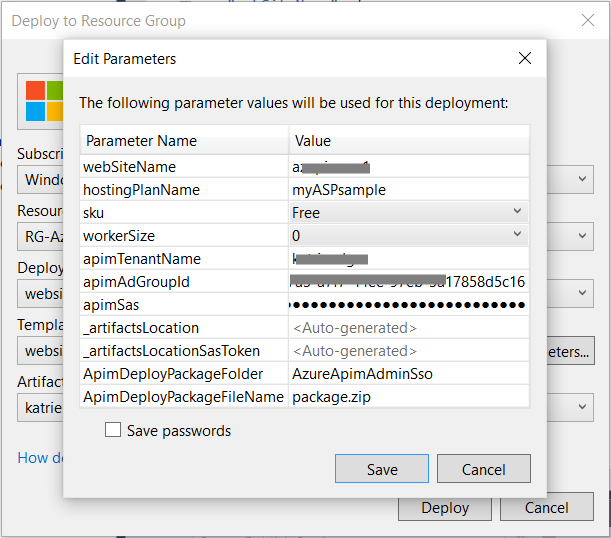
The JSON parameters can be entered through the Visual Studio interface, then click Save and Deploy to initialize the deployment to Azure.
- webSiteName – the name of the website that will host the webapp - needs to be unique on Azure (so not just for your subscription)
- hostingPlanName – new app service plan name, unique only for your Azure account.
- apimTenantName – the name of the APIM account
- apimAdGroupId – GUID corresponding to the group to which the internal Admin users must belong to in order to get access to the Azure API Management publisher portal. See above for details on retrieving the right Group ID.
- apimSas – this is a secure string that needs to contain the ShareAccessSignature you created above. Only copy the part after ShareAccessSignature and remove the space. It should start with uid=…
- ApimDeployPackageFolder: The name of the app in Visual Studio
- ApimDeployPackageFileName: package.zip (use this name)
Review the Output window to validate the progress and successful completion of the ARM deployment.
Securing the Web App
The Azure web application uses Authorization/Authentication feature in Azure App Service to secure the application itself. Once the user is allowed in through Azure AD authentication, it then validates the user is part of the predefined Group (claim). If valid, the Azure API Management REST API is used to generate a valid Admin User token. With this valid token the redirection to the Publisher portal is then initiated.
To set this up, go to your newly deployed Web App in the new Azure Portal. When browsing to the web app, you should see something like this.
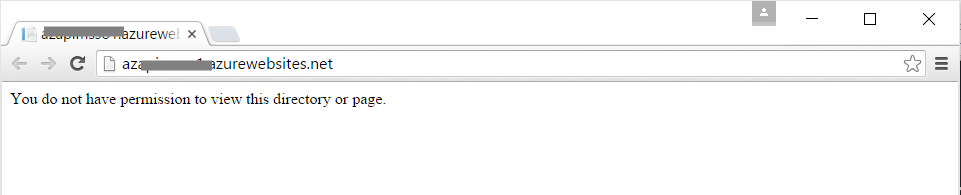
This is because we have used the [Authorize] attribute in the Controller, so that the web app is not accessible at all without the proper Authorization setup in Azure.
In the Azure portal, browse to the newly created web app, then click Authentication/Authorization.
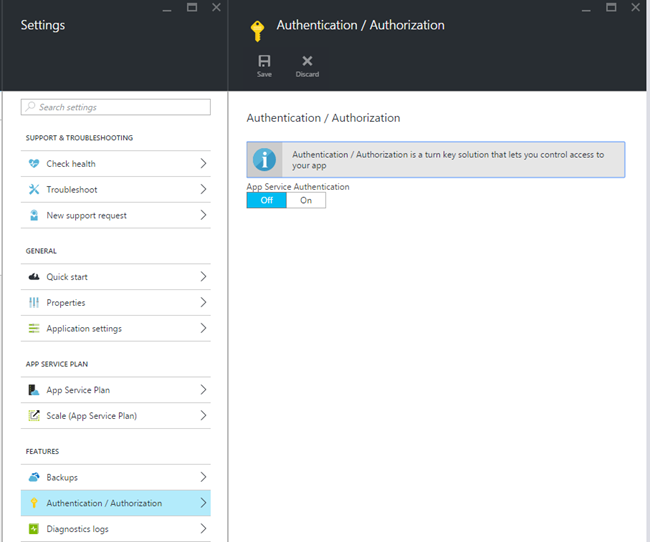
Choose On to activate the feature. Next choose “Login with Azure Active Directory” in the Action to take when request is not authenticated. Then continue by configuring Azure AD, click Not Configured to open the details pane.
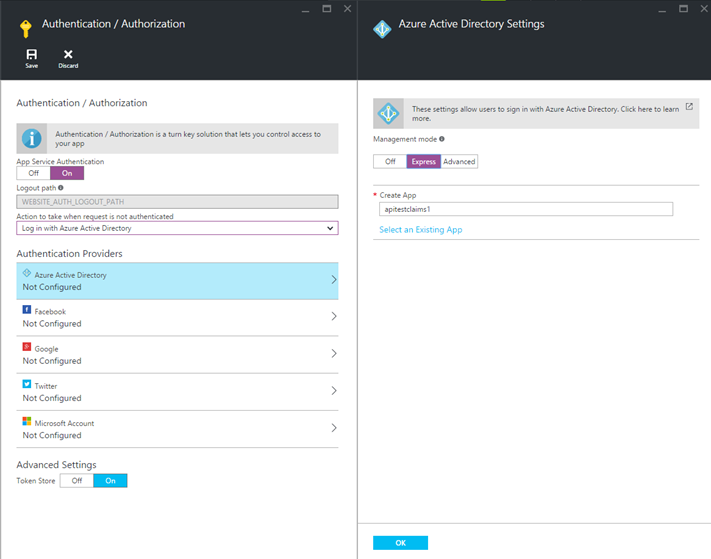
Choose Express settings, provide a unique name to the app. This will create and configure the unique App in Azure AD.
Note if you prefer to setup another Azure AD domain or app settings, you can manually configure the right app in Azure AD and choose the Advanced pane to just enter the app’s ID and secret.
For this test we just choose the simple Express version. Click OK, then back in the main Authorization pane, click the Save button. You can now close the Authentication/Authorization pane.
Configure Azure AD app settings
With the above configuration, a new Azure AD application has been added. We still need to configure a few things. Browse to the (old) Azure Management portal and open up your Azure AD domain details.
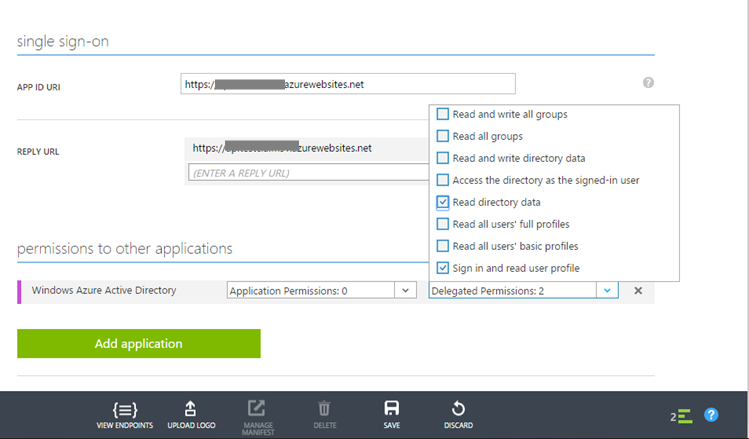
Choose Applications tab, then select Applications my company owns, and click the search button (v). The newly created app should be in the list. Click on it to open it. Go to the app’s Configure tab and click Delegated Permissions, activate Read directory data, and then click SAVE.
Next, after successfully saving, the bottom bar should now display a button “Manage Manifest”. In that action, choose Download manifest. Save it locally and open it up in a code editor. For more information about the Azure AD manifest, see here https://azure.microsoft.com/en-gb/documentation/articles/active-directory-application-manifest/.
Edit your manifest and change “groupMembershipClaims” value to “SecurityGroup” instead of the value null.
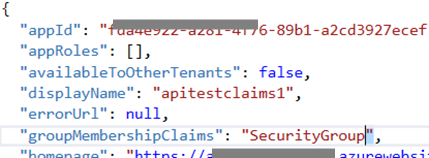
Save the manifest.
Back in the Azure portal, in your Azure AD application were editing previously, click the Manage Manifest button again, this time choose Upload Manifest.
See the following article for a detailed overview of authorization with AD group claims: https://www.dushyantgill.com/blog/2014/12/10/authorization-cloud-applications-using-ad-groups/
Validating the solution
Before testing if the solution works, make sure the App Settings have been updated with the different values:
With all the settings configured, browse to the Web App again. Instead of receiving the error message, you should see a redirection to Azure AD authentication. If you are using the same browsing window as your Azure user, you will be redirected automatically as you are already authenticated. Now click the LOGIN button and you should have access to the Publisher portal for API Management.
To test correctly, I advise creating a new test user in Azure AD, assigning the user to the above group, and activating the user. Testing the application with the newly created user should work end to end.
Possible issues
- Token is not valid – to see the actual error message you can activate Stream logs
- Token has expired: generate a new one and update the Web App’s app setting.
- Group claims does not return the required Group – you might see a detail in getting the newly assigned group of an AD user, this might seem like an error but I assume there is a cache that needs to expire so that new group memberships get returned with in the claims.
Security concerns: the access token is stored in the App Settings pane, which is accessible by Azure admins. Knowing the same admins also have access to the portal to generate a new token we don’t think this is a big risk. You can evaluate storing the token in Key Vault and retrieving it from there.