Windows 7 RC and support for VHD (including booting from VHD)
I’m loving the new Windows version, I’ve been using it on my work and my demo computers since the release of the Beta version in January. I’m not going back!
Now with the release of Windows 7 RC we are coming closer to a scheduled release by holiday season 2009 (as announced during TechEd US keynote).
Expiration of Beta and RC versions
If you are using the beta version yourself it’s recommended to upgrade (actually do a clean install) for RC. The beta version will be expiring in July 2009.
Windows 7 RC install will expire in February 2010.
Note that the RC version is available for download until the end of June 2009, from the MSDN site.
VHD support
One of the interesting features in Windows 7 is support for VHD. There’s support in two ways: first is being able to create and mount a VHD file as a disk in the OS.
This is done through the Disk management settings under Computer Management.

The second feature is booting from a VHD file. As my colleague Arlindo explained to me, this is not running on vritualization technology. It’s done through the boot loader which will unpack the VHD and then boot from there. So it’s not the same as running your VHD with Virtual PC.
Creating a bootable VHD
To create my bootable VHD I used a few sites with to gather the information and guide me through the process. These were:
- Arlindo’s post on creating a bootable VHD
- Cesar de la Torre’s post “Windows 7 - Natively Booting from a .VHD file (Virtual PC image”
Because an existing VPC is not supported to be used as a bootable VHD, you are obliged to follow one or other procedure in order to get a new Windows 7 installed on the VHD. Basic steps are, as I followed from Cesar’s post:
- After the base Windows 7 OS is installed, restart the computer and run from Windows 7 DVD. Note: it
- Choose Windows Repair (or press Shift+F10 to load the command line at the first install screen)
- Start the Command prompt.
- Type Diskpart
- Diskpart utility will load. Type create vdisk file=c:\Windows7Build7000.vhd maximum=40000 (where “c:\Windows7Build7000.vhd” can of course be another location and name). The 40000 refers to the disk size. Adapt as required.
- Enter the command to select the newly created disk: select vdisk file=c:\Windows7Build7000.vhd
- Type: attach vdisk
- Type: exit (you exit Windows Repair, but Do Not Reboot), or close the command line
- Click “Install now” back in the installation wizard.
- Accept license and then make sure you choose “Custom (advanced")” in the installation type screen.
- Choose the newly created disk as a destination (by checking the size of your newly created VHD you should be able to recognize which one it is.
- If you get a warning saying that your computer hardware might not support this drive just ignore it.
- Continue installation wizard, Windows 7 gets installed and will reboot the system a few times. That’s it.
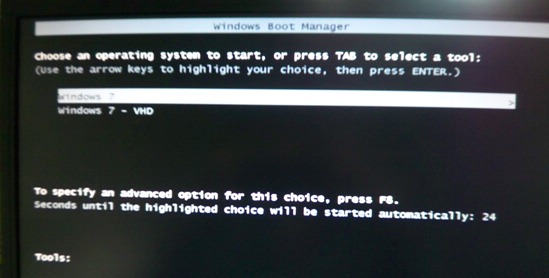
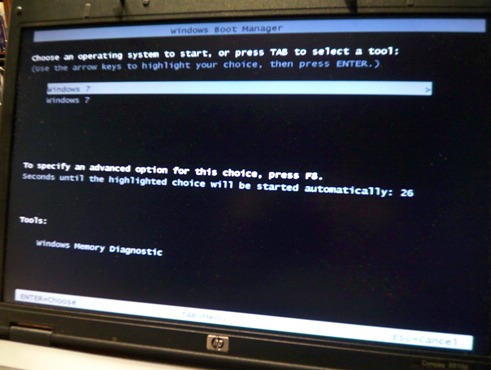
After following this procedure I ended up with two Windows 7 entries in my boot sequence so this is something that needs to be addressed. I found out the last install (on VHD) is put at the top.
The only change needed here is adapting the entries in the boot loader so that I know exactly which one is which. To do this we can use the bcdedit.exe command line tool.
The bcdedit tool is pretty straightforward (see TechNet document on command line options). What I need to do is rename the VHD Windows 7 entry to something that is more logic, and secondly I would like my base OS to appear as the first in the dual boot option. To do this I opened up command line in admin prompt, and used these commands.
bcdedit /v
This command will list the boot loader entries. Copy the GUID for the VHD entry onto clipboard.
bcdedit /set {GUID} description “Windows 7 – VHD”
Setting the entry description, you can of couse choose whatever description fits you.
bcdedit /displayorder {guid} /addlast
Here we set the display order of the VHD entry to be displayed last. Since the entry already exists it’s simply moved to the end of the list.
Now since I also want to make sure the first entry gets selected by default when booting, I copy the base OS GUID to clipboard and then use the /default option:
bcdedit /default {GUID}
With that I’m all set: my main install I’m using for my main (released) version demos and keeping the VHD for trying out all beta versions of technologies. And my boot entries show as I have set:

Sleep mode also continues to work perfectly, indifferent from the fact that it’s been booted on the VHD or the base OS.
To finish off, another interesting advantage of having a bootable disk on a VHD: you can use BitLocker to encrypt the whole disk where the VHD sits: if by any your laptop gets lost or stolen there’s no way to get the VHD’s content.
