Windows Azure – installing SDK, tools and creating a first cloud project
The Azure Services Platform was announced October of last year at the Professional Developers Conference (PDC). Part of the Azure Services Platform is hosting on the cloud with Windows Azure.
If you want to test Windows Azure yourself you can already do a lot locally on your development machine. Deploying to the cloud however will require a token for which you can enroll for at https://www.microsoft.com/azure/register.mspx. When you receive the token via e-mail you will need to claim it at https://lx.azure.microsoft.com/Cloud/Billing/ResourceTokens.aspx.
In this post you can follow the needed steps to locally install, create and test a Windows Azure hosted service. To finish I also deploy my test app to the cloud.
Before going into the installation and sample application, let’s quickly recap what Windows Azure represents in the overall Azure Services Platform.
Windows Azure is the hosting and storage part of the platform. Windows Azure can be used to host services and manage this hosting on the cloud. This post does not address other elements of the Azure Services Platform like the .NET Services, Live Services or other.
Here are more resources to learn more about Windows Azure and the Azure Services Platform:
- Windows Azure: MSDN Developer Center
- Azure Services Platform – MSDN Developer Center
- Azure Services Training Kit - PDC Preview
Windows Azure SDK and pre-requisites
For developing locally you need the pre-requisites: Windows Vista or Windows Server 2008, Visual Studio 2008, .NET 3.5 SP1, IIS7, Microsoft SQL Server Express 2005 or 2008.
Note, you can use the Microsoft Web Platform Installer to get all the prerequisites.
The downloads used in this post:
Installing the SDK and tools
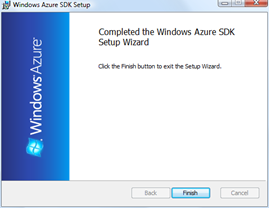
1. Install Windows Azure SDK.
The SDK installs documentation, the Development Fabric and Development Storage, so that you can locally develop and test your apps. There are also some sample applications which are really worth checking out to get some insights into this new technology.
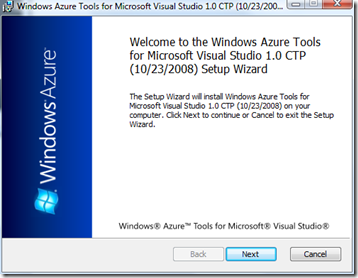
2. Install Windows Azure Tools for Microsoft Visual Studio
The version 1.0 refers to the CTP of Windows Azure not Visual Studio version :-) This strikes me as funny actually it applies to Visual Studio 2008 of course.
Creating a Cloud Web Role Service and debugging using Visual Studio
New project templates are available in Visual Studio after installation of the Tools. For a Hosted Windows Azure project you have the possibility to create a Web Cloud Service or a Worker Cloud Service. A single project may contain one of each but no more.
For now I’m going to create a Web Cloud Service which is an ASP.NET Forms application. You can also choose to use ASP.NET MVC application.
My web application will be hosted on the cloud but I can still develop pretty much as I’m used to in ASP.NET. The solution contains two projects: the ASP.NET application as you would expect along with the Cloud Service project. This project contains service configuration and service definition files.
I’m creating a simple default.aspx page and running and then deploying to the cloud. First running locally, when I press F5 to debug the local environment starts up:
- Development Fabric
- Developmnet Storage (which I’m not using at the moment)
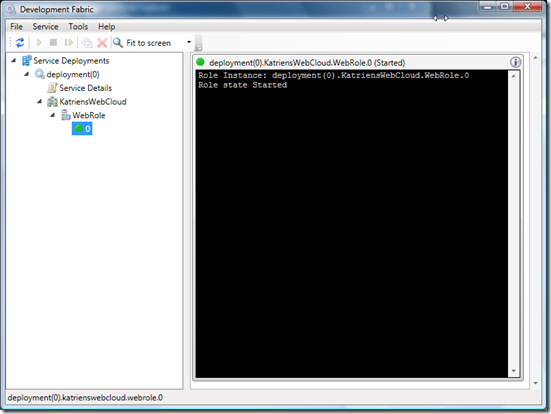
Test locally with the Development Fabric: I can see here that my Web Role is started:
Now that my website is running locally I can go and publish this to the cloud.
Deploying the project on the cloud
Creating the project on Azure Services Developer Portal
Two types of projects can be configured at the portal for Windows Azure at https://lx.azure.microsoft.com/Cloud/Provisioning/Templates.aspx.
- Storage Account
- Hosted services
Note: This portal also allows for the configuration and management of your Live Framework projects.
Because I want to host a Cloud Service I choose to create a new Hosted Services project. With the developer token you get just one of these projects.
I choose to create a new project:
This creates my empty Hosted Services project. From here I need to grab the Application ID (not visible on the screenshot, it’s lower on the page). The Application ID will be needed in order to package and publish the application from Visual Studio.
Deploying to the cloud
Back in Visual Studio open the properties window for the Web Cloud service project. There is a tab called Portal in which you need to paste the previously copied Application ID. This will make sure the correct web page on the Azure portal is opened.
Publish the application to the portal (and the cloud!)
This will package the application, choosing the Publish action opens up the folder in which the application has been packaged and opens up the browser with the application properties page.
You can locate your package file (.cspkg) and your configuration settings file (.cscfg)
The application is now uploaded and initialized.
Once the app is initialized you can test it on a staging environment by clicking the Web Site URL. Use the Configure button to change settings and for example increase the number of instances of your application to be running. At the moment the interface is well, non-existent, and you need to edit the XML file directly. You may expect this interface to become more user-friendly in the future.
When the application is ready to be published to production just press the switch icon to move from staging to production.
Hope this was an interesting walkthrough. If you want to read more and see some nice examples of using the Storage capabilities I recommend reading Maarten Balliauw’s 5 posts on Windows Azure.


