Call Multiple Services With One Login Prompt Using ADAL
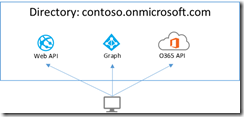
This blog will show how to create a client application using Active Directory Authentication Library (ADAL) that authenticates to multiple Web API applications in Azure Active Directory while only prompting the user a single time for credentials.
Background
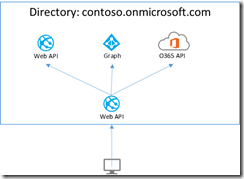
I wrote a previous post that showed how you can create your own Web API that enables impersonation of the calling user, allowing you to call a different web service on behalf of the current user. I used Office 365 APIs as a demonstration, but that same approach works with other types of services such as Graph API or your own Web API.
While this is an awesome feature (I am still excited that this is now so easy to do), what if we want the client to call the resource endpoints directly without requiring a custom Web API? Yes, we can.
Turns out this is incredibly easy to do, especially if you are using Visual Studio 2013 Update 2 RC. We will create this astonishingly dreary-looking application that, while it is in desperate need of attention by someone who can design pretty user interfaces, will demonstrate an incredibly cool concept using Azure Active Directory.
Refresh Tokens for Multiple Resources
Azure Active Directory provides a feature called multi-resource refresh tokens. The concept is simple, you can use a single refresh token to request access tokens for multiple resources.
For more information, see Refresh Tokens for Multiple Resources.
The Active Directory Authentication Library (ADAL) library is smart enough to see if a refresh token is available. If a refresh token is available, it will present that refresh token to Azure AD and receive an access token without requiring an additional authentication prompt. This is possible because of the support in Azure AD for multi-resource refresh tokens.
The trick to making this work with the ADAL library is to create a single AuthenticationContext and reuse that for all secured calls.
Let’s try it out to see how it works.
Create a Web API Endpoint
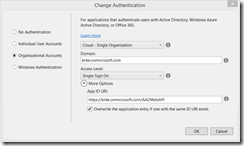
Create a new ASP.NET Web Application. Choose the template as Web API, and change the authentication to Organizational Account.
Notice the App ID URI. That’s also known as the resource, that’s the identifier of the thing in Azure AD that you are going to call. We’ll use that value in our client app in a few minutes.
Sign in as a global administrator (allowing Visual Studio to automatically register the app for you in Azure AD). Now click the “create remote resources” option to automatically create an Azure web site. This is a new feature in Visual Studio 2013 Update 2 RC.
I am prompted for a site name and Azure subscription.
Choose OK, and Visual Studio will automatically register 2 applications in Azure AD: the one running on localhost, used for local debugging, and one for your new Azure Web Site. You can now right-click your ASP.NET Web API project and choose Publish. Go to the Settings tab and enable organizational authentication, providing your domain.
Click Publish, and your Web API is now published to a new Azure Web Site, secured with Azure AD.
Update Web API Permissions
Go to the Azure Management Portal. Go to your directory and choose the Applications tab. Find your new Web API application.
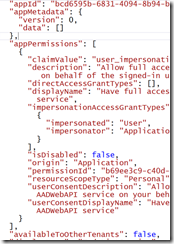
Open it and choose Configure. At the bottom of the page there is a “Manage Manifest” button. Click it and choose “Download Manifest”. Save the file locally, then edit it with Visual Studio 2013 Update 2 RC, which provides color-coded JSON editing. By default it will have an appPermissions property with an empty array.
We will replace that property with the following:
Sample Code
- "appPermissions": [
- {
- "claimValue": "user_impersonation",
- "description": "Allow full access to the AADWebAPI service on behalf of the signed-in user",
- "directAccessGrantTypes": [],
- "displayName": "Have full access to the AADWebAPI service",
- "impersonationAccessGrantTypes": [
- {
- "impersonated": "User",
- "impersonator": "Application"
- }
- ],
- "isDisabled": false,
- "origin": "Application",
- "permissionId": "b69ee3c9-c40d-4f2a-ac80-961cd1534e40",
- "resourceScopeType": "Personal",
- "userConsentDescription": "Allow full access to the AADWebAPI service on your behalf",
- "userConsentDisplayName": "Have full access to the AADWebAPI service"
- }
- ],
The final result looks like this:
Save the file locally. Go back to the Azure Management Portal. Go to the application again and choose Manage Manifest, then Upload Manifest. Upload the file.
Note: If you do this enough times, you are going to have a bunch of .json files with GUIDs in your Downloads folder. By default, the file will have the same name as the client ID for your application.
We are now ready to create an app to consume our Web API endpoint.
Create a Windows App
Add a Windows App client application using the Blank App template. When the app is created, open MainPage.xaml and add a textbox named “txtCallback”.
In the MainPage method, add a call to find out the callback URI for this app.
Sample Code
- public MainPage()
- {
- this.InitializeComponent();
- txtCallback.Text = WebAuthenticationBroker.GetCurrentApplicationCallbackUri().ToString();
- }
Run the app, you’ll see the callback URI for the app that starts with ms-app.
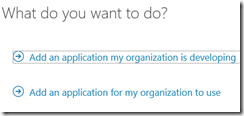
Go to the Azure Management Portal, navigate to your directory, and then go to the Applications tab. Click the Add button at the bottom of the page. Choose “Add an application my organization is developing.”
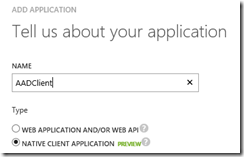
Give the app a name (it can be quite helpful to use the same name as the app here.
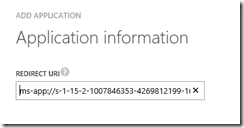
In the next screen, copy the callback URI from your Windows 8 app and paste it into the screen.
Once the app is created, go to the Configure tab and go to the “Permissions to Other Applications” section. By default the application is granted permission to call the Graph API. Add permission to read directory data.
Since we’ve configured the permissions, the dropdown will now show our Web API with the ability to add permission for this client to call that API. Enable that permission.
Finally, add permission to call the O365 SharePoint Online API to read items in all site collections.
MAKE SURE YOU HIT SAVE! I have forgotten this several times, and you’ll debug and see that you get a null access token. If you see this, it means you failed to hit save here.
Finally, go to the “Update Your Code” section to obtain the client ID.
Create the UI
I am terrible at making user interfaces. Always have been, and this time is no exception. Here is the XAML for my application.
Sample Code
- <Page x:Class="AADClient.MainPage"
- xmlns="https://schemas.microsoft.com/winfx/2006/xaml/presentation"
- xmlns:x="https://schemas.microsoft.com/winfx/2006/xaml"
- xmlns:local="using:AADClient"
- xmlns:d="https://schemas.microsoft.com/expression/blend/2008"
- xmlns:mc="https://schemas.openxmlformats.org/markup-compatibility/2006"
- mc:Ignorable="d">
- <StackPanel Background="{ThemeResource ApplicationPageBackgroundThemeBrush}"
- Orientation="Vertical">
- <TextBox TextWrapping="Wrap"
- Text="TextBox"
- VerticalAlignment="Top"
- Width="660"
- x:Name="txtCallback"
- Margin="0,100,0,0" />
- <Button Content="Call APIs"
- Click="Button_Click"
- Height="50"
- Width="110"
- Margin="400,0,0,0" />
- <Button Content="Logout"
- Height="50"
- Width="110"
- Click="Button_Click_1"
- Margin="400,0,0,0" />
- <StackPanel Orientation="Horizontal"
- Height="Auto"
- Margin="0,50,0,0">
- <TextBlock Width="400"
- Text="Web API"
- FontSize="36">
- </TextBlock>
- <TextBlock Width="400"
- Text="SharePoint Online"
- FontSize="36"></TextBlock>
- <TextBlock Width="400"
- Text="Graph API"
- FontSize="36"></TextBlock>
- </StackPanel>
- <StackPanel Orientation="Horizontal"
- Height="Auto"
- Margin="0,50,0,0"
- MinHeight="100">
- <TextBlock x:Name="webAPIResult"
- Width="400"
- TextWrapping="Wrap"></TextBlock>
- <TextBlock x:Name="spoResult"
- Width="400"
- TextWrapping="Wrap"></TextBlock>
- <TextBlock x:Name="graphResult"
- Width="400"
- TextWrapping="Wrap"></TextBlock>
- </StackPanel>
- </StackPanel>
- </Page>
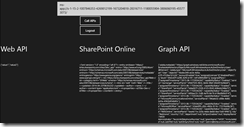
The main part to call out is that there are 3 text blocks that show the data from each of the API calls as a raw string.
Finally, Some Code!
The app is registered to use Azure Active Directory, now we have to add the reference to the ADAL library. Right-click the project and choose Manage NuGet Packages, search for “adal”, and include the prerelease option to take advantage of new features in the ADAL library. Install it.
Add two buttons to MainPage.xaml. The first one will be used to call the endpoints. The second will be used to log out. The code for MainPage.xaml is pretty straightforward.
We add using statements:
Sample Code
- using Microsoft.IdentityModel.Clients.ActiveDirectory;
- using System;
- using System.Net.Http;
- using System.Runtime.InteropServices;
- using System.Threading.Tasks;
- using Windows.Security.Authentication.Web;
- using Windows.UI.Xaml;
- using Windows.UI.Xaml.Controls;
Add a few fields to our class.
Sample Code
- //Context used for all operations
- AuthenticationContext context;
- //The domain used to authenticate
- string aadDomain = "kirke.onmicrosoft.com";
- //The client ID of the native app
- string clientAppClientID = "309a37cd-4246-4a78-b5b2-ee453cecd9ee";
Now, we add a method to call Azure AD to obtain an access token, then call an API.
Sample Code
- /// <summary>
- /// Obtains an access token from Azure AD
- /// and then calls the API endpoint
- /// </summary>
- /// <param name="APIEndpoint">API to call</param>
- /// <param name="AppIDURI">The APP ID Uri of the
- /// API to call. Value is found on the Configure
- /// tab of the Azure Management Portal.</param>
- /// <returns></returns>
- private async Task<string> GetResult(
- string APIEndpoint,
- string AppIDURI)
- {
- AuthenticationResult ar =
- await context.AcquireTokenAsync(
- AppIDURI,
- clientAppClientID);
- string authHeader =
- ar.CreateAuthorizationHeader();
- //Create an HTTP client for the local web API
- var client = new HttpClient();
- var request = new HttpRequestMessage(
- HttpMethod.Get,
- APIEndpoint);
- request.Headers.TryAddWithoutValidation(
- "Authorization",
- authHeader);
- var response = await
- client.SendAsync(request);
- var responseString = await
- response.Content.ReadAsStringAsync();
- return responseString;
- }
When the button is clicked, we will form the URLs to our three different services in the same directory.
Sample Code
- private async void Button_Click(object sender, RoutedEventArgs e)
- {
- string authority = string.Format(
- "https://login.windows.net/{0}",
- aadDomain);
- //One AuthenticationContext for the whole domain
- // and all operations.
- context = new AuthenticationContext(authority);
- //Call our Web API endpoint
- string APIEndpoint = "https://aadwebapi.azurewebsites.net/api/values";
- string APIAppIDURI = "https://kirke.onmicrosoft.com/WebApp-aadwebapi.azurewebsites.net";
- string response = await GetResult(
- APIEndpoint,
- APIAppIDURI);
- webAPIResult.Text = response;
- //Call SharePoint Online
- APIEndpoint = "https://kirke.sharepoint.com/sites/dev/_api/Web?$select=Title";
- APIAppIDURI = "https://kirke.sharepoint.com";
- response = await GetResult(
- APIEndpoint,
- APIAppIDURI);
- spoResult.Text = response;
- //Call Graph API
- APIEndpoint = "https://graph.windows.net/kirke.onmicrosoft.com/me?api-version=2013-11-08";
- APIAppIDURI = "https://graph.windows.net";
- response = await GetResult(
- APIEndpoint,
- APIAppIDURI);
- graphResult.Text = response;
- }
Finally, we add the code to log out.
Sample Code
- private void Button_Click_1(object sender, RoutedEventArgs e)
- {
- context.TokenCacheStore.Clear();
- // Also clear cookies from the browser control.
- ClearCookies();
- }
- private void ClearCookies()
- {
- const int INTERNET_OPTION_END_BROWSER_SESSION = 42;
- InternetSetOption(IntPtr.Zero,
- INTERNET_OPTION_END_BROWSER_SESSION,
- IntPtr.Zero,
- 0);
- }
- [DllImport("wininet.dll", SetLastError = true)]
- private static extern bool InternetSetOption(IntPtr hInternet,
- int dwOption,
- IntPtr lpBuffer,
- int lpdwBufferLength);
- }
- }
The Big Payoff
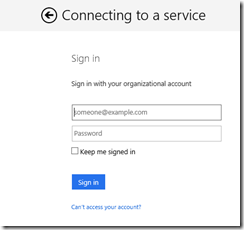
Think about how cool this is… with a bit of configuration and an incredibly small amount of code, we have called 3 different secure services and will only have 1 login prompt. We run the app and click the Call APIs button. When the first call to AcquireTokenAsync occurs, we see the login page.
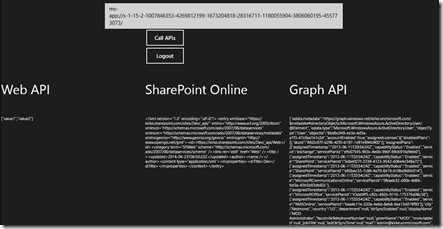
Once we log in, we see the data from each of our API calls without further prompts.
I am incredibly excited about Azure AD and the ADAL library. This opens up so many scenarios while reducing the amount of security stuff you have to know in order to build a secure application.
For More Information
Refresh Tokens for Multiple Resources
Windows Azure Active Directory Graph
