SharePoint 2013 Search Driven Publishing and Cross-Site Collection Publishing Overview
SharePoint 2013 introduces a new architecture that is a significant departure from previous SharePoint content authoring and rendering experiences.
Search Driven Publishing fills in the gap on SharePoint for fully taxonomy based navigation and experiences where taxonomy drives navigation and content appears in end user experiences based on tagging and not physical location. It also enables content to be reused in multiple places while authored and existing in only one.
And even if you choose to configure some of these features in such a way that is not taking advantage of this (what we will later call “integrated”), you still get to break conventional boundaries around the authoring location and visibility of content versus its actual location, and without using content deployment.
Another nice effect you naturally will achieve using this is Friendly URLS (FURLs) which lack the distinctive aspx tail for one. More importantly, FURLS specify what you want to see (based on taxonomy and metadata!), not where what you want to see lives (which can of course correlate visually if planned, but this is direct).
Along the way in Managed Navigation (navigation from taxonomy) you tie a rendering side web part page to tags so that content roll up/summary/welcome whatever you need is displayed. Such as a page the shows links/preview to the five newest “foo” tagged pages or lets you sort and page through all "foo" tagged content.
I’d like to caveat that I’m only going to talk about a hypothetical CMS page centric site here and Search Driven Publishing, but Cross-Site Collection Publishing applies outside of Pages and actually to any list. I will try to refrain from using Pages or Library in places List is a fair statement. But bear in mind I’m going to get publish-y and it’s an aggregate of features like Cross-Site Collection Publishing and Managed Navigation that enable the Search Driven Publishing example I use. How you choose to use those features independently of each other or together with different options for different lists is a broader picture I’m trying to avoid muddling with just this article.
Pre-requisites
I assume you’re quite familiar with SharePoint content management, publishing, search and taxonomy. The information here is based on preview release. The documentation and the product, at the time of this posting, are subject to change so obviously that applies here. This in whole is actually a rather lengthy and deep dive sort of post by necessity as cross site publishing is rather complex when using full settings. If you are looking for (or needing) a relatively high detail and non-superficial overview then this is an article for you.
Nominate
“Cross-Site Collection Publishing” (XSP) denotes the core SharePoint 2013 feature necessary to achieve your first Search Driven Publishing scenario. The name stems from the fact that the obvious boundary we’re going to break regarding where items live and where they are “reused” and shown to users is the site collection. How we break that boundary and others is through search. I’m going take a moment to drop some terms that you may see going forward:
Content Site Collection – The site collection containing the list(s) that will actually contain authored content. A.k.a “source” a.k.a Authoring Site Collection
Rendering Site Collection – The site collection that has managed navigation and a few very new and special kind of pages and page layouts, that will actually render the content to the user because their request points to a FURL here. A.k.a “target”
Content Reuse – Rendering content outside where it lives or was authored through search and content reuse related web parts.
Catalog – A list which has been nominated for reuse using the cross-site collection publishing feature.
Let’s take some time and look at how to nominate a list for consumption by other site collections through cross-site collection publishing. In order to have the most fun possible you need some taxonomy, a new site column, and obviously a list wired together before we even nominate. If you’re really trying to pick this up by doing this on a SharePoint 2013 Technical Preview OOTB farm then all the steps will be here. But don’t let a single example / scenario tunnel vision you on these features. There is a ton of flexibility on how “deeply” you make a connection to a catalog from a different site collection and whether you even use managed navigation and how you use it, and where a navigation term set might end and a tagging term set might begin, whether or not you use both etc. This is just something to illustrate, and I’m using this example on purpose because I think you can derive the less “deeply connected” (I’m headed here, “Integration”) and alternative scenarios based on a more full functionality one.
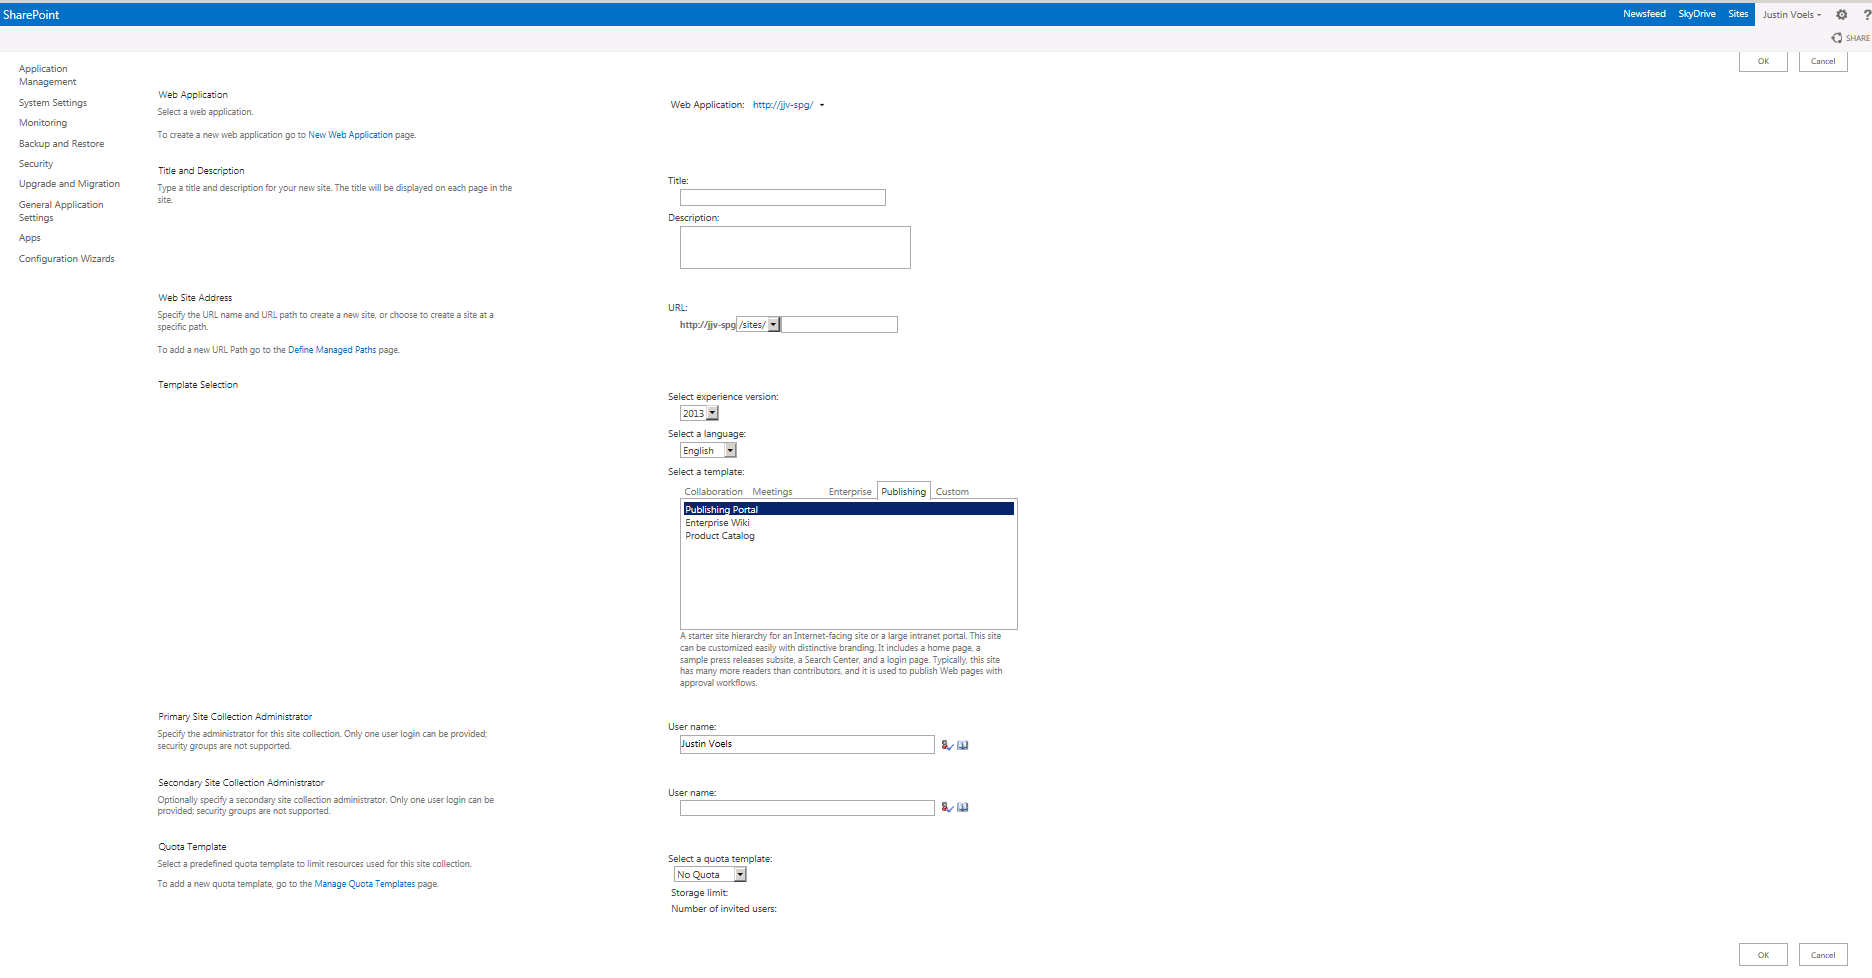
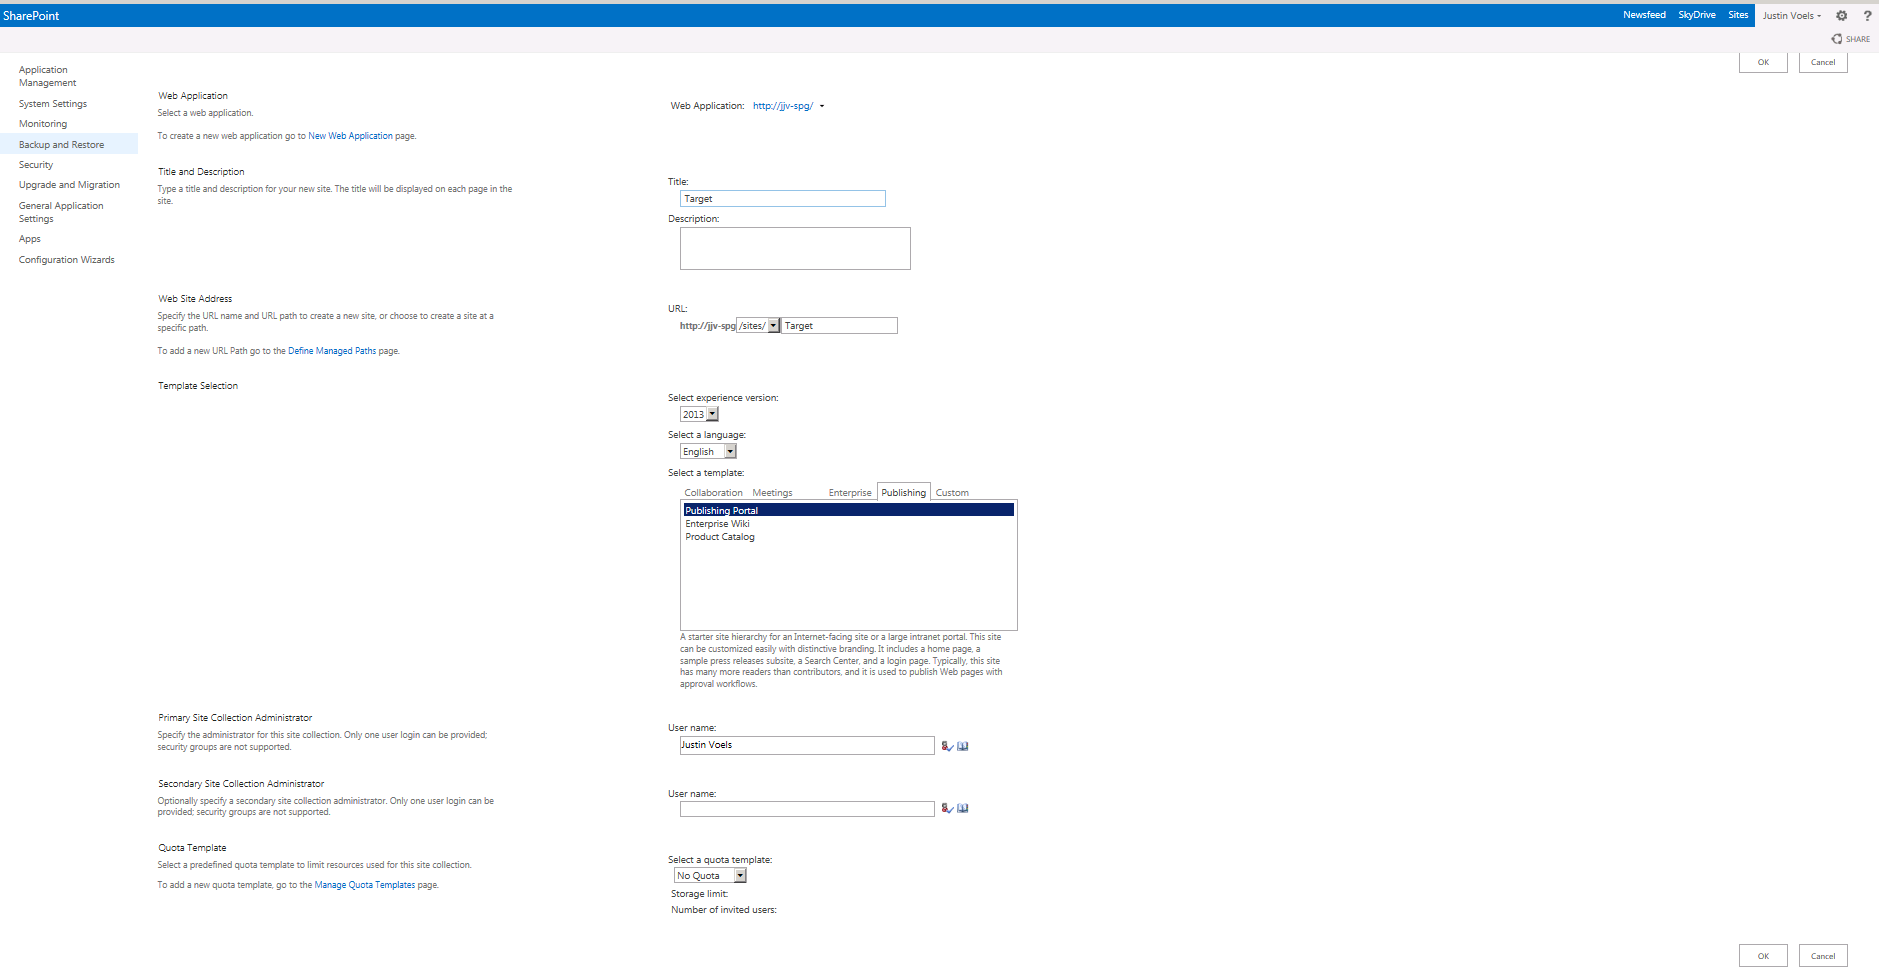
If you actually want to see some of this in action and follow along a small walk through here’s where we’re starting: go create two publishing site collections “Source” and “Target”.
URL: [/sites/] Source
Experience: 2013
Template: Publishing -> Publishing Portal
URL: [/sites/] Target
Experience: 2013
Template: Publishing -> Publishing Portal

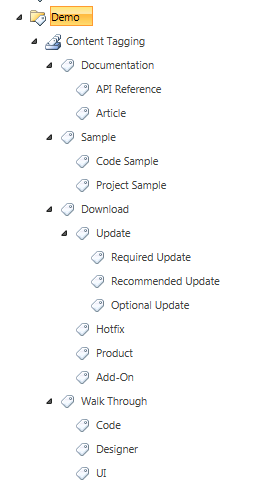
Create a term set “Content Tagging” in Central Admin like this:

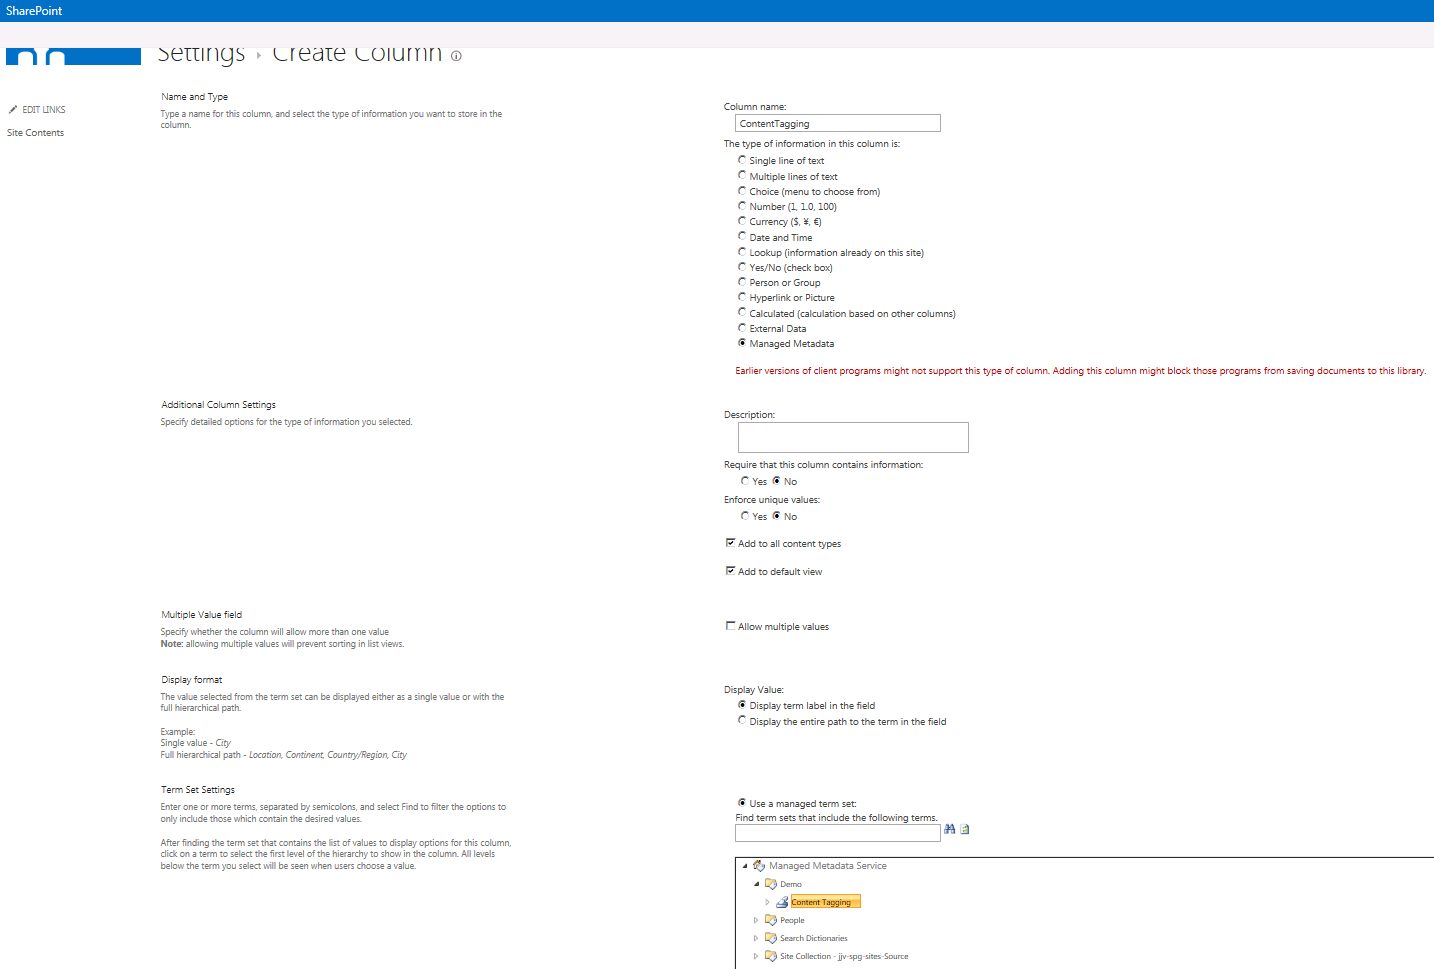
Next we need to create a new taxonomy site column and add it to the Pages library on Source.
Authoring Site Collection
1.) Go To Pages -> Settings page by choosing “Library Settings” in the Library tag of the ribbon when viewing the library contents (/sites/Source/Pages/Forms/AllItems.aspx)
2.) Choose “Create Column” in the Columns Section of the page
3.) Provide a name. I used “ContentTagging”, coincidental the name is almost the same as the name of the tagging term set we’ll be using as term set settings.
4.) Set the term set to “Content Tagging” created previously, otherwise all defaults are acceptable here. It’s worth noting the default unchecked of “Allow multiple values” is important. Multiple value columns are unsupported for the column used in integration.

Create a “Navigation” term set and apply it to Target through Navigation settings page:
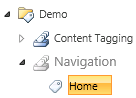
In the intended use tab for the term set you must enable “Use this Term Set for Site Navigation”.
And finally set the Home term to navigate to /sites/Target via this option under the Navigation tab.

Let’s set this on Target:
- Go to Site Settings for Target
- Choose Navigation under Look and Feel
- By default managed navigation should be selected for both Global and Current, ensure that is the case.
- Choose “Navigation” term set we created earlier for the Managed Navigation Term Set option
- Uncheck both options in Managed Navigation Default Page Settings section
- Click OK
Next we need to enable a feature on Source and then nominate the list.
- Enable the Site Collection Feature “Cross-Site Collection Publishing” on Source
- Site Settings (Top Level)
- Site Collection features
- Activate “Cross-Site Collection Publishing"
- For the list to be nominated go to List/Library settings, in our case Library Settings for Pages for Source
- There will now be a General Settings link for “Catalog Settings”
- Check the “Catalog Sharing” checkbox
Here is a screen shot of the catalog settings page in this case:
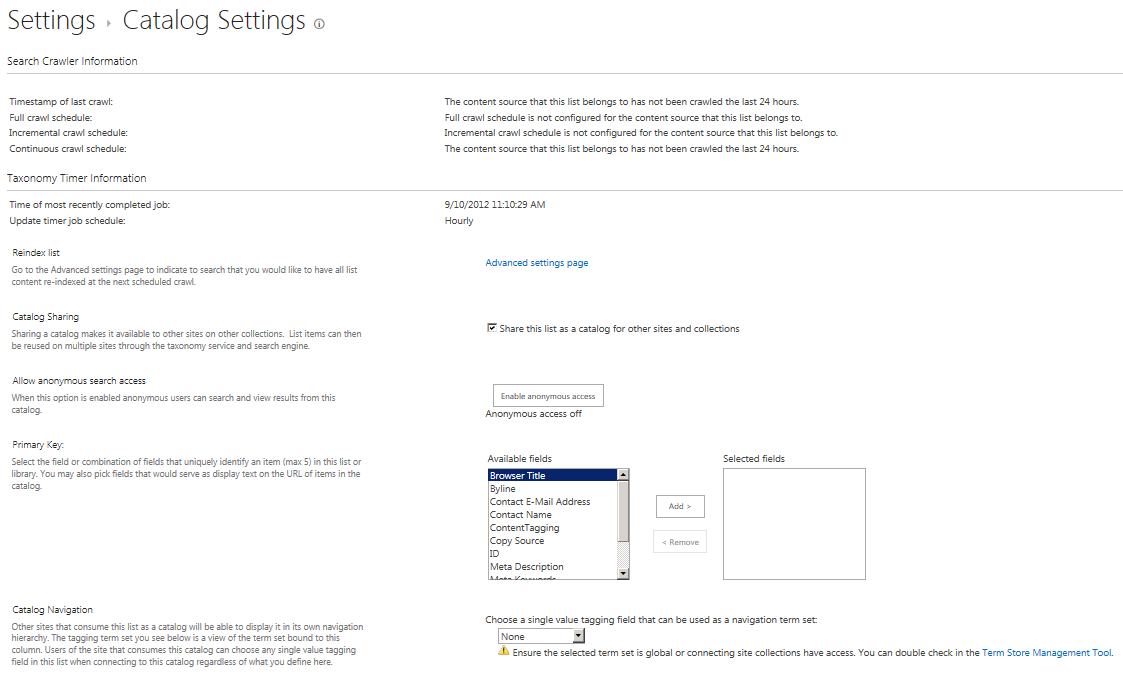
Let’s look at these settings more closely.
You can choose to suggest a default for FURL fields form the item, the fields in order at the end of the URL that specify the single item to be retrieved and displayed on a Catalog Item page. And you can choose to enable anonymous access, and also to suggest a single value tagging field the Rendering site would use for integration (we will talk about this in more depth when going over creating a connection).
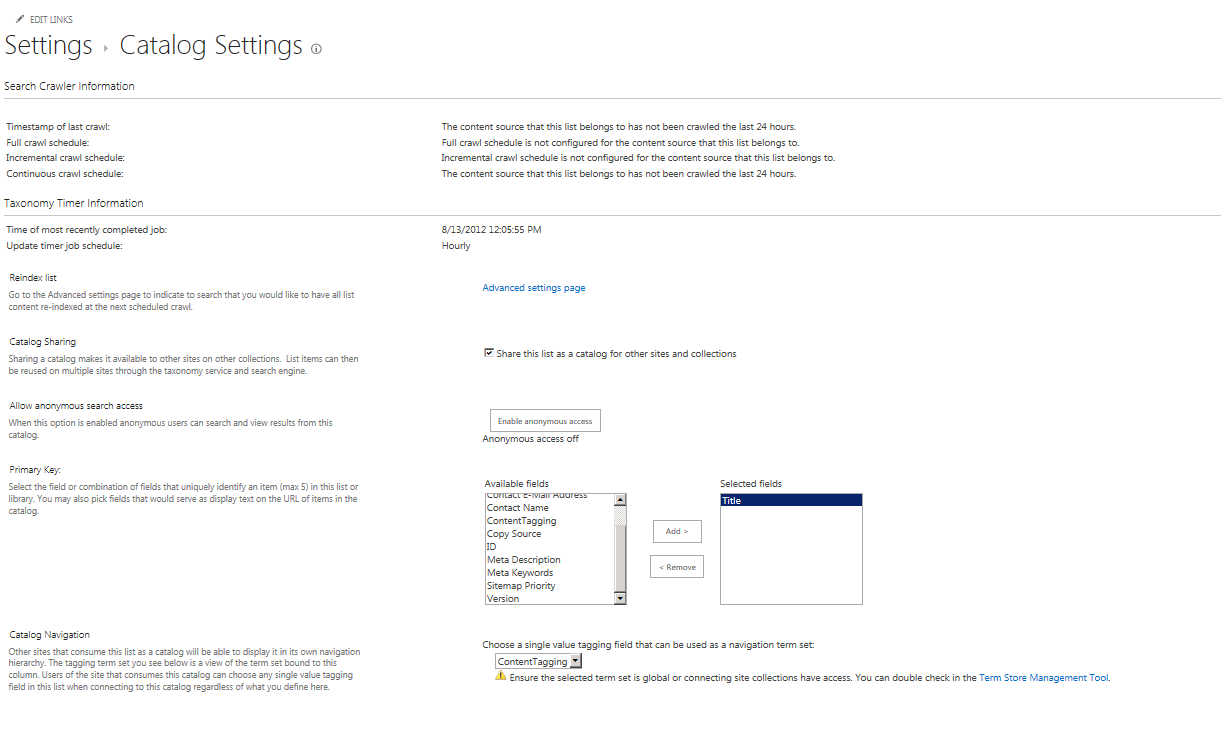
For the walkthrough/demo here are the settings I’m using. The checkbox, obviously, checked. Anonymous access left off (this is not a default the connection can override). Primary Key (FURL) just Title (a default), and Catalog Navigation as ContentTagging (a default, but this will be our only option, in this scenario, based on the lack of other single value tagging fields on the library):
You’ll get a confirmation pop up detailing some of what’s going on. The next thing we need for doing this in the UI isn’t entirely intuitive if you are working with new sites, and not existing ones. To get to connections page on the Target site collection there is a “Manage Catalog Connections” link in site settings. Note: you do not have to turn on the cross-site collection publishing feature on the Target Site Collection to finish this. Click on "Manage Catalog Connections"
Connect
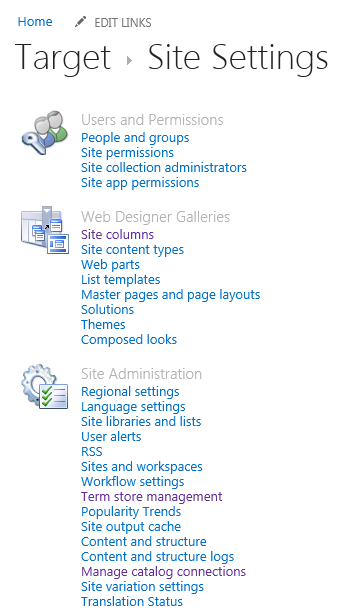
Choose “Connect to a Catalog” on the Manage Catalog Connection page.

You won’t see any catalogs! (“Available catalogs”)
That’s because you need a crawl for the settings to propagate correctly, you need more than that too, we’ll look at that in a second. If you’re uninterested in needing to crawl twice for some self-discovery on something when doing this in the UI, then skip this first crawl.
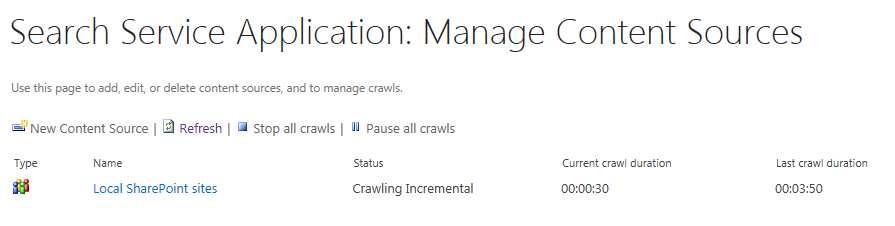
Go to your Search Service Application and kick off a full crawl for the “Local SharePoint sites” Content Source (in the demo this is my first crawl, you should be able to incremental crawl if you want).

Now back to the Connect to a Catalog screen, you’ll see your recently nominated library!

Hit Connect
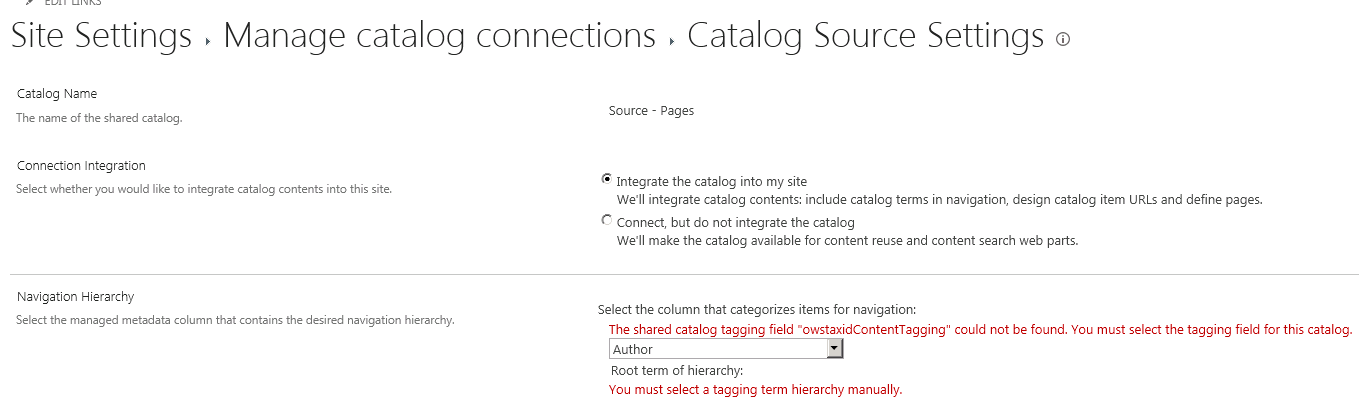
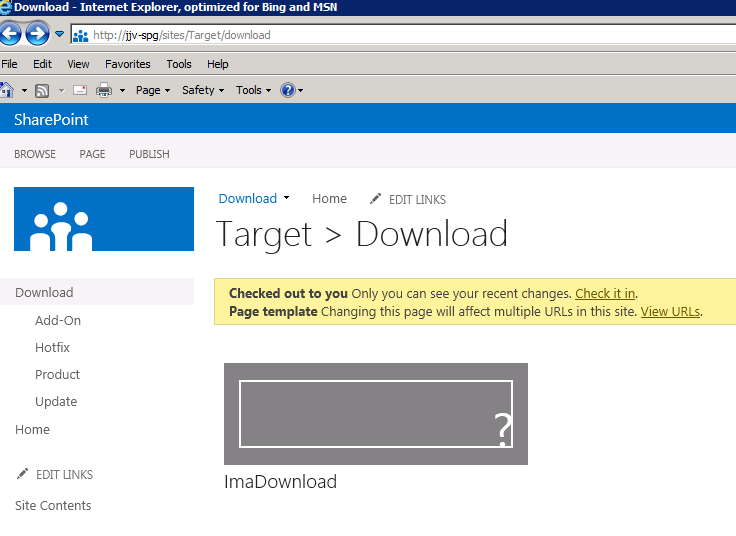
Whoops, what’s this red warning text? If you've followed along with a fresh couple site collections and new site column you will see and error about being able to locate a managed property it expected to see based on some fiddling with the name of the internal name of taxonomy field. To set this up using cross site publishing you must have added, tagged and published a piece of content in the catalog. That way the manage property exists for this page to look up and present to you.
So let’s go back to Source’s Pages library and add a piece of content tagged and published.
- Head to Source Site
- Choose Site Contents
- Pages library
- New -> Page
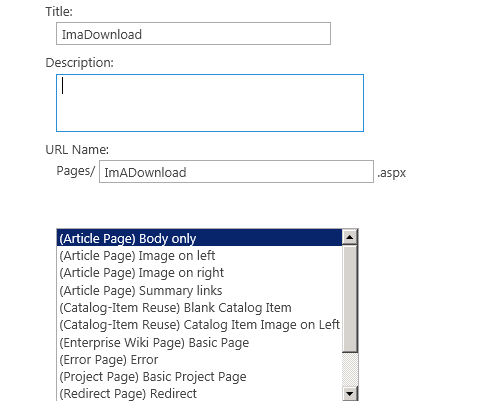
And hit Create.
Now select the row for the newly created item and go to Files -> Edit Properties.
Insert “Download” for the ContentTagging value and Save.

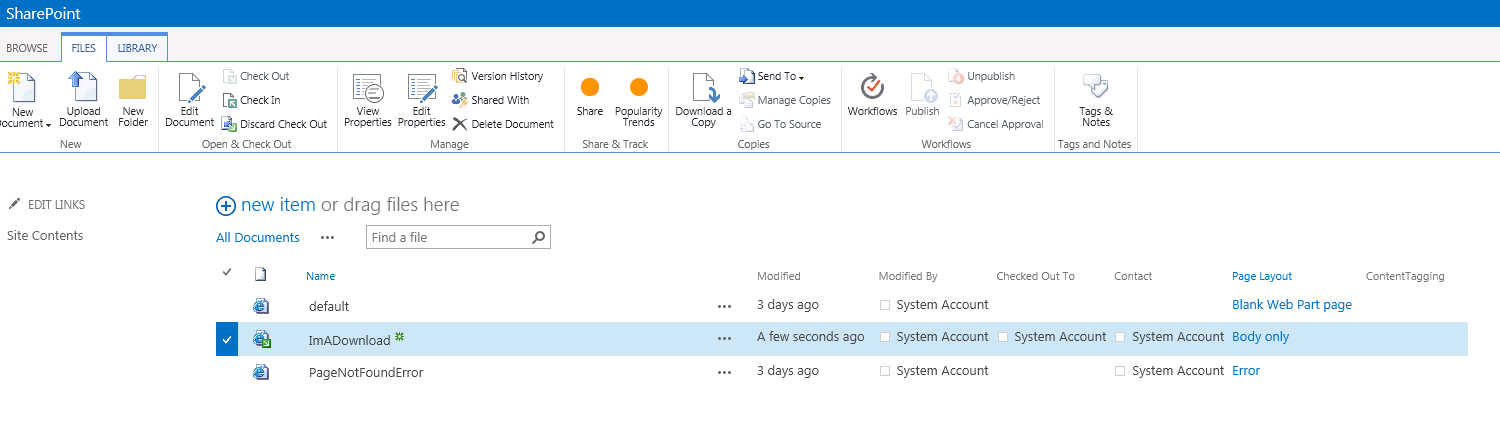
Now selected the ImaDownload row again and using Files->Check-In
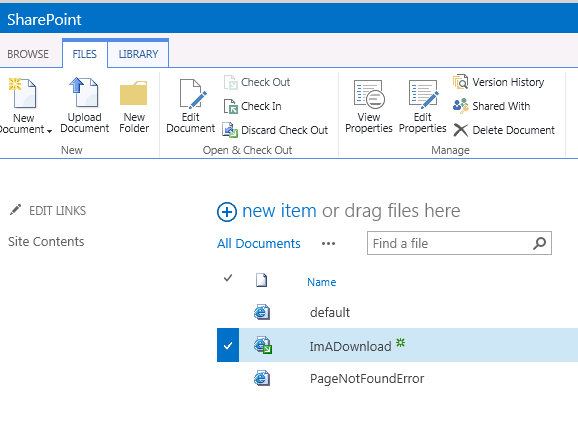
Check in Major Version (Publish)
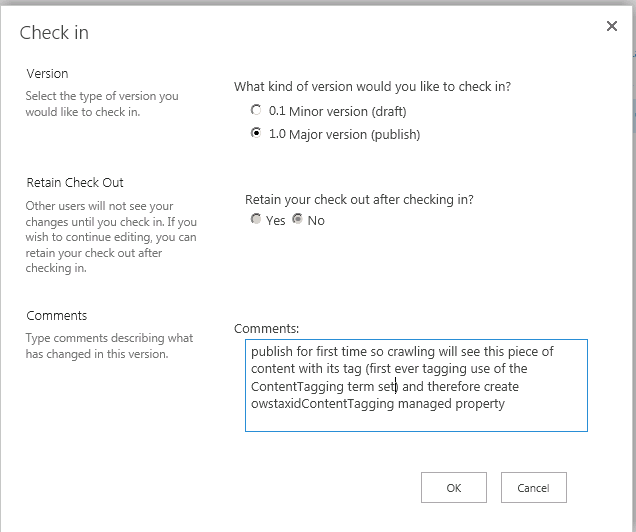
(You can leave comment blank)
Next run at least an incremental crawl for Local SharePoint sites.
And after that’s done - back at the connection UI things should be much happier:
In addition to checking out the actual descriptions for each setting in the UI; I’ll go over some definitions and some details on the options we have now in the UI and talk about how they we’re influenced when we nominated.
Catalog Connection – The configuration by which the Rendering Site Collection is able to surface content from the authoring site collection using the search index and optionally achieve “integration” type effects such as FURL.
It’s possible to consume a catalog and choose whether or not to (these map loosely to the options on the current page, but a one by one overview of UI choices follow after this):
- Rewrite the URL with FURLS and keep users in the Rendering site collection
- Alternative: make result point to the source; the URLs do point to where the content lives on authoring and a user would be redirected there. So in short, you can use cross site publishing in scenarios outside of a full taxonomy driven user experience, you can in general make your contents visible through search to other site collections.
- Pin the tagging term set (from the single value tagging field) in the managed navigation term set through a new feature called Pinning. Pinning is similar to Reuse (I typically refer to it as a "form of reuse") with a couple significant exceptions. 1.) With Pinning you reference the entire term set/sub-tree directly and cannot change hierarchy location of a term whereas with Reuse you can. 2.) With Reuse modifications to the original hierarchy such as the removal or addition of a term we’re not propagated, when Pinning these modifications to the hierarchy will be propagated. In short: Pinning really just thinks about “reusing” hierarchy and the aggregate while maintaining a relationship from the source instead of just reusing terms individually. There are some properties of term which are not forcibly maintained from the source and are referred to as local or local custom properties. These properties being local to the instance of reuse is very important as you might catch on to - based on navigation properties.
- Alternative: Reuse
- Select a different FURL format when rewriting URL, given you choose to rewrite to begin with
- Select a different single value tagging field for Catalog Navigation (relates to pinning, this field determines the piece of taxonomy you may or may not integrate into managed navigation)
- Auto Create Category Page
- The Category Page is a page that lives in Rendering which is actually rendered for request to a FURL when the FURL refers to a tag and not a particular piece of content. The goals of the Category page are to summary/roll-up content tagged with the current term from the FURL and allow users to pick content to go to. Category page is a setting under the term-driven pages tab of a term in the term store management tool.
- Alternative: specify existing page, this value would be used to update term properties
- Auto Create Catalog Item Page
- The Catalog Item Page is a page that lives in Rendering which is actually rendered for request to a FURL when the FURL refers to a particular piece of content. As with the Category page, typically modifying the Catalog Item Page affects multiple FURLS. The same page/layout is reused across all similarly tagged content. The goal of the Catalog Item page would be to query for a single item and display individual fields from the single piece of content given the page layout it is based on which also lives in Rendering. There is a one to many relationship between Catalog Item page and actual content from authoring.
- Alternative: specify existing page, this value would be used to update term properties
Notes on Catalog-Item page: Content from authoring is bound to share the same rendering page layout from the Catalog Item page based on sharing the same tag! There’s some deep implications right there that take a bit to wrap around. We've foregone the concept of creating a page from a page layout and getting a content type from that and now that item has that layout and then you go tag it with what you want. Now the authoring side page layout and content type are in some ways quite meaningless to Rendering, Rendering cares about an aggregate of fields picked out of the search index, some expectations about them, and choosing layout because of the term. If you do search driven content fully integrated with term-driven pages and Catalog-Item Pages then you are effectively restricted to a single Page Layout for all content in Authoring in the same catalog that is tagged that same. Obviously you can do some interesting or custom work around this, but contrasted to the traditional role of Page + Page Layout going into a Pages Library, this is significantly different. You have to design carefully if your scenario hits this. And now you really have to think about how an author previews their content. There is a physically different page layout being used in Authoring than in Rendering, and in order to view the page in rendering you need to Check In major version and also wait for any lag time around crawling. So your guarantee of how content looks in Authoring being the correct look in Rendering is something you must carefully build in.
Thinking about the connection page options again: The first two I currently like to consider the core “integrate” options, although in the UI the decision of whether or not integrate will affect ALL of the immediate options on the connection. The latter two are more of a nice bonus for getting this done the very first time and getting a feel for it. But when a consumer chooses not to “select a different” in two of those points they’re sticking with a default you’re setting up here and now when making the nomination. While choosing not to integrate may take away all options on this screen, some of the work they'd be doing for you could still go do on your own. For example nothing would stop you from going and pinning into the navigation term set and setting properties. In fact when you disconnect from a catalog you'll notice the clean up leave behind, for good reason, changes in taxonomy that may have come with the connection and auto generated pages, if any.
So it’s worth noting that when connecting the Catalog’s defaults for FURL / Catalog Navigation (field) will be pulled up and presented, but they are only defaults. The consumer, Rendering Site Collection, will be able to choose a different Catalog Navigation field if an acceptable substitute is available and also will still be able to choose/rearrange FURL fields. The defaults are helpful when you’re doing the nomination and consumption process both yourself and using the object model’s APIs for this since they limit the amount of complex look up or hard coding you might otherwise do. Providing logical suggestions is good but remember that it is not forced on the catalog consumer.
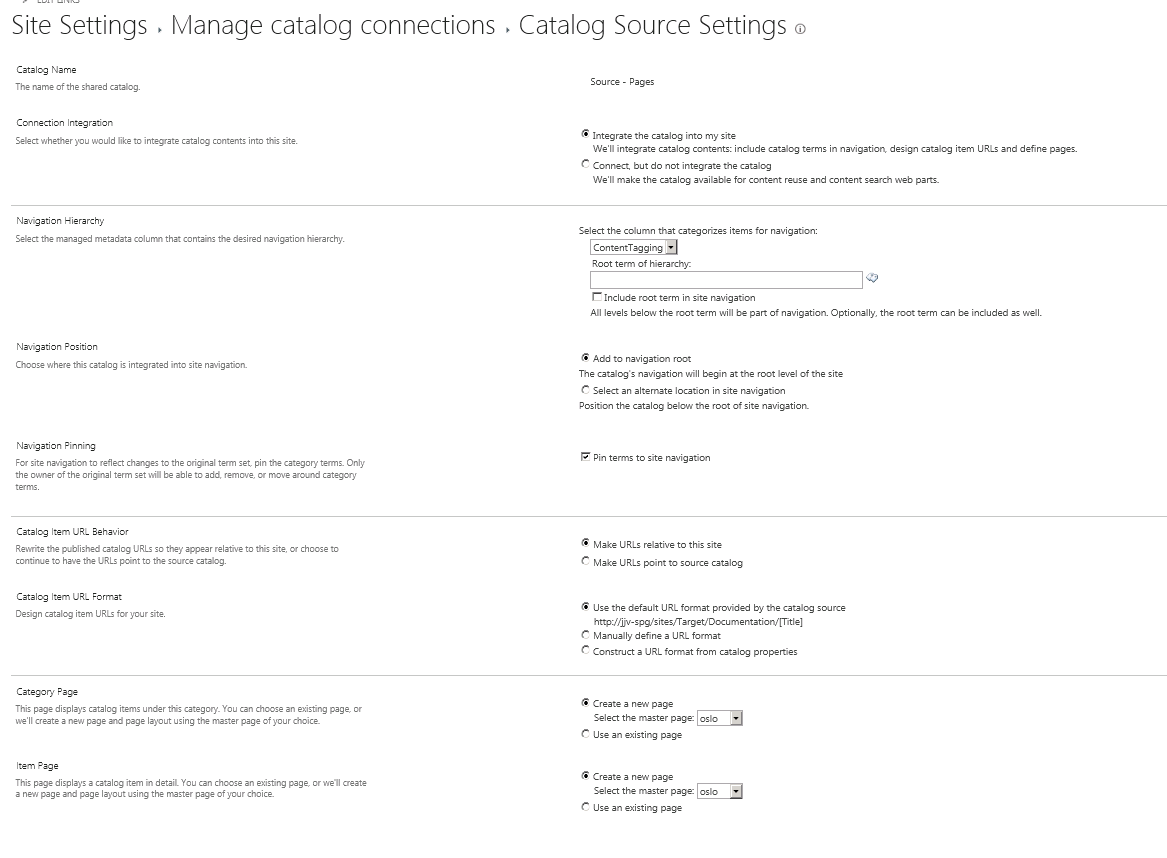
Here is a reference for the actual fields on the page as opposed to the options/effects:
Catalog Name -
You weren't able to set this when you nominated, but one was generated.
Connection Integration -
This is the major decision of whether or not you will integrate (here and now) in any way regarding navigation, FURL-ing, and setting/creating Catalog and Catalog-Item pages and page layouts. If you choose not to integrate at this option, you can manually do some of these tasks, like pin the tagging term set into the manage navigation term set. To keep this interesting obviously we’ll integrate in the walkthrough.
Navigation Hierarchy -
Based on the nomination settings it will default to a single value tagging field to be used to “categorize” items from the Authoring side, but you can choose any single value tagging field. To pick it you will have to have tagged and crawled something in Authoring regarding that field. The UI will call out if there are potential choices but are not available right now due to search schema not containing the managed property for the field.
Root Term of Hierarchy -
Root Term of Hierarchy is the first node in the tagging term set behind the catalog navigation field that will be integrated into managed navigation term site for the Rendering web. You can opt to include the actual term as the root node, or leaving “Include root term in site navigation” unchecked will only integrate all terms beneath the term in “Root Term of Hierarchy” selector.
Navigation Position -
Navigation Position allows you to choose the term from managed navigation to which the Navigation Hierarchy will be integrated under.
Navigation Pinning -
Choose whether or not to pin.
Catalog Item URL Behavior -
Choose whether or not to rewrite the Authoring URL to the content to make a FURL
Catalog Item URL Format -
If selected FURL behavior: choose how to rewrite to a FURL based on fields for the content and their order or choose to use the catalog default selection and order.
Category Page -
Generate or specify. When you generate, a page and page layout will be created for you and the root term of hierarchy will have a property set on it specifying this new Category page is the page to render with a FURL when the term or any term inheriting the setting is clicked on in navigation. If you specify, then only the latter is true. The asset you pick will be used to set the Term Driven Pages setting for Category Page for the term.
Item Page -
Generate or specify. When you generate a page and page layout will be created for you and the root term of hierarchy will have a property set on it specifying this new Catalog-Item page is the page to render with a FURL is requesting that specifies a single item based on primary key FURL field(s) after terms in the FURL. If you specify then only the latter is true, the asset you pick will be used to set the Term Driven Pages setting for Catalog-Item Page for the term.
Go ahead and copy the settings from the previous screen shot and hit OK.
You’re seeing a default display template (client side, determines how to display items from results using their fields). Note the rewrite for a FURL.
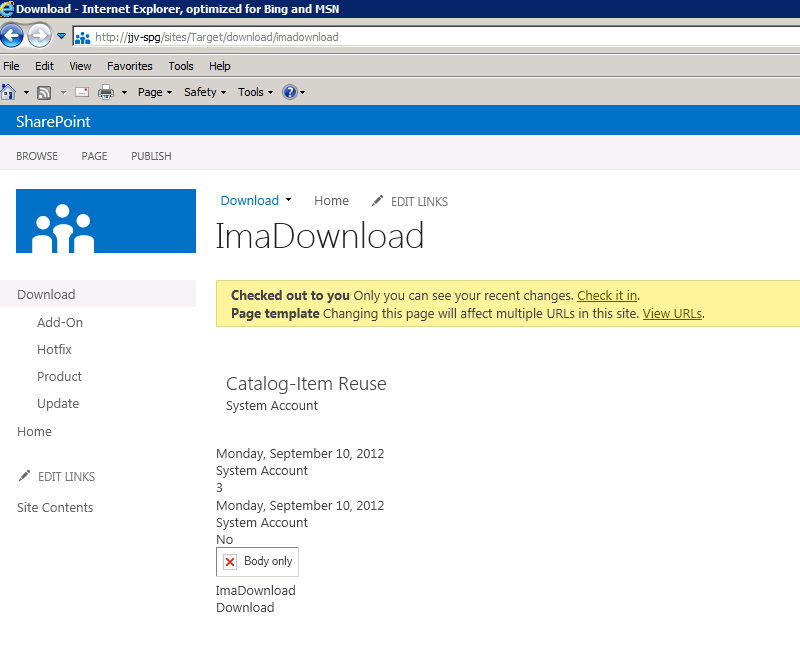
The item page can use a little UI work right away, but here it is showing fields off our content if you click on the single result “ImaDownload” from the Category page:
The page layouts for both Category and Catalog-Item pages have an associated html file in the gallery you can modify and a new layout page will be generated based on markup changes. You can also opt to disassociate and use just the aspx. This is a part of new design package feature in SharePoint 2013.
Summary
So why is this called Search Driven Publishing? - Because as you can tell by now search is at the very center of how of this actually works. And if anything is right beside it it’s the Managed Metadata Service. Essentially content is placed in one location and it’s rendered from different ones using search, taxonomy, and at least two special pages (for an arbitrary amount of items on authoring). The content is indexed and the rendering part using the appropriate query grabs those items, their fields, from the index and then pushes that data into something called a Catalog Item page or Category Page. These pages are inside the rendering site collection and are based on page layouts living in rendering. The features that let us do this walk through come together to enable what might be the coolest new SharePoint capability in the WCM space!