Download Azure Billing and Usage Information automatically
Using the Billing API to download your Azure Billing and Usage information requires a manual authentification against Azure everytime. I will show you how to programatically fetch the information without the requirement of a manual login using a certificate (of course we don't want to hardcode the password).
You can find this instruction in German and the Code on GitHub. The steps in the Azure Portal and all other steps can also be done by a Powershell script.
What do I need?
- Visual Studio 2015
- Visual Studio Developer Command Prompt
- makecert.exe (Windows SDK)
- Azure AD module for Powershell
- Internet Connection
- Azure Subscription
Steps
- Download the Code on GitHub.
- Create an Azure AD Web App.
- Create a Certificate.
- Convert your Certificate to a X509 Certificate
- Add the Certificate to the local certificate store
- Create a Service Principal.
- Modify the C# Project configuration.
- Automatically download your Billing Information! :)
Step 2: Create an Azure AD Web App
[caption id="attachment_33" align="alignnone" width="300"]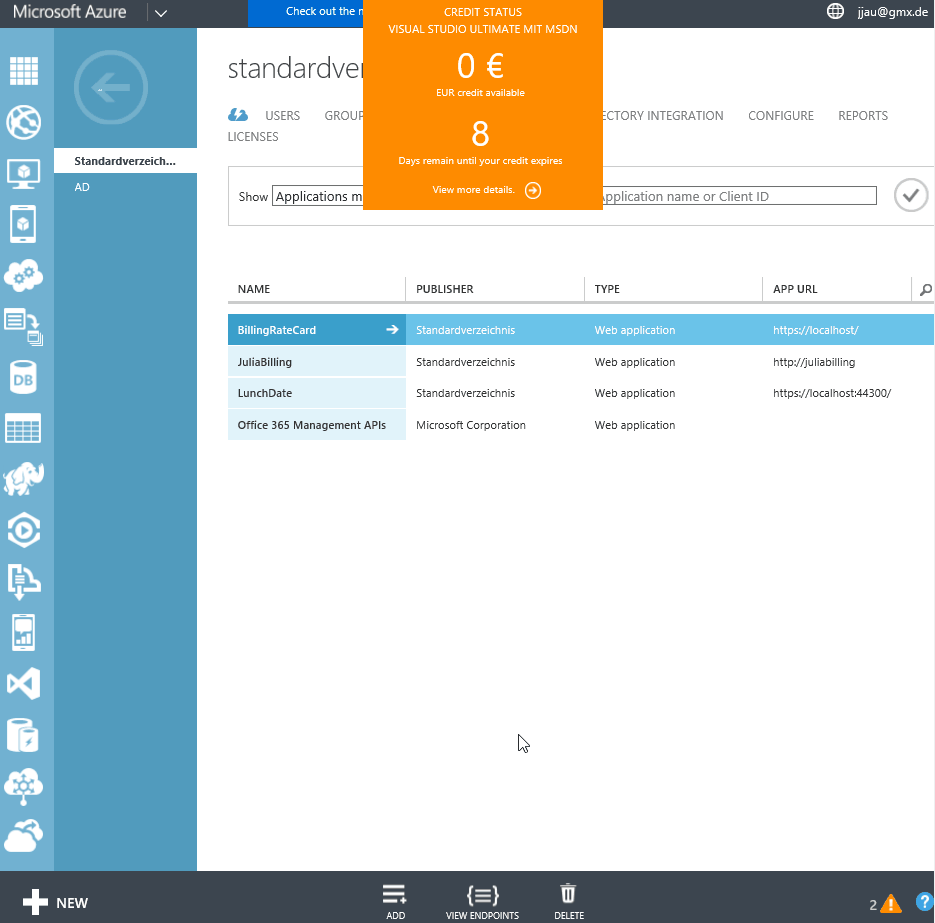 Click to Play this gif[/caption]
Note down the following for step 7:
Client Id: 038c63e3-f657-4c62-a139-b58c1781185d-**********
Tenant Id: c015601b-39cc-441b-a15b-************
Subscription Id: 00dd302a-92a9-* - - ***********
How can I find the Client ID? 
Select your App JuliaBillingBlog in your Default Directory. Select Configure and copy the Client Id.
How can I find the Tenant ID? 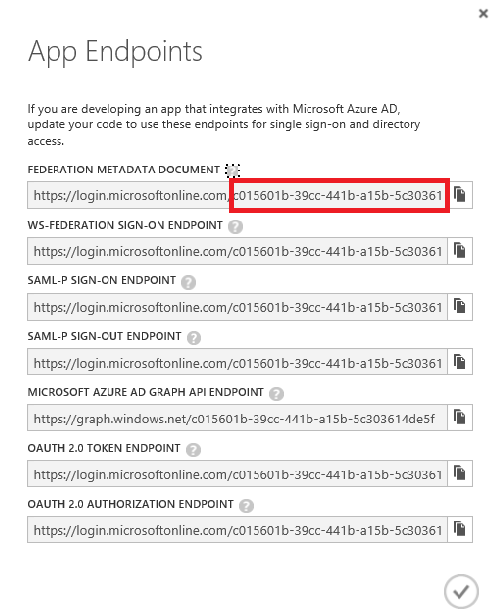
Select your App JuliaBillingBlog in your Default Directory. Select View Endpoints (at the bottom of the page)and copy the Tenant Id.
How can I find my Subscription ID?
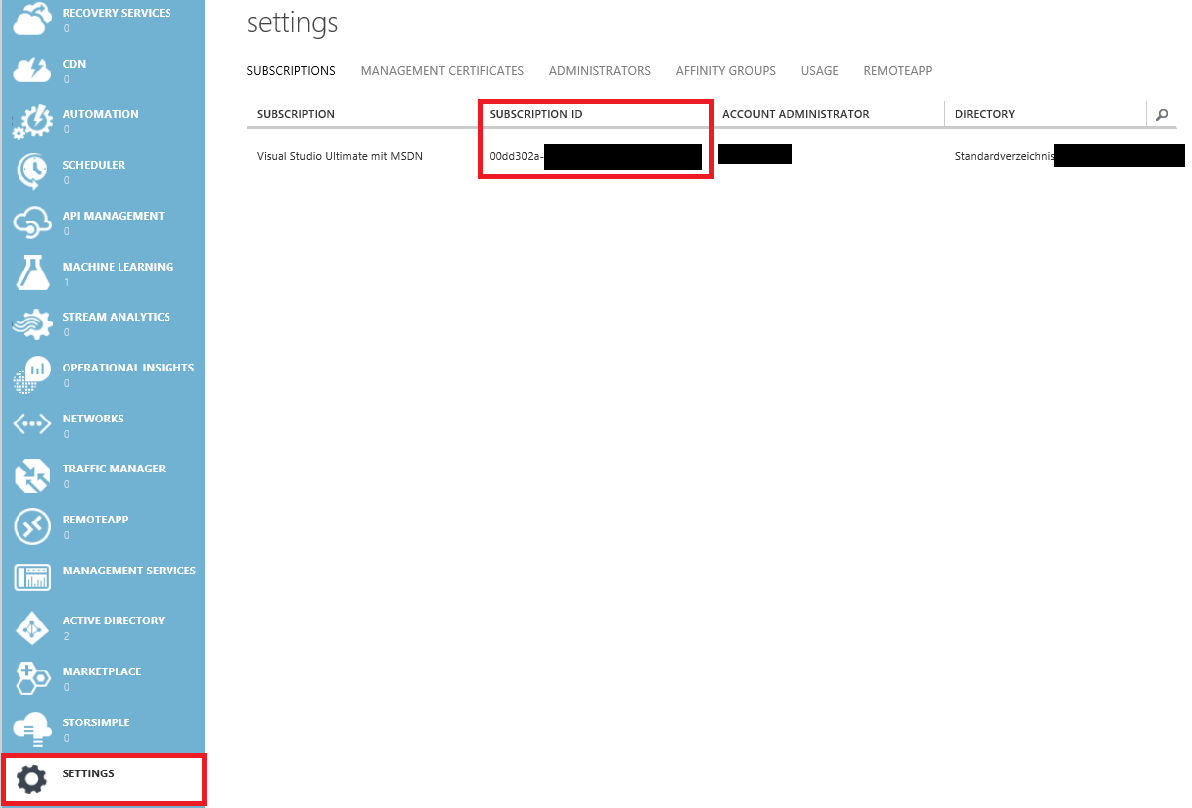
Select Settings in the left navigation pane. your Default Directory. Select View Endpoints and copy the Subscription Id.
Step 3: Create a Certificate
1. Open Visual Studio Command Prompt.
2. Create a Certificate:
makecert -r -pe -n "CN=JuliasCertificate" -ss My -len 2048 “C:\JuliasCertificate.cer“
Step 4: Convert your Certificate to a X509 Certificate
1. Open Powershell.
2. Create a new X509 Certificate:
$cer = New-Object System.Security.Cryptography.X509Certificates.X509Certificate
3. Import the Certificate created in the previous step (Step 3: Create a Certificate):
$cer.Import("C:\JuliasCertificate.cer”)
4. Save the raw data of the Certificate:
$binCert = $cer.GetRawCertData()
5. Convert the raw data from unsigned 8-bit integers into base 64 :
$credValue = [System.Convert]::ToBase64String($binCert)
Step 5: Add the Certificate to the local certificate store
1. Get the Thumbprint of your created Certificate:
dir Cert:\LocalMachine\My
2. Add the Certificate to your trusted root store:
$cert = (get-item cert:\LocalMachine\My\A70E0D9E39C32B482E8A8D7776462A9470DEF441) $store = (get-item cert:\Localmachine\Root) $store.Open("ReadWrite") $store.Add($cert) $store.Close()
3. Check if the Certificate was added:
dir Cert:\LocalMachine\Root
Step 6: Create a Service Principal
1. Open Azure Powershell as Admin.
2. Login to Azure:
Login-AzureRmAccount #This will pop up a login dialogue
3. Select your subscription:
Select-AzureRmSubscription -SubscriptionId "<your-sub-id>"
4. Open Windows Azure Active Directory Powershell Modul and connect to Azure AD.
connect-msolservice
5. Create a new Service Principal:
New-AzureRmADServicePrincipal -ApplicationId "<your-client-Id>" New-AzureRmRoleAssignment -ServicePrincipalName "<your-client-Id>" -RoleDefinitionName Contributor
6. Check with Get-AzureRmRoleAssignment if the assignment was successful.
Step 7: Modify the C# Project configuration
1. Open Visual Studio and the Project from GitHub.
2. Open the App.config file and replace the parameters with your Parameters you noted in Step2.
3. Run the Project and get your Billing Information :)