Dev/Test with Microsoft Azure & Visual Studio 2013
So, I have been working a lot with customers on DevOps and one of the quick and easy way to achieve a Dev/Test environment is using Microsoft Azure and Visual Studio. This scenario applies broadly to every type of organization. Whether you’re a single developer or a one-person startup getting your mobile app out the door , or a multi-national enterprise with 100,000 + employees, you need a sandbox to build, test, and deploy. You also need a safe, isolated zone in which to do it with. You can count on Microsoft Windows Azure to quickly setup development labs for testing your apps, validating application behaviors, or using the environment for training, and teaching. Provisioning Virtual Machines can take minutes and gives you access to a isolated sandbox that your developers can use right away. Most dev, test, and lab environments are project-based and don’t need to be up and running 24/7. When you’re done, simply turn your virtual machines off. You pay for what you use and no more. How great is that!
Check out below how to setup you instance of Azure in Visual Studio.
1. Open Internet Explorer and navigate your Windows Azure portal developer site https://manage.windowsazure.com/
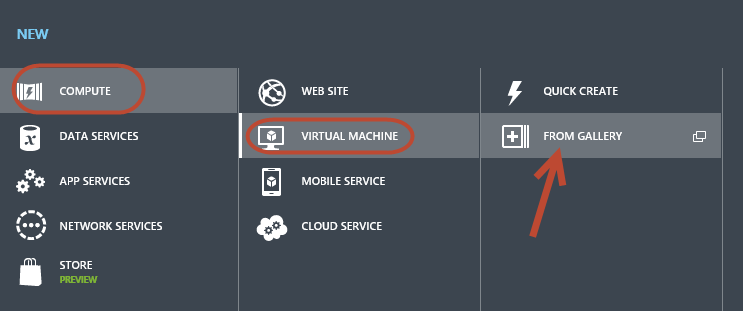
2. In the toolbar at the bottom, click on New | Compute | Virtual Machine | From Gallery Ok, for a change, let’s leave the server explorer aside for a moment, and take a look at the portal.
3. So, I’m going to create a new Virtual machine from our template gallery.
Note:
One of the cool features of Windows Azure is that it allows for a lot of scenarios related to development and test environments.
and the most flexible option for these scenarios are Virtual machines.
Windows Azure’s new IaaS and Virtual Networking capabilities make it really easy to enable enterprise development teams to use the cloud to do this. Using the cloud for dev/test enables development teams to work in a flexible, agile, way without ever being bottlenecked waiting for resources from their IT department. Development teams can instead use Windows Azure in a self-service way to spin up or down resources in minutes. And then when they are ready to deploy their apps, they can choose to do so either in the cloud or using their existing on-premises servers. This later option makes it really easy to start leveraging the cloud even without having to fully bet on it right away for production scenarios.
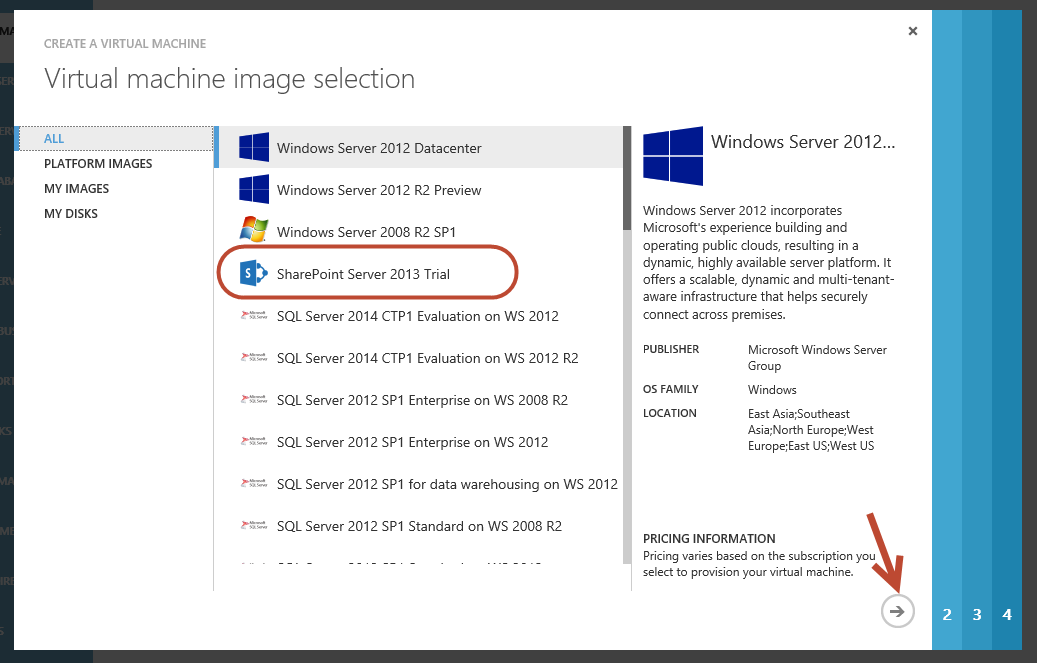
4. Click on SharePoint Server 2013 Trial
5. Click on next
Note:
We need to enter a unique site name, and choose the location, and database server that we want to use. In these case I’m going to create a new database.
The ASP.NET MVC application that I will deploy in the next few steps uses a database that I will deploy later.
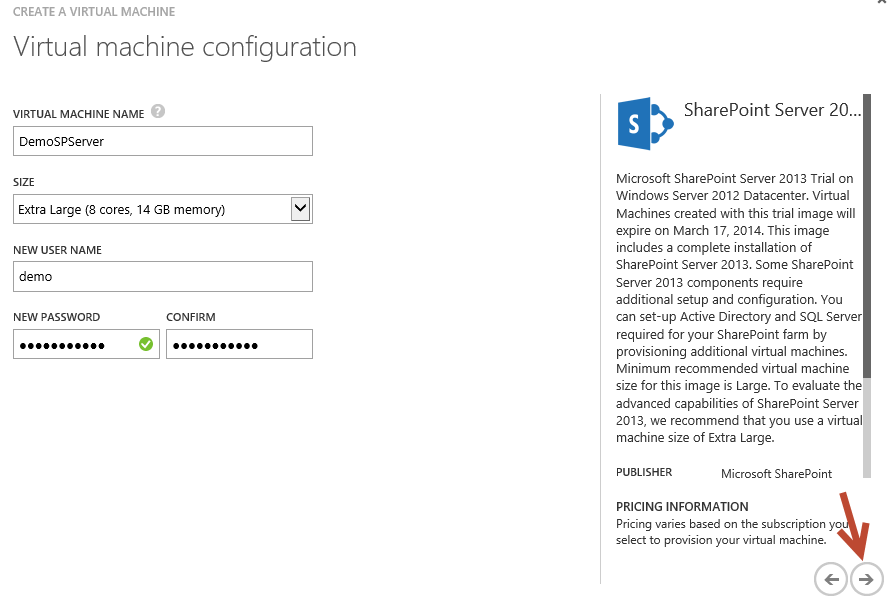
6. Set the virtual server name
7. Set the user name and password
8. Click on Next
Note:
In step two of the wizard, I get to supply a name for my new Virtual Machine, select its size and complete a username and password to login to the machine.
Remember, the size of virtual machine here is crucial as it both selects the hardware that my virtual machine will run on, but also has a knock on impact to the amount deducted per minute from my Azure subscription.
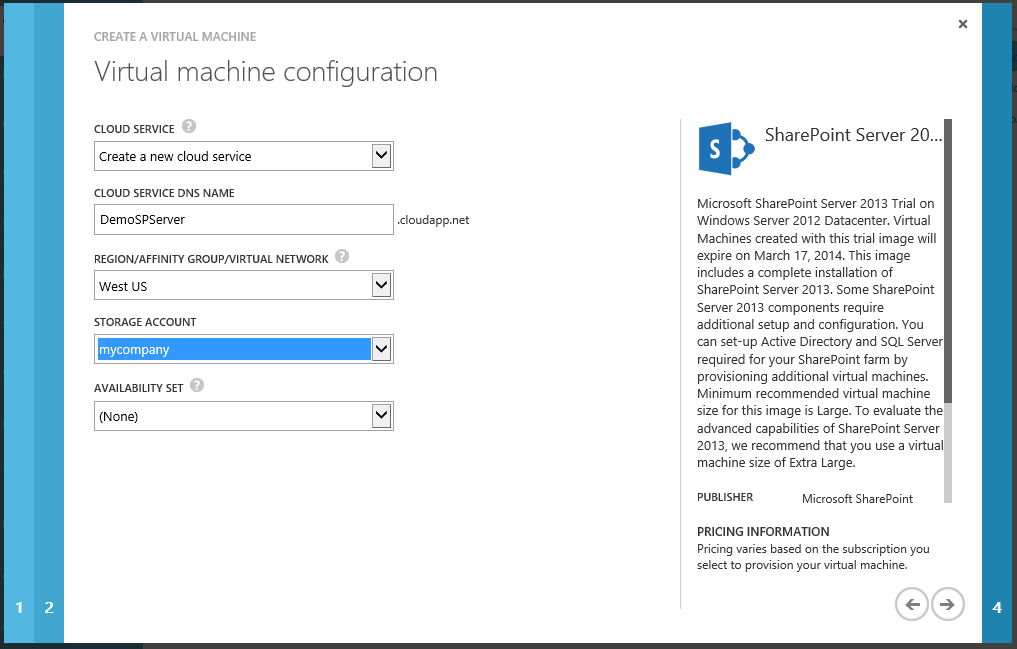
9. Set the Cloud Service Name
10. Set the region and the storage account
11. Click on Next Step three has a few more fields to be completed. Firstly, in the cloud service field, I will create a new cloud service for my virtual machine. This option is available so that virtual machines can be grouped logically for purposes such as load balancing.
Note:
If you already have a storage account in the same data center, choose that, if not you can choose to “Use an automatically generated storage account”.
12. Click on Next
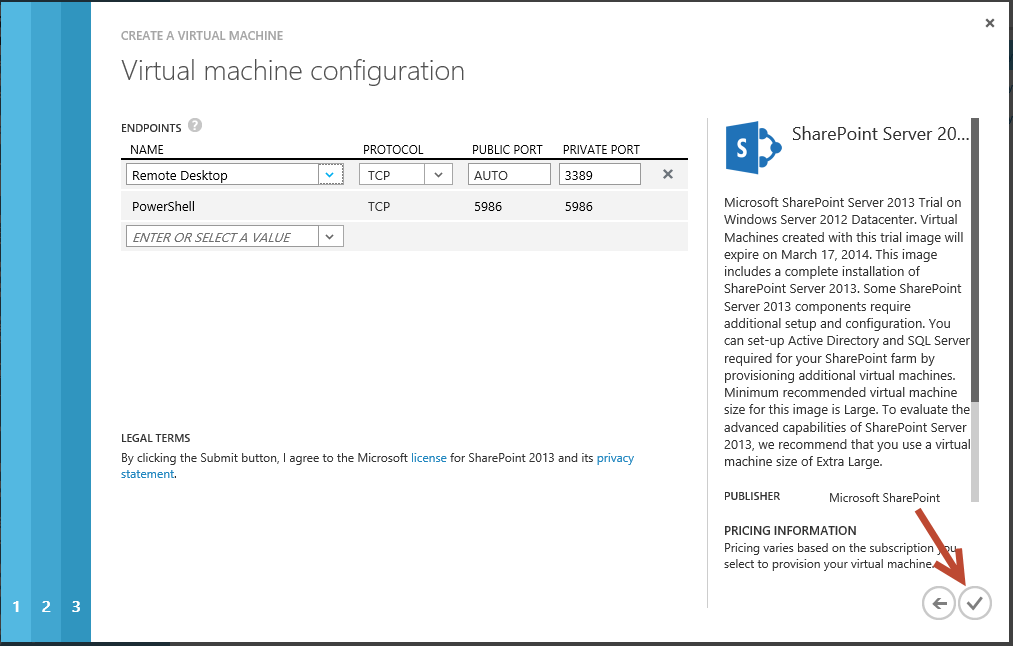
Note:
The final step allows us to specify the endpoint where we can communicate with our virtual machine. In my instance, the default settings used by Remote Desktop and PowerShell are suitable, so I can use either of these mechanisms to work with my VM.
With this all filled in automatically, we are all done with the wizard, so I can select the check mark at the bottom right of the screen to complete the wizard.

13. Wait until the virtual machine is created. This could take while.
14. When completed, Open Visual Studio
Note:
Virtual machine provisioning will take a few minutes, but once completed you will have an entry in your Virtual Machines section of the portal that you can select and connect to initiate a remote desktop session to your new virtual machine.
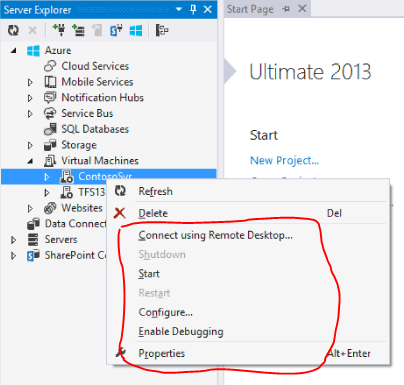
15. Open the Server Explorer in Visual Studio
16. Click on Virtual Machine node
(If the virtual machine does not appear click refresh)
17. Click on the new server (Virtual Machines now have context menu actions that allow you start, shutdown, restart, and delete a Virtual Machine directly within the Visual Studio Server Explorer.)
Note:
The shutdown action enables you to shut down the virtual machine and suspend billing when the VM is not in use, and easily restart it when you need it. When you stop a VM we no longer charge you any computing time for it – yet we still preserve the deployment state and configuration. This makes it incredibly easy to stop VMs when you aren’t actively using them to avoid billing charges, and then restart them when you want to use them again.
My next post will show you how to upload a website to the provisioned server and start testing it.
Happy Coding!
John