A tip for working with outlines in OneNote
I was digging through OneNote this week looking to increase test coverage for OneNote automation when I found this neat functionality. It made me remember my fifth grade science teacher Mrs. Jones, who loved outlines - she taught me more about outlines than anyone I have met since. She believed in lining up all your data in outline form to make study that much easier.
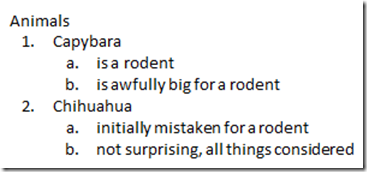
Suppose you have an outline something like this:
In this outline, my main topic is "Animals." My two topics below that are Capybara and Chihuahua, and each of those elements have sub topics.
Now imagine this outline went on for 20 topics or more. If you need to study for a test, you may want to focus only on certain topics within the outline. You may want to focus only on the list of animals (the topic level of this outline, or "1" and "2"), or the characteristics of the animals (the sub-topics, "a" and "b"). Here's the tip - you can extract only that level from the outline! Here's how:
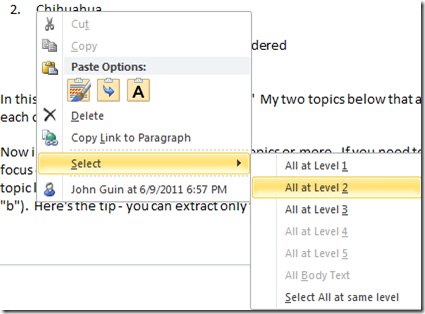
- Put your cursor at the start of the level you want to extract. I'll put mine to the left of Chihuahua.
- Right click and notice the "Select" command on the context menu
- Select that flyout menu
- From here, you can select "all at same level" to select all the elements at that same level within the page
- alternately, you can select "All at level 2" to get all those elements at that level
Here's what it looks like:
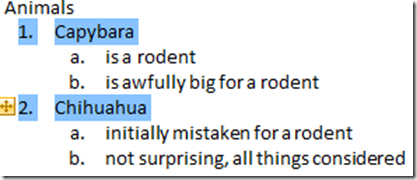
Level 1 in this outline is the heading "Animals" so level 2 is "Capybara/Chihuahua". Level 3 is as far as this outline goes.
Then when you are done, you have those elements selected:
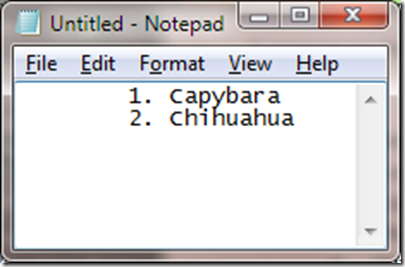
Copy and paste gives this:
Pretty slick, right? Makes me want to go back to science class (or at least make me wish I had OneNote back then)!
Questions, comments, concerns and criticisms always welcome,
John


