Branding SharePoint 2013-216 (Master Pages)
There is a process for making changes to a master page.
Assumptions:
-
-
- Environment installation and configuration complete
- Web Application created
- Site Collection created
-
In order to make a branding solution deployable, all assets need to be placed within the master gallery. Folders can be created to separate the various components.
Creating a Master Page
This section describes creating a master page.
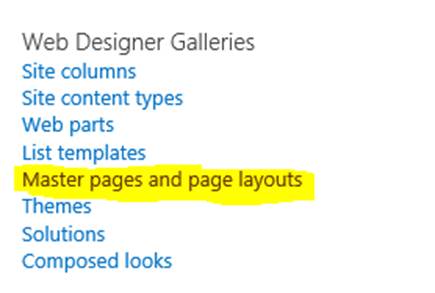
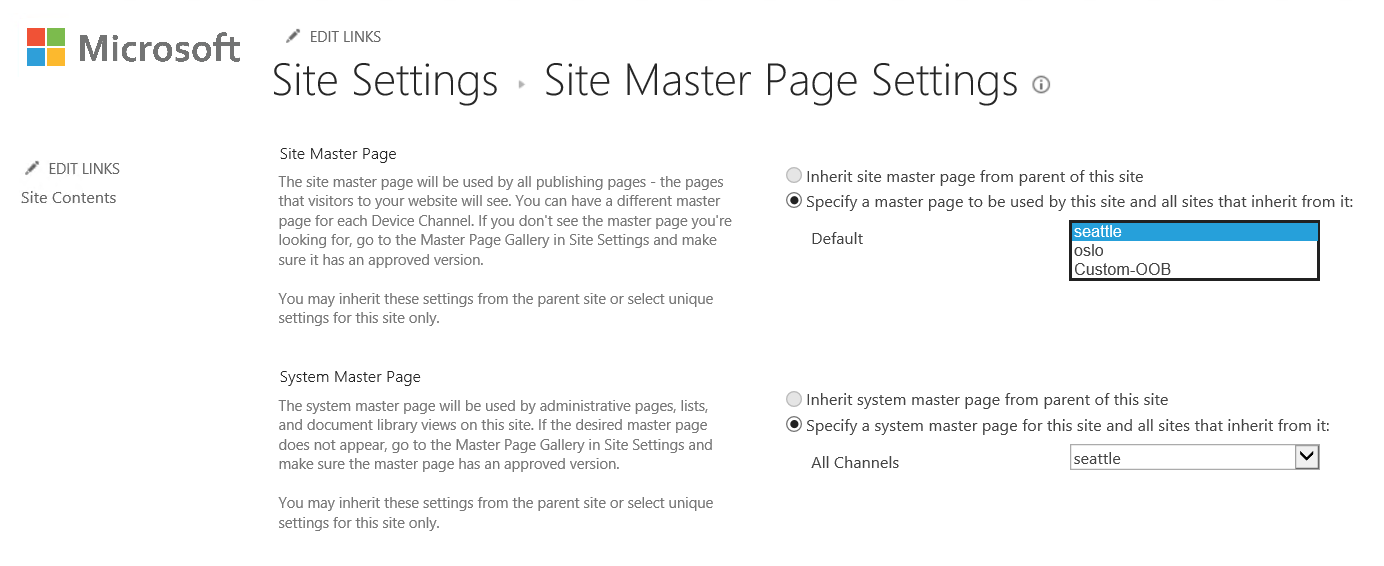
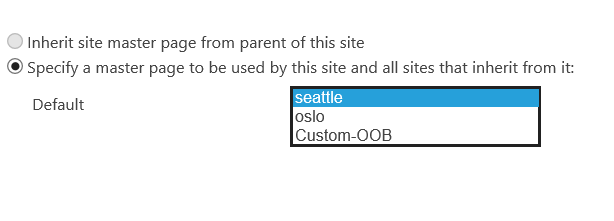
Navigate to Site Settings->Master Pages and page layouts
Download the base desired HTML file for either Seattle or Oslo.
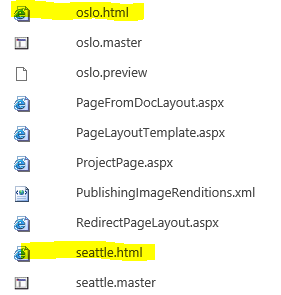
For this solution we will utilize “Seattle”. Rename the downloaded file “Custom-OOB.html”.
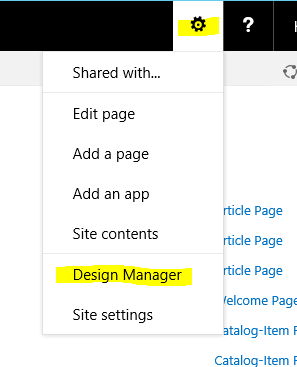
Go to Design Manager.
Now select number 4, edit master pages:
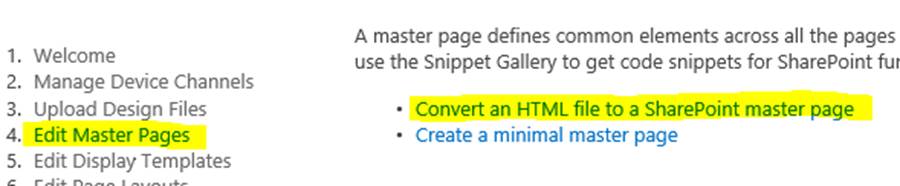
Click Convert an HTML file to a SharePoint master page
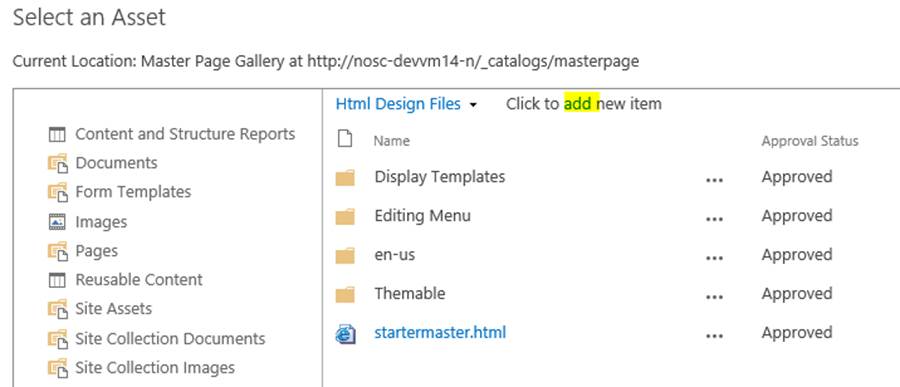
Click “add” as highlighted above.
Select the renamed file “Custom-OOB.html”.
Now you should have your new master file: 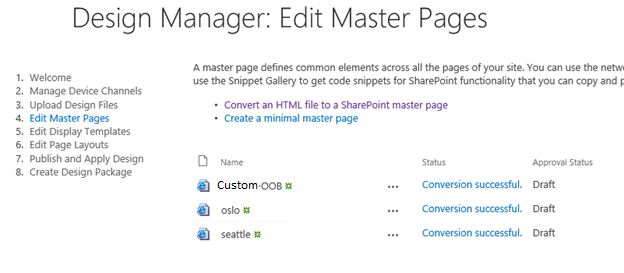
A review of the master page gallery will show it has a synchronized .master now.

NOTE: Never modify the .master file directly; changes are done via the html file.
Snippet Gallery
The easiest way to edit and customize existing controls is to do as follows:
Navigate to the snippet gallery: you can find the link in the Custom-OOB.html
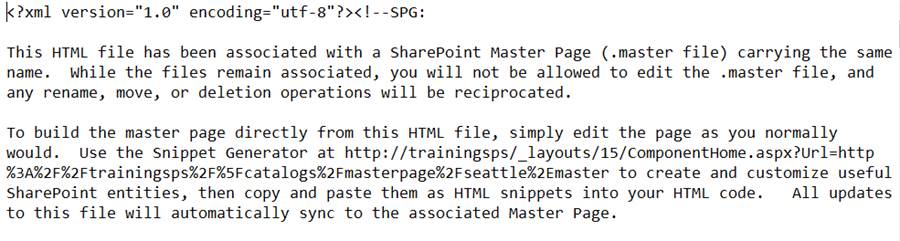
NOTE: the Oslo URL would be different, as highlighted above would be Oslo master.
The following is what the snippet gallery looks like:
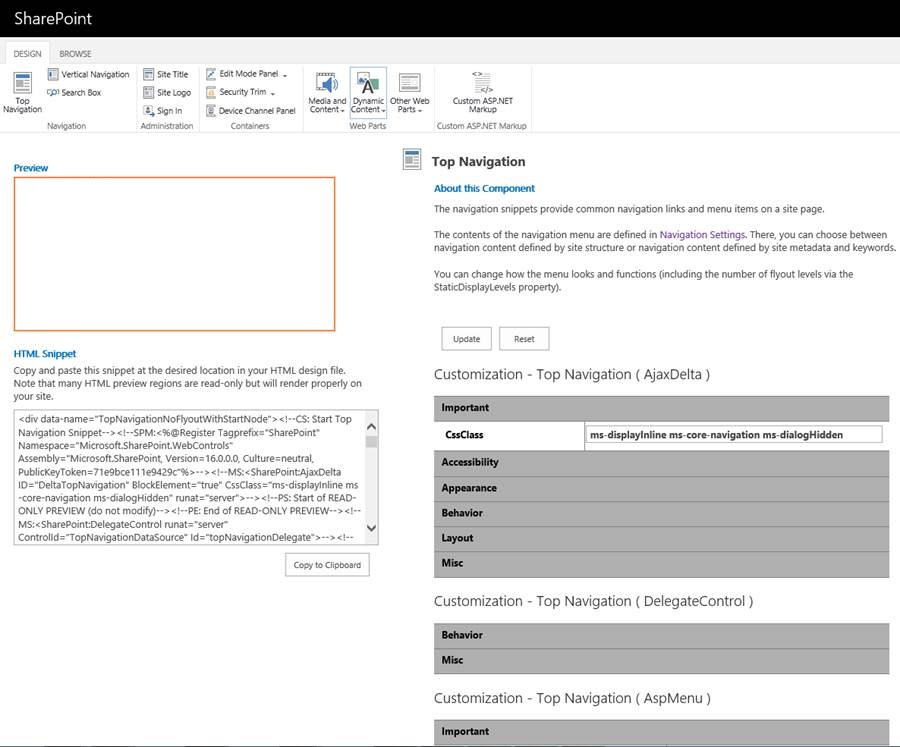
Click each of the top items in the ribbon to create snippets to be used in the master page.
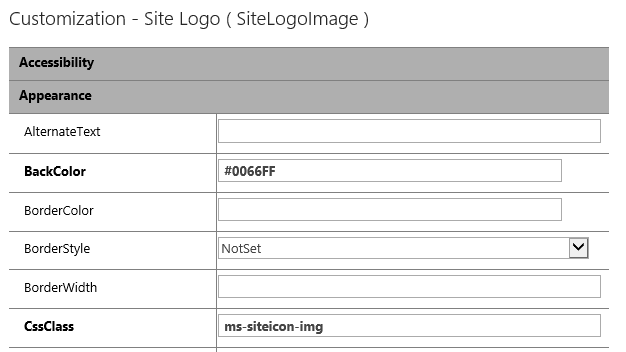
Start simple, change the background color of the site logo:
Now change the “backcolor” appearance:
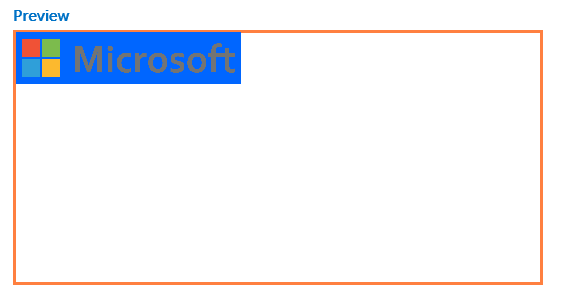
CLICK UPDATE
Result:
Copy the Code to the clipboard:

Open the Custom-OOB.html file in your preferred HTML editor, in this case VS.NET.
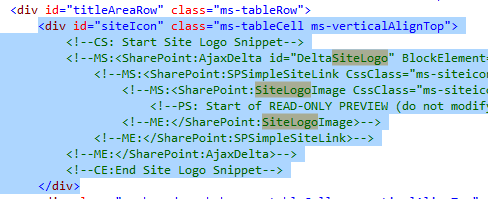
Select the surrounding DIV and paste what was copied to the clipboard here:
Now save, upload the file. You can map the master page gallery as well as a drive to make it easier to make changes.
NOTE: You must publish the .HTML and .master of your custom master in order to see the master page show in the drop down for selection. Also note anytime a change is done, the HTML file needs to be published.
Select the new master page.
Click OK and the result:
Background color is now blue.
NOTE: Color changes and such done via the snippet gallery tool place the changes inline. Although you can set CSS class names and override them later.
Default CSS
Many times there are small changes to be made to the master page, many of the changes are to the styles used, as previously discussed in 4.1.
There are 3 places to set a CSS style sheet to be used:
-
-
- Set the alternate CSS for a site
- In the customized master page
- Set the default CSS of a master page
-
Alternate CSS for a site is in place so that site collection administrators can add some additional styling above and beyond the standard. For example a site collection may want a blue header on top to indicate their departments color. Instead of changing the default or having multiple master pages, an alternate CSS can be set.
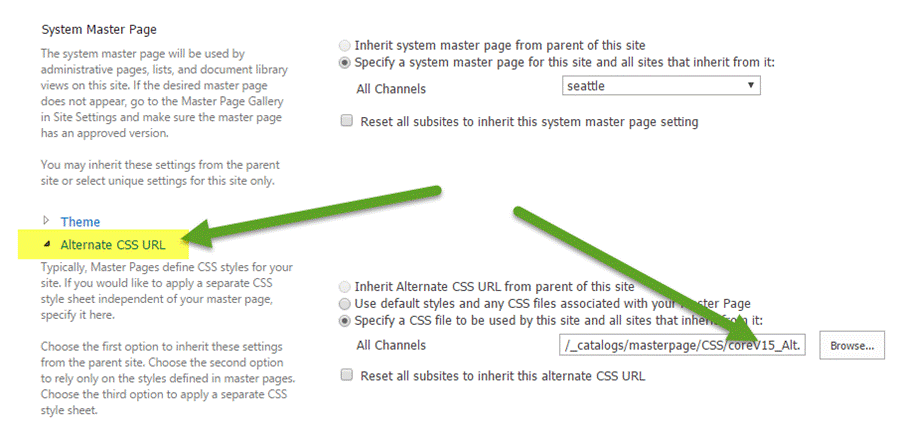
To Set the default CSS:
Adding CSS inside the master page, this is required in order to use the custom CSS.
<!--SPM:<SharePoint:CssRegistration runat="server" ID="CssRegistration1" Name="/_catalogs/masterpage/CSS/Custom-CSS.css" After="SuiteNav.css"/>-->
NOTE: It’s important to set which CSS to go after. For many instances going after “core15.css” is good enough, though many cases “SuiteNav.css” is the one register after.
Now setup the UI to know there is a link for exporting the solution.
Click the master page html file in this case “Custom-OOB.html”.
The arrow to the right:
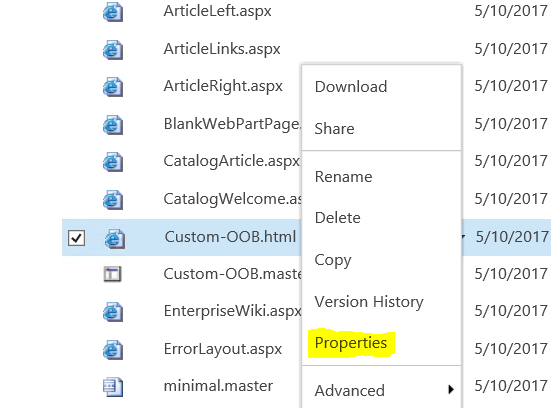
Select Properties:
Scroll to the section shown:
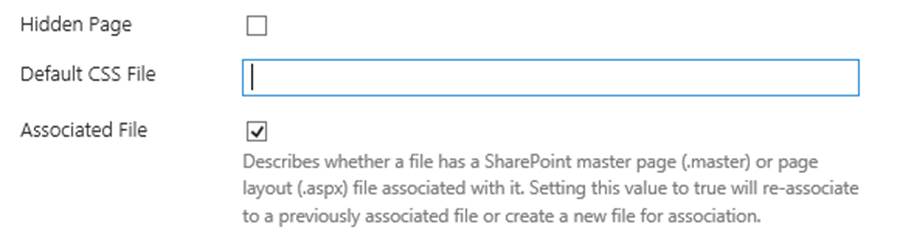
Here a relative path to the CSS file is set.
Note: You must publish the CSS and the html pages again in order to take effect.
The above Custom-CSS.css has a simple override for the header. This is the result:

So the CSS is being applied, now additional styles can be added as desired.