SharePoint Blog Navigator Web Part
Intro
Ok, ladies and gents, I just couldn't take it any longer! The out of the box navigation for blogs is less than ideal and although I will be soon investigating different content query web parts to accomplish the same thing, I went ahead a build a new one. Essentially, I wanted a grouping of blog articles in some sort of tree view as a web part. Simple right? The answer to this is actually yes. What I will plan to do here is simply write a quick code base and deploy to my site. At that point, I can just add my web part and ta-da, workie workie.
Implementation
- Create a CAML query based on the "Posts" list that just orders the posts by publish date. This will look something like:
using (SPWeb spWeb = SPContext.Current.Web) { string DocumentLib = "Posts"; string sUrl = spWeb.Url; string PostDate = string.Empty; SPList list = spWeb.Lists[DocumentLib];// here DocumentLib is name of the name of documentlibrary we are passing SPQuery docQuery = new SPQuery(); docQuery.ViewFields = @"<FieldRef Name=""LinkTitle""/>"; docQuery.ViewFields += @"<FieldRef Name=""PublishedDate""/>"; string CamlQ = @"<OrderBy> <FieldRef Name=""PublishedDate"" Ascending=""False"" /> </OrderBy>"; docQuery.Query = CamlQ; |
- Loop through these posts creating a string representation of XML that looks something like:
sBlogs = @"<?xml version=""1.0"" encoding=""utf-8"" ?>"; sBlogs += @"<BlogPosts>"; SPListItemCollection docList = list.GetItems(docQuery); foreach (SPListItem item in docList) { DateTime PublishedDate = DateTime.Parse(item["PublishedDate"].ToString()); if (PostDate != PublishedDate.ToString("MMMM yyyy")) { //Make sure not first time through loop if (PostDate != string.Empty) { sBlogs += @"</PostMonth>"; } PostDate = PublishedDate.ToString("MMMM yyyy"); sBlogs += @"<PostMonth name=""" + PostDate + @""">"; } sBlogs += @"<PostName name=""" + item["LinkTitle"].ToString() + @""" url=""" + sUrl + @"/Lists/Posts/Post.aspx?ID=" + item.ID.ToString() + @"""/>"; } sBlogs += @"</PostMonth>"; sBlogs += @"</BlogPosts>"; } return sBlogs; } |
- Create an XML Data Source and attach your bindings accordingly
XmlDataSource xBlogPosts = new XmlDataSource(); xBlogPosts.EnableCaching = false; XmlDocument xXMLDoc = new XmlDocument(); TreeNodeBinding tnbTop = new TreeNodeBinding(); TreeNodeBinding tnbMonth = new TreeNodeBinding(); TreeNodeBinding tnbName = new TreeNodeBinding(); string sXMLDoc = string.Empty; try { if (!Page.IsPostBack) { //Create XML sXMLDoc = GetBlogPosts(); //Load XML DataSource xXMLDoc.LoadXml(sXMLDoc); xBlogPosts.Data = xXMLDoc.InnerXml; |
- You will then set your XPath to narrow down your tree
xBlogPosts.XPath = "BlogPosts/PostMonth"; |
- Create a Treeview and set the XML Datasource be the binding
//Create TreeNode Bindings tnbTop.DataMember = "BlogPosts"; tnbTop.Text = "Blog Posts"; tnbMonth.DataMember = "PostMonth"; tnbMonth.TextField = "name"; tnbName.DataMember = "PostName"; tnbName.TextField = "name"; tnbName.NavigateUrlField = "url"; //Associate TreeView Bindings tv.DataBindings.Add(tnbTop); tv.DataBindings.Add(tnbMonth); tv.DataBindings.Add(tnbName); //Bind tv.DataBind(); tv.CollapseAll(); |
- Add the tree view through the RenderChildren method as explained in an earlier post here.
this.Controls.Add(tv); |
- Make sure you dispose your objects that you explicitly instantiate
xBlogPosts.Dispose(); xBlogPosts = null; xXMLDoc = null; tnbTop = null; tnbMonth = null; tnbName = null; tv.Dispose(); tv = null; |
- Build and deploy your finished webpart
- Add the webpart to the page(s) in question
Finishing touches
For full sample of the code, simply email me or send comment. I have uploaded the cs file, however, anonymous access is not yet enabled. I was tired of writing the code in the blog all the time, so figured I would try a different approach this time.
The end product looks something like:
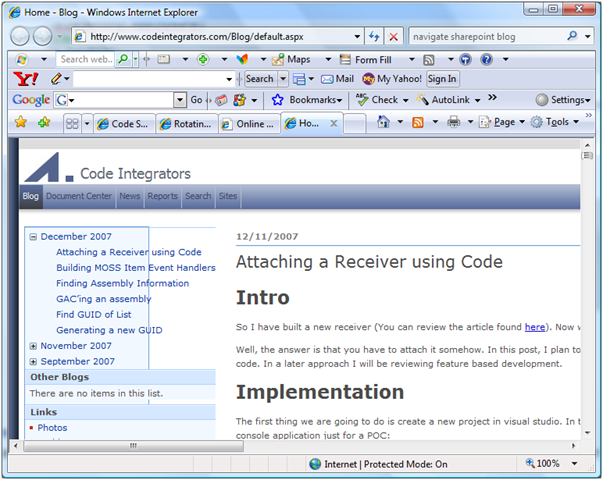
Pretty cool huh?