Web Standards Design with SharePoint, Part 6
In part 5 of this series, I showed how you can render semantic HTML for SharePoint list items (instead of the out-of-the-box table layout) using the new XsltListViewWebPart in SharePoint 2010.
Note
You can achieve similar results in Microsoft Office SharePoint Server (MOSS) 2007 using the DataViewWebPart .
For those of you that haven't yet read my previous post, the goal was to take a SharePoint list like the one shown below...
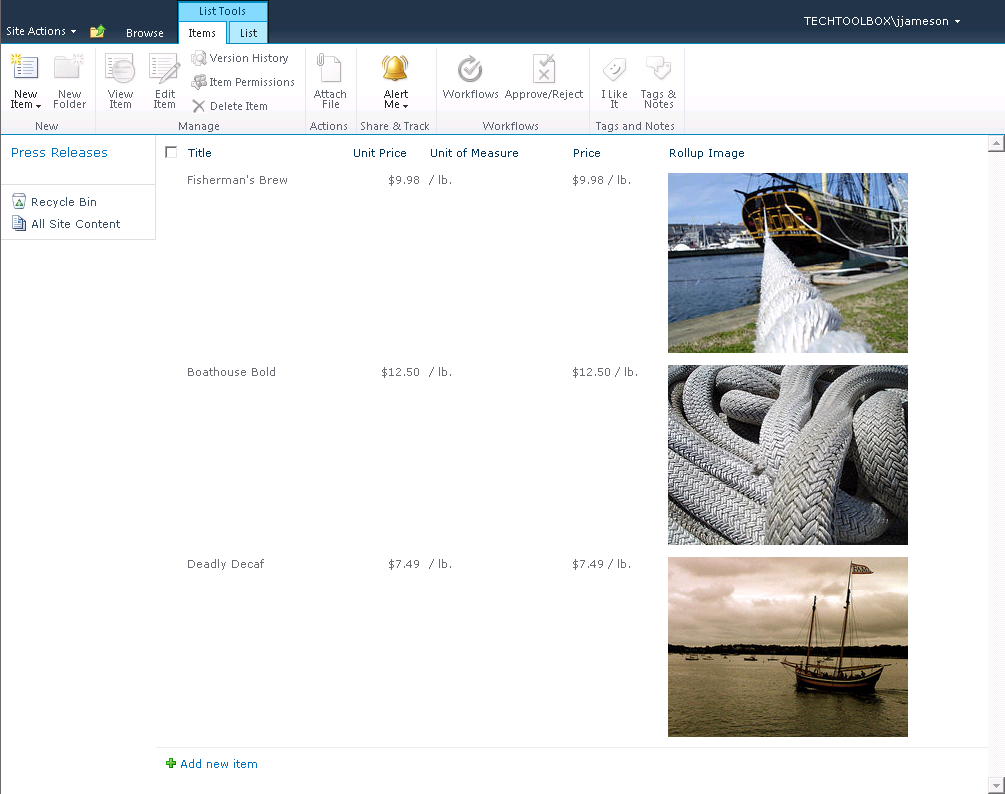
Figure 1: Specials list
...and subsequently render the list items as an HTML ordered list:
<h2>This Week's Specials</h2>
<ol class='specials group'>
<li class='group'>
<div class='special'>
<div class='special-img'>
<a href='#'>
<img src='/PublishingImages/boat.jpg' alt='coffee' />
<span><strong>Fisherman’s Brew</strong>
<em>$9.98 / lb.</em></span></a>
</div>
</div>
</li>
<li class='group'>
<div class='special'>
<div class='special-img'>
<a href='#'>
<img src='/PublishingImages/ropes.jpg' alt='coffee' />
<span><strong>Boathouse Bold</strong>
<em>$12.50 / lb.</em></span></a>
</div>
</div>
</li>
<li class='group third'>
<div class='special'>
<div class='special-img'>
<a href='#'>
<img src='/PublishingImages/fame.jpg' alt='coffee' />
<span><strong>Deadly Decaf</strong>
<em>$7.49 / lb.</em></span></a>
</div>
</div>
</li>
</ol>
After replacing the static HTML for the weekly specials section with an XsltListViewWebPart (and specifying the necessary XSL to transform the SharePoint list items into the desired HTML), the content on the Tugboat home page no longer needs to be updated directly. Instead, new items can be added to the custom Specials list (or existing items updated) in order to dynamically update the content on the home page.
However, as I mentioned at the end of my previous post, there's a problem. What happens if the number of items in the list is greater than the expected number? The following screenshot shows the updated home page content after adding a fourth item to the Specials list.
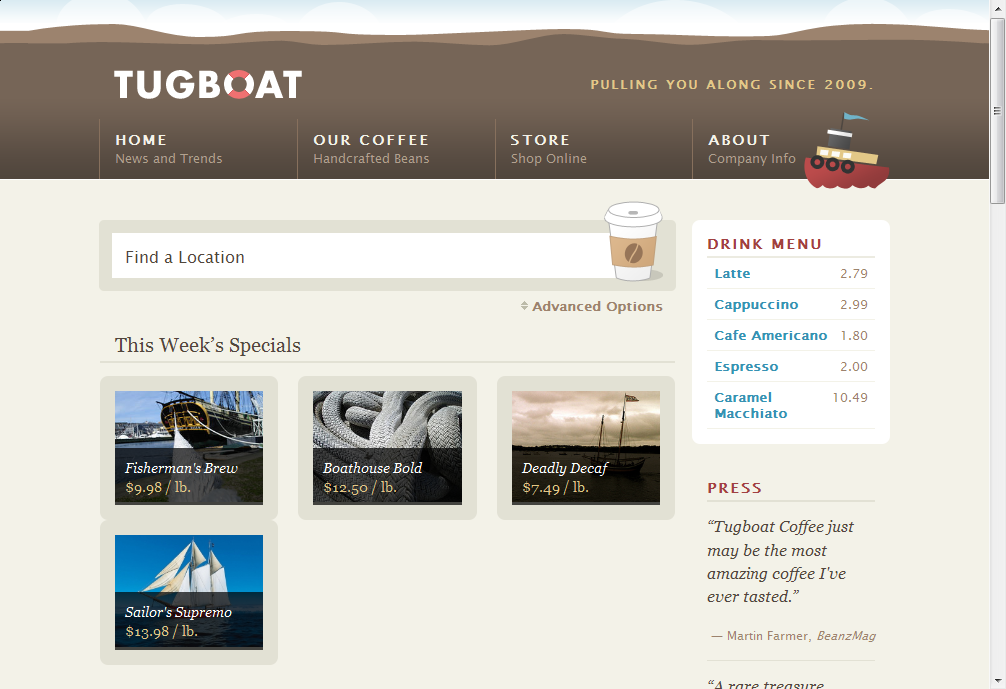
Figure 2: Too many items in the weekly specials section
While we could modify the XSLT to only render the first three items from the SharePoint list, this really isn't the best implementation choice. A better way of limiting the number of list items rendered in the weekly specials section is to use a custom view on the underlying list (instead of rendering items based on the default All Items view).
Let's suppose that in addition to restricting the number of weekly specials displayed on the home page (to three items), we also want to show the most recent items first.
To achieve the two goals, start by creating a new view on the Specials list using the following parameters:
- Name: Most Recent Specials
- Web address of this view: MostRecent
- Columns:
- Title
- Unit Price
- Unit of Measure
- Price
- Rollup Image
- Sort
- First sort by the column: Modified
- Show items in descending order
- Item Limit
- Number of items to display: 3
- Limit the total number of items returned to the specified amount.
Once we change the XsltListViewWebPart on the home page to use the Most Recent Specials view, the weekly specials section renders as expected regardless of the number of items in the Specials list.

Figure 3: Using the "Most Recent Specials" view (instead of "All Items") renders the home page as expected
Now that we have the XsltListViewWebPart rendering the desired HTML, we can turn our attention to automatically creating the Specials list (as well as the custom view), populating the list with default items, and adding an instance of the XsltListViewWebPart to the home page.
Creating the Custom List
While you could create the Specials list via a feature using CAML, I prefer to create custom SharePoint lists using code instead. The reason is because business requirements invariably change over time and I find it much easier to start out with code since it seems almost inevitable that you'll be programmatically manipulating SharePoint lists anyway.
Here's the code I wrote to create automatically create and configure the new Specials list:
         private static void ConfigureSpecialsList(
            SPWeb web)
        {
            Debug.Assert(web != null);

            SPList list = SharePointListHelper.EnsureList(
                web,
                "Lists/Specials",
                SPListTemplateType.GenericList,
                "Specials",
                "Items in this list appear in the \"This Week's Specials\""
                    + " section of the site home page.");

            Debug.Assert(list != null);

            SPField unitPriceField = SharePointListHelper.EnsureField(
                list,
                "UnitPrice",
                "Unit Price",
                SPFieldType.Currency,
                true);

            StringCollection unitOfMeasureChoices = new StringCollection();

            const string defaultUnitOfMeasureChoice = "/ lb.";
            unitOfMeasureChoices.Add(defaultUnitOfMeasureChoice);

            unitOfMeasureChoices.Add("ea.");

            SPFieldChoice unitOfMeasureField =
                (SPFieldChoice) SharePointListHelper.EnsureField(
                    list,
                    "UnitOfMeasure",
                    "Unit of Measure",
                    SPFieldType.Choice,
                    true,
                    string.Empty,
                    unitOfMeasureChoices);

            unitOfMeasureField.DefaultValue = defaultUnitOfMeasureChoice;
            unitOfMeasureField.Update();

            SPFieldCalculated priceField =
                (SPFieldCalculated) SharePointListHelper.EnsureField(
                    list,
                    "Price",
                    "Price",
                    SPFieldType.Calculated);

            priceField.Formula =
                "= DOLLAR([Unit Price]) & \" \" & [Unit of Measure]";

            priceField.Update();

            SPField rollupImageField = web.AvailableFields[FieldId.RollupImage];
            rollupImageField.Required = true;

            SharePointListHelper.EnsureField(list, rollupImageField);

            string[] defaultViewFields = new string[] {
                    list.Fields[SPBuiltInFieldId.Title].Title,
                    unitPriceField.Title,
                    unitOfMeasureField.Title,
                    priceField.Title,
                    rollupImageField.Title
                };

            ConfigureViewsForSpecialsList(
                list,
                defaultViewFields);

            if (list.ItemCount == 0)
            {
                CreateDefaultItemsInSpecialsList(list);
            }
        }
Note that I use a separate method to configure the default views for the new list:
         private static void ConfigureViewsForSpecialsList(
            SPList list,
            string[] fields)
        {
            Debug.Assert(list != null);
            Debug.Assert(fields != null);
            Debug.Assert(fields.Length > 0);

            // Configure "All Items" view
            SPView allItems = SharePointViewHelper.EnsureView(
                list,
                "All Items",
                fields,
                "AllItems");

            SharePointViewHelper.EnsureViewFields(
                allItems,
                fields);

            // Configure "Most Recent Specials" view
            SPView mostRecentSpecials = SharePointViewHelper.EnsureView(
                list,
                "Most Recent Specials",
                fields,
                "MostRecent");

            SharePointViewHelper.EnsureDefaultView(mostRecentSpecials);

            SharePointViewHelper.EnsureViewQuery(
                mostRecentSpecials,
                "<OrderBy>"
                    + "<FieldRef Name='Modified' Ascending='FALSE' />"
                + "</OrderBy>");

            if (mostRecentSpecials.Paged != false
                || mostRecentSpecials.RowLimit != 3)
            {
                mostRecentSpecials.Paged = false;
                mostRecentSpecials.RowLimit = 3;
                mostRecentSpecials.Update();
            }
        }
Adding the Default Items to the List
I populate the default list items using a couple of other helper methods (but only if the list is empty upon activation of the feature -- in order to avoid adding duplicate items to the list):
         private static void CreateDefaultItemsInSpecialsList(
            SPList list)
        {
            Debug.Assert(list != null);

            CreateDefaultItemInSpecialsList(
                list,
                "Fisherman's Brew",
                9.98,
                "/ lb.",
                "/PublishingImages/boat.jpg");

            CreateDefaultItemInSpecialsList(
                list,
                "Boathouse Bold",
                12.50,
                "/ lb.",
                "/PublishingImages/ropes.jpg");

            CreateDefaultItemInSpecialsList(
                list,
                "Deadly Decaf",
                7.49,
                "/ lb.",
                "/PublishingImages/fame.jpg");
        }
         private static void CreateDefaultItemInSpecialsList(
            SPList list,
            string title,
            double unitPrice,
            string unitOfMeasure,
            string rollupImageUrl)
        {
            Debug.Assert(list != null);
            Debug.Assert(string.IsNullOrEmpty(title) == false);
            Debug.Assert(unitPrice > 0);
            Debug.Assert(string.IsNullOrEmpty(unitOfMeasure) == false);
            Debug.Assert(string.IsNullOrEmpty(rollupImageUrl) == false);

            SPListItem item = list.Items.Add();

            item[SPBuiltInFieldId.Title] = title;
            item["Unit Price"] = unitPrice;
            item["Unit of Measure"] = unitOfMeasure;

            ImageFieldValue rollupImage = new ImageFieldValue();
            rollupImage.ImageUrl = rollupImageUrl;

            item[FieldId.RollupImage] = rollupImage;

            item.Update();
        }
There are certainly other ways to avoid adding duplicate items to a list, but this method is straightforward and sufficient for this scenario.
Adding the XsltListViewWebPart to the Home Page
In order to add the new XsltListViewWebPart to the home page, I modified the existing ConfigureHomeSiteDefaultPage method that I created previously:
         private static void ConfigureHomeSiteDefaultPage(
            SPWeb homeWeb)
        {
             ...

            // Configure Web Parts
            SPWebPartPages.SPLimitedWebPartManager wpm =
                homeWeb.GetLimitedWebPartManager(
                    page.Url,
                    PersonalizationScope.Shared);

            using (wpm)
            {
                string zoneId = "TopLeftZone";
                int zoneIndex = 0;

                SharePointWebPartHelper.EnsureWebPart(
                    wpm,
                    "FindLocation",
                    "Tugboat_FindLocation.webpart",
                    zoneId,
                    ref zoneIndex);

                ConfigureSpecialsWebPart(wpm, zoneId, ref zoneIndex);

                ...
            }

            SharePointPublishingHelper.PublishPage(
                page,
                "Published by Tugboat.Web.HomeSiteConfiguration"
                    + " feature.");

        }
The new ConfigureSpecialsWebPart method is shown below:
         private static void ConfigureSpecialsWebPart(
            SPWebPartPages.SPLimitedWebPartManager wpm,
            string zoneId,
            ref int zoneIndex)
        {
            Debug.Assert(wpm != null);
            Debug.Assert(string.IsNullOrEmpty(zoneId) == false);

            SPList specialsList = wpm.Web.Lists["Specials"];
            SPView mostRecentSpecialsView =
                specialsList.Views["Most Recent Specials"];

            WebPart webPart = SharePointWebPartHelper.FindWebPartByTitle(
                wpm,
                "Specials");

            SPWebPartPages.XsltListViewWebPart specials =
                webPart as SPWebPartPages.XsltListViewWebPart;

            if (specials == null)
            {
                specials = new SPWebPartPages.XsltListViewWebPart();
                specials.Title = "Specials";

                specials.ListId = specialsList.ID;

                wpm.AddWebPart(specials, zoneId, zoneIndex);
                zoneIndex++;
            }
            else
            {
                specials.ListId = specialsList.ID;
            }

            specials.ChromeType = PartChromeType.None;
            specials.ViewGuid = mostRecentSpecialsView.ID.ToString();

            Assembly thisAssembly = Assembly.GetExecutingAssembly();

            specials.Xsl = AssemblyHelper.GetEmbeddedResourceAsString(
                thisAssembly,
                "Tugboat.Web.HomeSiteConfiguration.Xsl.Specials.xslt");

            wpm.SaveChanges(specials);

            specials.Dispose();
        }
Deploying the Sample Solution
I've attached an updated version of the Tugboat solution in case you are interested in seeing the changes to render the weekly specials from a SharePoint list.
Here are the instructions to deploy the Tugboat sample to your own SharePoint environment. First, download the attachment and unzip the files. Then you simply need to create a few domain users and run a handful of PowerShell scripts, as described below.
To deploy the Tugboat solution to SharePoint:
- Create three service accounts for the Tugboat site:
- {DOMAIN}\svc-web-tugboat-dev - used as the application pool identity for the new Tugboat site
- {DOMAIN}\svc-sp-psr-dev - object cache user account providing Full Read access to Web applications (https://technet.microsoft.com/en-us/library/ff758656.aspx)
- {DOMAIN}\svc-sp-psu-dev - object cache user account providing Full Control access to Web applications
- On the Start menu, click All Programs, click Microsoft SharePoint 2010 Products, right-click SharePoint 2010 Management Shell, and then click Run as administrator. If prompted by User Account Control to allow the program to make changes to the computer, click Yes.
- From the Windows PowerShell command prompt, change to the directory containing the deployment scripts (e.g. C:\NotBackedUp\Tugboat\Main\Source\DeploymentFiles\Scripts), and run the following commands:
$env:TUGBOAT_URL = "https://tugboatcoffee-local"
$env:TUGBOAT_BUILD_CONFIGURATION = "Debug"
& '.\Rebuild Web Application.ps1'
Note
Technically, you don't have to set the environment variables (and use the "-dev" accounts). However, I recommend this in order to bypass SharePoint timer jobs when deploying the WSPs.
At this point you should be able to modify your hosts file accordingly and browse to either https://www-local.tugboatcoffee.com (to view the site as an anonymous user) or https://tugboatcoffee-local (to view the site as an administrator).
Additional Resources
Here are some additional resources that you may find helpful for rendering SharePoint list items using the XsltListViewWebPart.
XsltListViewWebPart and Custom List Views
https://msdn.microsoft.com/en-us/library/ff806162.aspx
Overview of XSLT List View Rendering System
https://msdn.microsoft.com/en-us/library/ff604024.aspx
Examples of Input and Result Node Trees in XSLT Transformations
https://msdn.microsoft.com/en-us/library/ff602042.aspx
How to: Customize the Rendering of a Field on a List View