Couchbase on Azure: Deploying TapMap
This is the fifth post of a walkthrough to set up a mixed-mode platform- and infrastructure-as-a-service application on Windows Azure using Couchbase and ASP.NET. For more context on the application, please review this introductory post.
TapMap is a reference application that John Zablocki, Developer Advocate for Couchbase, has been building to demonstrate techniques and best practices for accessing Couchbase from ASP.NET applications. Note that the project (on GitHub) is actively being developed, so depending on when you’re reading this, it may look a bit different from what I cover here. As I’m writing this post, the Visual Studio solution includes an ASP.NET MVC 3 application (TapMapWeb) and a small console setup program (TapMapDataLoader) for seeding the database with over 1400 breweries and 5000 beers.
Turning TapMap into a Cloud Application
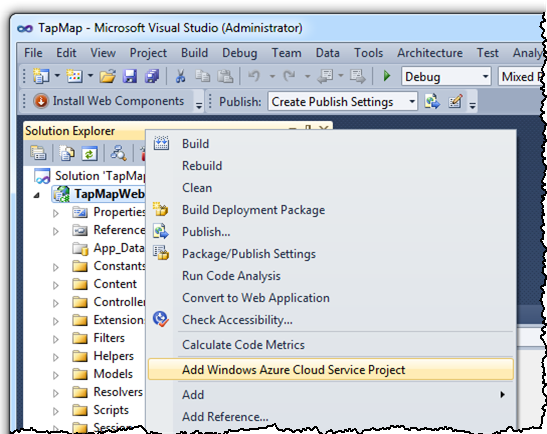
Since TapMap is an ASP.NET application it’s an obvious candidate for deployment to Windows Azure as a Cloud Service (formerly called a Hosted Service). To quickly enable cloud deployment of an existing ASP.NET project, I select the Add a Windows Azure Cloud Server Project option from the context menu on the selected ASP.NET project. That action creates a new Windows Azure cloud project (TapMapWeb.Azure) with a role referencing the existing ASP.NET application and a default configuration for that role.
In most cases and to engage the 99.95% uptime Service Level Agreement for Windows Azure, you’ll want to run at least two instances of the application (as I’ve configured below). Each instance is housed in its own stateless VM, and the Windows Azure load balancer distributes requests to them in a round robin fashion. 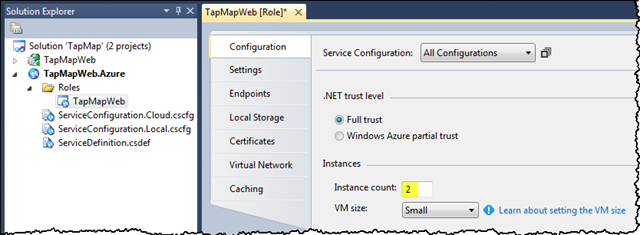
TapMap Client Network Configuration
TapMap uses the web.config file to establish the connection to the Couchbase cluster. Since each of the machines in the Couchbase cluster can service any request, the server URIs can point to any of the VMs in that cluster. Additionally, the Couchbase client interface maintains knowledge of the cluster configuration; it merely needs to establish the initial connection after which point the client will be able to seamlessly manage failover to the other cluster members. In the web.config, therefore, I’m specifying only two of the servers in the cluster, with the expectation that one will be accessible at all times.

The server URIs above reference the persistent IP addresses assigned to two of the VM instances in the Couchbase cluster. Those IPs were doled out from the virtual network I set up earlier, so for them to be reachable by the ASP.NET instance I’m about to deploy to the cloud, the TapMap Azure project needs to be deployed to that same network, or more specifically in this case to the ComputeCluster subnet that I defined.
To have that occur, the ServiceConfiguration.cscfg document needs a NetworkConfiguration section. There is no UI in Visual Studio for modifying the network configuration (as there is for instance count and size), so I need to modify the XML file directly.
The NetworkConfiguration section (below) references the virtual network name (TapMapVNET) and enumerates the roles within the Cloud Service project that should be associated with that network. For those roles, like TapMapWeb, that should be associated with a subnet, the subnets are likewise enumerated. The role will be placed in the first subnet in that list with remaining capacity.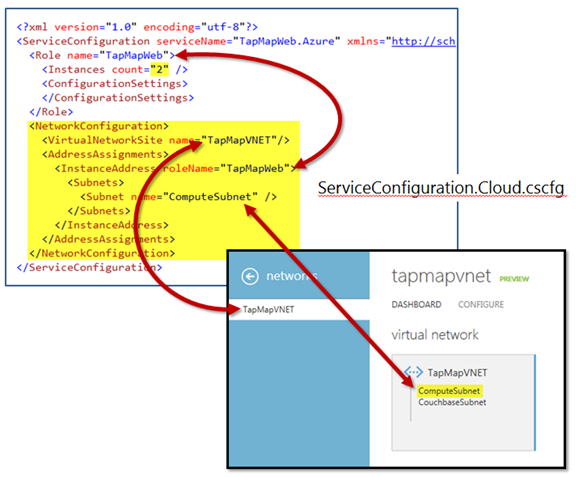
Deploying the Cloud Service
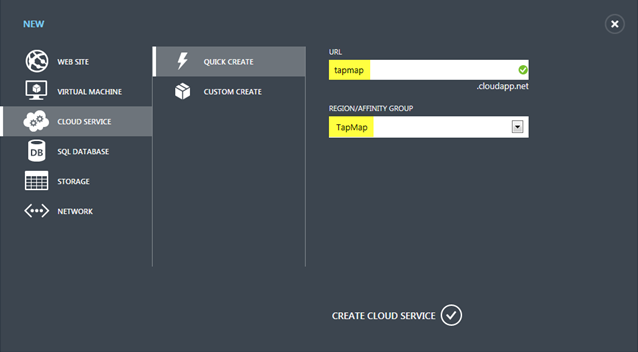
With the June 2012 Windows Azure release, a new HTML 5 portal experience became available for deploying Cloud Services (formerly Hosted Services) to Windows Azure, so I’ll use the Quick Create option to create a new service with the endpoint tapmap.cloudapp.net that is associated with the affinity group TapMap (the same affinity group containing my virtual network, TapMapVNET).
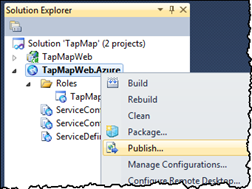 Once the service has been created, I can deploy the application directly from Visual Studio. Doing so requires a one-time setup to associate a publication profile on my Visual Studio client machine with my Windows Azure subscription. That association is initiated via the Publish option (see right) accessible from the TapMapWeb.Azure project in Visual Studio.
I first download and save a publication settings file, which requires accessing the Windows Azure portal with my subscription credentials. That settings file is imported locally, and the information retained on my local machine for future deployments. Once imported, the .publishsettings file can and should be immediately deleted, since it contains the Windows Azure management API key that, if compromised, could enable others to access all the assets in the associated Windows Azure subscription.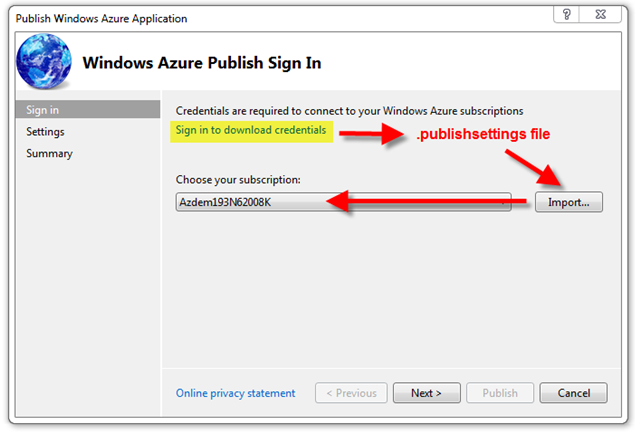
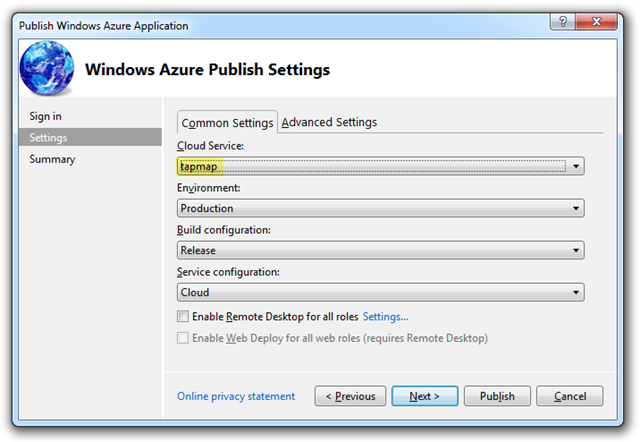
In the next step of the wizard, I associate the Visual Studio solution with the cloud service I just set up in the portal.
Why did I need to create the Cloud Service in the portal? Those of you that have used the Publish option in Visual Studio know that you can create a cloud service (using the Create New... option in the Cloud Service drop down below) as well as deploy to an existing service. Although the Create New.. option allows you to associate the new service with one of the eight Windows Azure data center locations, it does not allow you to specify an affinity group, and that is required in this case due to the virtual network association with the TapMap affinity group.
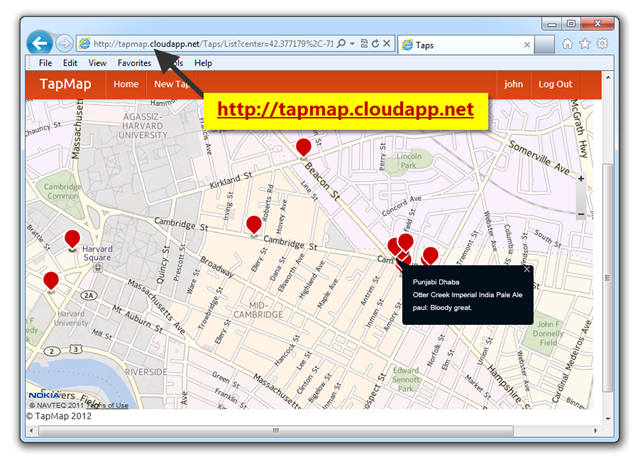
When I select Publish, a confirmation screen appears listing the settings I’ve selected, and I then press the Publish button one last time to upload my code and configuration to Windows Azure. Once the deployment is complete (it takes a few minutes), the TapMap application becomes live at https://tapmap.cloudapp.net.
Running the Application
If you’re deploying the application to your own account, you’ll want to initialize the demo database which includes beer and brewery data derived from the Open Beer Database, as well as four user accounts (see right), some sample taps, and Couchbase view documents. All of these files are in the App_Data directory of the TapMapWeb project and marked to be copied to the output directory so they are automatically included in the package file ( |
|
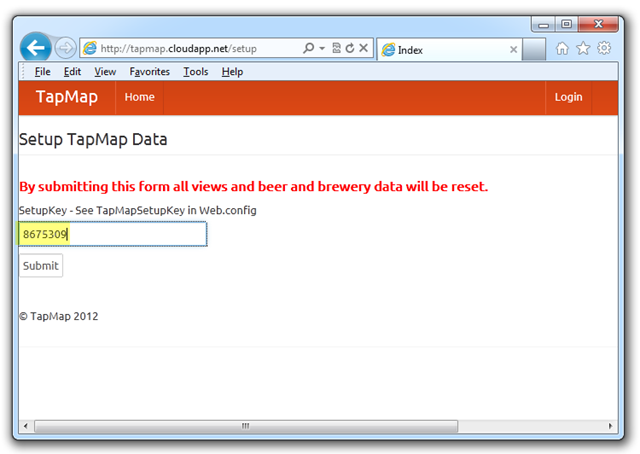
Browse to the URL https:// <yourservicename> .cloudapp.net/setup to import the data into your Couchbase cluster. A setup key is required, the value of which is recorded in the web.config file (and seems to expose John as a Tommy Tutone fan!). Note, I changed the value before deploying to https://tapmap.cloudapp.net, so you won’t be able to reset my data with the default value as shown.
 Below is a screen shot of the Greater Boston region with the taps that have been included in the demo data. Assuming my deployment of the application is still live (Azure isn’t really free for me either), feel free to add more taps as one of the four users above, or create an account for yourself!