Setting up continuous deployment from Docker Hub using VSTS Release Management
Now you can set up continuous deployment from DockerHub using Visual Studio Team Services Release management. A release can get triggered automatically once an image is updated in docker hub.
We will see how this can help us automatically keep our Azure web app updated with the source code sitting in GitHub.
Step 1: (Code): You can keep your code on GitHub. For example https://github.com/jikuma/nodeJsSampleService. This is a simple site which displays "Hello Docker Hub".
We want to automatically create/update a container image once any edit is made to source code. Once an image is pushed to Docker hub, we further want to automatically trigger VSTS release to update my website hosted in Azure web app.
Step 2: (CI): Once we have a code we want to automatically build and push an image to docker hub.
Step: 2.1 (Link GitHub to your Docker Hub Account):
Log in to your docker hub account
If you have not already connected your GitHub account to DockerHub account, you will have to link these account. Here are steps to do it.
Step: 2.1.a: Click on link account
Select link GitHub and then provide details to link your GitHub account
If a GitHub account is already linked you will get list of your GitHub repository
Step: 2.2 (Create a Docker Hub image/repository using GitHub repo)
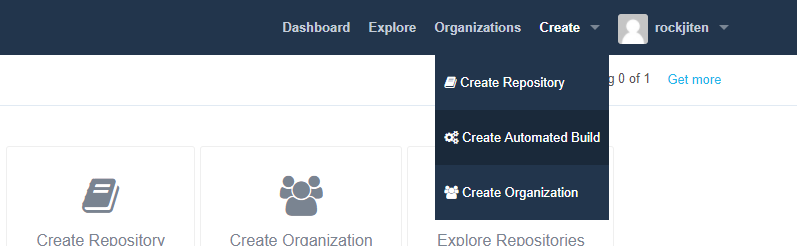
Click on Create -> Create Automated Build -> Github
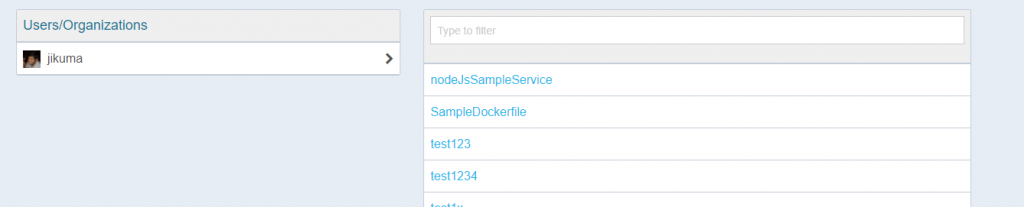
Select the repository you want to create image from
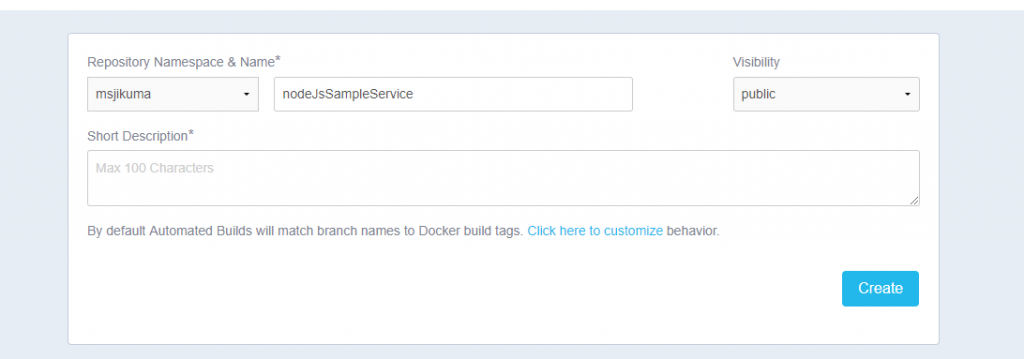
Enter repo details and select Create.
A docker hub repository will be created for you.
Step: 2.3 (Verify that CI is set up for you):
Go to Build settings tab of Docker hub repo and check if the setting is correct.

It's saying that whenever a change is made to master branch of the GitHub repo it will trigger image build and will update the docker hub repo.
Your CI is set up. You can now make changes to your Github repo and check if Docker hub repository/image is getting updated or not.
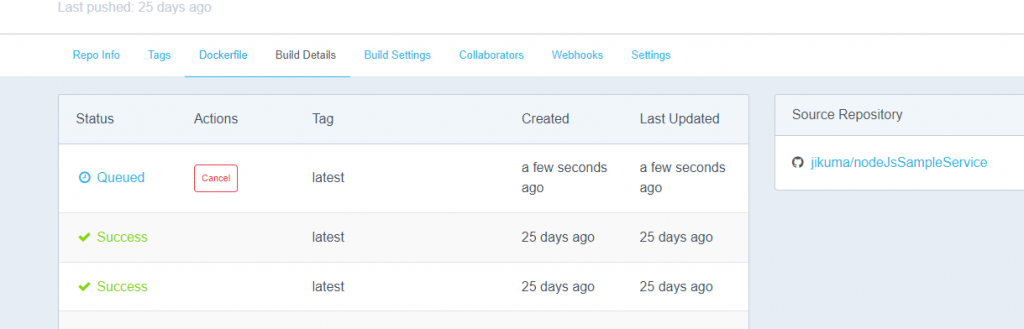
You can see a build getting triggered in the Build Details tab.

Step 3: (Setting up CD: update my website as soon as the new image is pushed to Docker hub).
Step 3.1: Let's create an Azure web app using this docker hub image.
Step 3.1.a Log into the Azure portal https://portal.azure.com
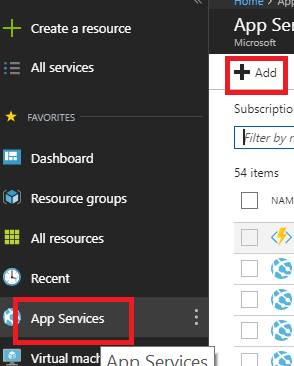
Step 3.1.b Select App service
Click on the plus to create new web app.
Search for ‘Web App for Containers’, and press 'Create'.
Give details, like app name and click on 'Configure Container'.
Input the image details.
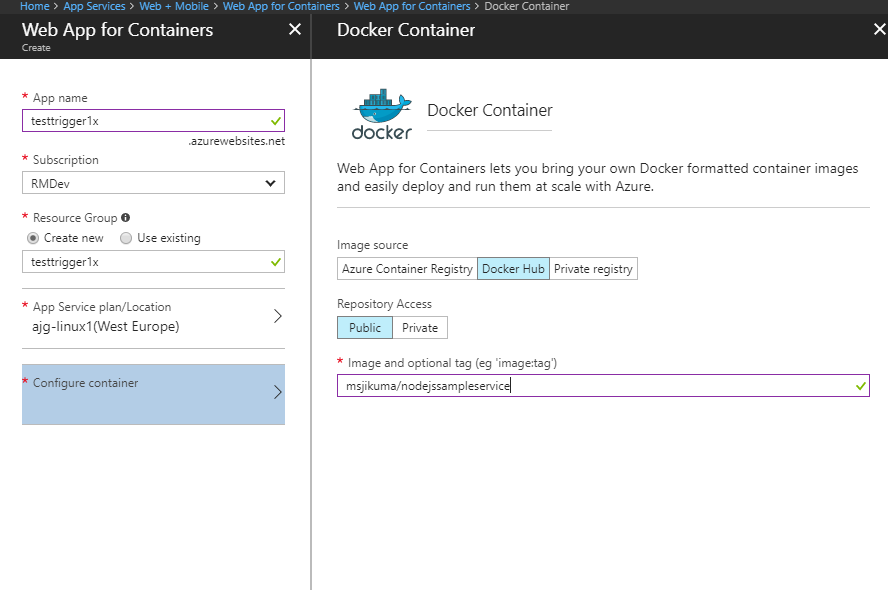
Click ok, to create the web app.
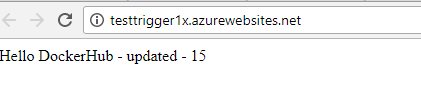
Once the web app is created, visit the site to check if deployment is successful.
Once you have successfully deployed your web app, we will set up a CD so that whenever the image is updated in the DockerHub, web app gets updated automatically.
Step 3.2: (Setup CD using VSTS Release Definition):
Let's create a Release Definition in VSTS to achieve Continuous deployment
Log in to your VSTS account. If you don't already have a VSTS account, here are steps to get started.
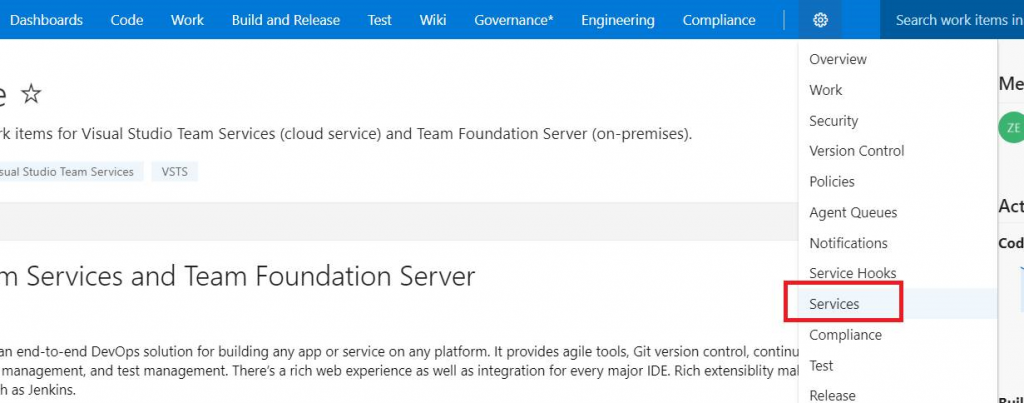
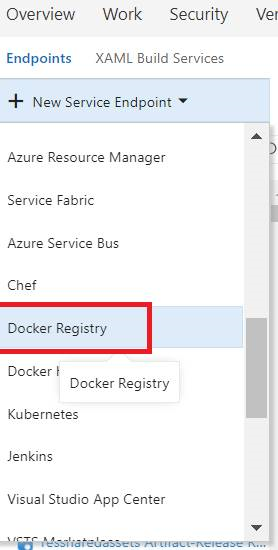
Step 3.2.a (Create a Docker Registry endpoint.) In the VSTS Project, create a service endpoint by clicking on the Gear icon -> Services.
Step 3.2.b: Select “+ New Service Endpoint" -> Docker Registry.
Step 3.2.c: Create a Docker Registry endpoint by entering docker hub credentials. 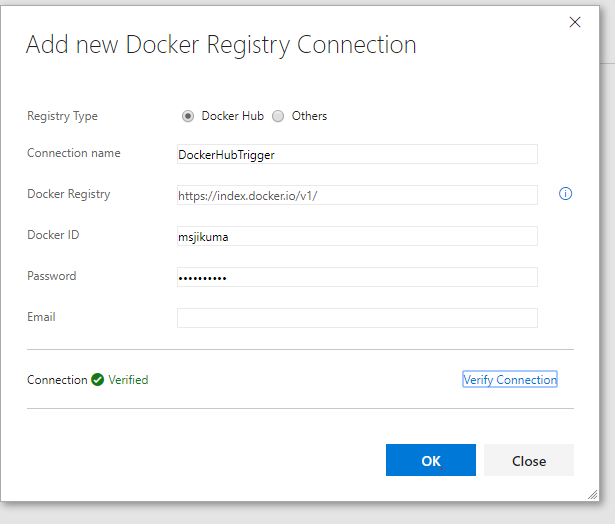
Click on 'Verify Connection' to check if provided credentials are valid. Click "OK" to create an endpoint.
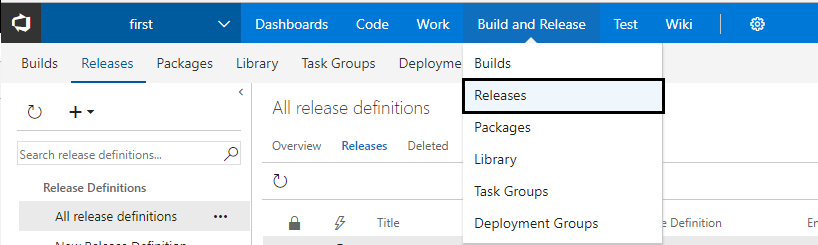
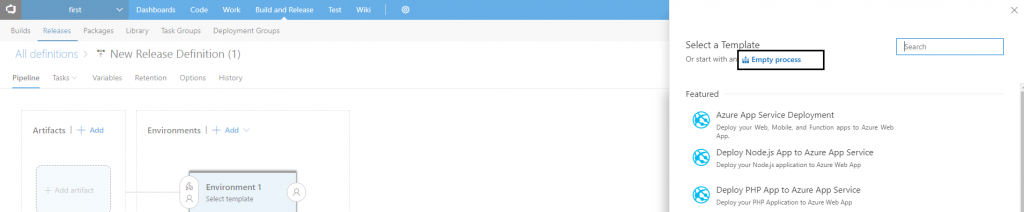
Step 3.2.d: Now , Create new release definition.
Hower over "Build and Release" and select Release.
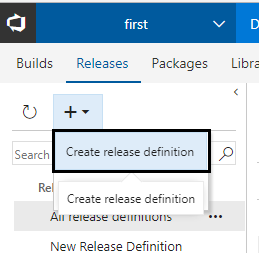
Click on "+" icon and select "Create release Definition."
Let's start with an empty template.
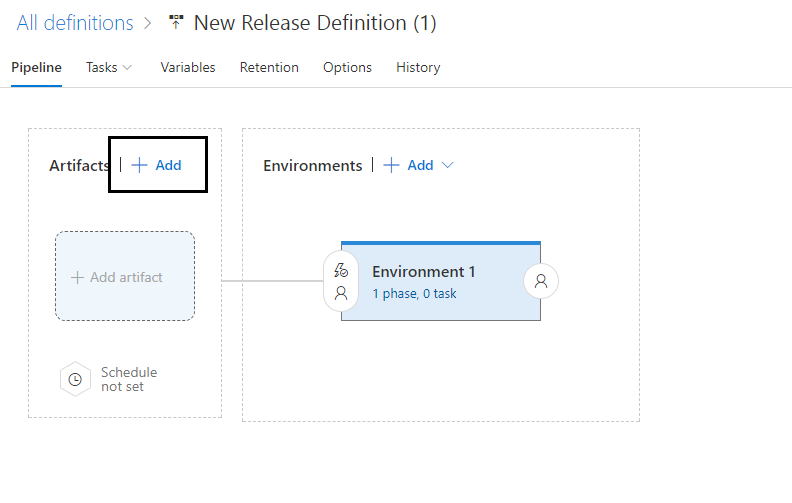
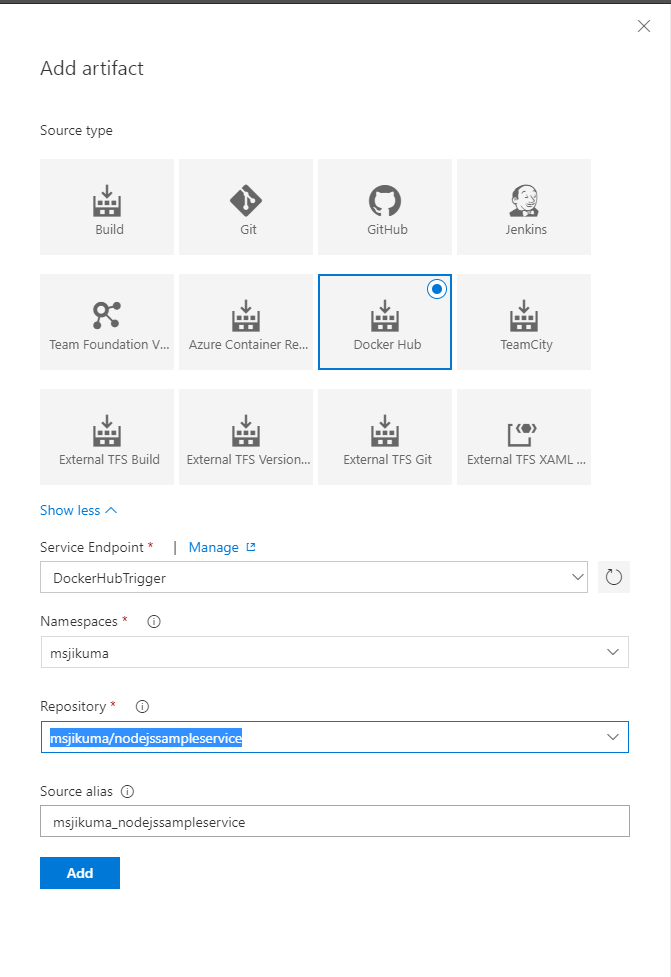
Step 3.2.e: Add an Artifact.
Select an artifact of type Docker hub and select the namespace and repo from the drop-down.
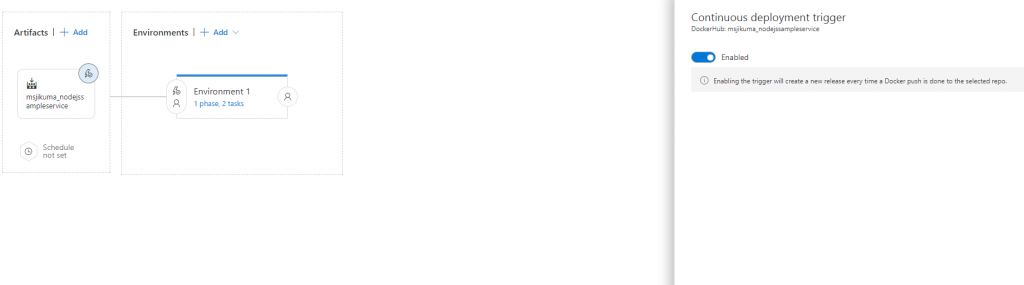
Step 3.2.f: Once Artifact is created click on the lightning icon and enable continuous deployment.
Step 3.2.g: Now, let's add the tasks to update the web app.
Go to add task ui of 'Environment 1' by clicking on "1 phase, 0 task".
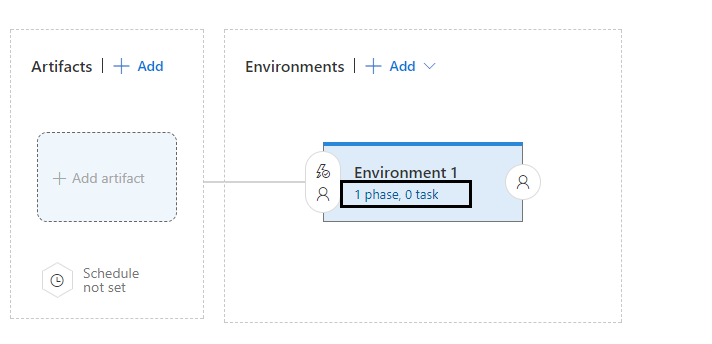
Add a task to deploy web app and another to restart the web app.
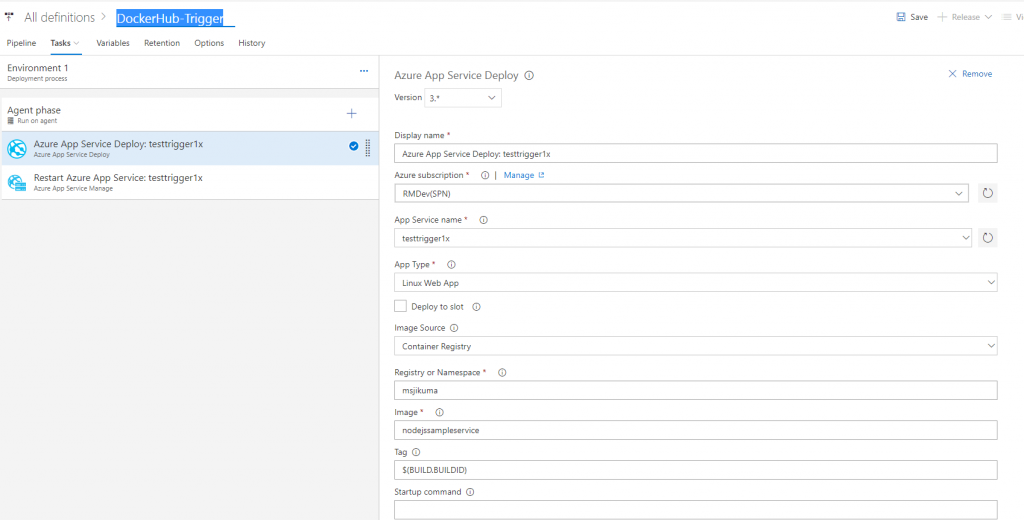
Deploy Web app: Enter the details of the web app. Inside tag field input the variable name $(BUILD.BUILDID). The value of BUILD.BUILDID is the image tag name for which release has been queued.
Restart Web App:
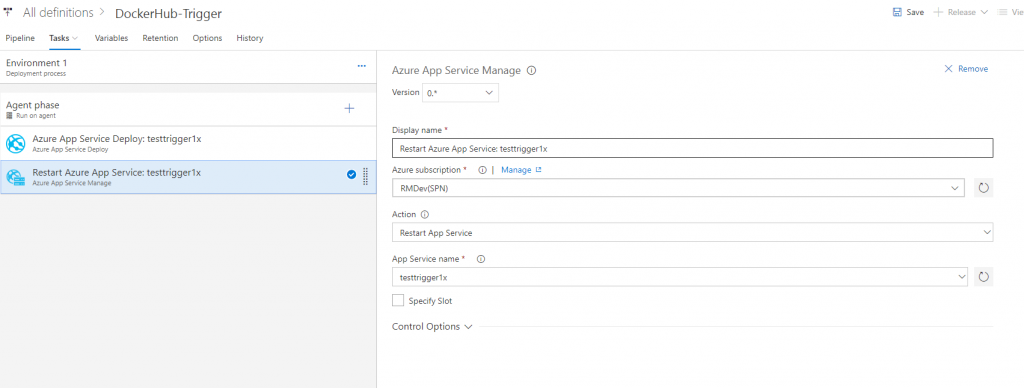
Enter the details in the task and save the RD.
Now you are all set.
Step 4: Validation (Validate that a check-in in GitHub will automatically update your web app )
Step 4.1: Make a change in your github repo. 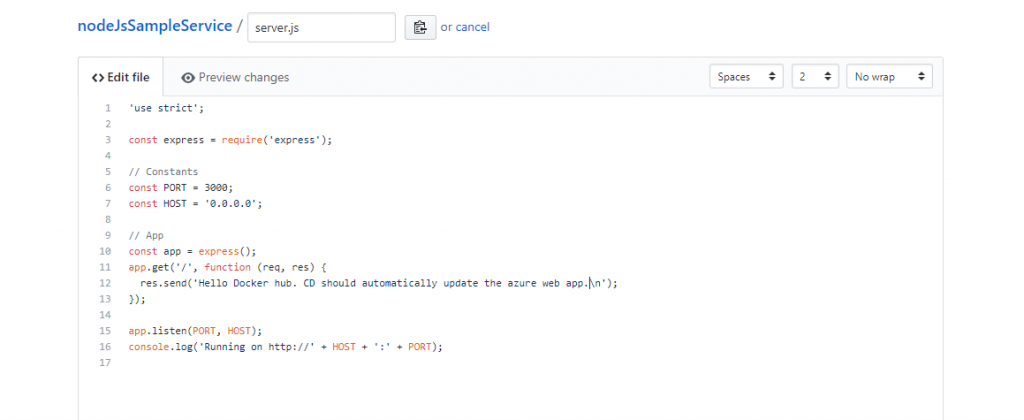
We have changed the message on the site from "Hello DockerHub - updated - 15" to "Hello Docker hub. CD should automatically update the azure web app."
Commit the change.
Step 4.2: (Validate CI)
It will automatically trigger a build in docker hub to update the docker hub repo. Validate that in docker hub, check if a new build to update the image is triggered.
Step 4.3 (Validate CD):
Once new image in dockerhub is updated, a release will automatically get triggered in VSTS. This will update your webapp.

Step 4.4 (Validate web app):
Refresh the website for the change to take effect

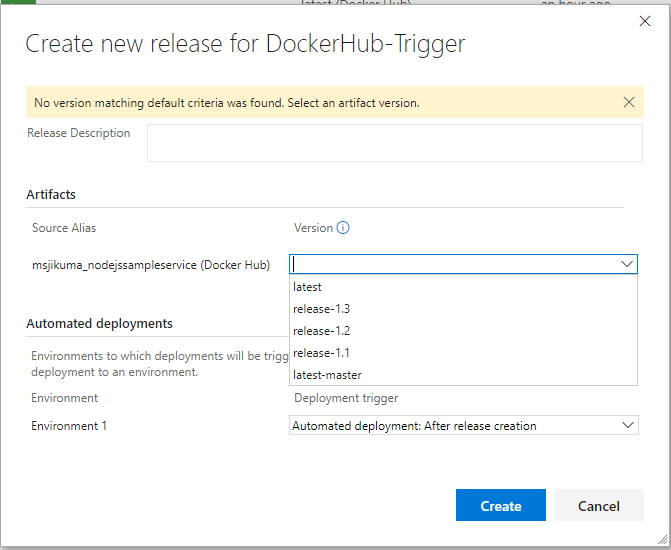
You can also manually select the image tag to deploy without setting the CD. For this, you have to create a release and select the tag from the drop-down with which you want to update the web app.