Windows Azure Storage - 公有云存储(Blob Storage)管理及传输最佳实践
在使用公有云存储(WAS:Windows Azure Storage)过程中,一个常见的问题是,开发者需要上传较多或者较大的本地数据(文件)到WAS中,传输效率尤为关键。
本篇将对WAS中常用的数据上传方式进行总结和比较,供Windows Azure开发者参考。
上传本地文件到WAS存储中,主要有以下几种方法:
- 使用现成的界面化工具。
- 使用流行的脚本工具。
- 使用Azure SDK中提供的API上传数据文件。
- 调用REST API上传文件(数据)。
- 拆分大数据文件成多个数据块,结合SDK API或者REST API实现多线程上传。
1. 使用现成的界面化工具
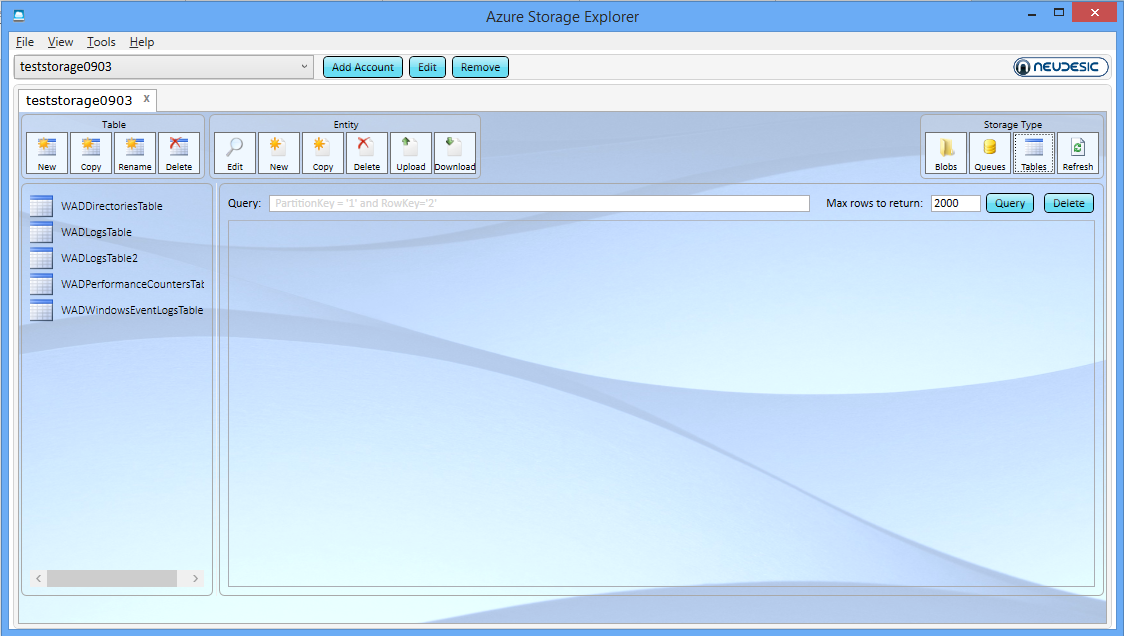
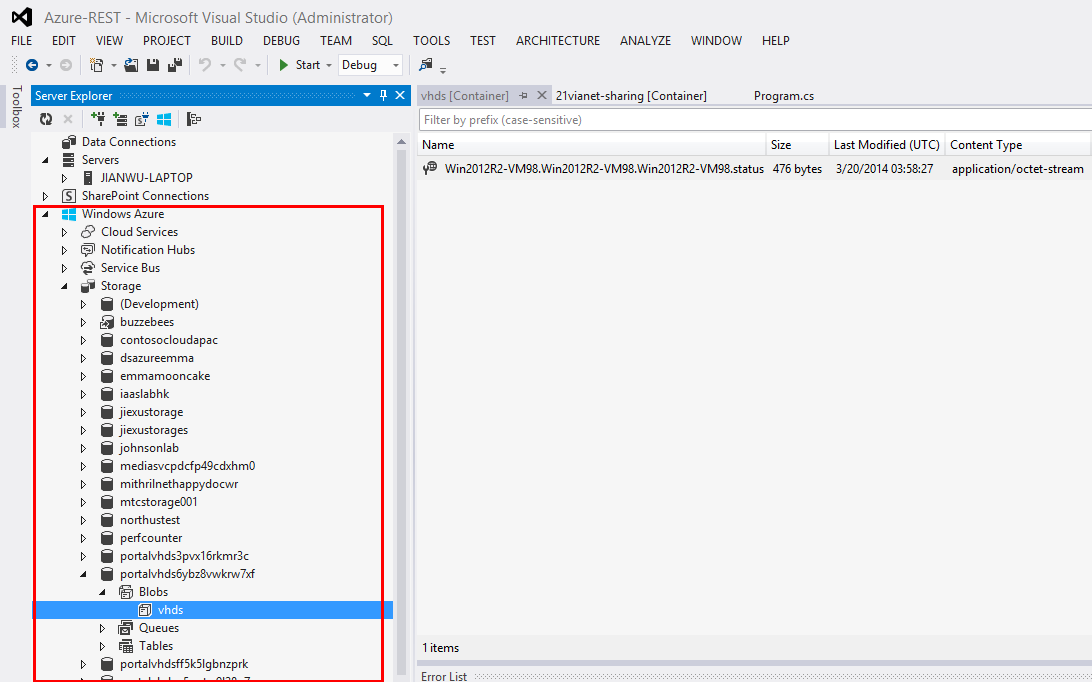
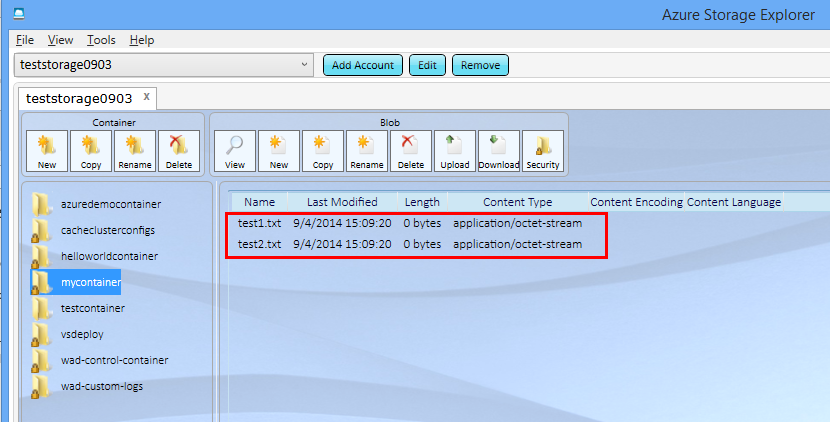
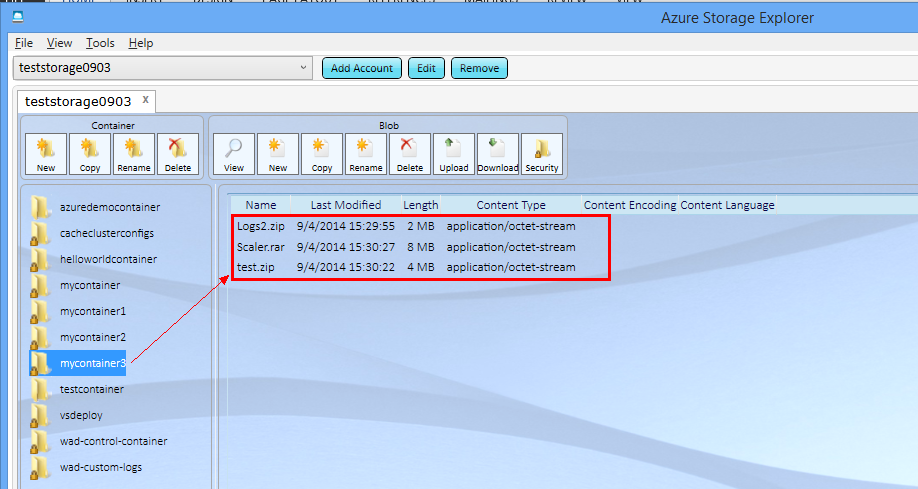
WAS使用者可以使用流行的第三方工具如Azure Storage Explorer,Cloud Storage Studio, CloudBerry, CloudExplorer等等或者Visual Studio来管理WAS重的Blob、Table、Queue,这些工具的共同特点是:界面化操作,极易上手,简便实用。
以下分别是使用Azure Storage Explorer和Visual Studio的示例:
2. 使用流行的脚本工具(azcopy)
azcopy工具可以在此:latest version of AzCopy 下载。按照提示安装azcopy后,可执行文件azcopy.exe会存储在本地计算机,如C:\Program Files(x86)\Microsoft SDKs\Azure\AzCopy>AzCopy.exe 。
azcopy工具可以通过cmd命令行启动,也可以通过PowerShell等脚本语言启动,其用法为:
AzCopy <source> <destination> [filepattern] [options]
使用azcopy传输文件,最优速度可达50MB/s.
常见的用法:
本地目标文件(夹)如下
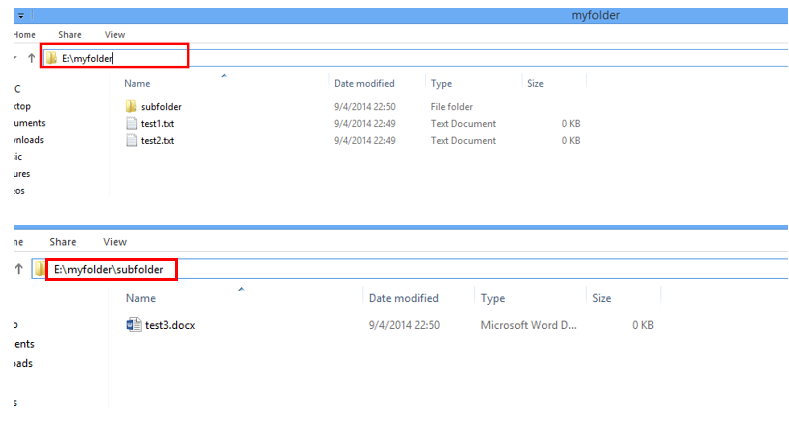
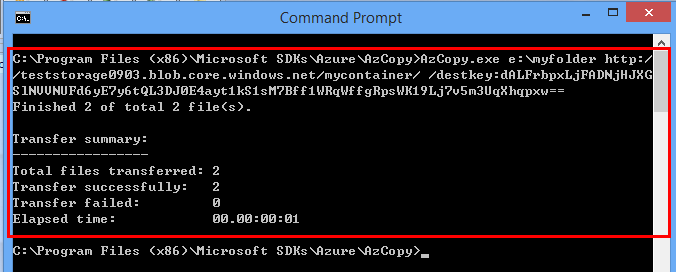
- 上传文件到WAS
C:\Program Files (x86)\Microsoft SDKs\Azure\AzCopy>AzCopy.exe e:\myfolder https://teststorage0903.blob.core.windows.net/mycontainer/ /destkey:H23Dwq!^&VCBM***ERFGHJKIUOP(^GFDSWERDAS#$%DFHYYYg==
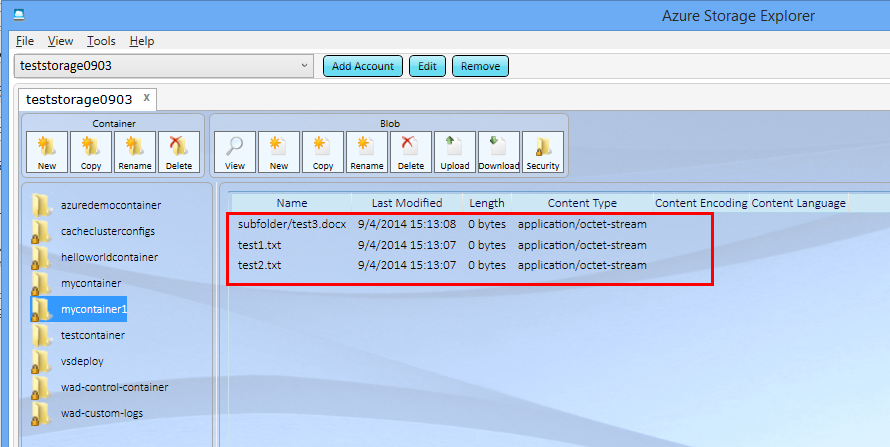
- 上传文件夹下面的所有子文件夹及文件到WAS (递归上传)
C:\Program Files(x86)\Microsoft SDKs\Azure\AzCopy>AzCopy.exe e:\myfolder https://teststorage0903.blob.core.windows.net/mycontainer1/ /destkey:dAL$%^&*#SDFGHYTRWCBJII)(O_+JDSSAAAWESDVG***********== /S
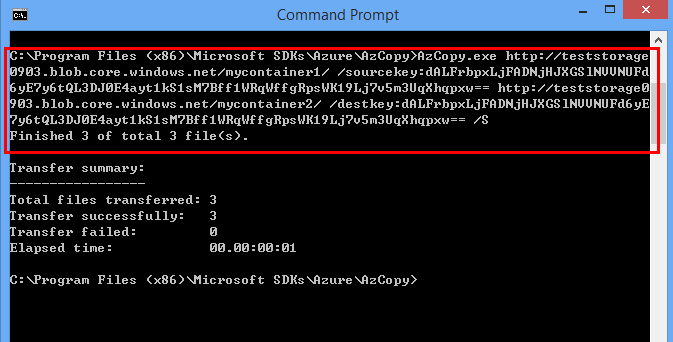
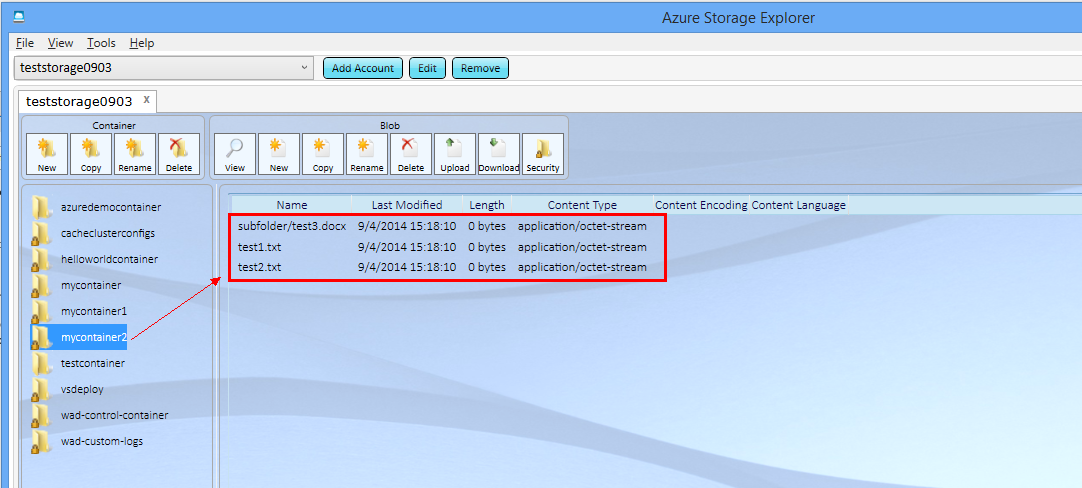
- 复制WAS中的文件到目标WAS中:
C:\Program Files(x86)\Microsoft SDKs\Azure\AzCopy>AzCopy.exe https://teststorage0903.blob.core.windows.net/mycontainer1/ /sourcekey:dALFrbpxL×××××××××××××qpxw== https://teststorage0903.blob.core.windows.net/mycontainer2/ /destkey:dALFrbpxLj×××××××qXhqpxw== /S
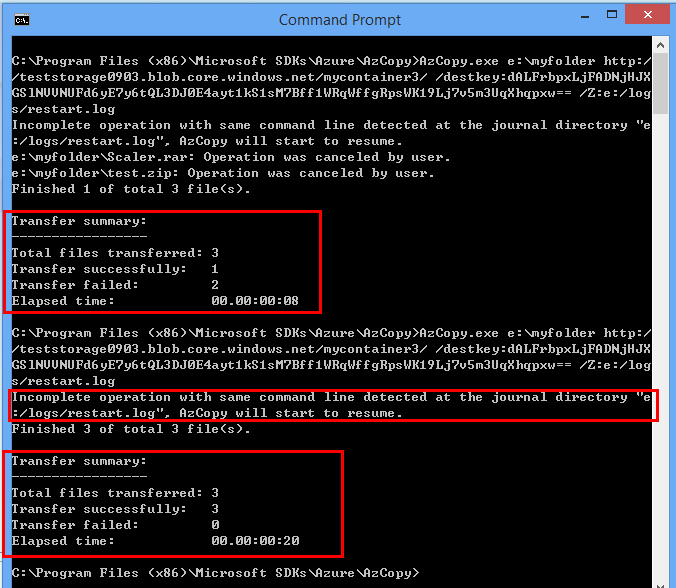
- 断点重传:azcopy支持断点重传功能,若传输整个文件夹到WAS过程中出现异常,则在重新启动同样的命令后,azcopy会根据历史上传进度文件(如下例中的e:/logs/restart.log)来续传。注意:断点续传仅适用于block blob,不适用于page blob。
C:\Program Files(x86)\Microsoft SDKs\Azure\AzCopy>AzCopy.exe e:\myfolder https://teststorage0903.blob.core.windows.net/mycontainer3/
/destkey:dALFrbpxLjFAD××××××××WK19Lj7v5m3UqXhqpxw== /Z:e:/logs/restart.log

更多参考:
https://azure.microsoft.com/en-us/documentation/articles/storage-use-azcopy/
3. 使用SDK API上传文件
此部分在前面的实践https://blogs.msdn.com/b/jianwu/archive/2014/08/14/azure-paas-2.aspx中已经涉及,可以参考:
如何创建你的Azure Storage存储:https://www.windowsazure.cn/zh-cn/manage/services/storage/how-to-create-a-storage-account/
如何查看你的存储帐号及密码:https://www.windowsazure.cn/zh-cn/manage/services/storage/how-to-manage-a-storage-account/#regeneratestoragekeys
进一步单独了解WAS提供的编程接口和访问方式,请参考:
如何编程访问Blob存储:https://www.windowsazure.cn/zh-cn/develop/net/how-to-guides/blob-storage-v17/
如何编程访问Table存储:https://www.windowsazure.cn/zh-cn/develop/net/how-to-guides/table-services/
如何编程访问队列存储:https://www.windowsazure.cn/zh-cn/develop/net/how-to-guides/queue-service/
4. 使用REST API上传
WAS除了提供标准的SDK API之外,还提供流行的REST API,供不同开发语言来调用。
关于REST API(参见:https://en.wikipedia.org/wiki/Representational_state_transfer)的定义,本节不做重点介绍,后续会单独讨论。其简单的解释是:REST 从资源的角度来观察整个网络,分布在各处的资源由URI确定,而客户端的应用通过URI来获取资源的表示方式。即客户端可以通过构造web请求来调用网络中的服务(资源)。
因此,参照上传blob对应的REST API定义:https://msdn.microsoft.com/en-us/library/azure/dd179451.aspx,可知:
调用该REST API需要构造一下web请求:
PUT请求发往https://【myaccount】.blob.core.windows.net/【mycontainer】/【myblob】
请求需包含以下头信息:
Authorization : 授权信息Date or x-ms-date :时间信息x-ms-version : 版本信息Content-Length :待上传文件长度x-ms-blob-type:<BlockBlob | PageBlob> : 目标blob类型
其中,授权信息Authorization是通过以下算法得来的:
1、集合web请求中的头信息形成待签名字符串。2、使用WAS的密钥生成用于签名的HMACSHA256值。3、使用2中的值来对1中的字符串签名,得到最后的授权信息。
以下是通过C#语言对上述过程进行实现,使用其他开发语言(如PHP、JAVA)的开发者可以使用相同的原理构造请求并发往目标WAS,从而实现基于REST API的上传Blob文件。
static void Main(string[] args)
{
//读取本地文件,转成byte数组
FileStream stream = new FileInfo("e:\\test.png").OpenRead();
Byte[] buffer = new Byte[stream.Length];
stream.Read(buffer, 0, Convert.ToInt32(stream.Length));
//调用基于REST API的函数,上传文件
PutBlob("mycontainer1", "test.png", buffer);
Console.Read();
}
public static string BlobType = "BlockBlob";
public static string SharedKeyAuthorizationScheme = "SharedKey";
public static string Account = "teststorage0903";
public static string BlobEndPoint = "https://teststorage0903.blob.core.windows.net/";
public static string Key = "TxfnG/××××××××××××==";
public static void PutBlob(String containerName, String blobName, byte[] blobContent)
{
String requestMethod = "PUT";
String urlPath = String.Format("{0}/{1}", containerName, blobName);
String storageServiceVersion = "2009-09-19";
String dateInRfc1123Format = DateTime.UtcNow.ToString("R", CultureInfo.InvariantCulture);
Int32 blobLength = blobContent.Length;
String canonicalizedHeaders = String.Format(
"x-ms-blob-type:{0}\nx-ms-date:{1}\nx-ms-version:{2}",
BlobType,
dateInRfc1123Format,
storageServiceVersion);
String canonicalizedResource = String.Format("/{0}/{1}", Account, urlPath);
String stringToSign = String.Format(
"{0}\n\n\n{1}\n\n\n\n\n\n\n\n\n{2}\n{3}",
requestMethod,
blobLength,
canonicalizedHeaders,
canonicalizedResource);
String authorizationHeader = CreateAuthorizationHeader(stringToSign);
Uri uri = new Uri(BlobEndPoint + urlPath);
HttpWebRequest request = (HttpWebRequest)WebRequest.Create(uri);
request.Method = requestMethod;
request.Headers["x-ms-blob-type"] = BlobType;
request.Headers["x-ms-date"] = dateInRfc1123Format;
request.Headers["x-ms-version"] = storageServiceVersion;
request.Headers["Authorization"] = authorizationHeader;
request.ContentLength = blobLength;
try
{
using (Stream requestStream = request.GetRequestStream())
{
requestStream.Write(blobContent, 0, blobLength);
}
using (HttpWebResponse response = (HttpWebResponse)request.GetResponse())
{
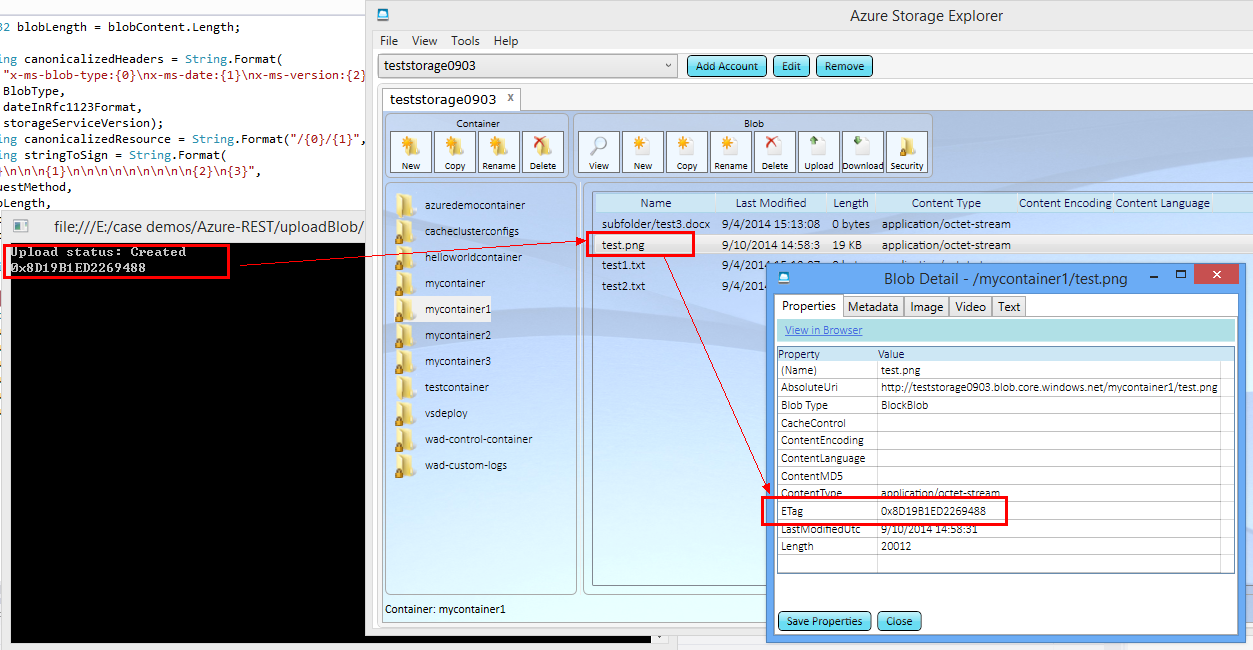
String ETag = response.Headers["ETag"];
Console.WriteLine("Upload status: {0}", response.StatusCode);
Console.WriteLine(ETag);
}
}
catch (WebException ex)
{
Console.WriteLine("An error occured. Status code:" + ((HttpWebResponse)ex.Response).StatusCode);
Console.WriteLine("Error information:");
using (Stream stream = ex.Response.GetResponseStream())
{
using (StreamReader sr = new StreamReader(stream))
{
var s = sr.ReadToEnd();
Console.WriteLine(s);
}
}
}
}
private static string CreateAuthorizationHeader(string canonicalizedstring)
{
string signature = string.Empty;
using (System.Security.Cryptography.HMACSHA256 hmacSha256 = new System.Security.Cryptography.HMACSHA256(Convert.FromBase64String(Key)))
{
Byte[] dataToHmac = System.Text.Encoding.UTF8.GetBytes(canonicalizedstring);
signature = Convert.ToBase64String(hmacSha256.ComputeHash(dataToHmac));
}
string authorizationHeader = string.Format(CultureInfo.InvariantCulture, "{0} {1}:{2}", SharedKeyAuthorizationScheme, Account, signature);
return authorizationHeader;
}
其运行情况如下:
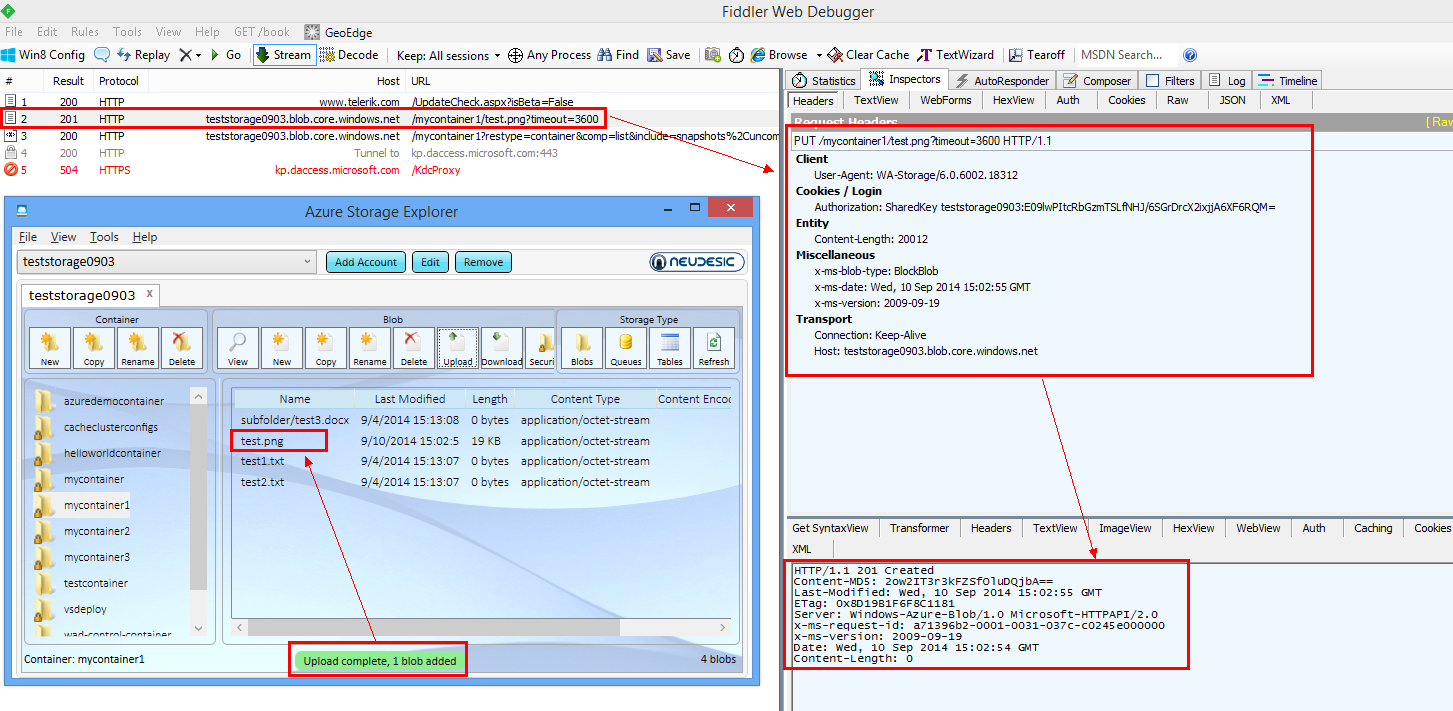
更进一步,在使用工具如Azure Storage Explorer或者SDK API上传文件时,若开发者同时打开网络分析工具Fiddler,可以发现,不管使用流行工具还是SDK API,其底层实现目标WAS的操作都是基于REST API的,因此,进一步可以说明,WAS中的所有操作的基础就是其提供的REST API服务。
5. 拆分大文件,分块同步上传
首先需要了解一下Blob Storage所提供的两种主要数据形式。
从存储结构上来说,Blob Storage提供了两种类型的Blob。
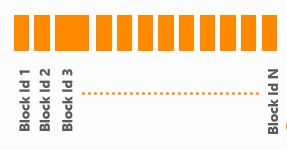
- „ Block Blob:分块存储,其存储方式类似于传统文件系统中的簇(Cluster)的概念。如图所示,一个Blob文件被分成一个或多个Block(块),并且每个Block都有其唯一的序号,WAS根据开发者上传的Block内容和Block ID序号串在云端创建对应的文件。该类型的Blob主要用于存储文件。
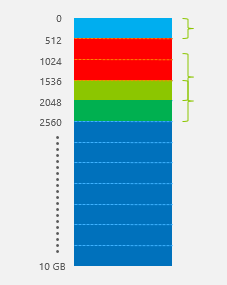
- „ Page Blob:页式存储,应用于随机读写,由多个存储页(pages)组成,每个存储页的大小没有固定定义,存储页根据Blob文件开始位置的偏移量来标识,如图所示。Page Blob主要用于给托管服务(Cloud Service)的虚拟机添加本地磁盘和给IaaS虚拟机提供数据磁盘。
由于Block Blob的灵活“拆装”性,开发者在使用Blob Storage来存储文件时,可以充分利用该特性,将待上传的本地大文件拆分成多个小块(blocks),并对每一个数据块进行编号(如1,2,3…),然后调用Storage API上传到WAS中。示例代码如下:
string filePath = @"e:\DEL1-LHP.dmp.zip";
CloudStorageAccount account = CloudStorageAccount.DevelopmentStorageAccount;
//read local file into byte array
byte[] fileContent = File.ReadAllBytes(filePath);
string blobName = Path.GetFileName(filePath);
//refer to target blob file and set container public
CloudBlobClient blobClient;
blobClient = account.CreateCloudBlobClient();
CloudBlobContainer container = blobClient.GetContainerReference("blobcontainer");
container.CreateIfNotExist();
var permission = container.GetPermissions();
permission.PublicAccess = BlobContainerPublicAccessType.Container;
container.SetPermissions(permission);
CloudBlockBlob blob = container.GetBlockBlobReference(blobName);
int maxSize = 4 * 1024 * 1024; // 4 MB
//if file sie is bigger than 4MB, split it to blocks and upload one by
one
if (fileContent.Length > maxSize)
{
int id = 0;
int byteslength = fileContent.Length;
int bytesread = 0;
int index = 0;
List<string> blocklist = new List<string>();
int numBytesPerChunk = 500 *1024; //500KB per block
int totalblocks = fileContent.Length / numBytesPerChunk;
//upload one block by one block
do
{
byte[] buffer = new byte[numBytesPerChunk];
int limit = index + numBytesPerChunk;
for (int loops = 0; index < limit; index++)
{
buffer[loops] = fileContent[index];
loops++;
}
bytesread = index;
string blockIdBase64 = Convert. ToBase64String(System.BitConverter.GetBytes(id));
bool trial = true;
//retry policy here to ensure each block is successfully uploaded
while (trial)
{
try
{
blob.PutBlock(blockIdBase64, new MemoryStream(buffer, true), null);
trial = false;
}
catch (Exception exx)
{
Console.WriteLine(exx.Message);
System.Threading.Thread.Sleep(2000);
}
}
blocklist.Add(blockIdBase64);
id++;
Console.WriteLine(id.ToString() + " blocks of " + totalblocks. ToString() + " have been uploaded.");
}
while (byteslength - bytesread > numBytesPerChunk);
//upload the rest of bytes as a last block
int final = byteslength - bytesread;
byte[] finalbuffer = new byte[final];
for (int loops = 0; index <byteslength; index++)
{
finalbuffer[loops] = fileContent[index];
loops++;
}
string blockId = Convert.ToBase64String(System.BitConverter.GetBytes(id));
blob.PutBlock(blockId, new MemoryStream(finalbuffer, true), null);
blocklist.Add(blockId);
//upload blockid list to finish the upload
blob.PutBlockList(blocklist);
Console.WriteLine(filePath + " was uploaded successfully in blocks.");
}
//if file size is smaller than 4MB, call API to directly upload
else
{
blob.UploadFile(filePath);
Console.WriteLine(filePath + " was uploaded directly and successfully.");
}
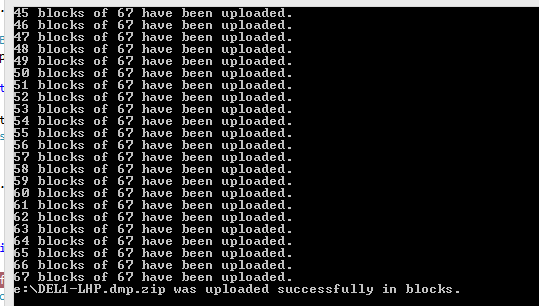
Block Blob的每一个单元块(Block)的大小最大可为4MB,上例中将本地文件拆分成多个500KB的块数据,然后一块块上传。在上传每个数据块时,为了防止网络问题或者服务器异常,代码中加入了while循环来实现重试,保证每个数据块都能最终上传到WAS中,当所有的数据块上传完毕之后,客户端上传块文件对应的序号(串),使得WAS在云端“组装”出源文件的副本。示例代码的运行结果如图。
由于在拆分过程中,最后一个数据块很可能达不到500KB,故单独进行处理。
在上述基础上,开发者可以进行上传流程的优化,实现更优的数据交互效率——主线程将文件拆分成数据块之后,开启多个子线程来完成数据块的上传,主线程负责监督子线程的上传状态和后续任务分配,并在所有数据块上传完毕之后,主线程完成Block ID串的上传。
小结:
传输文件到公有云存储WAS中时,主要有以下方法,其特点各异,开发者可以针对不同场景选用最优的实践方式。
- 使用现成的界面化工具:简便快速,无需开发基础。
- 使用流行的脚本工具:较适合整体数据搬移,如本地文件系统搬移到WAS。
- 使用Azure SDK中提供的API上传数据文件:适用于直接集成到开发项目代码中。
- 调用REST API上传文件(数据):适用于跨平台的开发语言,脱离OS及开发语言的限制。
- 拆分大数据文件成多个数据块,结合SDK API或者REST API实现多线程上传:适用于传输单个大文件,要求传输性能优于SDK API。