Real-World Live Tiles: Working with Live Tiles in Windows 8 Apps
 Some teammates and I have built a “Contoso Food & Dining” app that surfaces top restaurants and their reviews from Yelp based on your location. We built this app as a reference application to be published on MSDN. (NOTE: I also have another article on building secondary tile support for this app.)
I owned implementing live tiles. Live tiles should only be used to update the tile when you have fresh, relevant content. At a high level, we knew that we wanted something around pushing the latest online Yelp reviews for a restaurant to the tile. I started my investigation into what this should look like by reading Choosing a notification delivery method, which details the four mechanisms for delivering a notification to our tile:
- Local - a set of API calls that send notifications while your app is running, directly updating the tile or badge, or sending a toast notification
- Scheduled - a set of API calls that schedule a notification in advance to update at the precise time you specify
- Periodic - notifications that update tiles and badges regularly at a fixed time interval by polling a cloud service for new content
- Push - notifications sent from a cloud server, even if your app isn't running
I strongly recommend that you read this article first to determine the best way to make your tile “live”. (Note that the article is not limited to tile notifications; it covers badge updates and toast notifications as well.)
Looking through the different notification types, I quickly eliminated “scheduled” as an option, because I don’t know when new reviews will be published on Yelp to schedule them in advance; a polling or push mechanism when there is an update on Yelp would make more sense. I then brought the decision to the team: local vs. periodic or push? With the periodic or push options, we would have to write a server-side component in the cloud. This is not hard from a technical standpoint (and with Windows Azure Mobile Services it gets even easier!), but it is hard in other regards – we would have an obligation to maintain the server-side code for the lifetime of the reference app, and if it’s on MSDN, that could be a very long time. Plus there is an ongoing cost associated with running code in the cloud. In the end, our team decided against having a server-side component associated with our app, so I would need to implement local notifications where the app directly updates the tile.
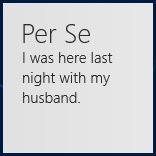
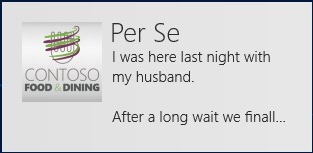
Next, I had to choose which tile template to use to surface the review. I wanted to display the name of the restaurant, the latest review from that restaurant, and a restaurant image from Yelp. I browsed through the list of tile templates. For square tiles, the templates are either text-only or image-only unless you use a “peek” template that animates between 2 different square tiles. I chose TileSquarePeekImageAndText02 since it had a header string in larger text (for the restaurant name) and the smaller text (for the restaurant review) wraps. Here’s a sample of what the template looks like:
I wrote a method called SendLiveTileUpdate() and called it from the code that loads the restaurant details whenever the user navigates to a specific restaurant’s page. The restaurant detail page that was viewed will push its restaurant name, latest review comment, and image to the square tile on the Start Menu using the “peek” template. This live tile will expire after 1 day and go back to the default tile with the Contoso logo.
In the code, I get the template and fill out its 2 text properties, putting the restaurant name in the first text block (which is that larger header text) and the restaurant review in the second text block (which is the three lines of smaller wrapping text). Then I put the restaurant image as the top part of the peek animation, also specifying relevant “alt” text. Finally, I create a new tile notification, set it to expire in 1 day, and update the tile.
private void SendLiveTileUpdate()
{
XmlDocument tileXml = TileUpdateManager.GetTemplateContent(TileTemplateType.TileSquarePeekImageAndText02);
XmlNodeList tileTextAttributes = tileXml.GetElementsByTagName("text");
tileTextAttributes[0].InnerText = this.Restaurant.Name;
tileTextAttributes[1].InnerText = this.Restaurant.Reviews[0].Comment; // this will grab the latest review text
XmlNodeList tileImageAttributes = tileXml.GetElementsByTagName("image");
((XmlElement)tileImageAttributes[0]).SetAttribute("src", this.Restaurant.ImagePath);
((XmlElement)tileImageAttributes[0]).SetAttribute("alt", this.Restaurant.Name + " image");
TileNotification tileNotification = new TileNotification(tileXml);
tileNotification.ExpirationTime = DateTimeOffset.UtcNow.AddDays(1);
TileUpdateManager.CreateTileUpdaterForApplication().Update(tileNotification);
}
Here are some screenshots, although you don’t get the full effect of the peek animation (I had to take screenshots of the top and bottom part of the tile separately since the tile animates between them):
This looks decent in the screenshots above, but there were issues for some restaurants. The next design decision that I made was to replace the restaurant’s image from Yelp with our Contoso logo, for multiple reasons:
- Yelp images can be low-quality, which makes the tile look unprofessional
- Restaurants on Yelp are not required to have images, so some restaurants may not have one at all
- It can sometimes be confusing and difficult to locate your app on the Start Menu when the image on the tile completely changes (I’ve found this for other apps that I’ve installed that have live tile updates)
Here is the new code to enable this, which replaces the image-setting code in the block above:
XmlNodeList tileImageAttributes = tileXml.GetElementsByTagName("image");
((XmlElement)tileImageAttributes[0]).SetAttribute("src", "ms-appx:///Assets/tile-150.png");
((XmlElement)tileImageAttributes[0]).SetAttribute("alt", "Contoso Food & Dining logo");
So things were looking pretty good, except that I realized that we should now have a wide tile. If you reference the guidelines on tiles, it says:
- Use only a square tile if your app will not use tile notifications to send updates to the user. Wide tile content should always be fresh and regularly updated. If you aren't using a live tile, do not provide a wide logo in the manifest.
- Use the wide size tile only if your app has new and interesting content to display to the user and those notifications are updated frequently (at least weekly).
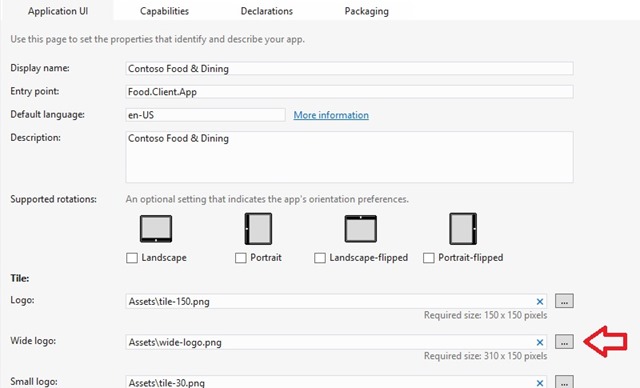
You can define a wide tile by creating a default wide tile in the package manifest. In Visual Studio, double-click on Package.appxmanifest in the Solution Explorer. In the Application UI tab under the Tile section, point to an image (which you should include in your Visual Studio project) that is 310x150 pixels.
Now, we need to modify our code above to also include a notification for a wide tile. I again looked through the templates for wide tiles, and chose an image-and-text template that optimizes to have more room for the review text and a smaller image. Again, I wanted header text and smaller text that would wrap. So I went with TileWideSmallImageAndText04.
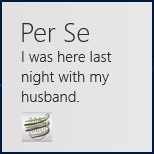
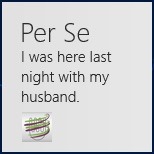
By default, there is a logo in the lower left-hand corner for both the square and the wide tiles, like so (these are the square tile top and bottom of the peek animation and then the wide tile):
This is redundant since I am now using our logo as the image. You can remove this logo from the lower left corner by setting the branding = none on your binding. Here is how I am doing it for the square tile (and I did the same thing for the wide tile as well):
var sqTileBinding = (XmlElement)tileXml.GetElementsByTagName("binding").Item(0);
sqTileBinding.SetAttribute("branding", "none"); // removes logo from lower left-hand corner of tile
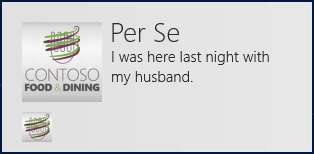
The resulting tiles now look like this (these are the square tile top and bottom of the peek animation and then the wide tile):
Here is the final code:
/// <summary>
/// Sends a live tile update with the restaurant name, its latest review, and our app logo to our tile.
/// The update includes both a square and wide tile payload.
/// </summary>
private void SendLiveTileUpdate()
{
// Create a live update for a square tile
XmlDocument tileXml = TileUpdateManager.GetTemplateContent(TileTemplateType.TileSquarePeekImageAndText02);
XmlNodeList tileTextAttributes = tileXml.GetElementsByTagName("text");
tileTextAttributes[0].InnerText = this.Restaurant.Name;
tileTextAttributes[1].InnerText = this.Restaurant.Reviews[0].Comment; // this will grab the latest review text
XmlNodeList tileImageAttributes = tileXml.GetElementsByTagName("image");
((XmlElement)tileImageAttributes[0]).SetAttribute("src", "ms-appx:///Assets/tile-150.png");
((XmlElement)tileImageAttributes[0]).SetAttribute("alt", "Contoso Food & Dining logo");
var sqTileBinding = (XmlElement)tileXml.GetElementsByTagName("binding").Item(0);
sqTileBinding.SetAttribute("branding", "none"); // removes logo from lower left-hand corner of tile
// Create a live update for a wide tile
XmlDocument wideTileXml = TileUpdateManager.GetTemplateContent(TileTemplateType.TileWideSmallImageAndText04);
XmlNodeList wideTileTextAttributes = wideTileXml.GetElementsByTagName("text");
wideTileTextAttributes[0].AppendChild(wideTileXml.CreateTextNode(this.Restaurant.Name));
wideTileTextAttributes[1].AppendChild(wideTileXml.CreateTextNode(this.Restaurant.Reviews[0].Comment));
XmlNodeList wideTileImageAttributes = wideTileXml.GetElementsByTagName("image");
((XmlElement)wideTileImageAttributes[0]).SetAttribute("src", "ms-appx:///Assets/tile-150.png");
((XmlElement)wideTileImageAttributes[0]).SetAttribute("alt", "Contoso Food & Dining logo");
var wideTileBinding = (XmlElement)wideTileXml.GetElementsByTagName("binding").Item(0);
wideTileBinding.SetAttribute("branding", "none"); // removes logo from lower left-hand corner of tile
// Add the wide tile to the square tile's payload, so they are sibling elements under visual
IXmlNode node = tileXml.ImportNode(wideTileXml.GetElementsByTagName("binding").Item(0), true);
tileXml.GetElementsByTagName("visual").Item(0).AppendChild(node);
// Create a tile notification that will expire in 1 day and send the live tile update.
TileNotification tileNotification = new TileNotification(tileXml);
tileNotification.ExpirationTime = DateTimeOffset.UtcNow.AddDays(1);
TileUpdateManager.CreateTileUpdaterForApplication().Update(tileNotification);
}
Some final considerations on tiles:
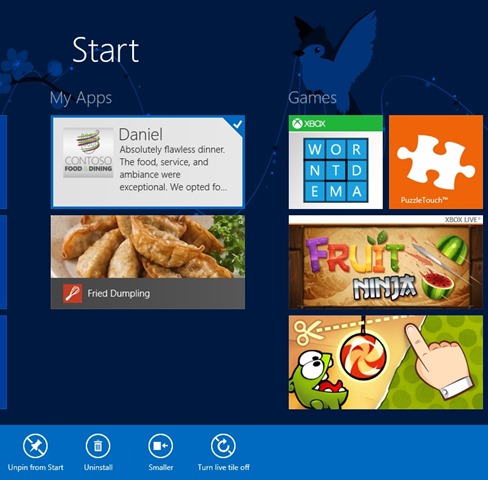
- If you offer a wide tile, the user can resize the tile from wide to square or square to wide at any time. (See the third option in the AppBar below.) That is why we always include both a square and wide tile update in our notification.
- The user can turn live tiles off at any time. See the fourth option in the AppBar below.
Resources – Live Tiles
Guidelines and checklist for tiles and badges
Choosing a notification delivery method
Tile template catalog and enumeration
Quickstart: Sending a tile update (this is a local update from your app)
How to schedule a tile notification
Quickstart: Setting up periodic notifications for tiles
Quickstart: Sending a tile push notification
Are you interested in further tips on Windows 8 development? Sign up for the 30 to launch program which will help you build a Windows Store application in 30 days. You will receive a tip per day for 30 days, along with potential free design consultations and technical support from a Windows 8 expert. (See https://aka.ms/JenGenApp and click on the appropriate tiles.) Register at https://aka.ms/Jen30TLWin8.


