Build Your Own SKYNET with the Windows Azure Auto-Scaling Application Block (WASABi)–Part 2
Welcome back – this blog post is Part 2 to my previous post to help provide a functional walk-thru of how to install and get up-and-running quickly with the Windows Azure Auto-Scaling Block – also known as “WASABI”.
This walk-through will demonstrate how much time, effort, headaches, and money you can save with this fantastic new (and *free) application framework for running a highly dynamic Windows Azure infrastructure that can easily scale up or down (automatically) with both predictive and reactive rule capabilities to handle almost any business scenario (seen or unforeseen).
Rule Types in the Windows Azure Auto-Scaling Block:
There are (2) basic rule types to consider:
Constraint rules:
- Use timetables (with recurrences) to proactively set limits on the number of instances for handling peaks & valleys.
- Have a rank to determine precedence if there are multiple overlapping rules.
Reactive rules:
- Use conditions to reactively adjust the number of running instances or perform some other action like notify an operator to take some action.
- Reactive rules would be typically based on performance counters and other potential system metrics (like Azure Queue length).
- You also have the ability to define custom business metrics – which in turn, can be used to trigger reactive actions.
- These capabilities help you to respond to unexpected bursts or collapses in your application’s workload.
- Guard your SLA and Save Money.
Scenario:
I chose the simplest of scenarios to help illustrate the capabilities of the WASABI block, so the scenario we will cover will be an Azure Worker Role that monitors an Azure Queue to determine whether to scale the number of Worker Role instances Up or Down with a minimum of (1) instance and a maximum of (4) instances.
Before you begin:
You will need to have the following items to make it all work:
- A Windows Azure account and access to the Azure Management Portal- you can also try Azure for free for 30 days at: https://windowsazurepass.com
- Visual Studio 2010 with the Azure Tools for Visual Studio 2010 downloaded and installed from: https://www.microsoft.com/windowsazure/sdk
- An X.509 Certificate for the Windows Management API https://www.davidaiken.com/2009/12/21/how-to-create-a-x509-certificate-for-the-windows-azure-management-api
- The Windows Azure Storage Explorer from: https://azurestorageexplorer.codeplex.com
Getting Started:
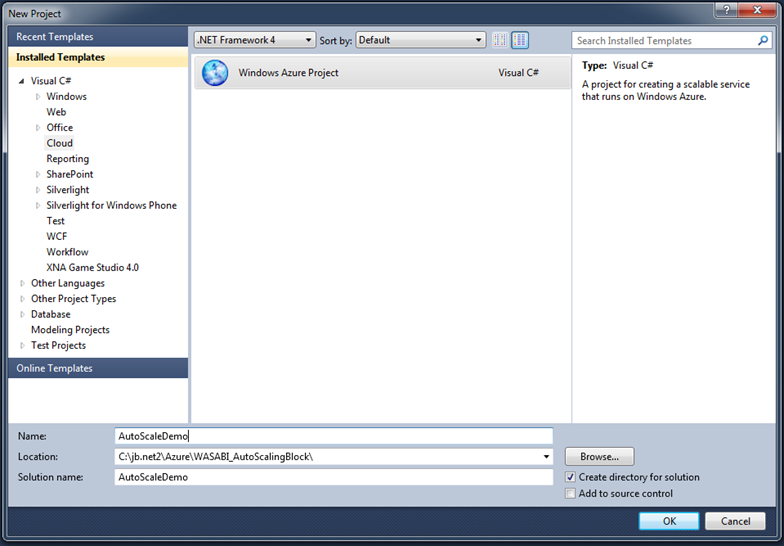
Now, from Visual Studio 2010 – File / New Windows Azure Project:
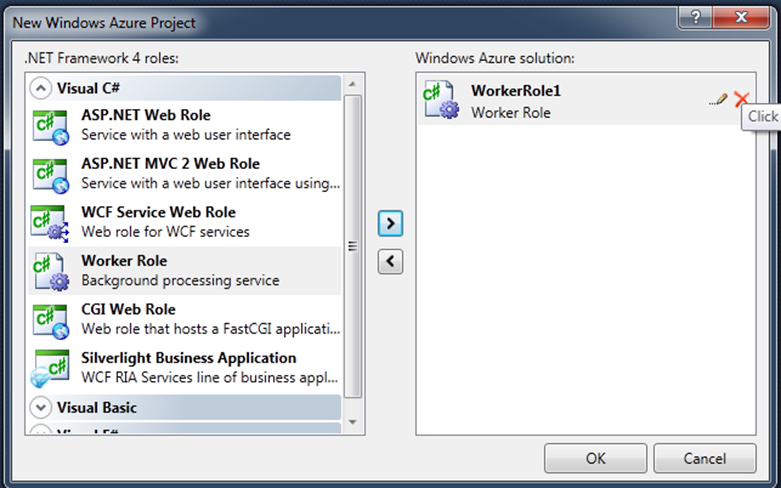
Select a Worker Role and let Visual Studio create your project and Solution.
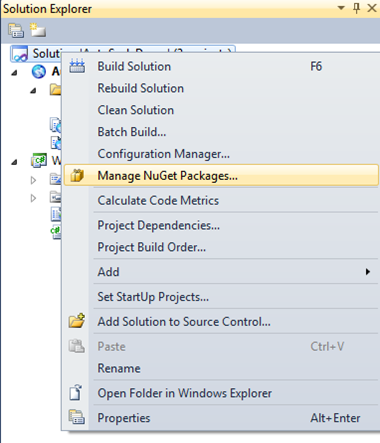
If you have NuGet installed, its as simple as right-clicking on your solution and selecting “Manage NuGet Packages”
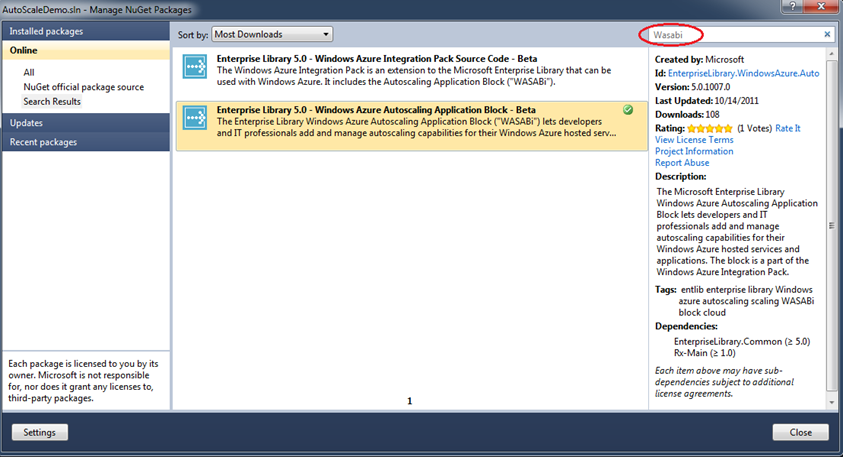
Once we have a base initial project, the first step is to find and install the NuGet packages – simply search on “WASABI” and you should get the two packages listed below.
The first selection is for the Windows Integration Pack (beta) Source code – I would suggest downloading and exploring this package if you want to see all the underpinnings of the Auto-scaling Application block. For purposes of this demo – select the second option to install the WASABi Block (Beta).
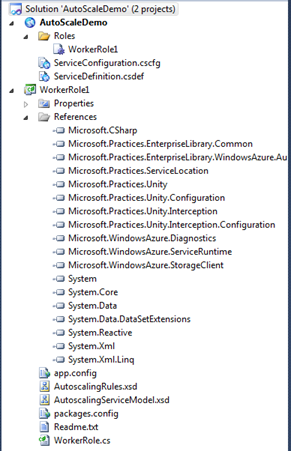
Once the NuGet package has been installed, you will notice that all of the prerequisites and dependencies have been also been installed for you.
The next step is to open the Worker.cs file in your project and add the following references for the Enterprise Library blocks:
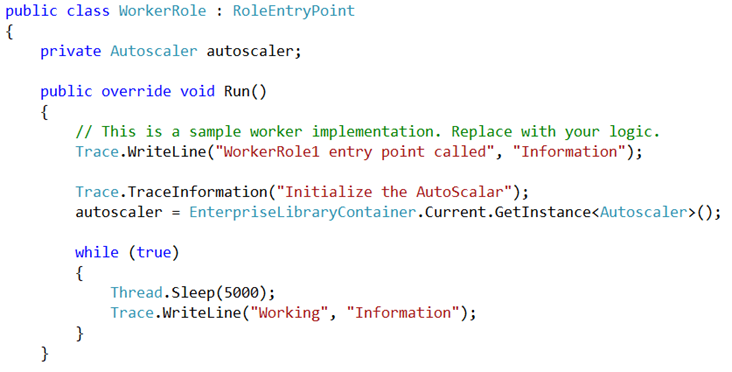
The next step is to modify the Worker Role to declare an initialize an Autoscaler object and set it to the current instance – along with a few handy trace statements:
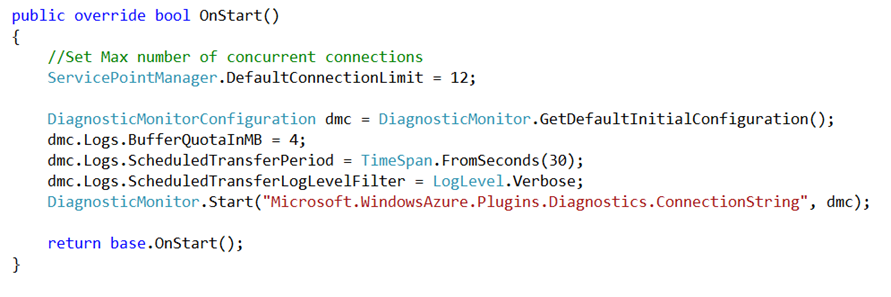
After that, we override the OnStart() method to set-up the default connection limit and diagnostic monitor configuration. The diagnostic monitor set-up is super important because this allows the Auto-Scaling block to capture and monitor system usage metrics.
 The next step is to configure the Azure Auto-Scaling block with the Enterprise Library Configuration Console by right-clicking on the “app.config” file in the solution and selecting the option to “Edit Configuration File”:
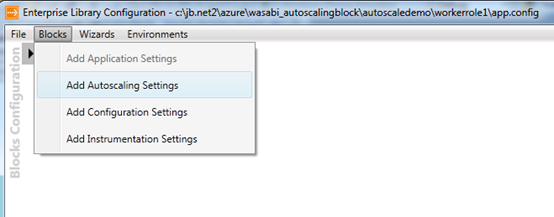
From there, you can select the option to “Add Autoscaling Settings”:
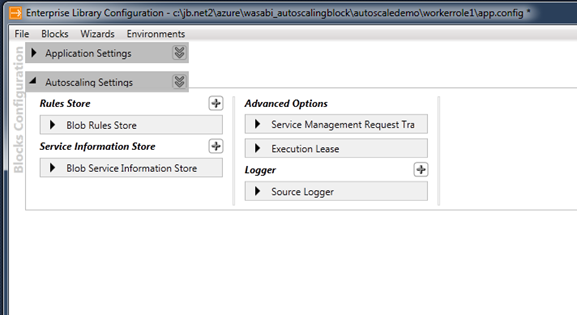
Now you should have the following screen displayed to allow you to configure the Auto-Scaling Block:
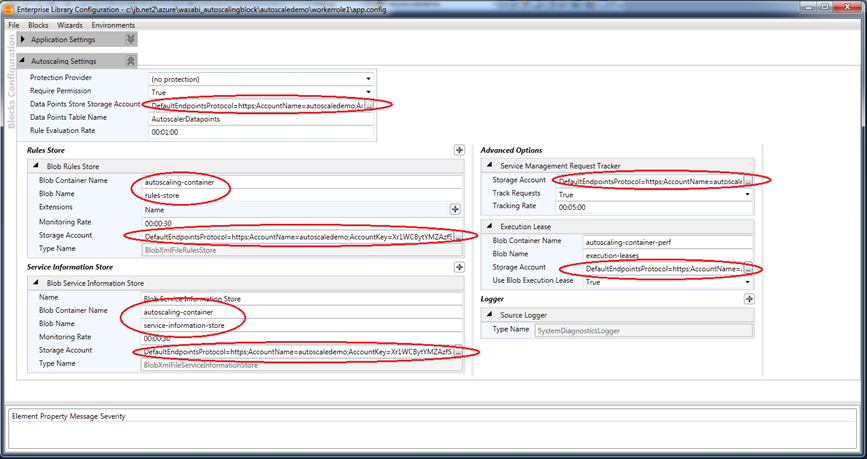
Note in the settings below, I configured the Application Block to use my Azure Storage account credentials to allow the block to retrieve the rules and service information files from my Azure Blob storage account that I had previously set-up for easy rule modifications on the fly:
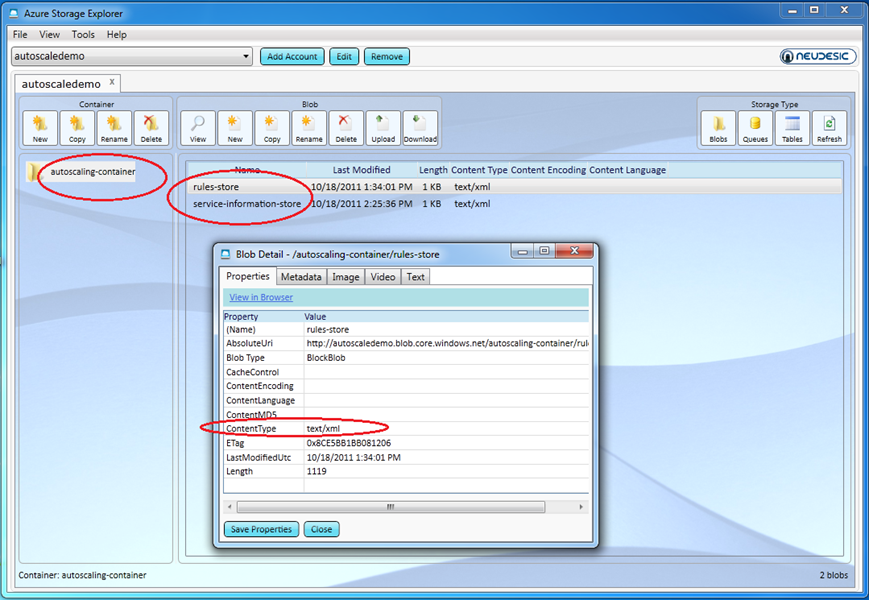
Next, we use the Azure Storage Explorer application to create an Azure container named “autoscaling-container” and (2) Blobs:
- Rules-store – this blob will hold the contents of the rules.xml file for runtime evaluation.
- Service-information-store – this blob contains the contents of the services.xml file.
*Super Important* – note the content type above – you must manually change the content type for these (2) blobs to “text/xml” after you create the blobs – the default content type is “application/octet-stream” – which will not work for our demo. Make sure you get this right.
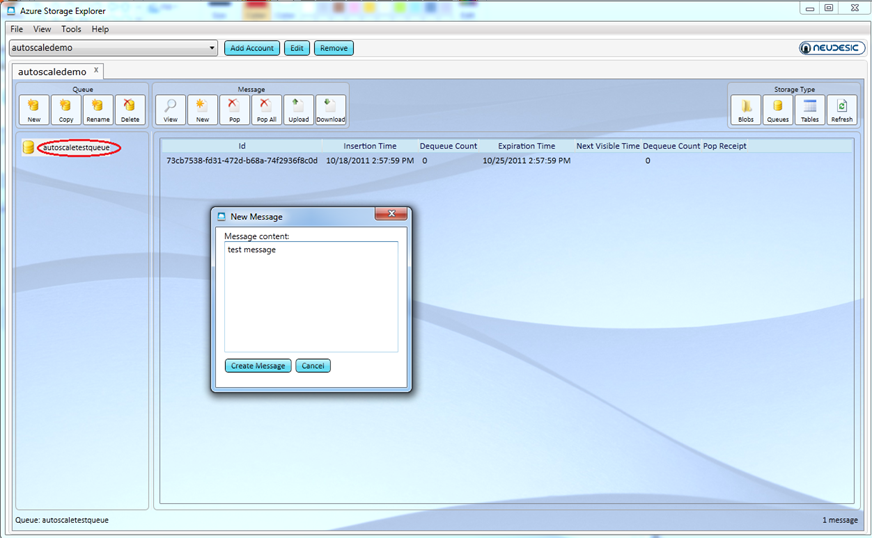
Another key component of our demo is to create an Azure Queue that we can use to have our Auto-Scaling block monitor in order to decide whether to spin-up (or down) new Worker Role instances.
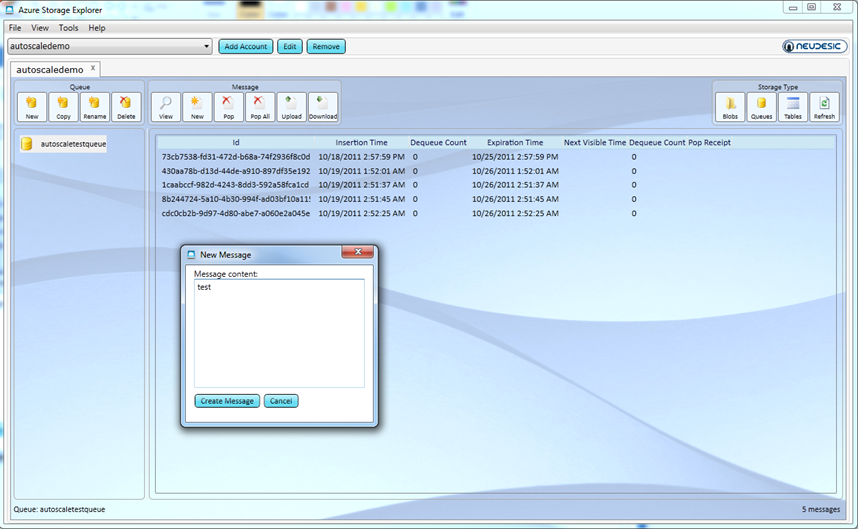
Note that we can use the Azure Storage Explorer to manually create and add new messages to our Queue – which will be very handy for experimenting with the Windows Azure Auto-Scaling block and testing our rule behaviors in response to the Queue length.
Setting the Rules:
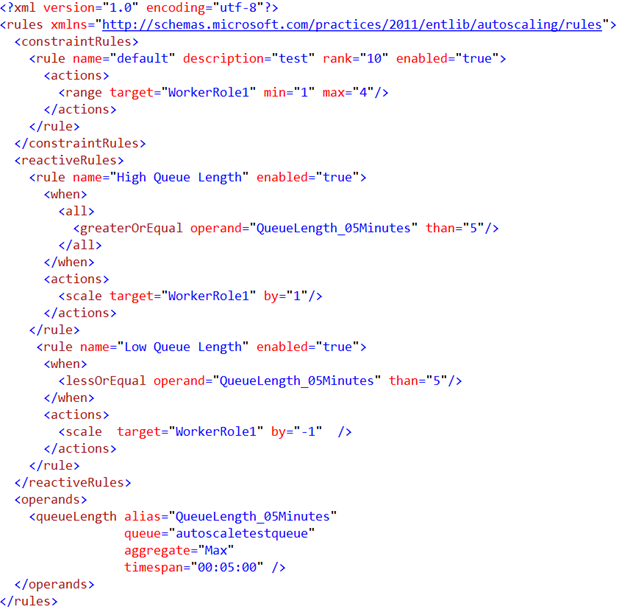
Below is our sample rules.xml file that defines the rules for our scenario. Note that I have uploaded the contents of this file to my azure Blob named “rules-store” – this allows me to easily change the rules “on-the-fly” by simply editing the contents of the Azure Blob.
As you can see from the above rule definition, we have defined the following criteria:
- A rule ranking of “10” to establish evaluation order and precedence for any overlapping rules.
- A Minimum Worker Role instance count of (1) and a Maximum of (4).
- Rule to increase the number of instances by (1) whenever the Azure Queue is greater or equal to (5).
- Rule to decrease the number of instances by (1) whenever the Azure Queue is greater or equal to (5).
- Information about the Azure Queue to monitor “autoscaletestqueue”, what statistics to monitor (Max number of entries), and time period (within a 5 minute period).
Auto-Scaling Services Definition:
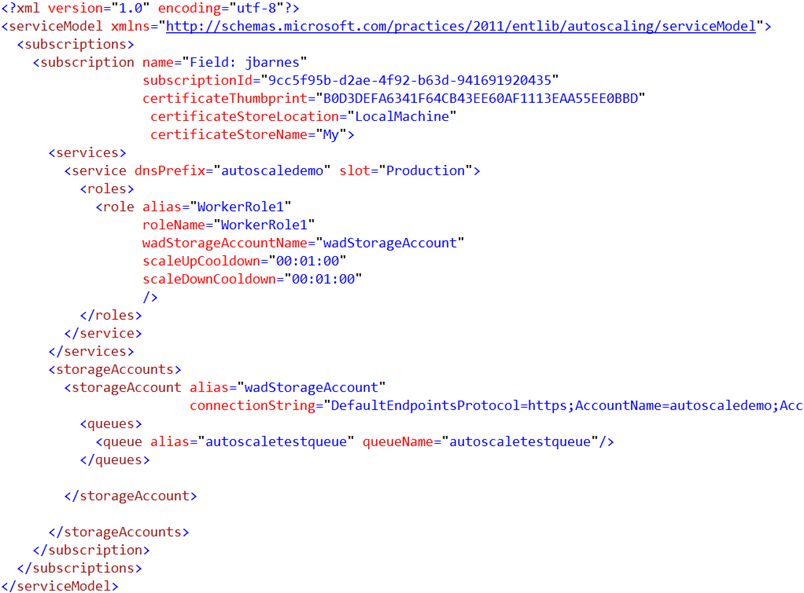
Below is a snapshot of the services.xml file that defines our Azure service and storage account information:
Note that I have uploaded the contents of this file to my Azure Blob named “service-information—store” – this allows me to easily change the service information by simply editing the contents of the Azure blob.
*Important* – pay close attention to this configuration – the settings in tis file must exactly match your specific Windows Azure environemnt settings in order to work correctly. Pay careful attention to the “dnsPrefix” setting and the “slot” (Production or Staging) setting.
Ready for Testing:
At this point, after configuring everything and uploading to Windows Azure, we are ready to begin testing the azure Auto-Scaling block.
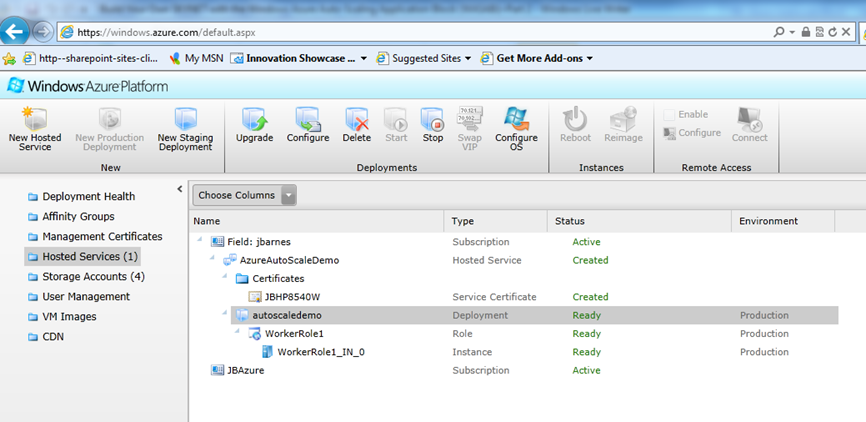
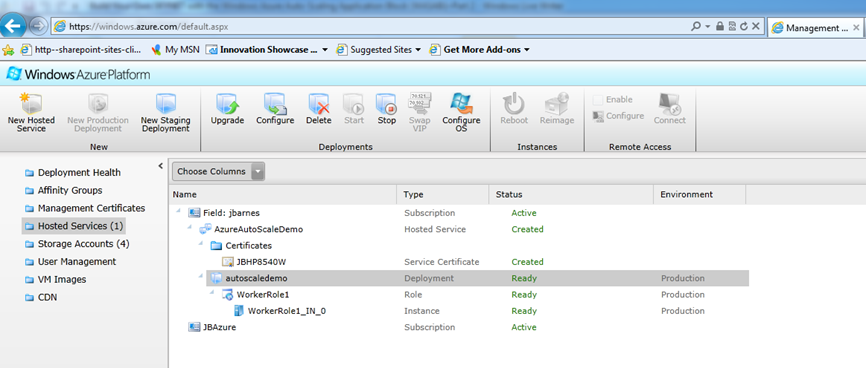
To see the WASABI block in action, we will start our Azure application and note the default behavior in the Azure Management portal – which is to have only (1) instance running due to the fact that we have < 5 messages in our Azure Queue. Remember that our rule is to increase the number of instances of the azure Queue length equals 5 or greater.
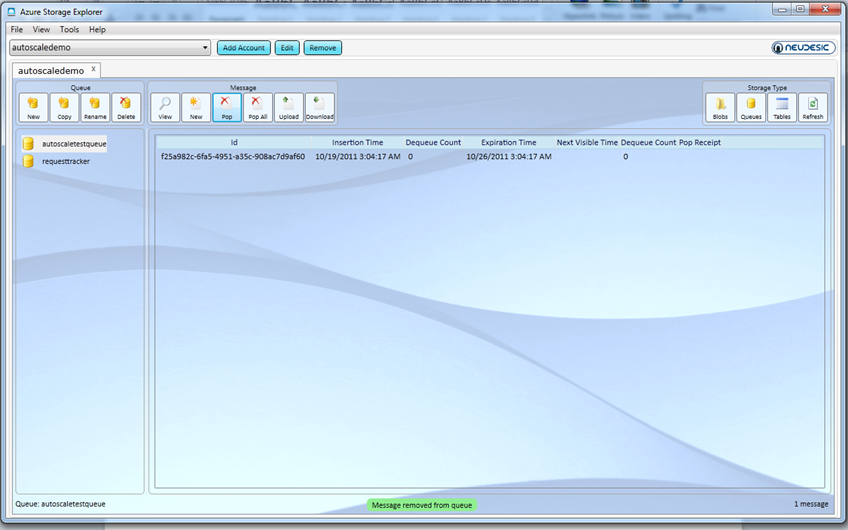
Now, if we manually add a few messages to our Azure Queue using the Azure Storage Explorer tool, we can quickly make sure that there are (5) or more messages in the Queue – which will trigger the auto-Scaling block to spin-up more instances to handle the load:
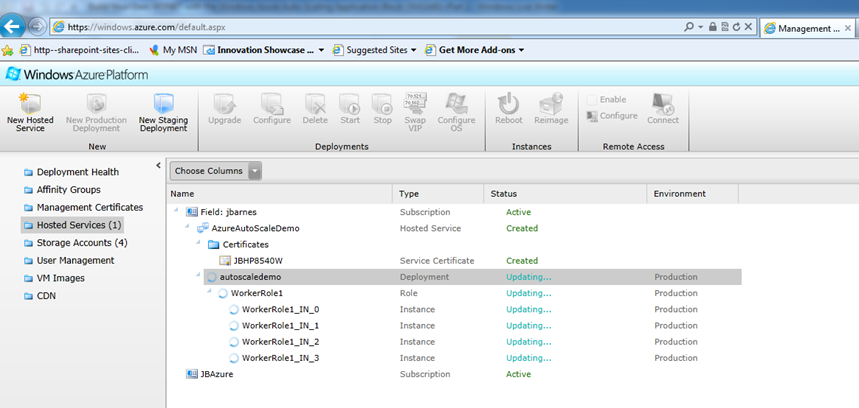
A few minutes after adding (5) or messages to our Azure Queue – we can see that the Auto-Scaling block has automatically started additional Worker Role instances – up to the “max” of (4) running instances!
Ok, so the rule for detecting increased load worked great – and we have automatically spun-up the maximum desired instances.
Now let’s see what happens when we delete all but one entry form the Azure Queue:
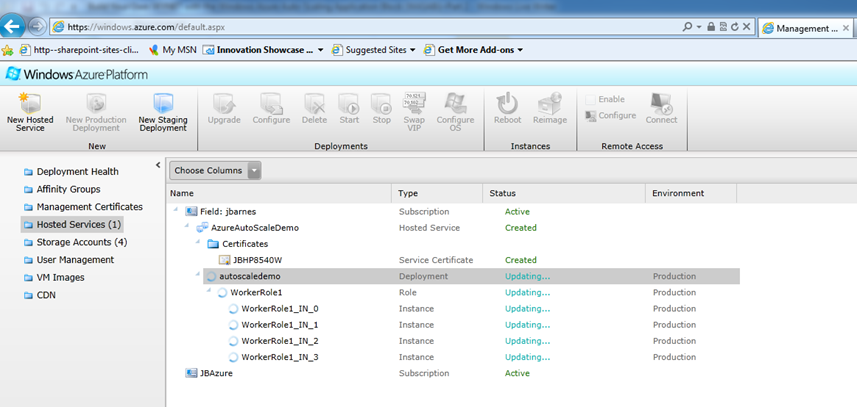
Now, after a few minutes, when we look at the Windows Azure Management Portal, we see that our “Low Usage” rule has been activated and the Auto-Scaling block is now decreasing the number of running instances – and will quickly get back down to (1) running instance – our desired minimum.
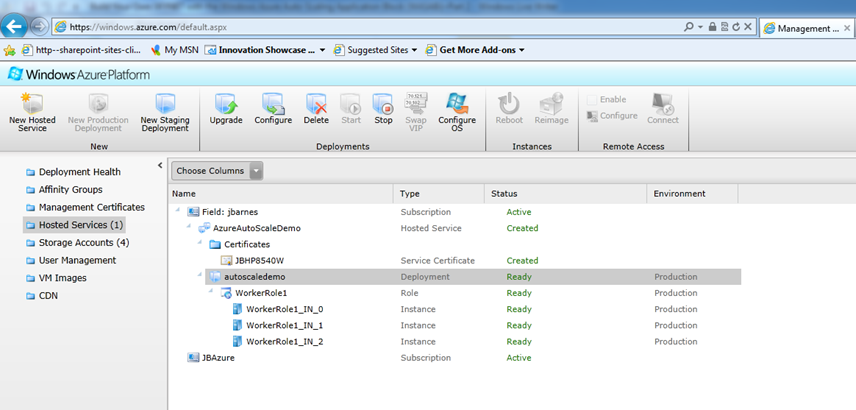
Below, we see the results of the first decrease of the number of running instances by (1). This will continue to automatically decrease as Azure Queue length is evaluated every 5 minutes.
And after a few more minutes, we get right back down to only (1) running instance:
And there you have it! All these instances were scaled up and down automatically without any human intervention!
This was just a simple walk-thru and demo of the new capabilities in the Windows Azure Auto-Scaling Application Block – this is only a small sample of the automation capabilities exposed by the block.
I would encourage you to try it for yourself and see how easily you can create a truly dynamic, elastic, and “self-aware” Azure cloud infrastructure.
You can download the sample demo code here. Please remember to modify the project for your own Azure credentials for storage and host environment settings.
Happy Auto-Scaling!

