Announcing Microsoft® Visual Studio® LightSwitch™ Beta 2
I’m happy to announce that as of 10:00 AM PDT today Microsoft® Visual Studio® LightSwitch™ Beta 2 is available for download! MSDN subscribers using Visual Studio 2010 can download the beta immediately with general availability on Thursday, March 17.
- Download LightSwitch Beta 2 (MSDN Subscribers with Visual Studio 2010)
- Thursday's 10:00 AM PDT general availability download will be here.
Please see “What’s New in Beta 2” for information on new capabilities, installation options, and compatibility notes for this release. Unfortunately, due to the many improvements in Beta 2, projects created in Beta 1 cannot be opened or upgraded. You can find instructions for moving your existing projects forward on the LightSwitch team blog.
We are happy to announce that Beta 2 comes with a “Go Live” license which means you can now start using Visual Studio LightSwitch for production projects!
Since the launch of Beta 1, the team has been heads down in working through your feedback and has made some improvements that I think you’ll agree are pretty cool.
- Publish to Azure: the Publish Wizard now provides the ability to publish a LightSwitch desktop or browser application to Windows Azure, including the application’s database to SQL Azure. The team is planning a detailed tutorial of this experience that will get posted on the team blog later this week.
- Improved runtime and design-time performance: Build times are 50% faster in Beta 2 and we have made the build management smarter to improve iterative F5 scenarios by up to 70%. LightSwitch Beta 2 applications will startup up to 30% faster than Beta 1. New features like static spans will include related data in a single query execution and improve the time to load data on a screen by reducing the total number of server round-trips. The middle tier data load/save pipeline has been optimized to improve throughput by up to 60%.
- Runtime UI improvements: Auto-complete box, better keyboard navigation, and improved end-user experience for long-running operations.
- Allow any authenticated Window user: When Windows authorization was selected in a LightSwitch app, you previously needed to add the Windows users who are allowed to use the application into the User Administration screen of the running application. This is cumbersome in installations where there are a large number of Windows users and when you just wanted to open the app up to all Windows users. The project properties UI now allows you to authenticate any Windows user in a LightSwitch application while still using the LightSwitch authorization subsystem for determining user permissions for specific users.
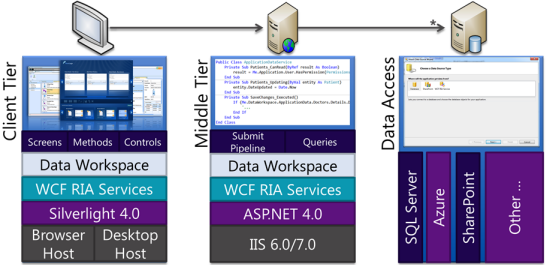
LightSwitch Architectural Overview
Applications you build with LightSwitch follow n-tier best practices and use common .NET technologies that you are probably building upon yourself today. For an overview of LightSwitch architecture, please see "The Anatomy of a LightSwitch Application Series" on the team blog.
I've included a detailed walk through below, to help you get your first LightSwitch application up and running using Beta 2. You may also find the following links useful as you explore LightSwitch:
- LightSwitch Developer Center
- LightSwitch Team Blog
- LightSwitch Feature Matrix
- LightSwitch Forums
- Feedback: Visual Studio Connect
Now on to building your first application!
Tutorial
In this tutorial we are going to build a student-course registration application to be used at a local college. There are six parts to this tutorial.
- Part 1 – Installation
- Part 2 – Creating a New Project
- Part 3 – Starting with Data
- Part 4 – Creating Screens
- Part 5 – Adding Relationships
- Part 6 – Writing Some Code
- Summary
Let’s get going!
Part 1 – Installation
Visual Studio 2010 Professional, Premium, Test Professional or Ultimate users must install Visual Studio 2010 SP1 before installing Visual Studio LightSwitch Beta 2. Visual Studio LightSwitch Beta 1 users should uninstall Beta 1 before installing Beta 2. Also see the Beta 2 readme for late breaking issues. For information on known incompatible releases with Visual Studio LightSwitch Beta 2, please check out the team post.
There are two installation options available from the download link above, a web installer and a DVD ISO image:
- Visual Studio LightSwitch, Beta 2 (x86) – DVD (English). This is an ISO image which can be burned to a disc and used by multiple users (or mounted using a utility).
- Visual Studio LightSwitch, Web Install Beta 2 (x86) – (English). This is a web installer that will download all components incrementally and install them on a single machine.
Unless you plan to take the bits with you or hand around a DVD to co-workers, I recommend using the web installer which will lower your bandwidth requirements and eliminate the need to burn a DVD or mount an ISO.
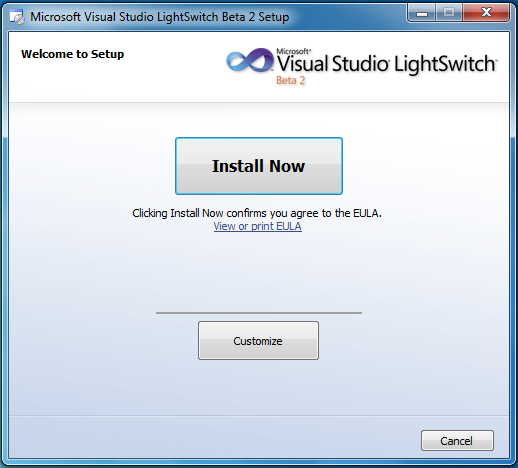
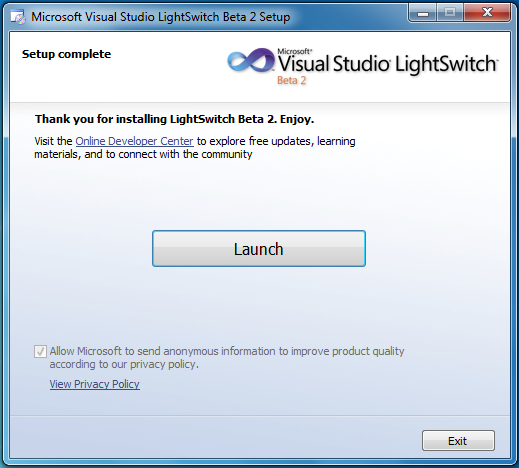
A goal of LightSwitch is to remove the need for configuration, so all you have to do is click “Install Now” to get going. After all components are installed, you can simply click the [Launch] button:
Note: if you had Visual Studio 2010 already installed, you will find the new LightSwitch templates in your installation.
Part 2 – Creating a New Project
In this example, I am building a simple course registration application for the staff at the Office of Registrar of a local college. This application will allow the staff to easily register courses for new or existing students.
To get started, choose File, New Project. If you installed Visual Studio 2010, you will need to select the LightSwitch templates:
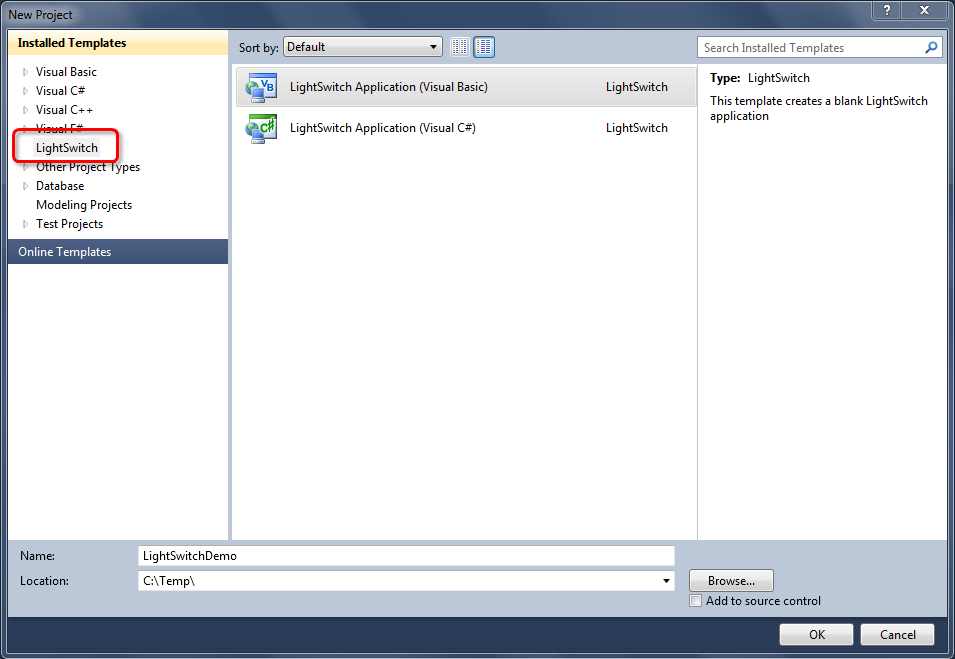
You can choose from Visual Basic or C#. I’m going to pick Visual Basic and call the application “LightSwitchDemo.” Then hit [OK]. After a few moments your new project will come up and we can start adding data.
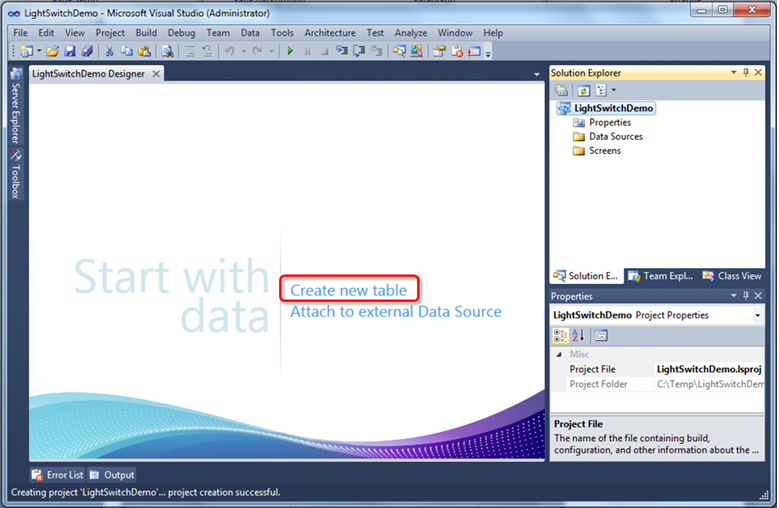
Part 3 - Starting with Data
To get started we need to track students. Because working with data is such a basic operation, the initial designer gives you these options right away. We’ll get started by clicking on [Create new table] .
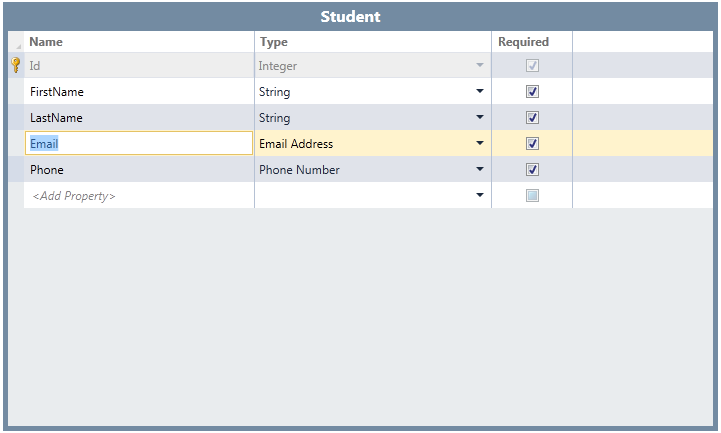
This will bring up the table designer. Start by changing the name of the table to “Student” , which you can do by simply typing in the title bar.

Next, edit the fields for the table to store typical data about a student. Note the usage of domain types like Email Address and Phone Number, which provide built-in validation logic and customizable UI on the screens we create in later steps.
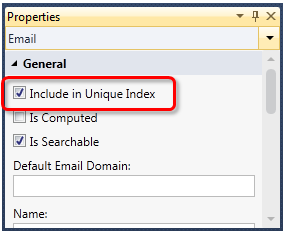
To ensure each student record will have a unique email address- click Select Email field and check the “Include in Unique Index” in Properties. This is a new Beta 2 feature.
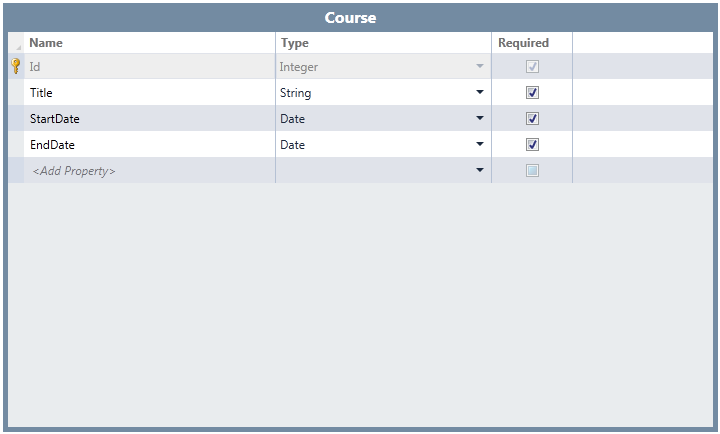
Next we will need a table for courses. To get started, click “New Table” button in the command bar.

Edit the table name to “Course” and add new columns.
At this point we need to create some UI for our application to allow us to edit table data.
Part 4 - Creating Screens
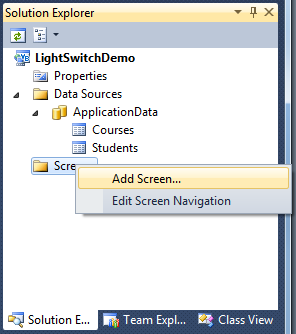
The most common activities for business applications are layout out your data and create screens to work with that data. In this step we will create a couple of screens to allow us to edit the table data. To start, right click the Screens folder in the Solution Explorer and choose "Add Screen".
There are a very common set of screen patterns for working with data and LightSwitch includes those patterns by default. Screen templates are also an extensibility option for LightSwitch, so you should expect Visual Studio partners to add new patterns in the future (or you can create your own with Visual Studio Professional).
For our application let’s create a “New Data Screen” so we can edit our student list. On the Add New Screen dialog, select “New Data Screen”, then select "Student" from the Screen Data combo box:
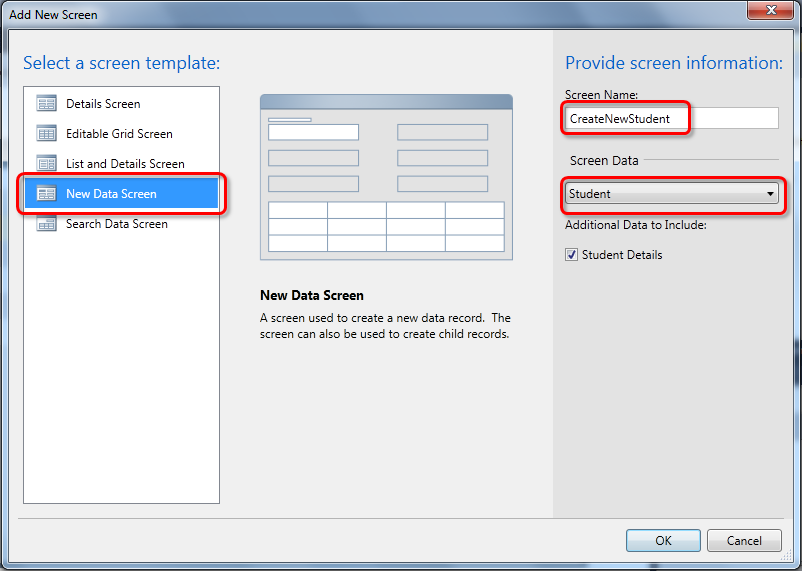
Notice that as you select the Student table, the default Screen Name updates itself to give you a reasonable unique screen name. You can always choose to update this name yourself, if you have your own naming pattern to follow. Once you have made the changes, click [OK] .

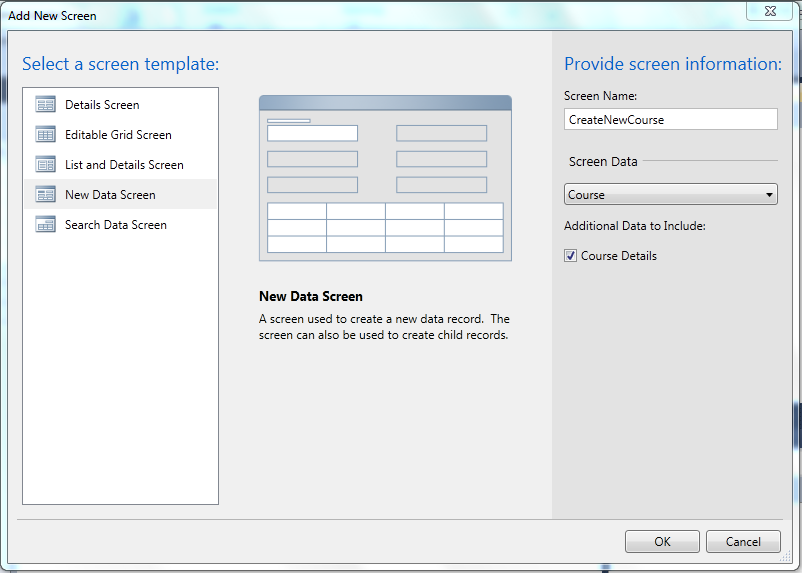
The Screen Designer now appears. For now, let’s just add another screen for the Course table. Again, right click the Screens folder in the Solution Explorer and choose "Add Screen" . On the Add New Screen dialog, select “New Data Screen”, then select "Course" from the Screen Data combo box:
Click [OK] . Then hit F5 (or Debug, Start Debugging from the menu). This will kick off a build of the application and start the running app:
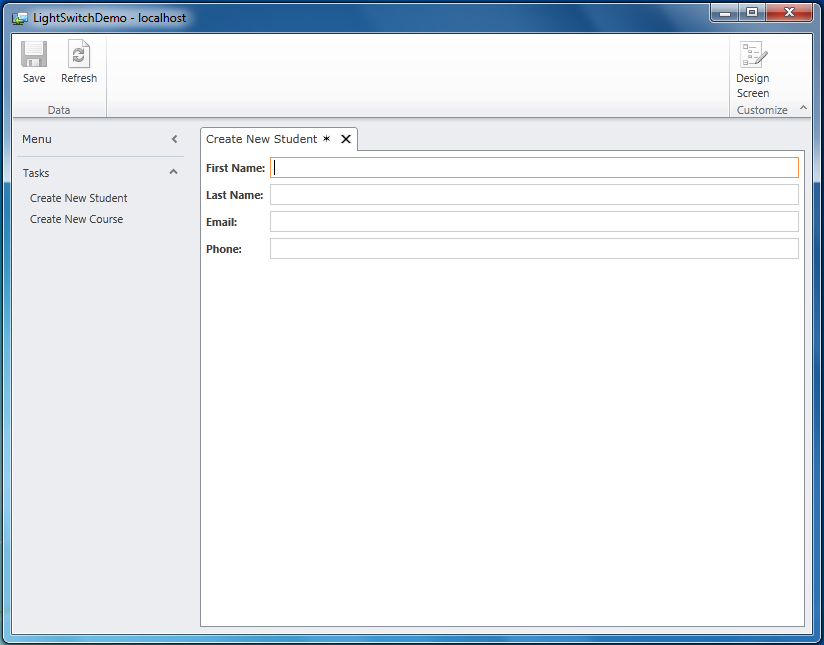
By default your application will be a Windows desktop application. If you have experimented with Beta 1, you will notice that Beta 2 has improved the application start time and performance. The default Office-like theme is more refined and user-friendly. It also provides a better use of the screen real estate. You can now collapse both the task list and the ribbon. In Beta 2, we also set the display name of a field based on camel casing convention. For example, FirstName of the Student table will have “First Name” as its display name by default.
The application shell is another extension option for LightSwitch and we have Visual Studio partners working on creating new ones. This means in the future you’ll be able to select from a set of shells to build an application that looks cool (kind of like selecting PowerPoint slide deck templates).
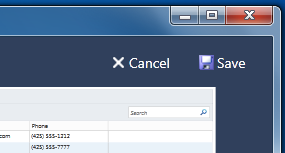
I’ll start by adding my personal information to the database. When done, just click the "Save" ribbon button.
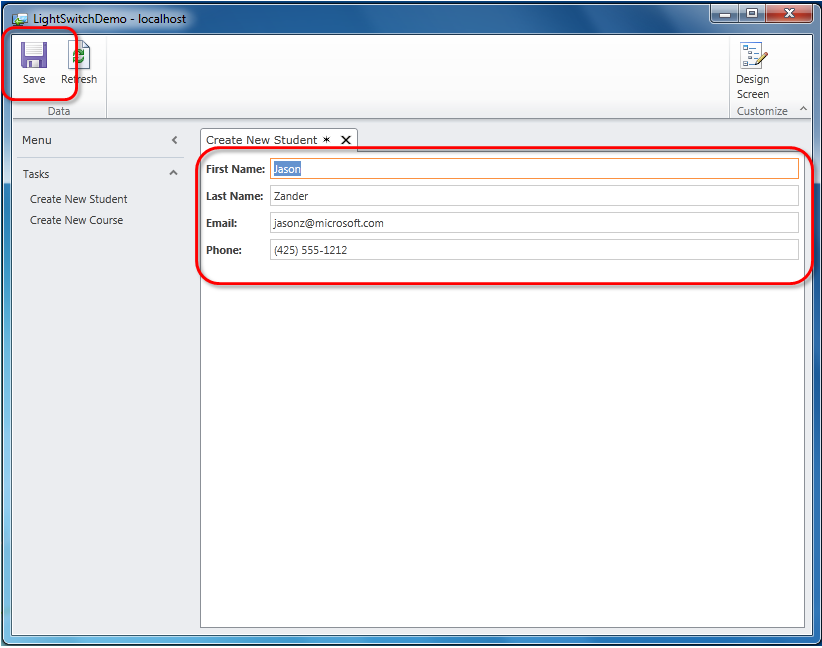
Go ahead and add a few more student and course records.

The two screens make it easy to create new data, but they’re not designed to browse and find existing records. Let’s add a screen to search for students. Close the running application to exit debug mode and return to the Visual Studio IDE. Right click the Screens folder in Solution Explorer and choose "Add Screen".
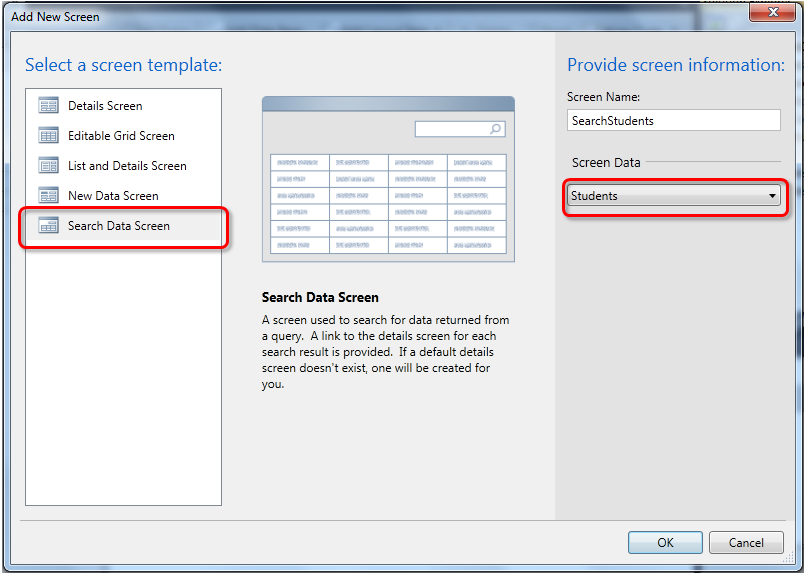
Select the “Search Data Screen” template and then select the “Students” table from Screen Data combo box, and then hit [OK] . Once again the screen designer will appear. Let’s just hit F5 again.
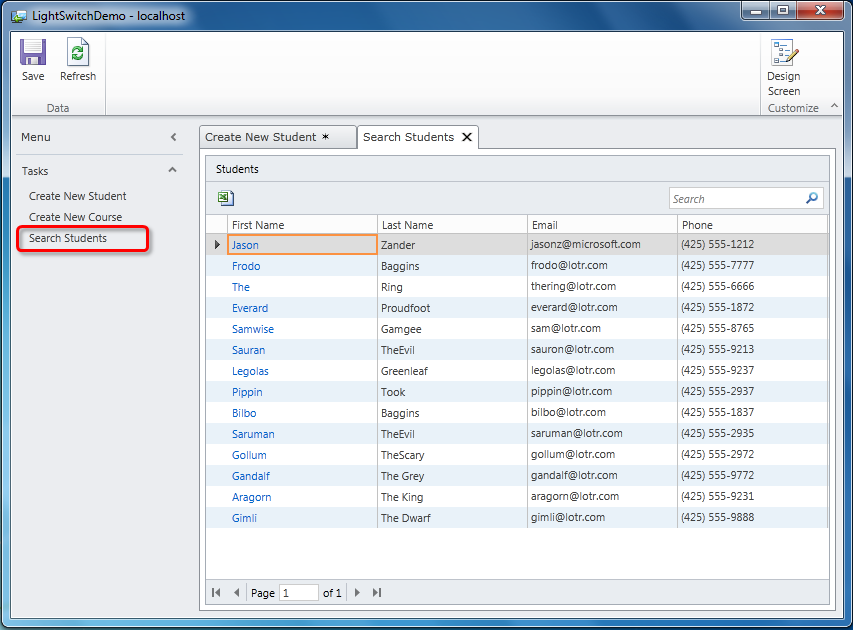
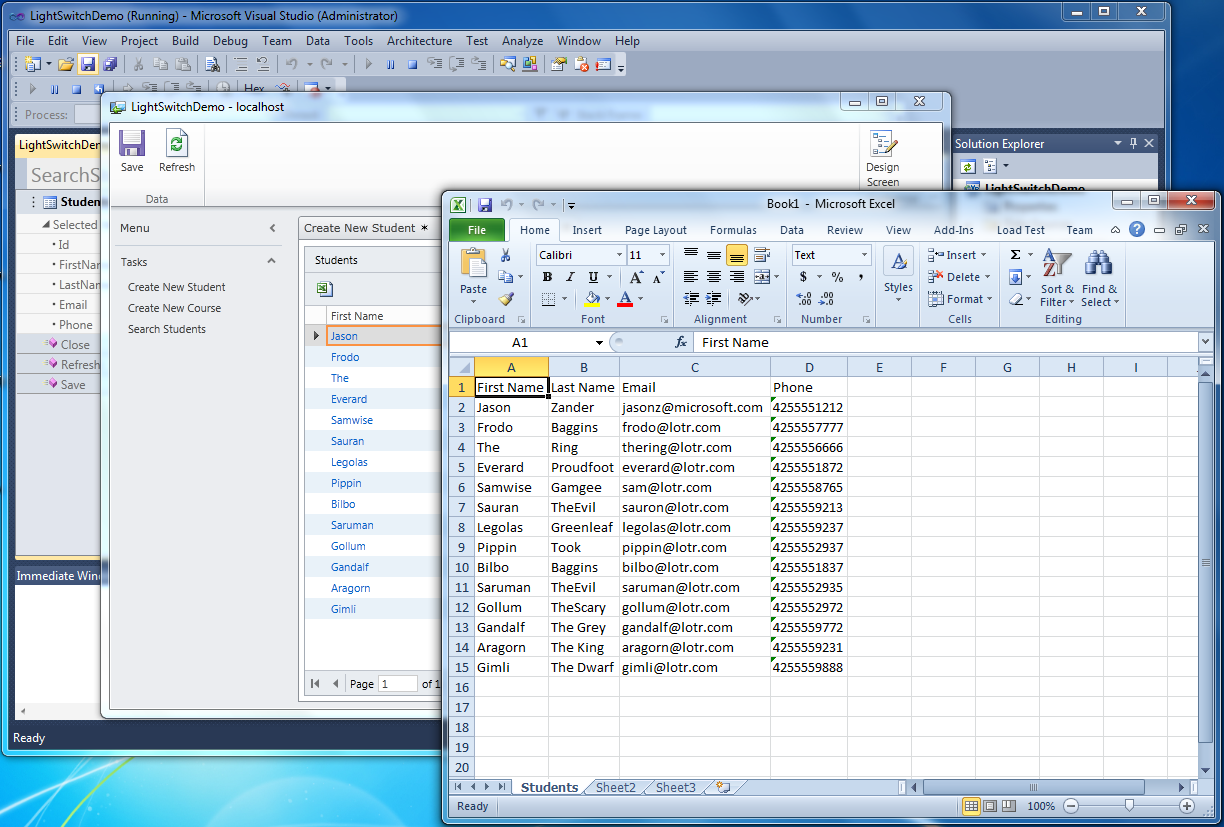
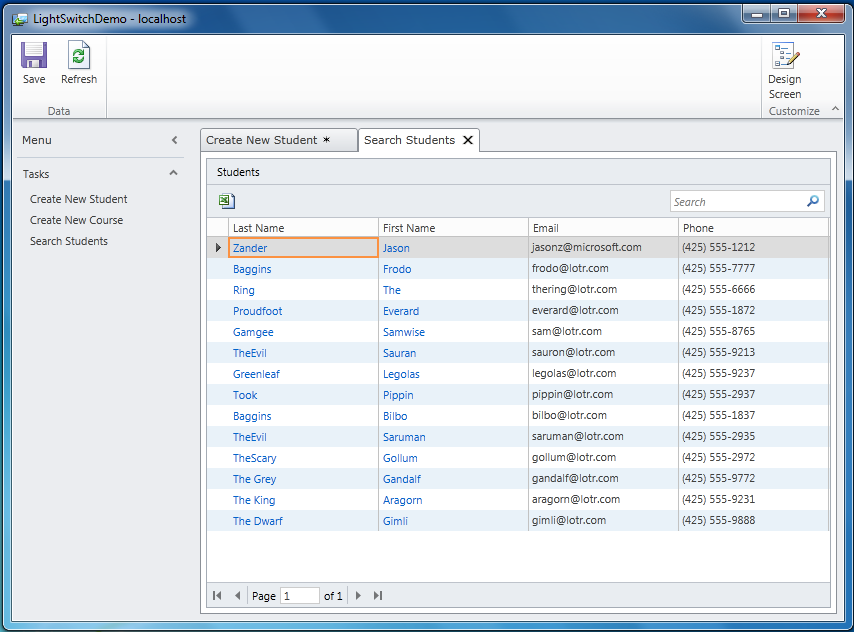
When you select “Search Student” from the task list, you will get the list of all the student data you have entered. Because we picked the Search template, we have searching, sorting, and paging capabilities built into the screen by default.
Another default feature of the desktop application is Office integration. In this case, I can click on the Excel icon and get my data opened as an Excel spreadsheet.

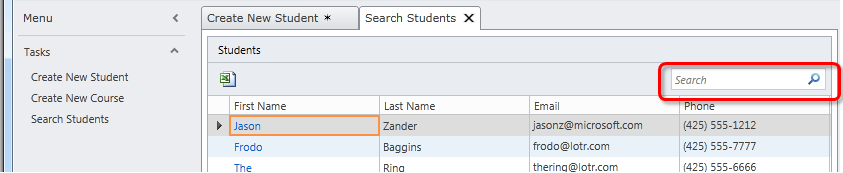
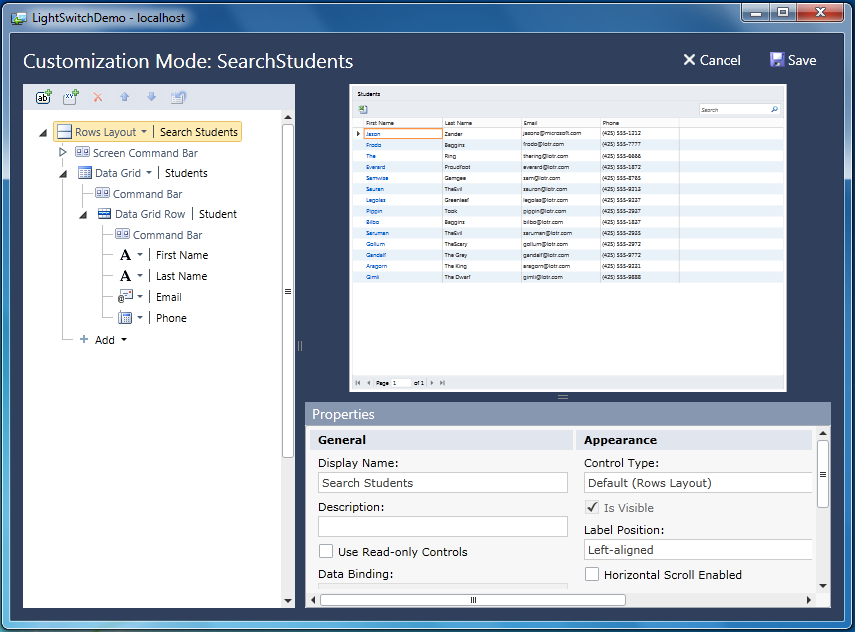
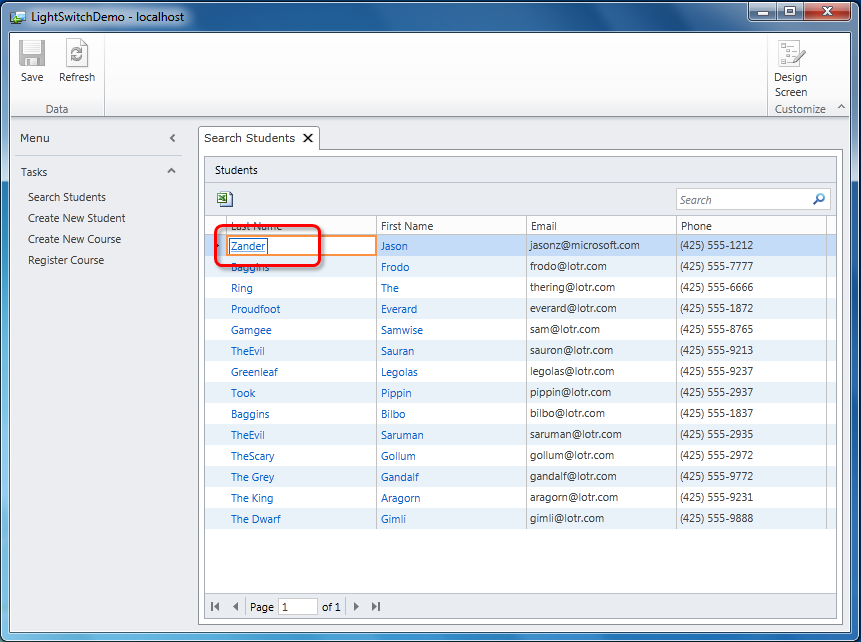
Notice that First Name is shown as a link, by default. The link takes you to an auto generated details screen for the student. We will show you how to customize the details screen in a bit. For now, I’d like to customize the search column order and make Last Name appear as a link as well. To do this, click “Design Screen” button in the upper right hand corner of the running app to enter the runtime screen designer.

One of the features of LightSwitch is that it allows you to make quick UI changes while the app is running in debug mode. As you change the UI tree, you get an instant preview of what your screen will look like.
Select "Last Name" under Data Grid Row and check “Show as link” in Properties (which is new in Beta 2).You will see the links show up in the preview pane.
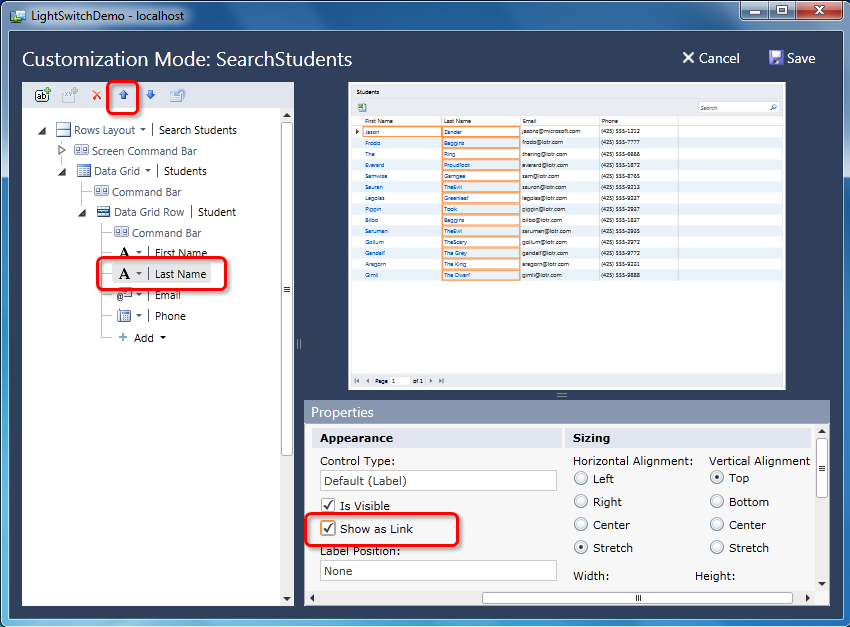
Let’s also move the "Last Name" column before the "First Name" column by using the up arrow in the command bar.
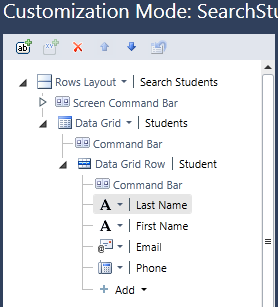
Hit [Save]
We have now exited the runtime designer and returned to the running screen. We can see our UI changes reflected in the running app.
As a side note, if the app user resizes the grid columns, LightSwitch will remember the user setting next time he/she runs the app again. This is also something we introduced in Beta 2.
So far my application is looking pretty decent and LightSwitch is doing all the work for me. One unfortunate behavior we have to deal with is that by default our app opens the Create New Student screen every time we launch the application. The college staff won’t be creating a student that often so let’s customize that.
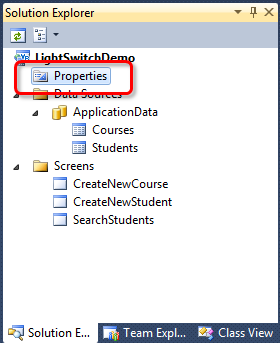
Close the running app and return to the Visual Studio IDE. Double-click the Properties node that’s just under the application node in the Solution Explorer.
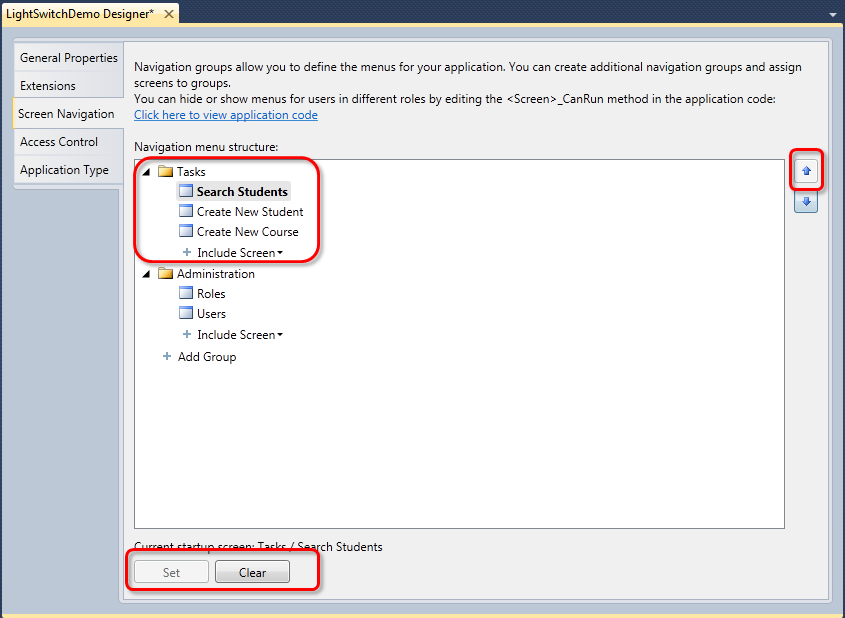
On the property designer page, select "Screen Navigation" which will allow us to edit the menu structure for the application.

We want to make the Search Student the default start screen which will avoid trying to add a new record every time we execute the application. To do this, select the "Search Student" task then click [Set] button to make it the startup screen. Let’s also move it up in the task list by clicking the up arrow. When you are done, the designer should look like the following:
Now when we run the application, the student list comes up first and we do not get a new student screen unless we explicitly click on that task.
Part 5 - Adding Relationships
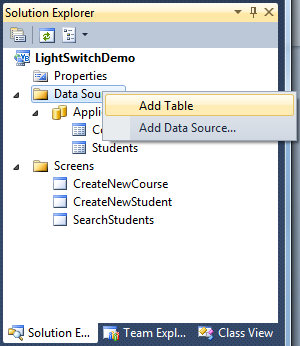
At this point, we have a Student and Course table but we have no way to connect them. Each student can register many courses; and each course can have many students in it. This is a classic many to many relationship which will require a new table to track instances of student-course pairs. Once again we will right click the "Data Sources" folder and choose "Add Table" :
Name the table “Enrollment” by editing the title.

Next we need to add a relationship to the Student table. Click the “+ Relationship…” tool bar button.

Using the Add New Relationship dialog is one of those things that remind me why I like LightSwitch so much: it’s just easier to use than other complicated dialogue boxes. When the dialog comes up, simply change the To column of the Name row to our target table "Student" .
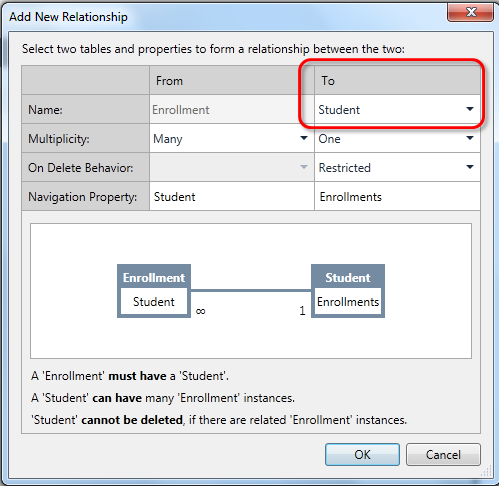
Notice that the dialog now shows you both the relational diagram of many to 1, as well as plain, old fashioned text to explain what you just did. Having worked on two databases and three database API sets I know how to edit this stuff by hand using SQL syntax, but this is just easier. After your edits are complete, hit the [OK] button to save the relationship. LightSwitch now automatically adds a new column for the relationship and updates the Student table for the foreign key:

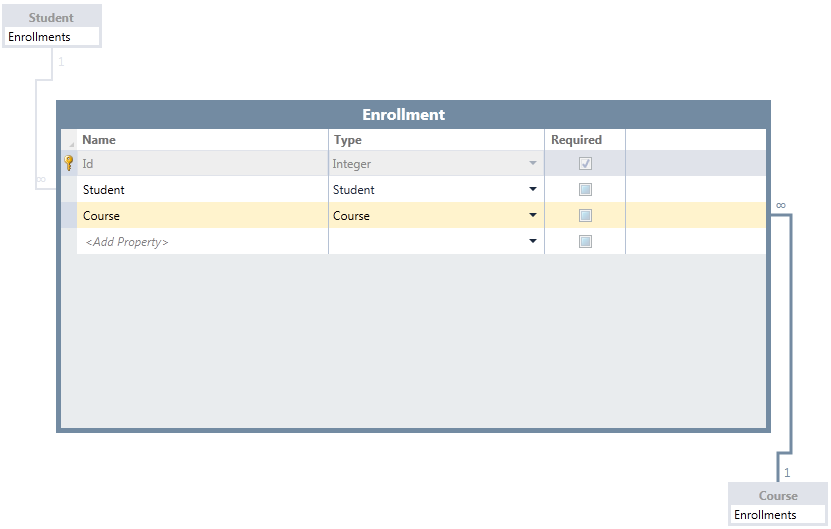
Let’s repeat the step again for the Course table by clicking the + Relationship… toolbar button. Now change the target Name to Course to establish the relationship:

Now click [OK] and our many-to-many relationship has been set up through the Enrollment table.
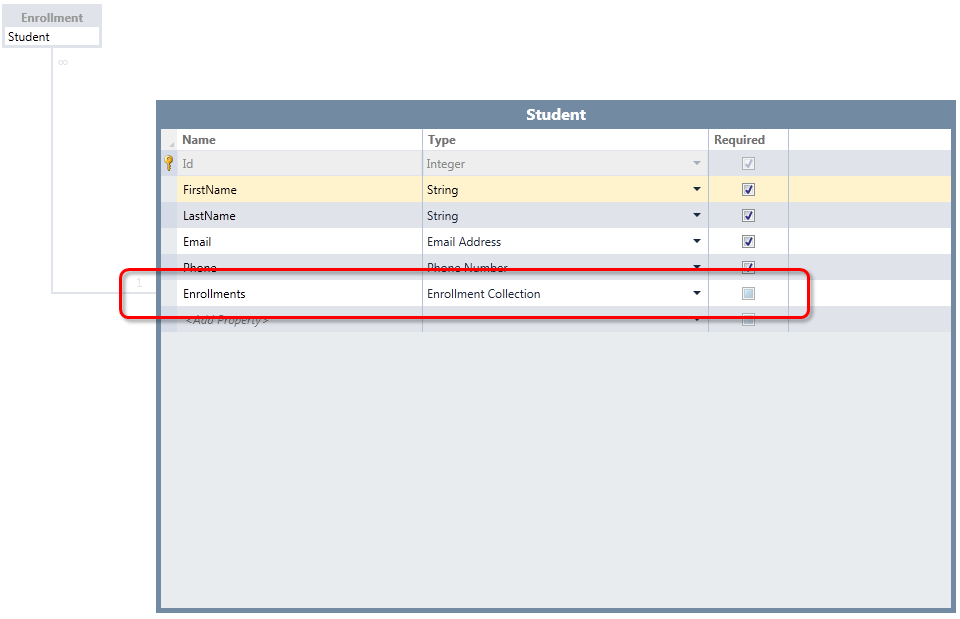
If you double click the Student table item on the designer your focus will change to that table and you can see that the Enrollment column which has been added for you.
Now let’s add a screen for the Enrollment table. As we did before, right click the Screens folder and add a new screen. Select the New Data Screen template and change the Screen Data to the table Enrollment.
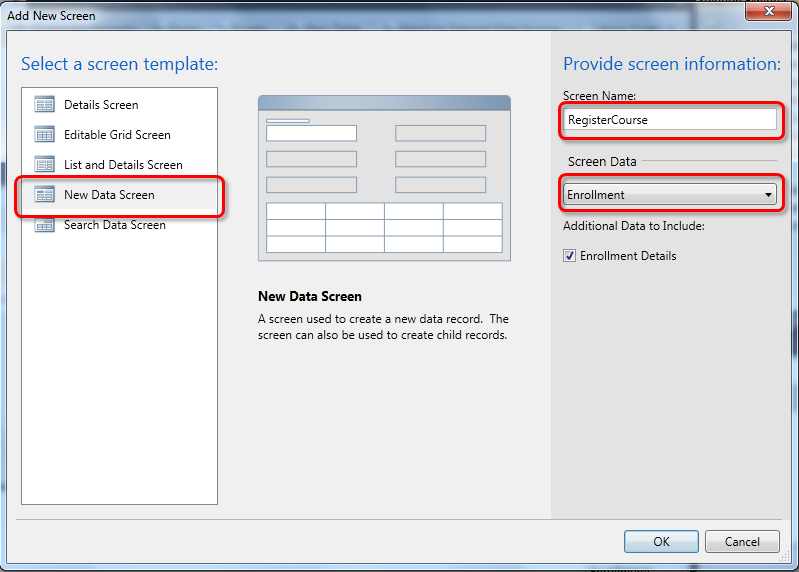
Let’s name the screen RegisterCourse, then click [OK] .
After the screen is created, hit F5 to run the application. Click the Register Course on the task list to open the screen. We will see an auto-complete box for Student and one for Course.
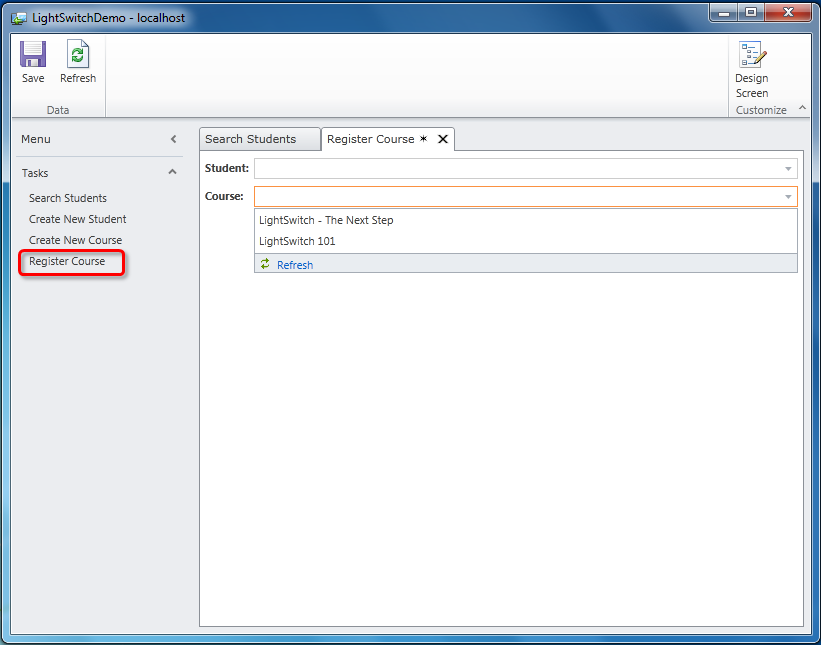
Auto-complete box is another new Beta 2 feature that LightSwitch provides by default. It greatly improves the keyboard navigation experience for data entry tasks.
We now have a functional application without writing a single line of code! We can create new students, search existing students, and register courses for students. To further optimize the workflow- imagine handling a phone call for an existing student. We’d want to enable a user to find the student via the Search Student screen. Wouldn’t it be nice if we could open the Register Course screen with the student auto complete box already filled out?
Part 6 - Writing Some Code
To do this, we need to provide the Register Course screen with an optional screen parameter. If the parameter is set, we could use it to prefill the student information.
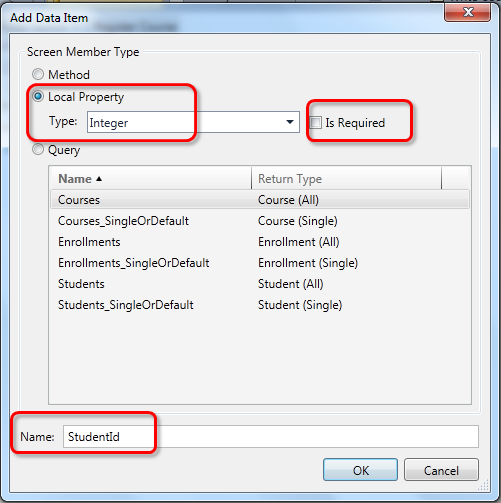
Close the running application and go back to the Visual Studio IDE. Double click on the RegisterCourse screen on the Solution Explorer to open the screen designer. To add a parameter to this screen, click “Add Data Item… “ button in the command bar.

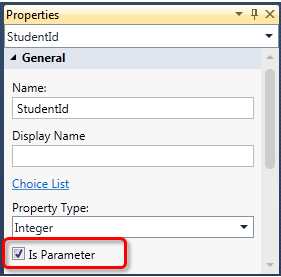
In the Add Data Item dialog, select Local Property, Integer type, and uncheck “Is Required” to make it an optional property. Name the property StudentId and click [OK] .
Then select the newly created StudentId in the Screen Designer.
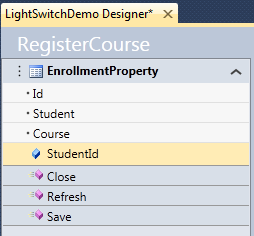
Check “Is Parameter” in the property pane indicating this is a screen parameter.
We now have an optional screen parameter. Next, we need to write some code to check its value when the screen is being initialized. Use the “Write Code” dropdown button in the command bar and select RegisterCourse_InitializeDataWorkspace.
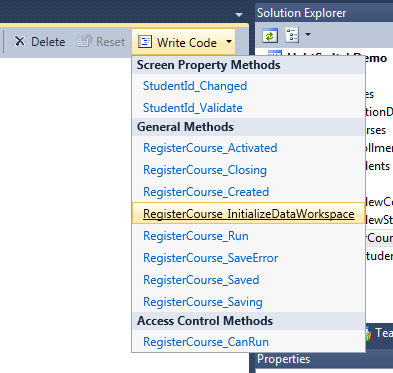
LightSwitch now takes you to the code editor for the Register Course screen:
Private Sub RegisterCourse_InitializeDataWorkspace(saveChangesTo As System.Collections.Generic.List(Of Microsoft.LightSwitch.IDataService))
' Write your code here.
Me.EnrollmentProperty = New Enrollment()
End Sub
InitializeDataWorkspace is called before the data on the screen is being loaded. We want to check for its value and find the corresponding student record. Let’s add the following code:
Private Sub RegisterCourse_InitializeDataWorkspace(saveChangesTo As System.Collections.Generic.List(Of Microsoft.LightSwitch.IDataService))
' Write your code here.
Me.EnrollmentProperty = New Enrollment()
' MY CODE: StudentId is an optional parameter. Check if it has a value. If so, run a query to fetch the student record and prefill the EnrollmentProperty
If (StudentId.HasValue) Then
Me.EnrollmentProperty.Student = DataWorkspace.ApplicationData.Students_Single(StudentId)
End If
End Sub
That’s all we need to do for the Register Course screen. Next, we need to customize the student details screen to include a launch point that opens the Register Course screen with a parameter.
To do this let’s create a details screen for the students. Once again right click the Screens folder and choose Add Screen. Select the Details Screen template and then select the Student table from the Screen Data.

Make sure “Use as Default Details Screen” is checked and click [OK]. The screen designer for the details screen appears.
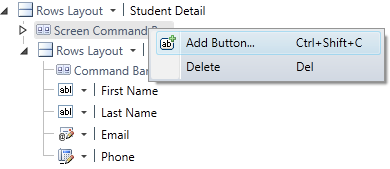
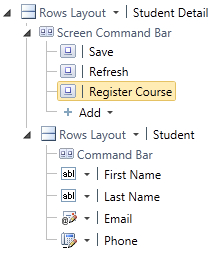
Let’s add a new ribbon button to the student details screen. Right click on the Screen Command Bar in the content tree and select “Add Button…”
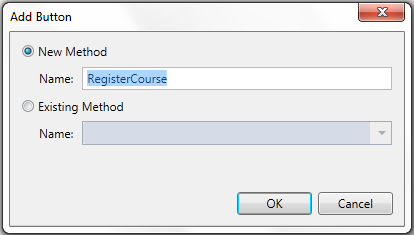
In the Add Button dialog, name the method RegisterCourse and click [OK].
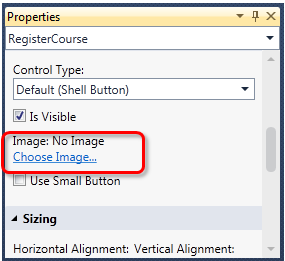
With the newly created button selected, go to Properties and click “Choose Image…” link.
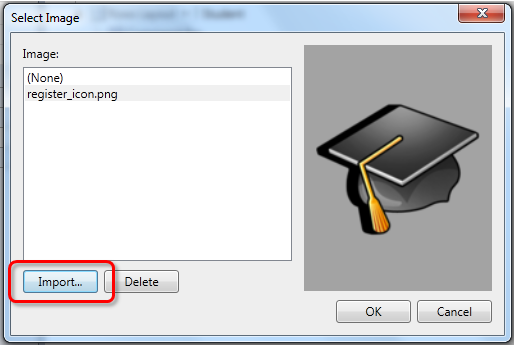
In the Select Image dialog, import an image from your computer for this ribbon button and click [OK].
Double clicking on the Register Course button will take us to the corresponding screen code. Add the following code:
Private Sub RegisterCourse_Execute()
' MY CODE: open the Register Course screen with the student id as its screen parameter
Application.ShowRegisterCourse(Student.Id)
End Sub
Now hit F5 and see it in action. In the "Search Students" screen, click on one of the student links.
It will take us to the details screen we just created. As you can see, we’ve added a new ribbon button called “Register Course.”
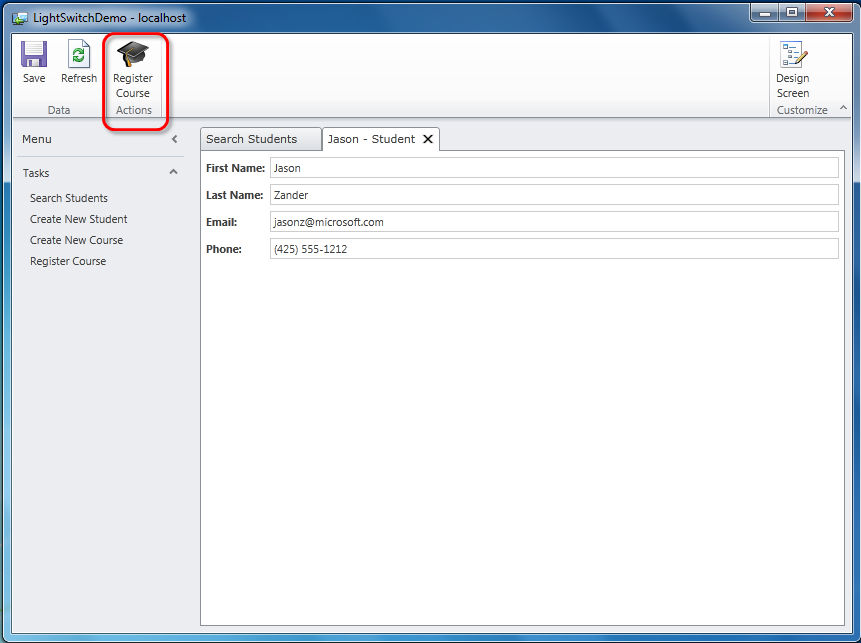
Now click on the “Register Course” ribbon button. It will take us to the Register Course screen with the student field already pre-set to Jason. To register a course, you only need to select a course from the auto-complete box and save the screen.
Summary
In this tutorial we’ve created our first working LightSwitch application completely from scratch. We took advantage of some of Beta 2’s new features, along with adding some simple coding. The team is publishing additional walkthroughs that will go into more detail, as well as, providing guidance on publishing to Azure.
With the addition of the Go Live license for Beta 2, you can see we are well on our way towards releasing the final version of LightSwitch. We are really looking forward to your feedback on Beta 2 which will help us get over the finish line.
Enjoy!