Announcing: Visual Basic Windows Phone 7 Support RTW
I’ve personally been enjoying using my Windows Phone 7 device, and it’s been a lot of fun seeing the phones come to market across the world. As a developer, it’s an intriguing opportunity to see so many people buying Windows Phone 7 devices and starting to purchase applications on the Marketplace. With all this excitement around Windows Phone 7, I’m often asked by Visual Basic developers when they’ll be able to submit their applications to the Marketplace. I’m excited to announce that day is here!
Today we’re releasing “Visual Basic for Windows Phone Developer Tools – RTW”. This release is available in the same five languages as the Windows Phone Developer Tools:
- English: https://go.microsoft.com/fwlink/?LinkId=206790&clcid=0x409
- French: https://go.microsoft.com/fwlink/?LinkID=206790&clcid=0x40c
- German: https://go.microsoft.com/fwlink/?LinkID=206790&clcid=0x407
- Italian: https://go.microsoft.com/fwlink/?LinkID=206790&clcid=0x410
- Spanish: https://go.microsoft.com/fwlink/?LinkID=206790&clcid=0x40a
Please refer to the download pages for a list of System Requirements and Support Statements associated with the release.
To get started with the release, be sure to check out the Visual Basic Code Samples for Windows Phone: https://msdn.microsoft.com/en-us/library/ff431744(VS.92).aspx.
There are also forums available where you can post your questions:
- Silverlight for Windows Phone Forum: https://forums.silverlight.net/forums/63.aspx
- Windows Phone 7 Development Forum on App Hub: https://forums.create.msdn.com/forums/98.aspx
Walkthrough
To show the experience of building a Silverlight application with Visual Basic for Windows Phone Developer Tools - RTW, lets review a walkthrough highlighting the steps to build my Tip Calculator application in VB. (You can find the complete VB solution posted here.)
First start by installing the System Requirements:
- Windows 7 or Windows Vista
- Visual Studio 2010 Professional, Premium or Ultimate. If you don’t have one of these releases, you can also install a trial version: Ultimate | Premium | Professional
- Windows Phone Developer Tools RTW
- Visual Basic for Windows Phone Developer Tools - RTW
When you go to create a New Project, you will see a new Visual Basic project template node under Visual Basic -> Silverlight for Windows Phone. There are 5 Visual Basic Windows Phone project types available, in addition to 16 item templates.
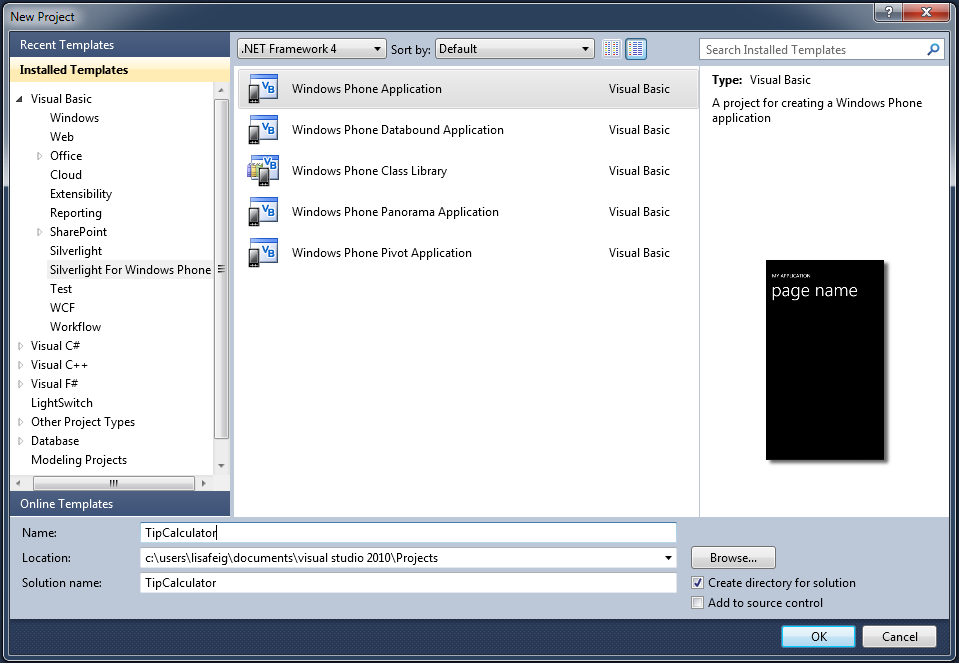
In this case, we select the ‘Windows Phone Application’ template.
(Please note that there are no Visual Basic XNA templates available at this time, since XNA is not currently supported in Visual Basic. This is consistent with the experience in the Visual Basic CTP for Windows Phone Developer Tools.)
Layout
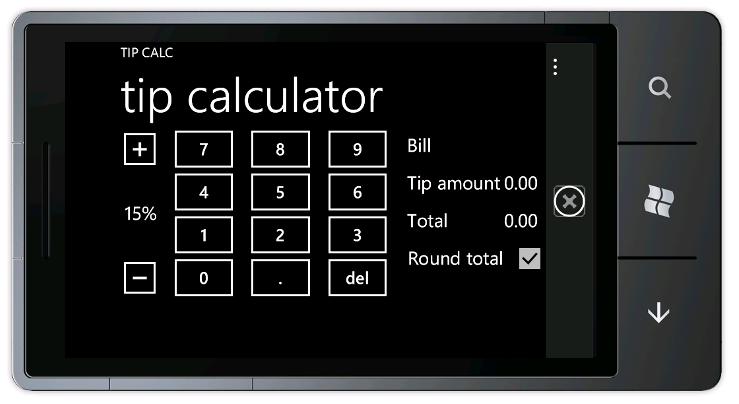
My earlier Tip Calculator post described the process for laying out the application shown below. Please refer to that post for details. The same designer experience is now available for Visual Basic Windows Phone applications.

The application has a built-in numeric key pad for entering the bill amount and controls which allow for adjustment of both the tip percentage, as well as, rounding the total bill to an even number.
In this post, I’ve included Visual Basic versions of the code snippets from my previous post. These code snippets describe how to implement different aspects of the application. For example, below is the code to implement Landscape and Portrait Mode, so that the application layout changes when the user rotates the phone. In order to do this, the application must indicate that it supports the setting and it must handle the change in orientation event as follows:
In MainPage.xaml.vb, add the following line in Sub New():
1: SupportedOrientations = SupportedPageOrientation.Portrait Or SupportedPageOrientation.Landscape
In MainPage.xaml.vb, update the MainPage_OrientationChanged method to handle the Me.OrientationChanged event:
    1: Private Sub MainPage_OrientationChanged(ByVal sender As Object, ByVal e As OrientationChangedEventArgs) Handles Me.OrientationChanged
    2: ...
    3:
    4: End Sub
When the orientation changes we’ll first move the TotalsGrid into the second column adjacent to the NumbersGrid, then change the column width attributes accordingly:
    1: Private Sub MainPage_OrientationChanged(ByVal sender As Object, ByVal e As OrientationChangedEventArgs)
    2:     ' In landscape mode, the totals grid is moved to the right on the screen
    3:     ' which puts it in row 1, column 1.
    4:     If (e.Orientation And PageOrientation.Landscape) <> 0 Then
    5:         LandscapeColumn.Width = GridLength.Auto
    6:         Grid.SetRow(TotalsGrid, 1)
    7:         Grid.SetColumn(TotalsGrid, 1)
    8:
    9:         LayoutRoot.ColumnDefinitions(1).Width = GridLength.Auto
   10:         ' In portrait mode, the totals grid goes below the number pad at the
   11:         ' bottom of the screen which is row 0, column 2.
   12:     Else
   13:         LandscapeColumn.Width = New GridLength(0)
   14:         Grid.SetRow(TotalsGrid, 2)
   15:         Grid.SetColumn(TotalsGrid, 0)
   16:
   17:         LayoutRoot.ColumnDefinitions(1).Width = New GridLength(0)
   18:     End If
   19: End Sub
The resulting display then looks like the following:
Button Handlers
The numeric button grid is implemented in xaml as a 3 x 4 grid. Each numeric button is given a name “button[x]”, corresponding to its value. When a button is pressed, we want to add that new digit to the bill amount. This is perfect place to take advantage of Visual Basic Statement Lambdas feature, introduced in Visual Studio 2010:
    1: Private Sub InitButtonHandlers()
    2:     For i = 0 To 9
    3:         Dim btnName = "button" & i.ToString()
    4:         Dim btn = CType(Me.LayoutRoot.FindName(btnName), System.Windows.Controls.Button)
    5:
    6:         Dim j = i ' avoid local variable capture
    7:         AddHandler btn.Click, Sub(sender As Object, e As RoutedEventArgs) TryUpdateBillAmount(textBlockBill.Text + j.ToString())
    8:     Next i
    9: Sub
Debugging With the Emulator
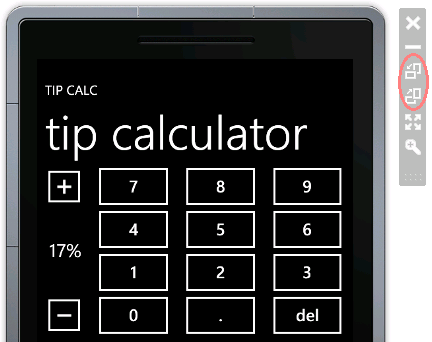
Like the C# debugging experience, VB debugging is also very simple - just press F5! By default the emulator is your target:

You can now test the application easily using the normal Visual Studio debugger and emulator controls. For example, to test landscape mode, simply select the direction you want to rotate the device:
Building to Release
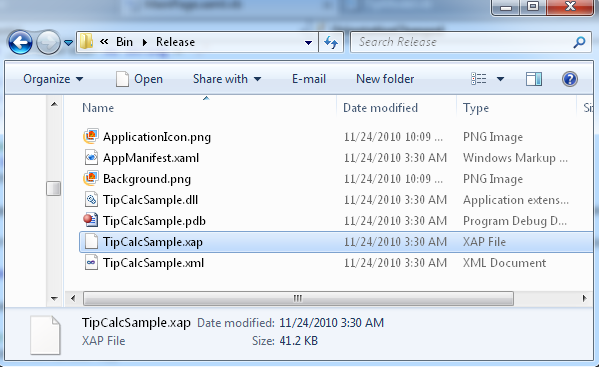
Assuming we’re all done developing the application and are ready to submit it to the marketplace, we’ll now change the configuration to Release and Rebuild:

In the Bin\Release folder, you will now find a XAP file, which is the package you will submit to the marketplace.
Publishing the Application
Your best one-stop shop for resources about publishing your application is https://create.msdn.com.
To submit an application to the Windows Phone Marketplace, you’ll first need to register and become a member here: https://create.msdn.com/en-us/home/membership
Here are a few additional resources to review before submitting:
- Windows Phone 7 certification requirements
- How To: Use the Windows Phone Capability Detection Tool
- UI Design and Interaction Guide for Windows Phone 7
- Best Practices for Application Marketing
- FAQ (including pricing considerations)
Finally you can use the application submission walkthrough, to guide you through the submission process.
Summary
You can find the full source code for the Visual Basic Tip Calculator application here. The application uses general Silverlight and Visual Basic features, which are available in other application types, and now also apply to the phone. As a VB developer, you’re well-positioned for success creating Windows Phone 7 applications.
Enjoy!