Silverlight 2 Map / DataGrid Demo (Part 1)
I did the keynote speech for VS Live in San Francisco on 3/31 and included a demo of how to use the new Silverlight 2 features including the DataGrid. I wanted to write up the steps required to reproduce my demo for anyone that wants to build it themselves. The demo shows how to use VS 2008 with the Silverlight 2 plug-in, Expression 2.5 preview, LINQ to SQL, LINQ to XML, as well as the new controls. This post got longer than I expected, so I'm going to post another that shows how to use the Silverlight Airlines demo map to give a new twist for looking up data.
In this write up, I tried to consolidate a lot of different sources of good data (like ScottGu's blog, the "How Do I" series for Silverlight 2, and several other great examples of LINQ to SQL). If you are an advanced user, you may find I have included too many steps. But I thought for a lot of folks it would be easier if you could really follow along and wind up with a working application.
To get started, you'll want to download all of the required software I use in the walk through. It is all free:
- Silverlight 2 Beta Runtime and Tools (here)
The application is a simple Silverlight 2 RIA that will call a web service for data which is filtered on the middle tier. The middle tier will in turn use LINQ to SQL to query my database (I'm using the Northwind database to make things simple).
The application is built in the following steps:
Step 1: Create the project with an ASP.NET backend and a Silverlight 2 front end
Step 2: Build a web service that can query the database and return an XML document with my data
Step 3: Create the Silverlight 2 client application that will invoke the web service and show data in a grid
Step 1: Create the Project
After you have installed the development environment, launch VS2008 and create the project. You will notice under both C# and VB.Net that the type 'Silverlight Application' has been added:
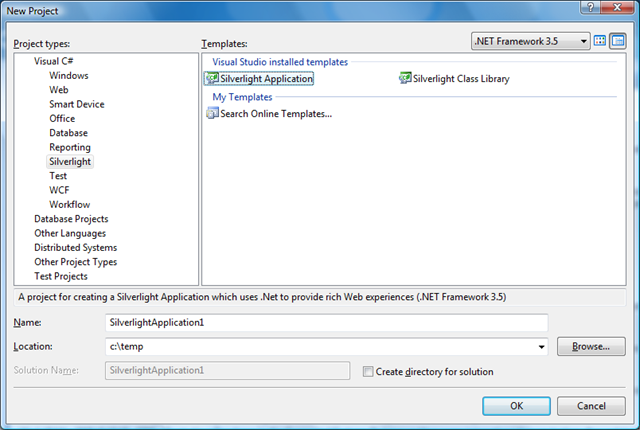
click OK after you have selected the project & language type. I have written my demo code in C#, but it you can easily write the application using VB.Net as well.
New for Silverlight 2 and VS2008, you can create either a test HTML page or you can create an entire web site solution with both a client and server piece. We're going to use that default option in our demo:
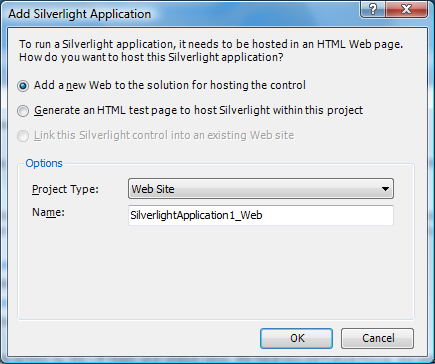
This will create both the server and client pieces:
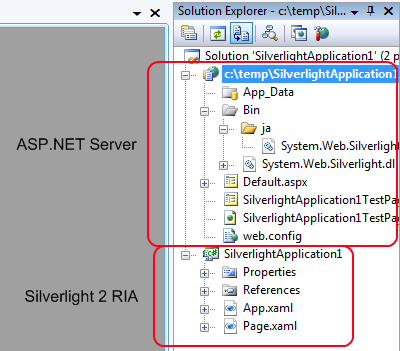
At this point you could build and launch the application to ensure everything is installed correctly. It will be rather boring.
Step 2: Create the Data Layer
The client application is going to query for an XML Document which is generated using LINQ to SQL and LINQ to XML. To start, we'll generate the LINQ to SQL access to the Northwind database. Right click the ASP.NET project and select 'Add New Item', then select 'LINQ to SQL classes'. Name the new item NorthWind.dbml:
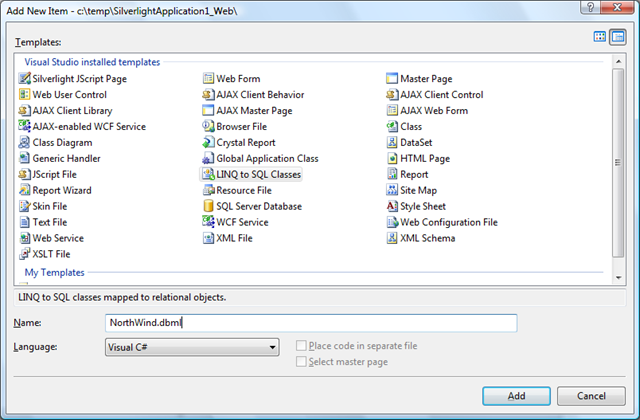
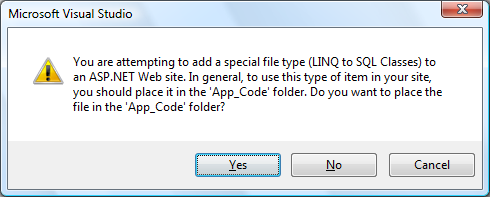
You will be prompted about organizing your code into proper folders, simply click 'Yes':
You will now get the LINQ to SQL designer view. This view allows you to drag tables to create schema mappings that are then accessible through LINQ. Change the view to Server Explorer and drag all of the Northwind tables onto the design surface. This will generate the schema mappings for you:

At this point you could declare the database context and start to write LINQ queries. For example:

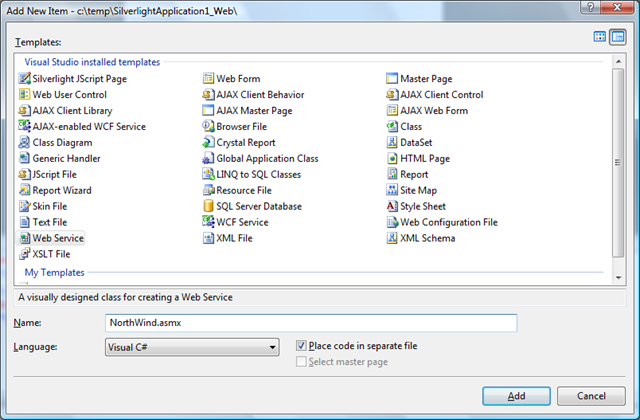
The next step is to create our web service to return the data base to the client. You could create the web service in a lot of different ways including using WCF. In my case I'm going to do a really easy web service using asmx. Right click the ASP.NET project and do 'Add New Item'. Add a Web Service called NorthWind.asmx:
In the new file, add a new [WebMethod] called GetCustomersByState which takes a string filter. The base LINQ to SQL statement for getting the customers filtered by state is shown above. However for our method, we want to return an entire XML document to the client. We could go through and build up a document element at a time, but one of the coolest things about LINQ is the ability to combine two different types of data into one expression. In this case we will use LINQ to XML with LINQ to SQL embedded in the expression to create an entire document at once:
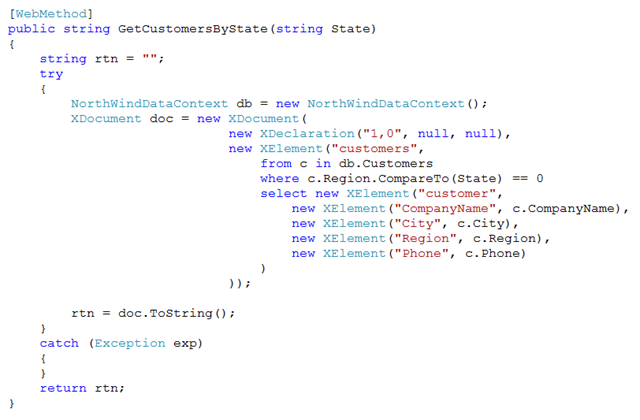
Let's break this one down a little bit as there is a lot going on here. The first few lines of the expression create the XML document, add the "1.0" utf header tag for the file, and then create an outer element: <customers></customers> to frame our list:

Notice that the XElement for "customers" doesn't actually terminate yet, the rest of the expression is passed in to the constructor to help create the contents of the document.
Next you will recognize the LINQ to SQL expression which retrieves the database records which match our filter criteria:

With the right records returned, we need to turn each into a <customer></customer> record instance. We'll do this by selecting each field into an element in the document:
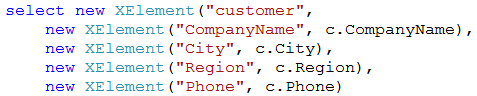
Here again there is an outer element, "customer", which will take the fields into its constructor. Each inner element then takes a field from the query, such as c.CompanyName, and populates the record instance.
The result is the fully formed document with a list of customer records. This ability to mix XML and SQL in one expression is very powerful. I've written only 13 lines of code to do an entire database query + document creation (and 2 lines of code were terminated parens <g>).
At this point we have a working web service we can invoke from the client so we'll build that next.
Step 3: Build the Client
The client is going to use a Grid for basic layout, as well as a DataGrid to display our content. To build the client, right click on page.xaml and 'Open in Expression Blend...'. Start by making the Canvas larger so we have some room. You can do this by either dragging it larger in the designer, or by switching to XAML mode and editing the settings directly:
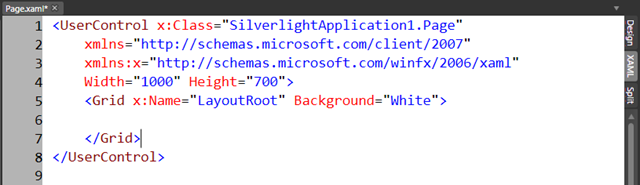
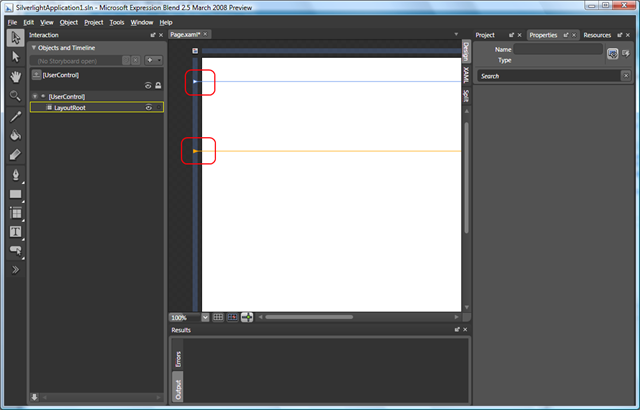
I've made the Width="1000" and Height="700" which fits a normal display when you are projecting to a screen. Next in Design mode, add a couple of rows into the grid by moving your cursor into the grid area and clicking. We'll create a skinny top row which will have the search box and button, and then leave room for a data grid. Make sure to leave most of the bottom open for the final step:
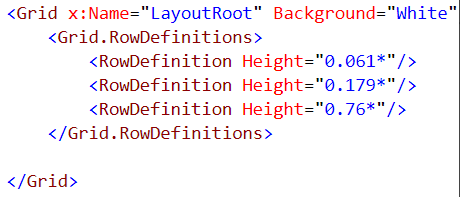
This will translate into XAML markup for the Grid that will look something like the following:
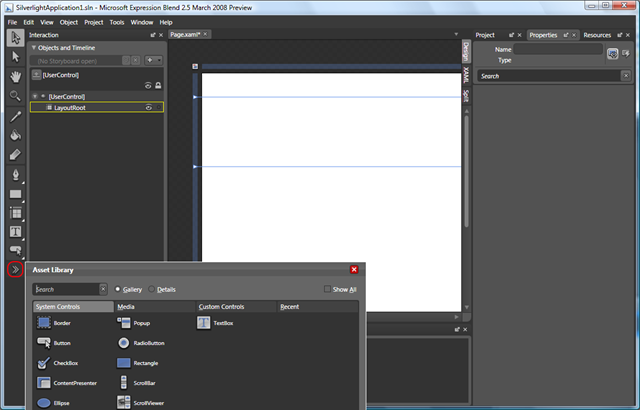
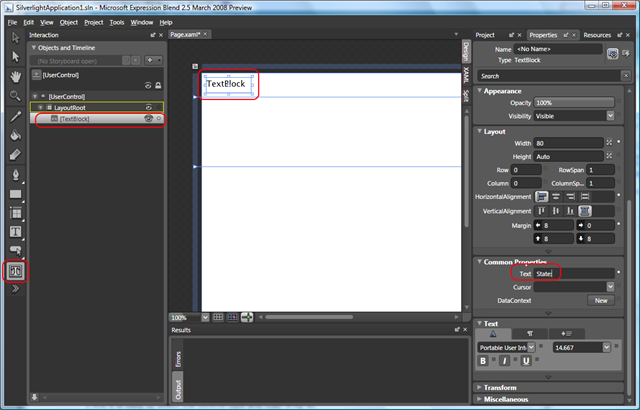
Now we need to place a TextBlock (aka a label), a TextBox (aka edit box), and a button into the pane row. You can do this using the control palette at the left side. Note that Expression does a good job of not cluttering the palette. So if you don't see what you want, you can search for it using the >> symbol as follows:
I find it is easy to select the control type and then drag an instance out in the grid row you want. This will automatically add the Grid.Row="0" property (or whatever row you place the control in). Change the Text property to "State:" for the prompt:
Now repeat the step for the TextBox. For this control, give it the name 'EditBoxState':
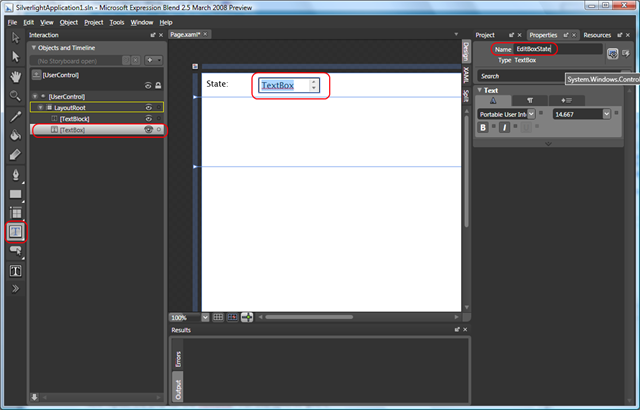
This will set the x:Name property for the control which means we can write managed code against it later. Finally add the button to the display:
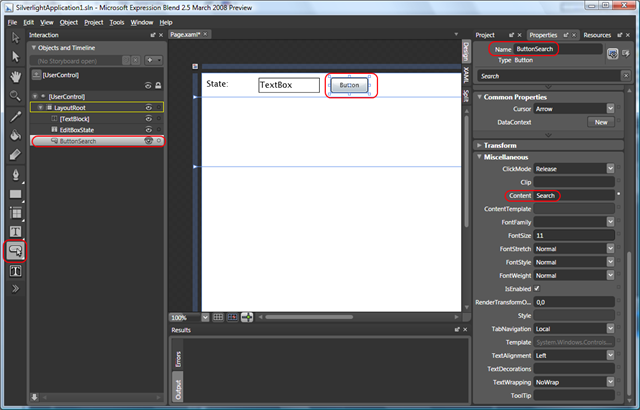
If you are used to Windows Forms, you might spend some time searching for the Text property on the button. It doesn't exist in XAML. Instead you need to set the Content property to change the display text. Set the name to ButtonSearch and then change the Content property (under Miscellaneous property pane) to 'Search'.
At this point we have a navigation pane that will take input (the state name to filter on) and action (the button). Make sure to save all of your changes.
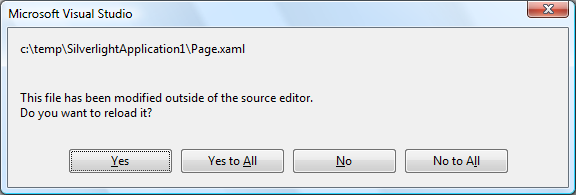
The next step is to add the data grid where we can display the data we retrieve from the server. Switch back over to VS2008. You'll be warned the XAML file contents have been changed, go ahead an reload the file.
Now open page.xaml in the VS designer. You'll see a set of controls in the Toolbox. This works just like Windows Forms and Web Forms. Find the data grid control and drag an instance into the XAML split pane view:
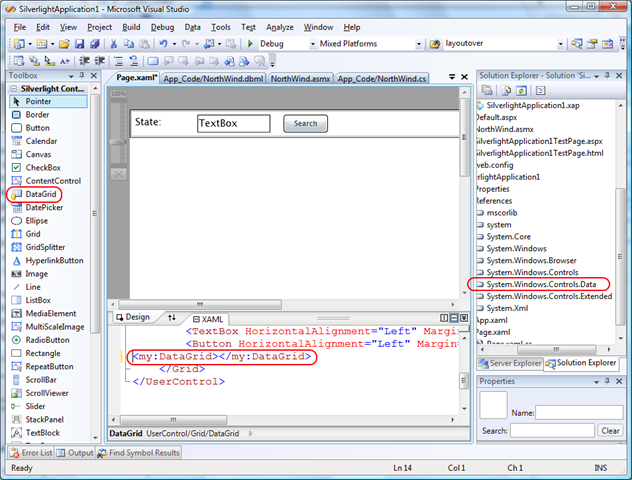
This will not only create an instance of the DataGrid, but it will also automatically add references to the correct assemblies to make it work. You'll need to now make a couple of edits to the control line to auto generate the columns and ensure the data grid is in the proper row:

You could do this kind of design work in Expression as well. In the markup I've also given the control a name, CustomerList, so we can write code against it.
At this point our first round of UI is done. But we need to hook up behavior. We'll do this by writing some client code in page.xaml.cs. First, do an Add Reference for System.Xml and System.Xml.Linq:
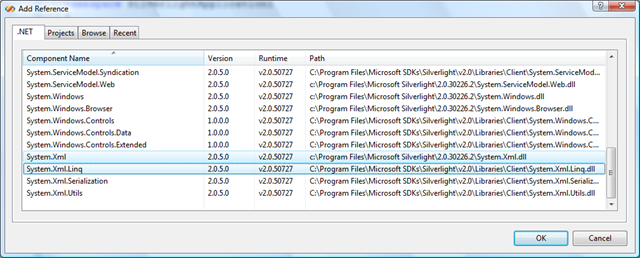
Notice that all of the assemblies are in the Silverlight 2.0 directory. These assemblies are designed to run against the Silverlight CLR and are logically a subset of the full .NET Framework assemblies. You'll need to add the using statements for both assemblies as well.

Now we need to add a reference back to our ASP.NET Web Service that we built in Step 2. We'll do this by doing an Add Service Reference:
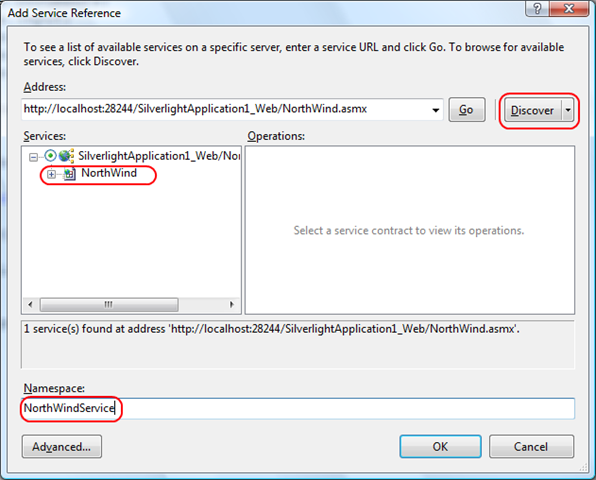
On the dialog, click the Discover button which will query our project for any existing web services. Expand the list and choose the NorthWind service. Call it 'NorthWindService' and click OK.
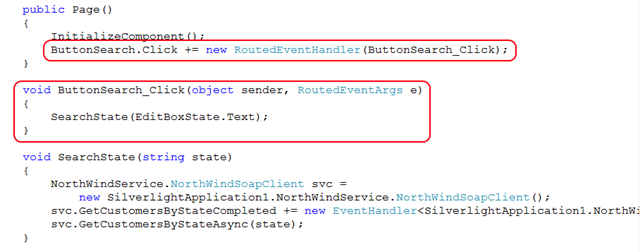
Now let's write a helper method which will create an instance of the web service and invoke the filter method. We'll pass in our filter criteria which will eventually be used by LINQ to SQL to find the correct set of records:

This code is using the async pattern so we don't stall the UI while we make calls over http. We'll need to add some logic to figure out when the call is complete and process the data. Insert a new line of code as follows:

go ahead and hit tab twice to fill out a default Completed method.
We'll want a class we can use to hold the results. Using auto properties, you can create one quite easily in the current namespace:
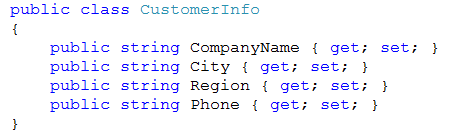
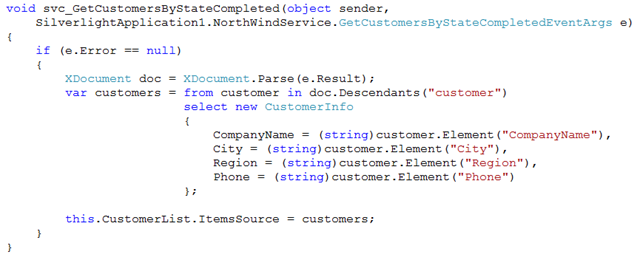
Back in our Completed() method, we can parse the results into a set of CustomerInfo items. The results of the call (assuming no error) will be in the e.Result field. In our case we'll once again use LINQ to XML to parse apart the document we sent back from the server:
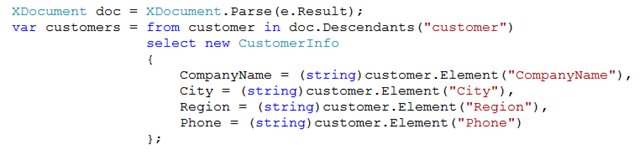
Like the server side code, this version parses the xml document looking for every <customer></customer> it can find. For each item found, it will pull the elements out and initialize them into a new instance of CustomerInfo.
Now that we have all of our data, we can tell the DataGrid to bind to that content and display it:

The DataGrid will now iterate over these items and display them. Because we had 'AutoGenerateColumns="True"' in our grid, it will automatically show our data for us in sizable columns. If you were at my keynote in San Francisco, this is the step I missed on stage which led to the data not displaying at first (gotta love those demo glitches).
When you are done, the final method should look like this:
Our final step is to actually hook up the Search button. To do this, add a Click handler for the button and pass the edit box text into our search helper:
Now build and run the application. Enter a state like 'OR' and hit Search:
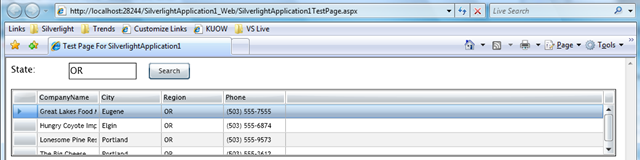
Wahoo!
In my next post, we'll add the USA map into our bottom pane and make it possible for you to look up customer records by clicking on states directly in the display.
Enjoy!