Simple web app application lifecycle management with VSTS and Azure
Disclaimer: Cloud is very fast moving target. It means that by the time you’re reading this post everything described here could have been changed completely  . Hopefully some things still apply to you! Enjoy the ride!
I wanted to create small and simple web application which I could use to demo few features of VSTS and Azure. Here are few things that I had on my mind:
I also wanted to make the example app so simple that it would be easier to focus to the development process and not just focus to the app itself. Application is purely placeholder Node.js application which prints out simple text every time. No other components in this application just to keep it bare minimum.
So let’s get started! First let’s look at the high level steps that what we need to do next:
- Connect VSTS and Azure
- Create repository for our application assets
- Create build definition for continuous integration
- Create release definition for continuous delivery
- Code-Build-Deploy -loop
1. Connect VSTS and Azure
In order to deploy easily from VSTS to Azure we need to set up service endpoint into VSTS. There are plenty of documentation about this:
Automating Azure Resource Group deployment using a Service Principal in Visual Studio Online: Build/Release Management
Or you can directly use this script (link was in above blog post) which has all the steps documented as PowerShell code :
https://github.com/Microsoft/vsts-tasks/blob/master/Tasks/DeployAzureResourceGroup/SPNCreation.ps1
Other useful information: Use Azure PowerShell to create a service principal to access resources
So hopefully you have now managed to create service principal and only thing you need to do in VSTS is to put those magical GUIDs and keys to this dialog:
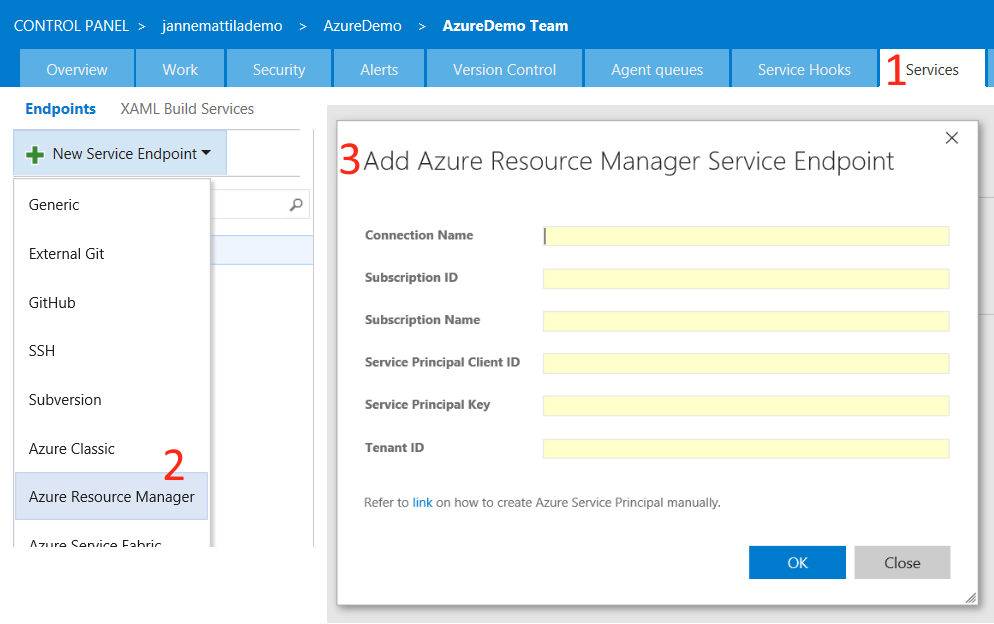
After that you’re good to proceed to real work!
2. Create repository for our application assets
Okay now we have VSTS and Azure connected so we’re ready to create simple web app. First I’ll create Git repo to VSTS and put my source assets there (see link to the GitHub repo at the end of the blog post to get the source):
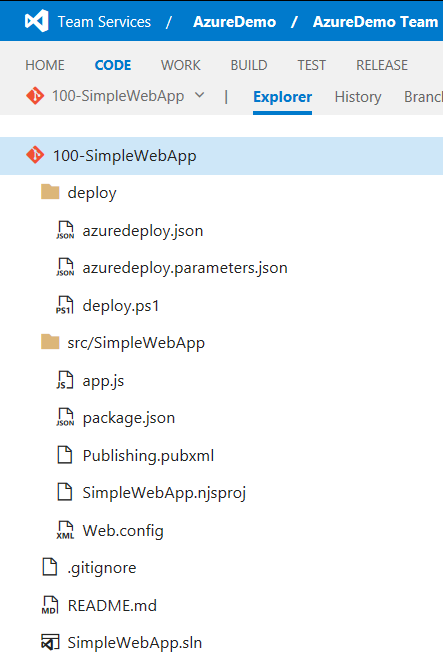
I have following folder structure under my repository:
- deploy: this folder contains code and configuration files to create all the necessary resources to Azure (infrastructure code)
- src: this is actual source of the application
- test: Ooops… Missing in action !
This structure means that I have all the necessary assets in the repository in order to create the infrastructure for the application and assets which define the application itself (a.k.a. normal source code).
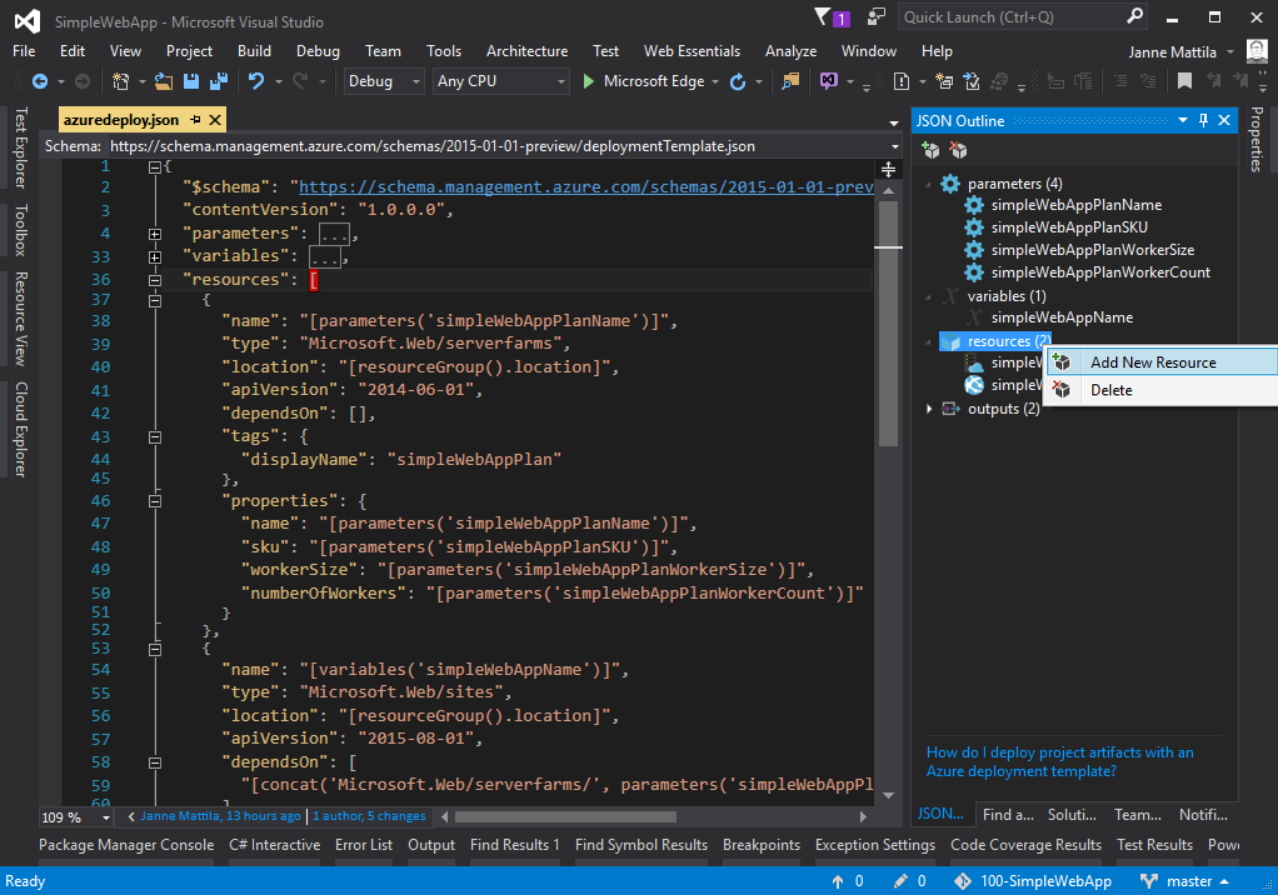
For all the developers the src folder is easy to understand since it contains the app source code. Deploy on the other hand can be something new. It has Azure Resource Manager (ARM) template and template parameter files and deployment helper PowerShell script. If ARM is something new to you, then please visit the Azure Resource Manager overview page to familiarize yourself to the topic. After that you can browse many readymade ARM templated directly from GitHub in Azure / azure-quickstart-templates.
This demo ARM template contains only single Azure Web App and App Service plan. Those can be quite easily done directly within Visual Studio 2015 using the JSON Outline view:
Now we have assets in place in order to develop app locally and run infrastructure test deployments to Azure locally using deploy.ps1. But that’s only local development and next step is to automate the process and execute those steps in hosted build environment.
3. Create build definition for continuous integration
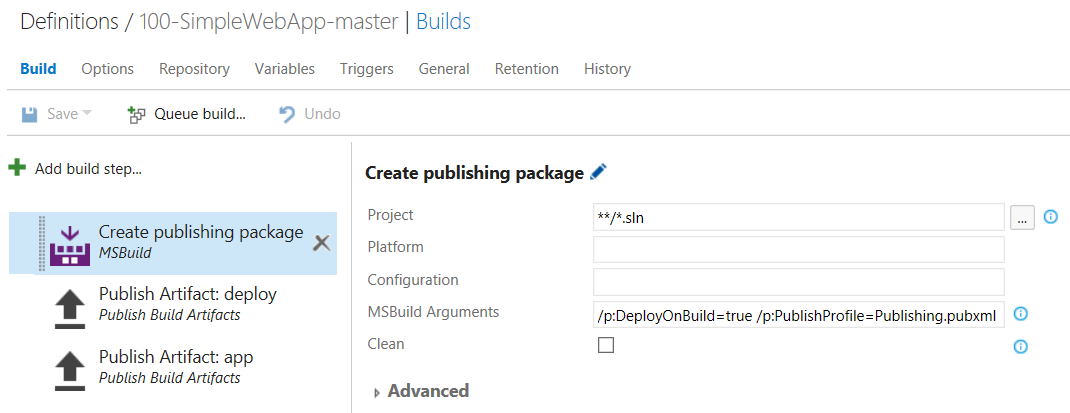
First we’ll create new build definition into VSTS. It will be connected to our newly created git repository and we’re now only focused for building master branch (to make this case very simple). Our build definition has following 3 build steps:
1. step is to create Web Deploy package from our web app using msbuild and Publishing.pubxml (file in repository):
Question: Why do you create this Web Deploy package and not just create connection directly from Visual Studio?
Answer: Good question! I did that because it might not be yet known at development time where this will be deployed. You might start with 1 target environment (development) but later on get multiple environment so creating publishing profiles for them is no-go in my opinion. Target environments should not be "hardcoded" to source control.
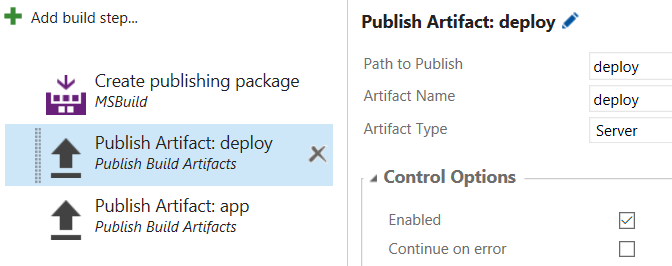
2. step is to publish deploy artifact that can be later on used in Release management. Deploy artifact contains ARM template, template parameter file and deployment helper PowerShell script:
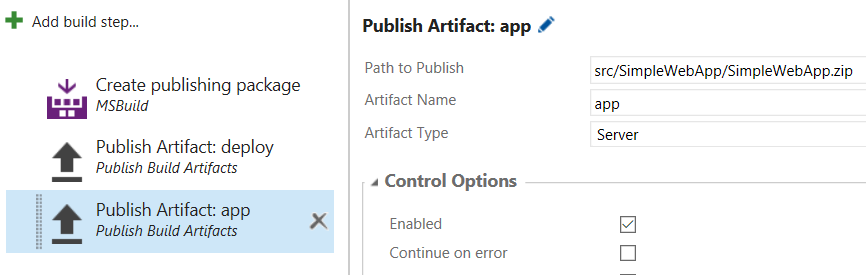
3. step is to publish Web Deploy package as app artifact so that we can use it later on in Release management:
Then you can also change build number format to something that suites you but I prefer this: "1.0.$(Rev:r) ".
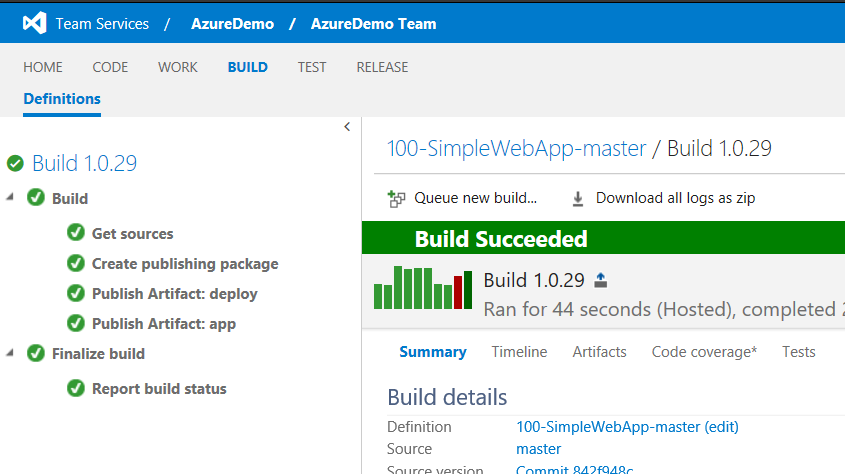
That's it for the build! Of course we now need to validate that build works correctly:
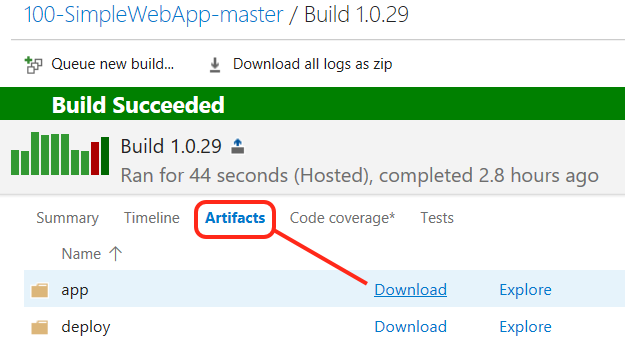
Remember to validate that build artifacts are as they should be:
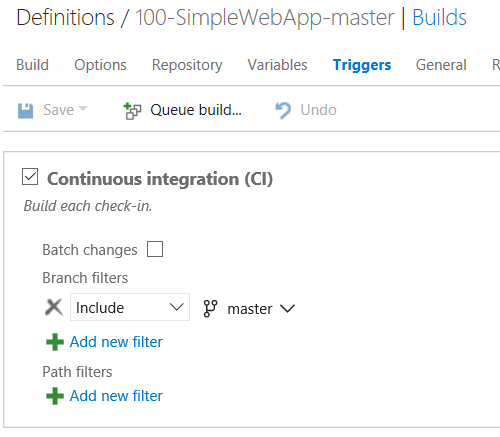
Then we just check the Continuous Integration (CI) checkbox which means that build kicks off right away when code is committed to the repository:
Now we're ready with build definition and we’re ready proceed to continuous delivery!
4. Create release definition for continuous delivery
First we'll create new release definition and connect it to the previously created build:
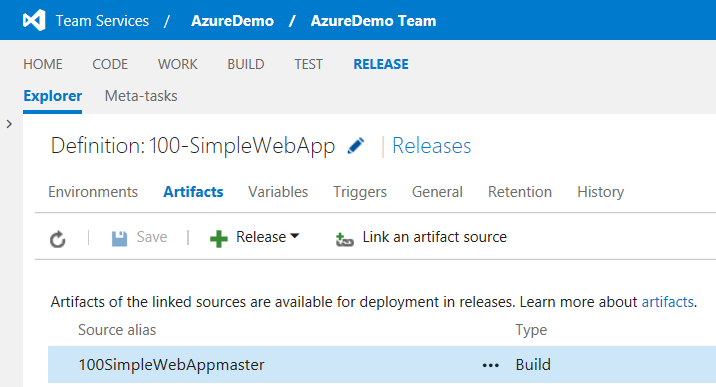
Now all those build artifacts we previously published from build are available for us to use in the release definition. This we will use later on.
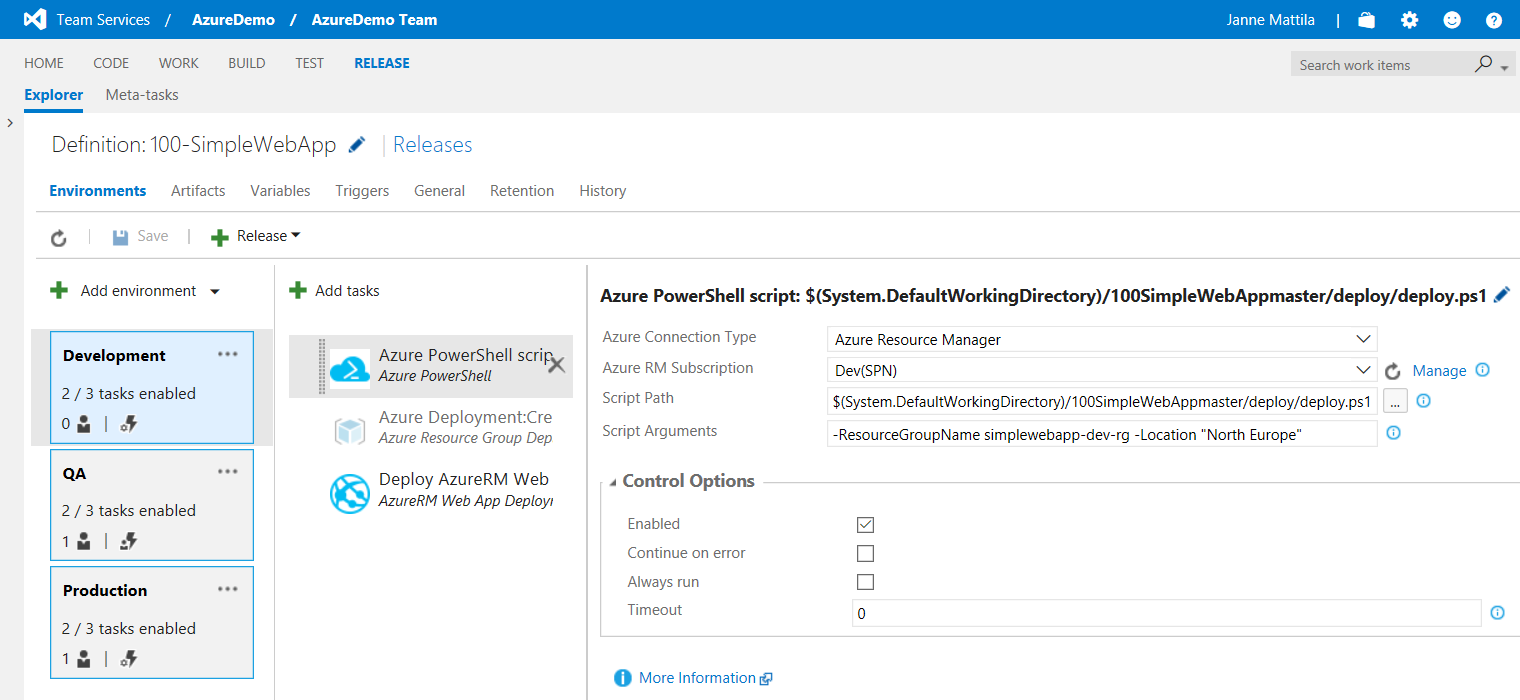
I have 2 release management tasks in our environment:
1. task is Azure PowerShell script to use previously created Azure connection and our deployment script coming from build artifact:
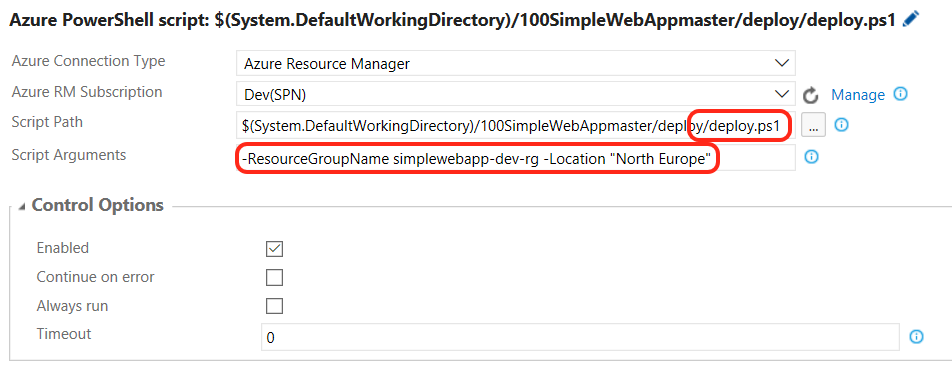
We also pass script arguments to the script to control the target resource group and deployment location in Azure.
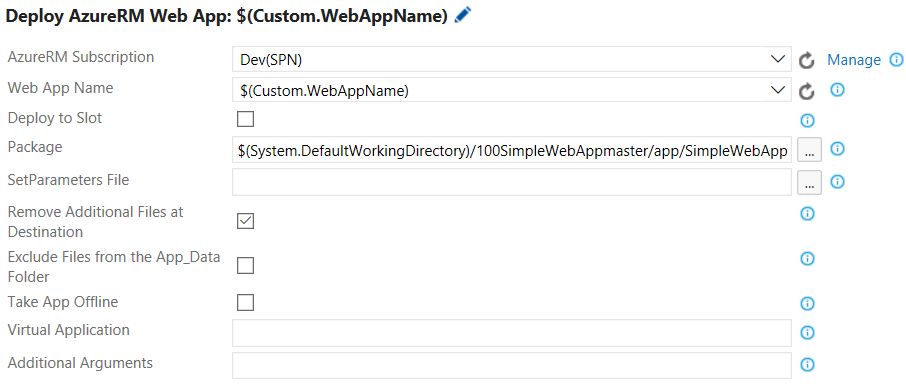
2. task deploys our previously created Web Deploy Package which has been passed to the release management as build artifact:
Similarly, you can have multiple environments in your release definition if you want to target multiple different environments:
NOTE: This part is especially something that I know will change in the future. But at the time of writing this blog post this was the experience I got. Above disclaimer applies here .
You might be wondering that why do I have Azure Resource Group Deployment step disabled in the above picture. Reasoning for that is the how ARM really works. If you deploy resources using ARM template, then it might be that ARM deployment itself goes fine but the actual resources are not yet available at the time you’re trying to use them. This “small gap” can be timewise small (~seconds) but potentially painful if your release fails due to web app not able to respond on time etc. Therefore deploy.ps1 tries to minimize this problem by verifying that required resources are as they should. It tries to do that by doing simple web request to the web app and verifying that it’s okay before proceeding. You might want to read the official documentation about this and not just believe me:
Understand when a deployment is ready – Clip from document: “...you should expect that the deployment status succeeds some time before your deployment can be used” .
Again this is something that can change in the future and especially the VSTS build and deploy task can be enhanced to support retry logic and timeouts etc. But for now to increase reliability of the release you could solve this by using own deployment script. Also this script can be further enhanced to validate the infrastructure even broader if needed (and not just the web app).
Now our release definition is ready and we can proceed to the actual work!
5. Code-Build-Deploy -loop
Yes I know I’m missing Test from the above loop . But in order to keep this example simple I simplified the loop a bit. But now let’s take a look how you would do changes to the infrastructure and to the code.
First let’s look at the case where you need to scale up the resources from "Free" to "Basic":
1. You would change the deployment configuration files to have new values.
2. Push this change to the remote branch and create pull request to the target branch (again I’m slightly simplifying to only have topic branch and master branch but you might also have dev branch in between in real life).
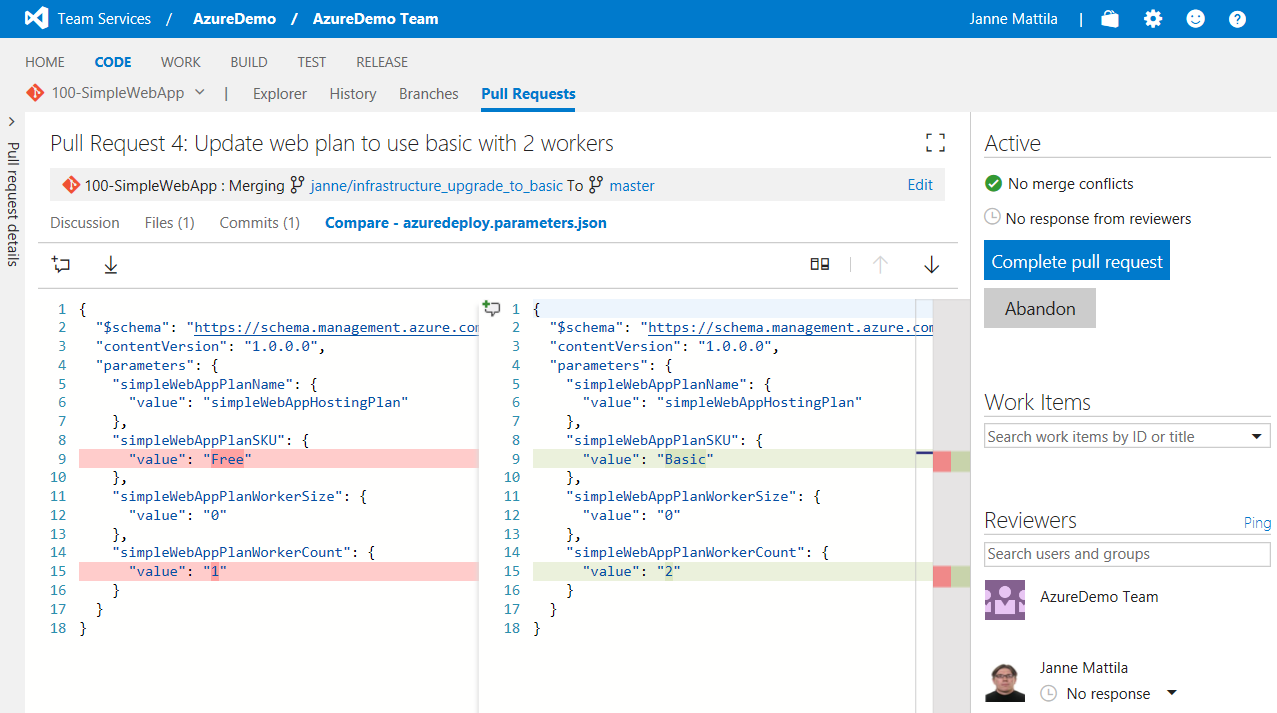
3. After the pull request is approved our CI process starts and that in turn starts CD process.
4. After CD has finished I can validate the change in the Azure Portal:
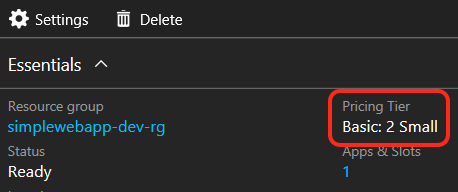
This means that I don’t need to go to Azure Portal to change the configuration because it’s all managed from code.
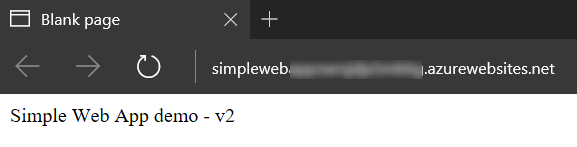
Exactly same model applies for source code changes. First you change some code and run the normal process to get that approved:
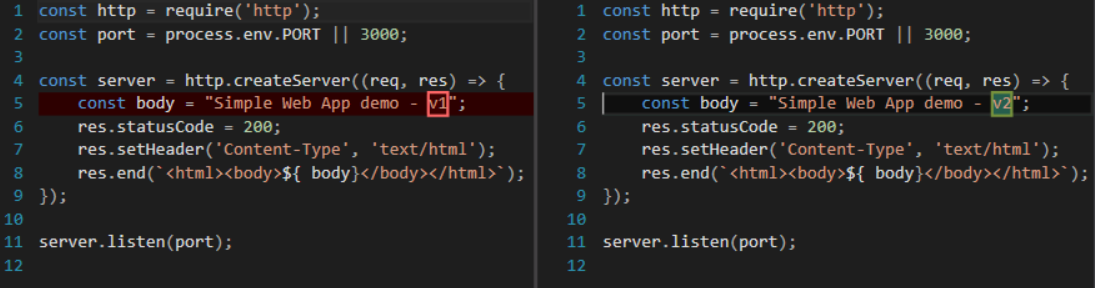
After CI and CD it lands into the website:
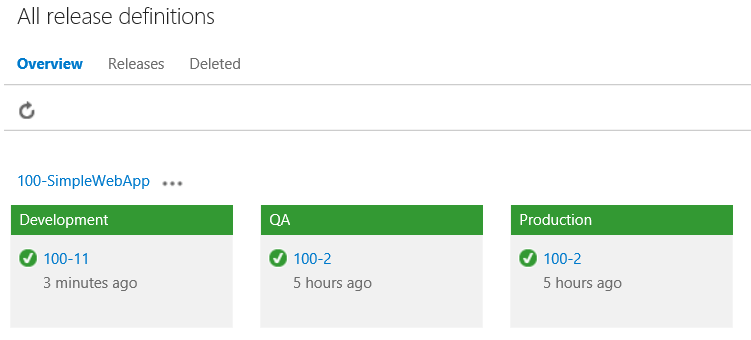
And even better... you can now monitor state of your deployments directly from VSTS user interface if you have multiple environments in your release definition:
You can combine this with approvals to have better control what gets deployed and where:
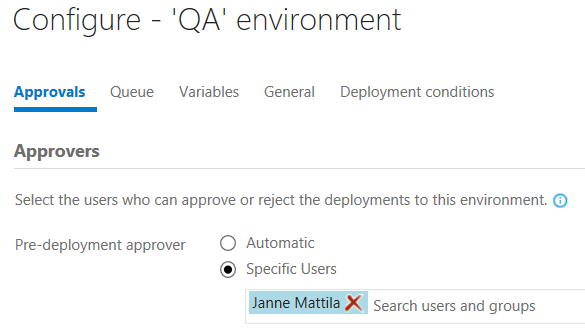
So you get approvals, audits etc which means this is pretty powerful model to build your solution!
Closing words
This was one way to combine source code management and infrastructure code management into single code repository. This by all means is not the only way to solve this but I think this model could work in many cases. You could of course have separate repos and deployments could happen in different release definitions etc but that’s just how you want to orchestrate and run your development. VSTS and Azure are very flexible to suite your needs.
As promised you can find the source code used in this example application from GitHub at JanneMattila / 100-SimpleWebApp.
Anyways... Happy hacking!