Getting Started with VM Depot
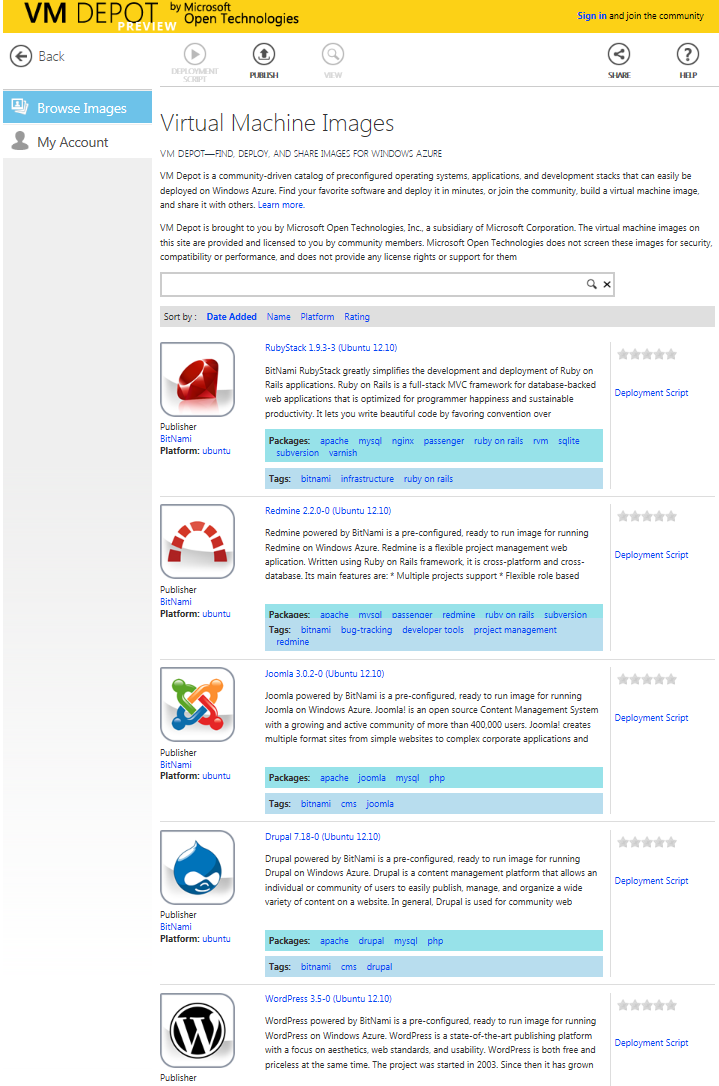 Do you need to deploy a popular OSS package on a Windows Azure virtual machine, but don’t know where to start? Or do you have a favorite OSS configuration that you’d like to make available for others to deploy easily? If so, the new VM Depot community portal from Microsoft Open Technologies is just what you need. VM Depot is a community-driven catalog of preconfigured operating systems, applications, and development stacks that can easily be deployed on Windows Azure.
You can learn more about VM Depot in the announcement from Gianugo Rabellino over on Port 25 today. In this post, we’re going to cover the basics of how to use VM Depot, so that you can get started right away.
Deploying an Image from VM Depot
Deploying an image from VM Depot is quick and simple. As covered in the online documentation, VM Depot will auto-generate a deployment script for use with the Windows Azure command-line tool for Mac and Linux that you can use to deploy virtual machine instances from a selected image. You can use the command line tool on any system that supports Node.js – just install the latest version of Node and then download the tool from this page on WindowsAzure.com. For more information about how to use the command line tool, see the documentation page.
Publishing an Image on VM Depot
To publish an image on VM Depot, you’ll need to follow these steps:
Step 1: create a custom virtual machine. There are two approaches you can take for creating your custom virtual machine. The quickest and simplest approach is to create a Linux virtual machine from the image gallery in Windows Azure and then customize your VM by installing or configuring open source software on it. And for those who’d like to build an image from scratch, you can create and upload a virtual hard disk that contains the Linux operating system and then customize your image as desired.
Regardless of which approach you used to create your image, you’ll then need to save it to a public storage container in Windows Azure as a .VHD file. The easiest way to do this is to deploy your image to Azure as a virtual machine and then capture it to a .VHD file. Note that you’ll need to make the storage container for your .VHD file public (they’re private by default) in order to publish your image – you can do this through the Windows Azure management portal or by using a tool such as CloudXplorer.
Step 2: publish your image on VM Depot. Once your image is stored in a public storage container, the final step is to use the Publish option on the VM Depot portal to publish your image. If it’s your first time using VM Depot, you’ll need to use your Windows Live™ ID, Yahoo! ID, or Google ID to sign in and create a profile.
See the Learn More section for more detailed information about the steps involved in publishing and deploying images with VM Depot.
As you can see, VM Depot is a simple and powerful tool for efficiently deploying OSS-based virtual machines from images created by others, or for sharing your own creations with the developer community. Try it out, and let us know your thoughts on how we can make VM Depot even more useful!
Doug Mahugh
Lead Technical Evangelist
Microsoft Open Technologies, Inc.
Eduard Koller
Senior Program Manager
Microsoft Open Technologies, Inc.