Implementing Roles in Browser Forms
What are Roles? Without going much in detail, InfoPath roles is a functionality where you can define user tags like "Sales", "Management" and utilize them in your form logic. This enables some very interesting scenarios in the forms space. For a detailed discussion on this topic, take a look at this MSDN lab. If you have worked with InfoPath 2003, you would notice that Roles have not changed much in 2007, and that they are not supported by InfoPath Forms Services. My focus will be in how we can enable role-related scenarios in browser forms.
For the purpose of this article, lets borrow the scenario from the lab. - "The management team at Contoso Corporation reviews each of the Sales Report filled out by sales representatives. Because the management team is interested only in sales deals that exceed a certain amount of money, your department is asked to add an additional view to the sales form that shows only those deals"
STEP 1: Find a way to store role-related data
You can store information about which users belong to which grounps in an XML file, included as resource as a part of the XSN. Here's one way to organize this XML file:
 <?xml version="1.0" encoding="utf-8"?>
<roles>
    <role>
        <name>Sales</name>
        <users>
            <username>john</username>
            <username>jane</username>
        </users>
    </role>
    <role>
        <name>Management</name>
        <users>
            <username>bill</username>
            <username>abby</username>
        </users>
    </role>
    <role>
        …
    </role>
</roles>
Create a data source pointing to this resource file and use this data source to make decisions in step 2.
Variation: Roles and Users relationship might be stored in a database (say HR system). You would then create a secondary data source connecting to your HR System instead of the XML file mentioned above; everything else stays the same.
STEP 2: Determine the role of the current user
1. Add hidden fields to the main data source of your form. These will store:
- Active Directory username (alias) of the currently logged on (let's call the field CurrentUser)
- Role of the current user, as determined by our form logic (let's call the field CurrentRole)
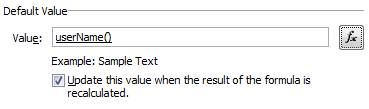
2. Set the detault value of CurrentUser to the username() function.
3. Set "CurrentRole" value to
name[username = CurrentUser]

STEP 3: Use rules and CurrentRole
To accomplish our scenario, we will create two views: one for "Sales", and one for "Management". Using Rules, you can switch to the appropriate view on load of the form:
1. With the form template in design mode, on the Tools menu, click Form Options.
2. Click the Open and Save tab, and then click Rules, and the following two rules:
- If CurrentRole = "Sales", switch the view to the Sales view.
- If CurrentRole = "Management", switch the view to the Management view.
And that's it! You can use CurrentRole the same way you'd have used Roles in the InfoPath smart client. Note that this trick works on the smart client, too - so if you want to create a roles-based InfoPath application, this method will help.
Pradeep Rasam
Program Manager