Custom Error pages in IIS 7/7.5
Today I thought I would walk through how to enable custom error pages in IIS 7/7.5. Custom error pages allow you to specify the content that you want to display to users when a specific HTTP error code is received. Its a powerful technique empowering users to be aware of what has happened that caused their request to fail.
It is now easier than ever to have your own custom error pages that can be reported back to all users or just clients and here are some simple steps on how you can achieve this.
Note: Our focus is on enabling custom error pages at the site level only. You can use this concept to apply the error pages to all sites if you wish.
1. Open the IIS MMC > In the Features view select Error pages
2. Click on the Edit Feature settings in the right pane
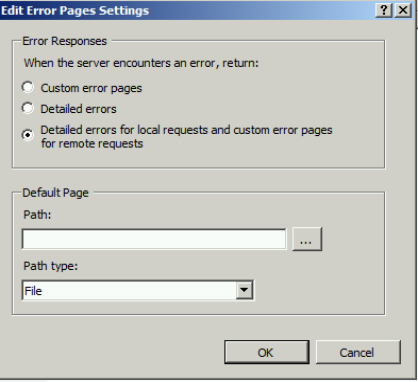
As you can see there are three choices here for error responses. "Custom error pages" - specifies that all requests (local or remote) are sent custom error pages. "Detailed errors" - specifies that all requests receive the default HTTP error pages. "Detailed errors for local requests and custom error pages for remote requests" - specifies that local requests are sent detailed error pages and remote requests are sent the custom error pages.
3. For the purposes of this walkthrough, I will select the last option as we want requests made on the server to receive detailed pages explaining the exact issue for troubleshooting. Leave the rest as default. > OK
4. In the right pane select Add and type in a custom status code. Remember that you cannot overwrite an existing one so you must delete it and then create a new one. We will create two, HTTP 401.1 - user access denied and HTTP 401.2 - denied by server configuration.
5. You can place the error pages within a physical directory located in your web content directory. In this example I have created a folder called custerr located in c:\inetpub\wwwroot with two custom error pages 401.1 and 401.2. The file path field takes a relative path as its value.
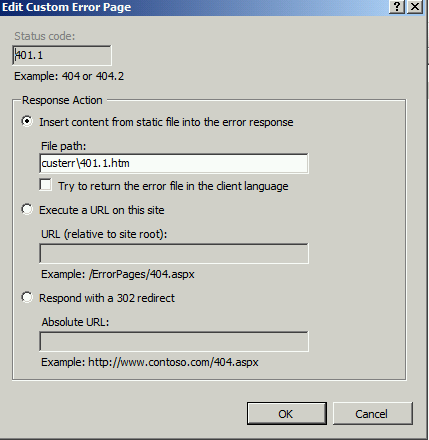
The "Execute a URL on this site" option allows you to specify a URL instead of a file path to your error page. This way the error page is displayed physically in the URL with the appropriate name in the address bar.
The "Respond with a 302 redirect" options redirects users to an absolute URL.
6. You should now see your custom error pages in the features view. Note: you can determine if the error page is specified at the root level or at the site/virtual dir level simply by viewing the "entry type" column. If its set to local then its set at the site/virtual dir level only otherwise it will be an inherited type.
7. Now open a browser window and browse to a site with Windows Integrated Authentication enabled. Enter a bad username/password combination and you should then see your detailed error page display on the server. Now test from a remote machine and you should see your custom error page.
See simple!
So where is this information stored?

Its all in the web.config file. So here you can manually edit and remove as and when necessary. One thing to note, if you remove the default HTTP error page references from the config file, you can simple start again by removing these custom HTTP error references to restore it back to the default.
So to summarise:
1. Opened IIS MMC and navigated to the website.
2. Clicked Error pages and selected the edit feature.
3. Selected display custom error pages and detailed pages.
4. Specified a relative path to the custom error pages which
were located in the root of the website content.
5. Browsed the site and made sure we get a prompt for
credentials, we did and we saw our custom error page when the correct
credentials were not entered.
Hope that helps.