Autoscaling Azure Web Apps
Recent changes in Azure brought some significant changes in autoscaling options for Azure Web Apps (i.e. Azure App Service to be precise as scaling happens on App Service plan level and has effect on all Web Apps running in that App Service plan). This article describes how you can configure basic autoscaling based on CPU load.
- Log in to the Azure portal at https://portal.azure.com
- Navigate to the App Service you would like to autoscale.
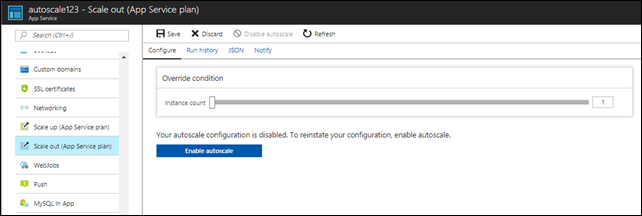
- Select Scale out (App Service plan) from the menu

- Click on Enable autoscale. This activates the editor for scaling rules.

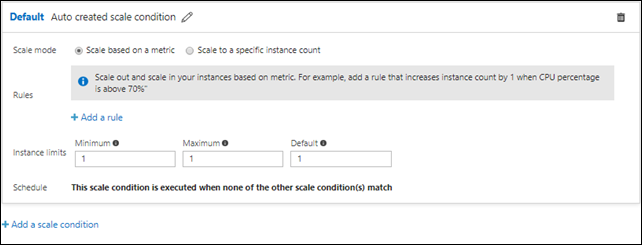
- Click on Add a rule. This shows a form where you can create a rule and specify details of the scaling.

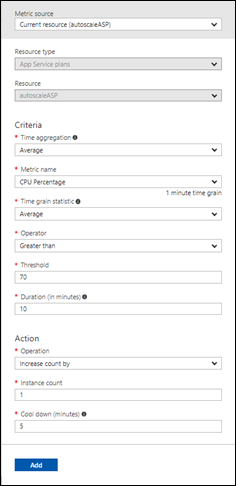
For the sake of simplicity, leave all values as they are, i.e.
Metric source: <the App Service plan> (this is the Azure resource, the metric is measured from)
Time aggregation: Average
Metric name: CPU Percentage
Time grain statistic: Average
Operator: Greater than
Threshold: 70
Duration (in minutes): 10
Operation: Increase count by
Instance count: 1
Cool down (minutes): 5
This means: Constantly the average of the CPU load of the last minute is calculated. If the average of this value calculated over 10 minutes is greater than 70% one App Service instance is added to the pool. The system waits at least 5 minutes before the next scaling action takes place.
- Confirm with Add. This adds the scale up rule, i.e. without any further action the App Service plan would only scale up, but never scale down.
- Add another rule. Keep default values for all parameters except the following:
Operator: Less than
Threshold: 40
Operation: Decrease count by
This means: When CPU load average over 10 minutes goes below 40% decrease number of instances by 1.
- Confirm with Add. Notice that the Instance limits are still set to their default values of 1. I.e. without further action the App Service plan wouldn’t scale because these limits set the number of instances are set to the fixed value of 1.
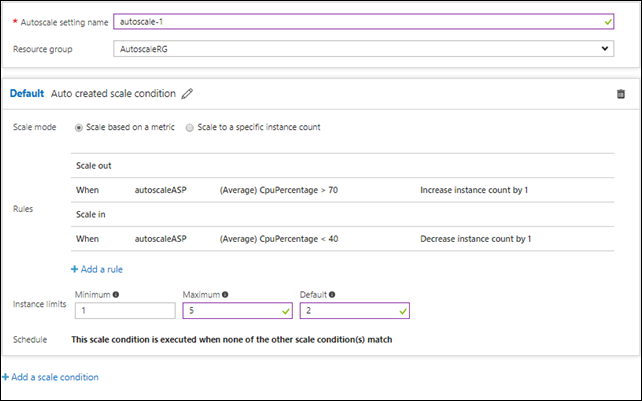
- Change the Instance limits to the following values:
Minimum: 1
Maximum: 5
Default: 2
This means: Always leave at least one instance (even though CPU load might be below 40%), never scale above 5 instances (even though CPU load might be above 70%). If there is a problem with the metrics system (metrics cannot be evaluated) and the number of instances is below 2 then scale up to 2 instances.
The dialog should now look like this:

- Confirm everything with Save.
That’s it. Your autoscale configuration is set now, i.e. the App Service plan autoscales according to the settings you specified above.
Further information
- Application design considerations
- Related patterns and guidance
- Azure App Service Best Practices for Large Scale Applications, Video, 0:28:30
- Further information (videos, online-trainings, tools etc.) about Azure App Service on Azure InfoHub.