FEZ Cerbuino Netを使ってみる
.NET Gadgeteer対応製品の中で、これだけ買えばネットワークにつなげられるというボードが、FEZ Cerubuino Netボードです。
https://www.ghielectronics.com/catalog/product/473
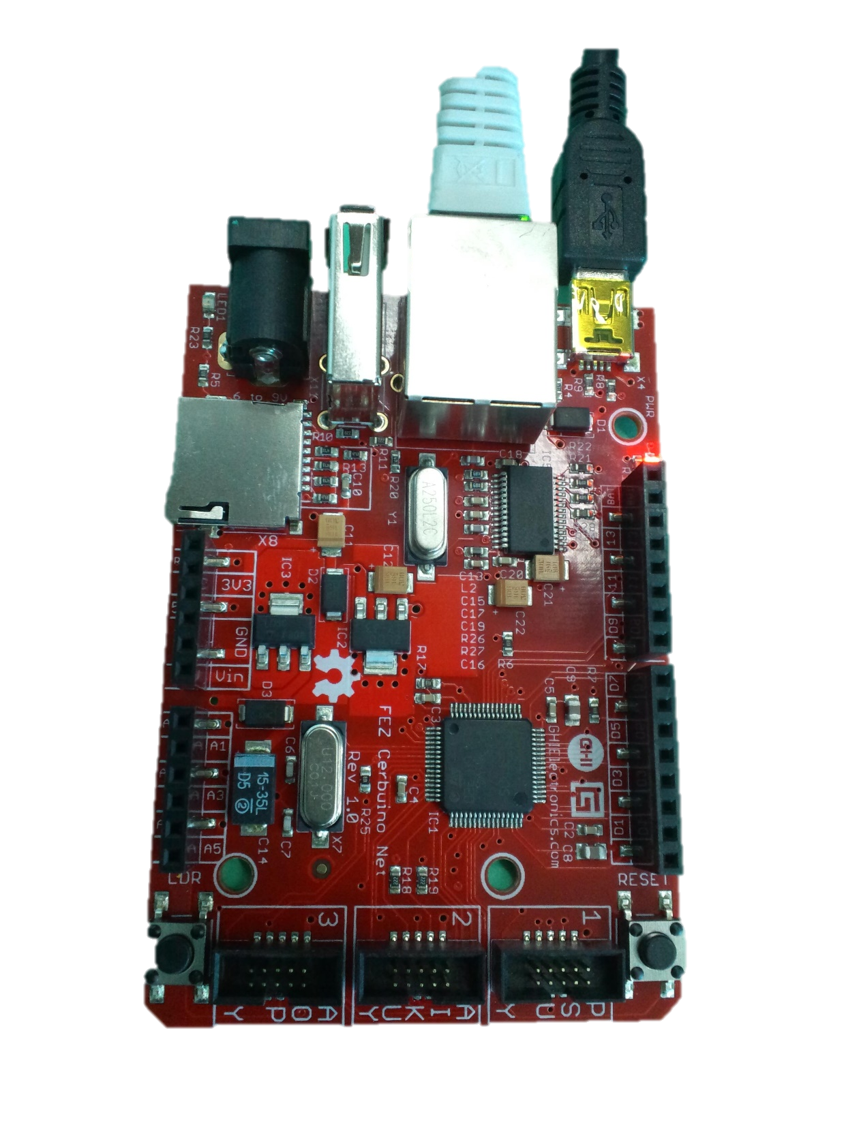
約$55と、Raspberry PIよりはちょっと高いですが、C#やVBでネットワーク連携する小型組込みHWを試してみたい方にはお勧めのボードです。最近手に入れたので、紹介しておきます。
ボードは、https://tinyclr.jp/ から日本でも購入可能。Gadgeteerボード用のコネクタを介して、センサーやDisplay、リレーやモータ駆動などGadgeteer Moduleボードをつなげるとともに、Arduino ピン互換のソケットもついているので、Arduinoを嗜んでいる人はそこで使っている各種HWもつなぐことができます。
開発環境は、Visual Studio 2012を使います。無償版を使う場合は、 https://www.microsoft.com/ja-jp/download/details.aspx?id=34673 から、Visual Studio 2012 Express for Windows Desktopをインストールしてください。
次に、https://netmf.codeplex.com から、.NET Micro Framework SDK 4.3をダウンロード(このページの右上のdownloadsボタンをクリック)し、ZIPファイルを解凍して中のMSIファイルを実行します。
次に、https://www.ghielectronics.com/news#13692 から、.NET GadgeteerとFEZシリーズ用のSDKをダウンロードし、ZIPファイルを解凍して、Setup.exeを実行してインストールします。
これで、終了。
Visual Studioでアプリを開発し、ボードをUSBで開発PCにつなげば、ボード上でプログラムを実行できます。
Visual Studio 2012を起動して、”ファイル”→”新規作成”→”プロジェクト”を選択します。プロジェクトテンプレートでは、Visual C#、もしくは、Visual BasicのGadgeteerカテゴリの”.NET Gadgeteer Application"を選択してプロジェクトを作成します。
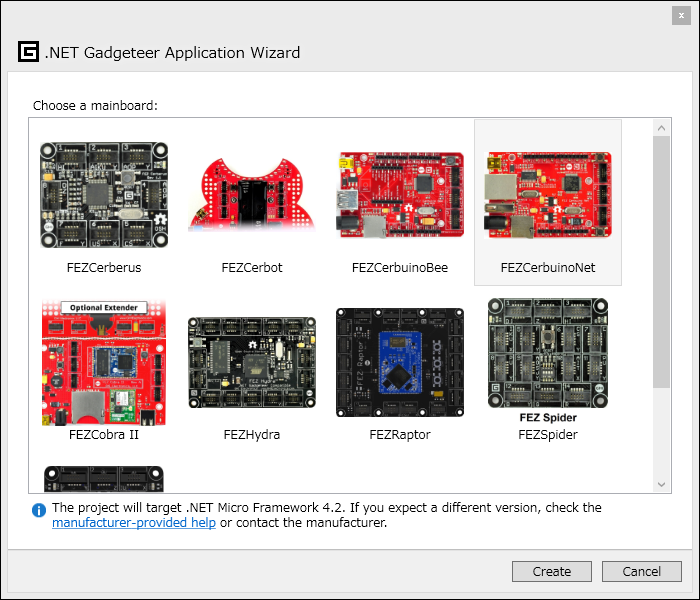
Mainboardは、FEZCerbuinoNet(右上のボード)を選択します。
プロジェクトが出来上がったら、Program.csを開き、ProgramクラスのProgramStartedメソッドに、以下のコードを書いてみましょう。
var timer = new GT.Timer(2000);
timer.Tick += timer_Tick;
timer.Start();
次に、Programクラスに、以下のコードをtimer_Tickメソッドとして記述します。
bool ledStatus = false;
void timer_Tick(GT.Timer timer)
{
if (ledStatus)
{
ledStatus = false;
}
else
{
ledStatus = true;
}
Mainboard.SetDebugLED(ledStatus);
}
はい、これで、F5実行すれば、Lチカの出来上がり。2秒間隔でついたり消えたりします。
ネットワークやGadgeteerセンサーなどは、FEZ Spider等と一緒です。このブログの他の投稿を参考にしてみてください。
例えば、REST APIのWebサービスを動かしたければ、ProgramStartedメソッドには、
foreach (var ni in NetworkInterface.GetAllNetworkInterfaces())
{
if (ni.NetworkInterfaceType == NetworkInterfaceType.Ethernet)
{
if (ni.IsDhcpEnabled)
{
ipAddress = ni.IPAddress;
if (ipAddress != null && ipAddress != "0.0.0.0")
{
break;
}
else
{
ni.RenewDhcpLease();
Thread.Sleep(500);
ipAddress = ni.IPAddress;
}
}
else
{
ni.EnableDhcp();
Thread.Sleep(500);
ipAddress = ni.IPAddress;
}
break;
}
}
Debug.Print("IP Address - " + ipAddress);
Debug.Print("https://" + ipAddress + "/LED?status=on|off");
WebServer.StartLocalServer(ipAddress, 80);
var ledEvent = WebServer.SetupWebEvent("LED");
ledEvent.WebEventReceived += ledEvent_WebEventReceived;
こんな風にコードを書いて、ボードのIPアドレスを取得し、Programクラスに以下のメソッドを追加すれば、簡単に作成できます。
void ledEvent_WebEventReceived(string path, WebServer.HttpMethod method, Responder responder)
{
string status= responder.GetParameterValueFromURL("status");
if (status == "on")
{
Mainboard.SetDebugLED(true);
}
else
{
Mainboard.SetDebugLED(false);
}
}