Crash course on The TFS Integration Platform
If you are somehow involved with TFS and ALM, I bet you have heard about TFS Integration Platform (https://tfsintegration.codeplex.com/). This is one great project allowing you to integrate TFS with other systems – including older versions of TFS. It is a well documented project and there are 2 wonderful videos helping you get started up easily (Video: Getting Started Part 1 - Basic Scenario and Video: Getting Started Part 2 - Advanced Scenario). Sometimes, for people like me, you need a crash course that will let you understand what the concept is about. In this post I will try to get you familiarized with TFS Integration Platform.
Before diving into screenshots, allow me to explain a bit more about why usage of TFS Integration Platform was necessary. For the current project I work for, we have installed a TFS 2008 server to host the code base and work items. We have 3 development teams and 1 management team, all in different geographies accessing the same TFS Server. Again, all teams have different branches that they work on. When a feature implementation is complete, merging is done to an integration branch allowing feature to be promoted for testing. After the release of TFS 2010, I wanted to upgrade the TFS 2008 server to TFS 2010. Due to the nature of geographically distributed teams, I wanted to make sure that the development continues without any downtimes and I will be able to switch the teams one by one to the new TFS Server. This is where TFS Integration Platform comes in handy – one of the many valuable features is that it allows you run two different TFS servers in sync.
There are two approaches you can take in using TFS Integration Platform for tackling this problem. One of them is to create your own configuration files and run the Integration Platform’s Services to perform the synchronization. The other option is more like a NEXT NEXT FINISH approach, allowing you to visually create the configuration files and execute the synchronization. In this post I will try to introduce you to TFS Migration Shell which allows you to define a TFS to TFS Connection Configuration. To keep the post short, we will only synchronize the source code.
The first step is to download the TFS Integration installer from https://tfsintegration.codeplex.com/ and install it to an environment that is going to be responsible for performing the SYNC between two different TFS Servers. During installation, you will be asked for a storage SQL Server and you can use any SQL Server Instance that is suitable for you. Again you will also be asked for credentials which has to have permission to access both TFS Systems (and projects that you are going to sync) and SQL server.
The next step is to browse the installation directory (in my case it is \Program Files\Microsoft Team Foundation Server Integration Platform\TFS to TFS Connector) and run the TFSMigrationShell.exe. You will see something similar to the following screenshot.

We will proceed with New Configuration option that will allow us to create a new configuration to sync our two TFS servers. As soon as we click on the New Configuration, we will be asked to choose a template. Using the file open dialog, browse to \Program Files\Microsoft Team Foundation Server Integration Platform\TFS to TFS Connector\Configurations directory which contains couple of templates. The first template is the VC_TFStoTFS_Template.xml which is designed for TFS to TFS version control synchronization. The second template is WIT_TFSToTFS_Template.xml which is designed for Work Item synchronization. The third template is WIT_TFSToTFS_FieldMap_Template.xml which is again designed for Work Item synchronization but with field mapping. As we are planning to do a TFS to TFS synchronization and we are planning only to synchronize the source code we are going to choose “VC_TFSToTFS_Template.xml”.

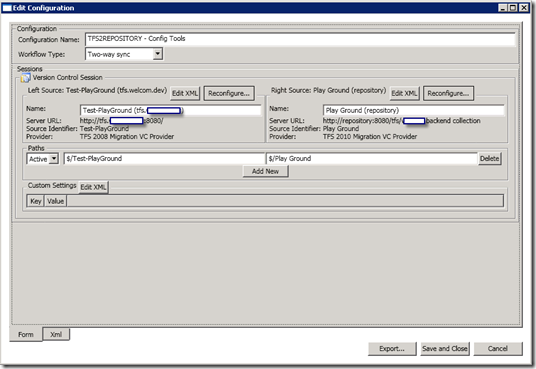
Once we select the template a new screen will show up where we will configure the template to fit our case. The first few values we have to provide are straight forward. The configuration asks us to provide a Configuration Name which is going to be the name that we will be able to locate the sync job.

The next value we have to provide is the Workflow Type. This is where we will be able to select what kind of a synchronization is going to take place. We can select one of the following:
- One-Way Migration: If the configuration is set to be one-way, the synchronization will only from Source to Destination. It is more like a pull subscription where the destination server is only a consumer. One can use this model where the source server gets updated and the destination server stays idle.
- Two-Way Sync: This option allows the changes to be propagated to both servers. This will be our option as we want to move the teams one by one to the new server.
- Custom: This is the option where you can define the frequency, direction and synchronization context. The frequency can be Continuous Automatic, Continuous Manual and One Time. The direction can be unidirectional and bidirectional. You can also disable the sync context or you can select unidirectional or bidirectional context synchronization.
Once we select the workflow type and put in a name, we will have to specify the Source System. This is again very simple. Remember our example was to move the code base and the users from TFS 2008 to TFS 2010. So we will be selecting TFS 2008 Migration VC Provider.

Once you select the TFS 2008 Migration VC Provider, you will be prompted for connecting to TFS. If you have not defined any servers before, click on the Servers button and add the TFS server. Once you add the server you will be back at the Connect to Team Foundation Server screen.Select the Server from the dropdown and select the team project you want to source from. For our case, we will be sourcing from server “tfs” and will use the Test-Playground team project.

The Right Source: Target System part is similar to Left Source. All we are going to do is click on the configure button and select “TFS 2010 Migration VC Provider”. Once we do that, we will be prompted for the TFS 2010 Server, Team Project Collection and the Team Project.

As you can see from the screenshot above, we are mostly done. We can add / delete Sync Paths in the Source Control. If you wish to sync only one branch or one directory, you can modify the existing Path to make sure that you ignore the rest.
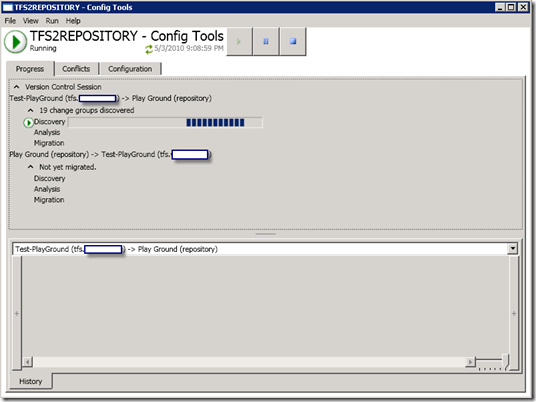
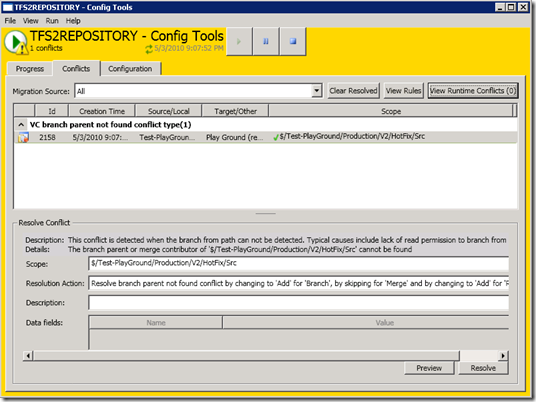
Since your configuration is now ready, you can choose the export it. With or without exporting, clicking Save and Close will take you to the Execution screen where you can pause, resume, stop and start the synchronization. Depending on your source code you will also encounter conflicts which you will also be able to solve on this screen. Again you can write / define rules in the Conflicts tab page to automatically resolve any conflicts.


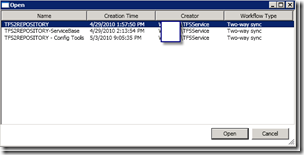
 Since the process takes place in the background services, you can exit the application and come back at a later time – you will be able to choose your configuration once you select the Open Configuration option at the start of the application - once you start the application you are prompted either to start a new configuration or to open a existing configuration. Alternatively you can choose to open a configuration by using the File Menu and clicking on the Open.
There is much more you can do with the Migration Shell but I guess you now know your way