Microsoft Azure Infrastructure as a Service – Part 1
Microsoft
Azure is offering among its different services, the Virtual Machine which
is considered the infrastructure as a Service, the layer where you can create,
deploy, migrate and manage Virtual Machine with different kind of operating systems
provided by Microsoft or by third certified parties. It can run Microsoft Technology like the
Windows server 2008 or Server 2012 or non-Microsoft technology like Linux, SUSE
and so on. The Azure Virtual machine
also provide you with different solution that can be installed and deployed
automatically or manually out of the box, like SharePoint, Dynamics and SQL
server with its different versions. Also
the different Virtual Machines created can communicate to each other or to the
on premises Virtual machines and can be migrated from and to Azure through
different the network configuration you make and using some tools, like the System Center.
Microsoft Azure Virtual Machine is based on Microsoft Azure Page
BLOB storage, which is at the end represented like an array of byte of 0 and 1,
which is used to upload and download content from Azure. You have the power to choose the required
processing power and memory for your virtual machines with different options
known as the A instances and the D instances.
The main differences between the A instances and the D instances are the
Processing power type and the SSD hard disks attached to the created VM, for
sure there will be differences in the prices.
For more information about the Virtual Machines pricing details, kindly
go to this link.
Once you create the Virtual Machine you will have the OS
disks with limited storage which is recommended to leave for the OS only and
you will have the capability to attach empty, uploaded or previously created
Disks for the different applications and storage for your use, will go through
all of this in my coming demos. Kindly
note that the disk maximum capacity is 1 terabyte per disk up to 16 disks per
Virtual Machine which is up to 16 terabytes per Virtual Machine. However you have to take care that with the
increasing number of Disks you will also have to increase the processing power
and the RAM of the VM. For more information,
you can find them in the
following link.
Now let start by creating your first Virtual Machine with
Microsoft Windows Server 2012 Datacenter on top of it, there are two way to do
so, the first quick one is the quick create:
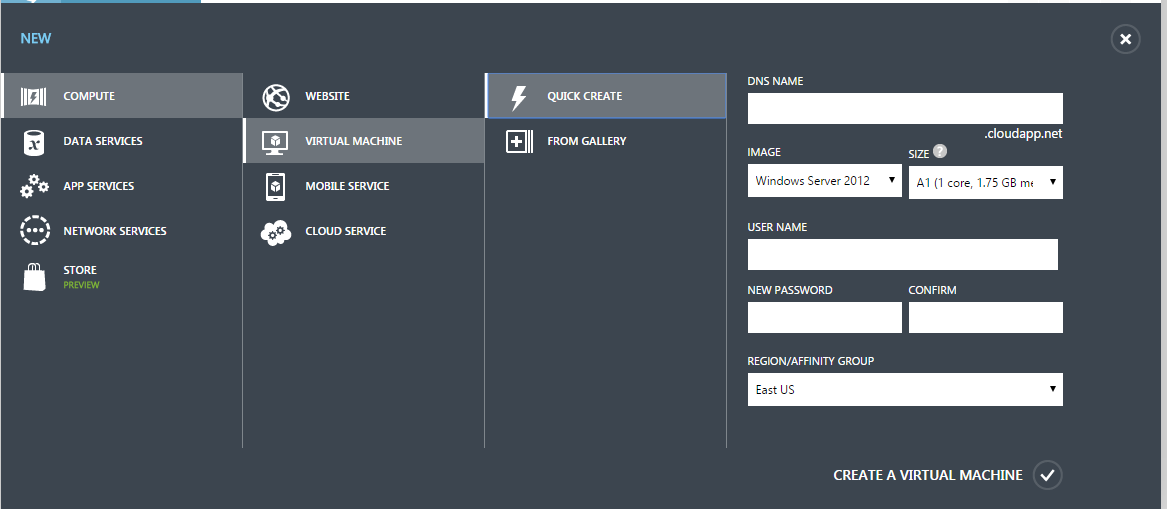
And the second one, which give you the full control on the
Virtual Machine step by step, but take some time. Click on New, Compute, Virtual Machine, From
Gallery:
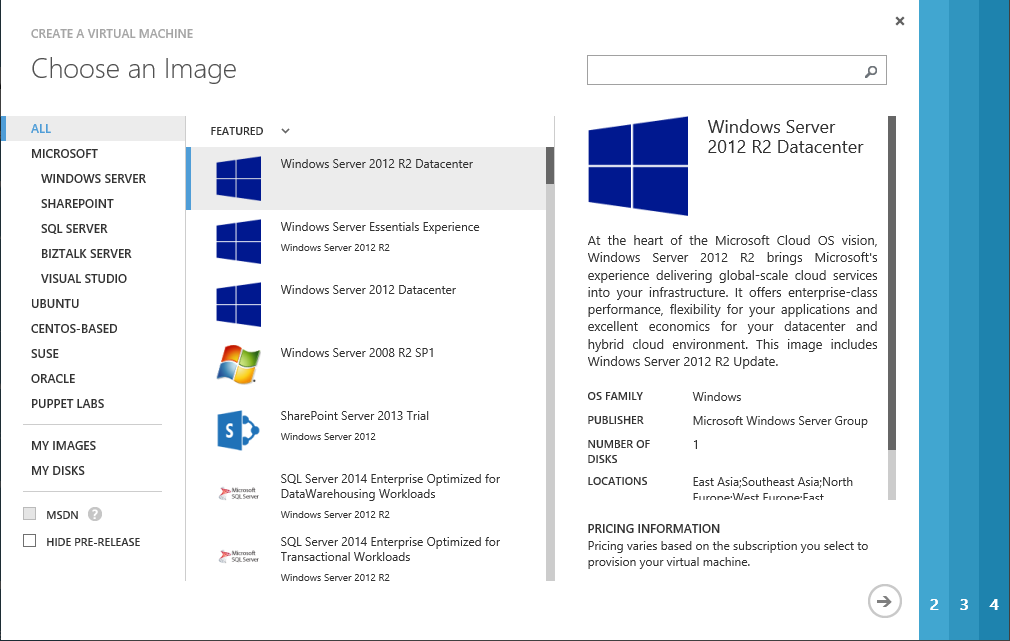
Under “All”, you can find all the OS supported by Microsoft,
whether based on MS technology or not, to run on Microsoft Azure VMs, at the
end of list, you can find the list “My Images” and “My Disks”. The “My Images” are the list of the
previously created Azure VM which you captured a snapshot of the whole VM. You can later on create new ones based on
this image.
For the disks, this is most of the time represents the data
disks attached to previously created VMs or uploaded ones from your infrastructure
to the Cloud. It also can be an OS disk
uploaded to your Azure account, a specially customized one, a migrated VM. Where you can initialize a new VM based on
it.
For the Demo purpose, we will choose the first choice which
is the Windows Server 2012 R2 Data center, and click on next.
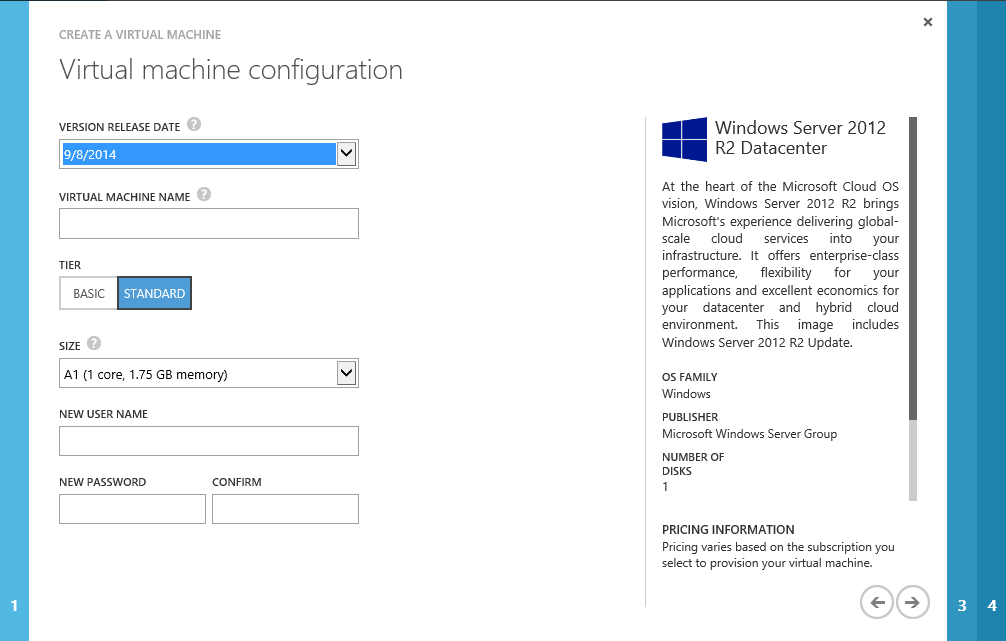
In this step you will be asked to enter some details and
information like, the username and password, choose the size of the VM. For the Tier there is for sure differences
between the basic and the standard Tier.
If you are looking for testing and so on then I recommend you choose the
basic one, however for production and driving pilots the standard one is yours
for sure. For more information about the
differences between the 2 tiers, I recommend you check the following
link.

And here comes the third step, which requires you to do the
configuration required for the VM, like if you want a new Cloud Services or if
it is going to join an existing one, the location where you want to host the
Virtual Machine, the Storage account as the Virtual Machines on Azure are based
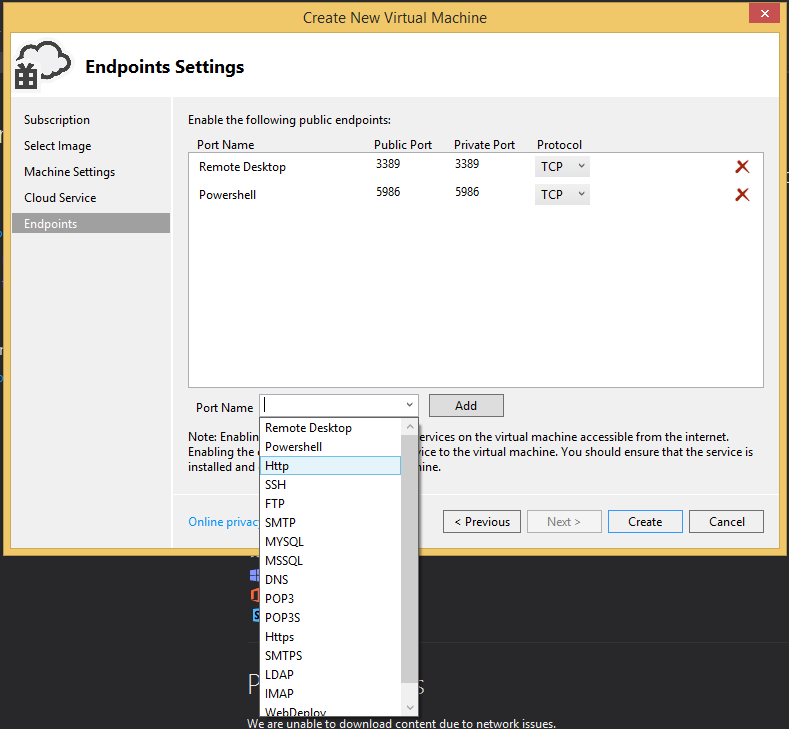
on the BLOB storage. For the Endpoints, they
are mainly for configuring the incoming traffic firewall, the thing here is the
endpoint has both public and private port, for security issues, the private
port might not be the best thing to share, except for sure the HTTP and the
HTTPS. One main additional thing, you
can configure the Endpoint to be load balanced between multiple VM in the same
availability set.

The last step for the VM wizard, is required for those who
will install Security Extensions on top of their VMs or for those who will
configure some extensions using Microsoft and non-Microsoft tools like the
Puppet Enterprise Agent and the Chef. For
the Microsoft Custom Script, it is PowerShell script you can directly run on a
VM to make the required configuration on the VM, rather than doing it couple of
times on different VMs.
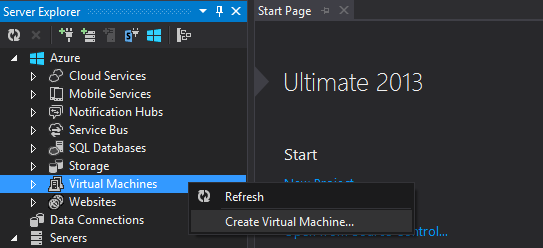
With the integration of the different tools of Microsoft,
now you can create and monitor some of your Azure Services through Microsoft
Visual Studio. Just open your Server
Explorer in Visual Studio and you will be able to add your Azure account to it,
monitor, develop and create new services like the following snapshot.

Now to create a new Virtual Machine through Visual Studio,
go to the Virtual Machines under the Azure tab, right click on it and click on “Create
Virtual Machine”:
You
will be prompted a new window for Virtual Machine Creation, first of all asking
which Microsoft Azure account you want to create your Virtual Machine in
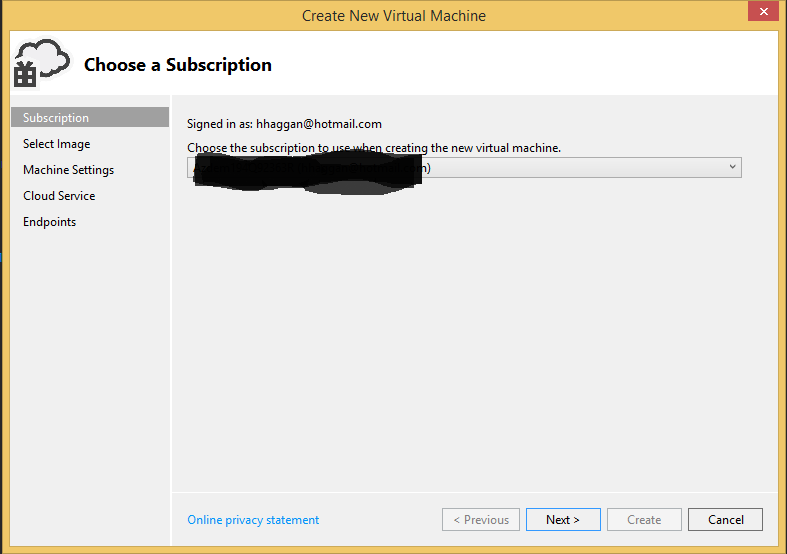
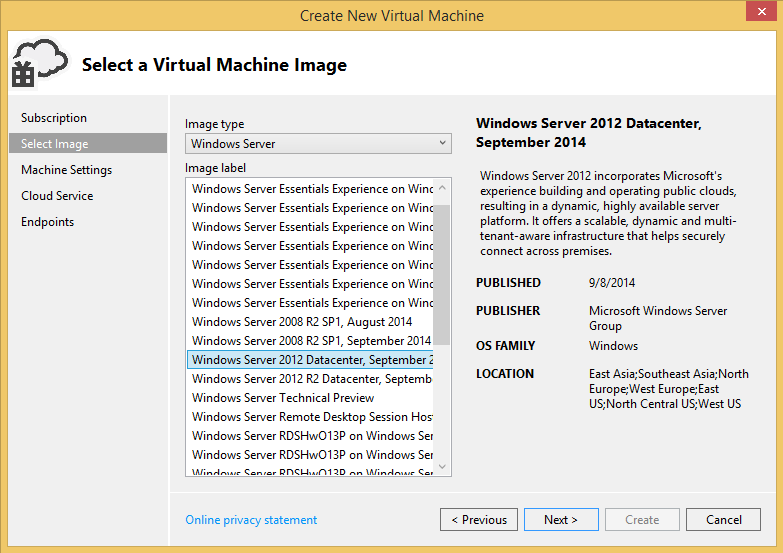
The next step, like the one you are creating through the portal, which
Image of OS you want to have on your VM:
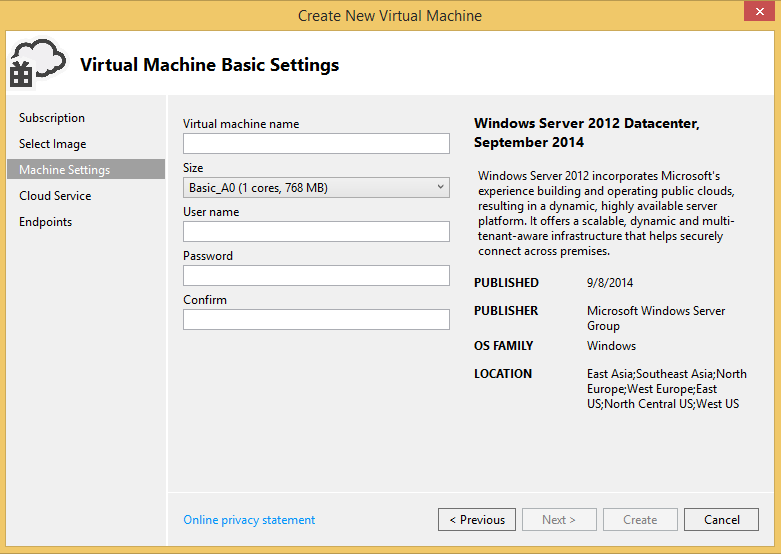
Next you will be asked to provide the required Virtual
Machine configuration out of the available list:
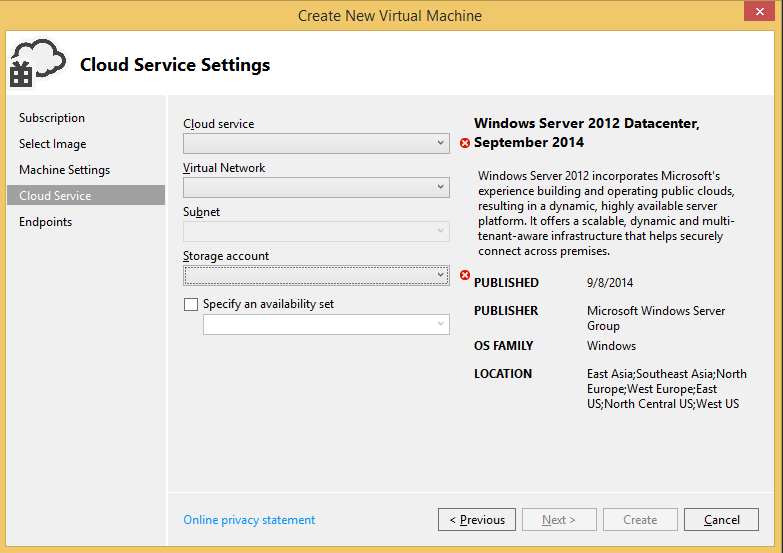
For the Cloud Service, networks, and storage account, you
will be able to make the VM to join previously created Cloud Service, Network,
Storage account, or even Availability set.
But you will be able to create only Cloud Service and storage account
through Visual Studio. For the
availability set and the network, if they were not created you will have to do
this step through the Azure portal.
Last step is the configuration of the Endpoints for your
Virtual Machine, like the steps we have done on the portal, but this time you
will have to do it through Visual Studio:
Once you click on Create the Virtual Machine will start provisioning
on Azure and after couple of minute, you will get the message of the
confirmation of the creation of the VM.
For more information about
the Availability Set and Cloud Service, kindly go to Microsoft Azure
infrastructure as a Service – Part 2.