Microsoft Azure Active Directory – Part 2 (MFA)
Previously blogged about Microsoft
Azure Active Directory Premium, one of the
Enterprise Mobility Suite services on Microsoft
Azure, and how can we use it and create users and assign them to the AD
Premium. In this blog post, I will show
you how to do the Multi factor authentication (MFA) configuration for the
assigned users.
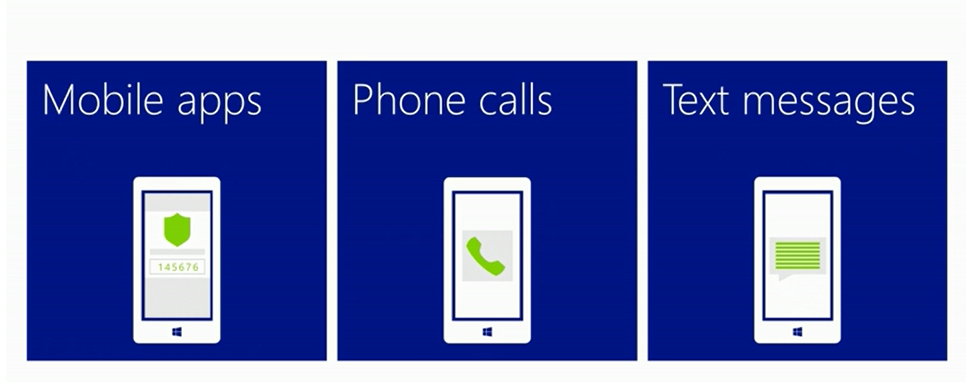
Let’s first understand what is the Multi-factor
authentication or the MFA. The MFA is a
way to authenticate the user trying to sign in to an application whether it was
a web application or non-browser application, through different ways defined by
the user. The first option is through a
call, the user will receive a call where he can get a code to enter to get
authenticated by the application, the second option is through SMS and the
third one is through a mobile application.
If you open your Azure Active Directory, like we
previously did, you will be able to see all the user created under the
users section.
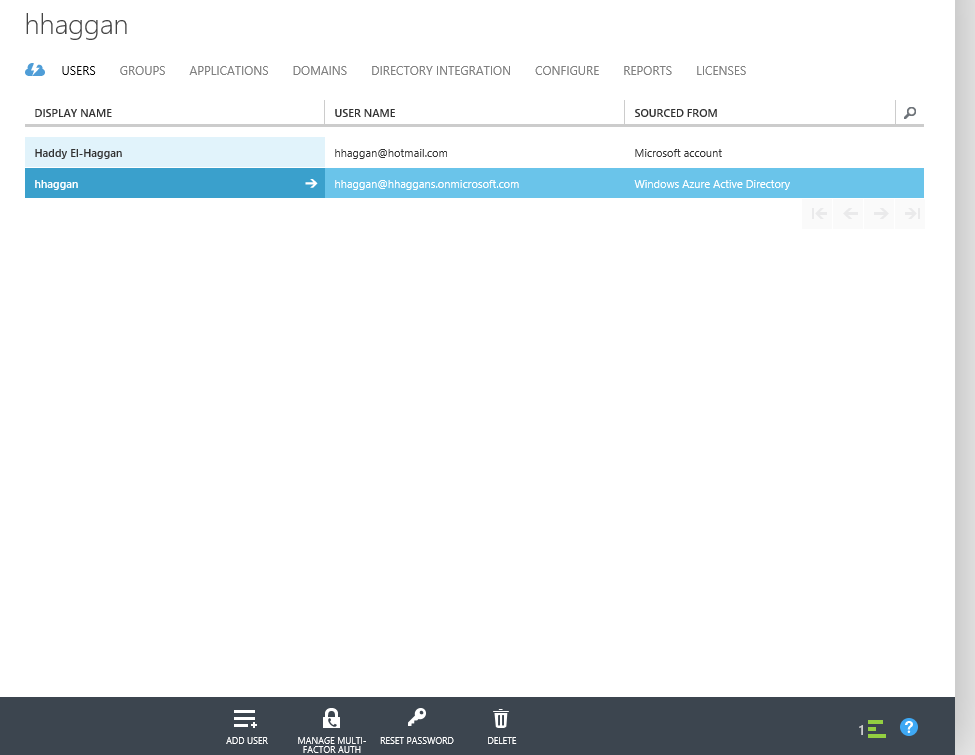
If you click on the global administrator, you will be able
to see two buttons at the end of the page, for adding new user and for the
selected user MFA configuration. If you
choose the Microsoft Azure AD User previously created in our scenarios “hhaggan”,
you will be able to see 4 buttons at the bottom of the page, the normal ones
and 2 others for resetting user password and the user delete button. For the demo purpose we will work on the MFA
one. Once you click on the Multi-factor
authentication, another page in the browser will open up asking for your
account credentials. After you enter
them, you will be able to see a similar page:

As we are focusing now on the “hhaggan” account, you can now
see the MFA status for this account that is has been enabled. If you click on the check box at the left
most of the “hhaggan” account you will be able to see the following options:
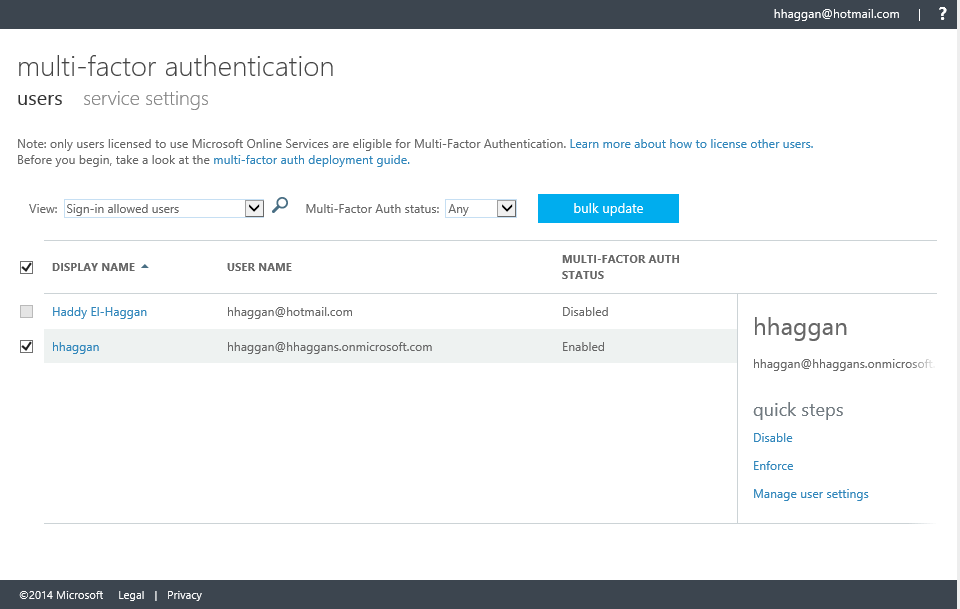
Simply they will give you the ability to disable the MFA
setting for the user, or whether you want to enforce it, like the following
snapshots

If you click on the Enforce multi-factor auth button, the
operation might take some time and you will be prompted the following window:
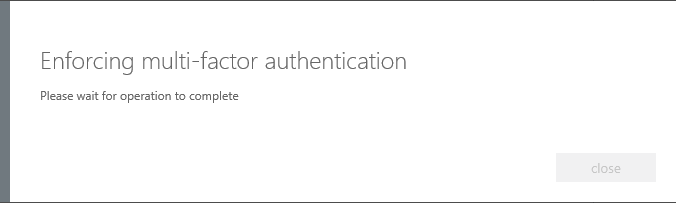
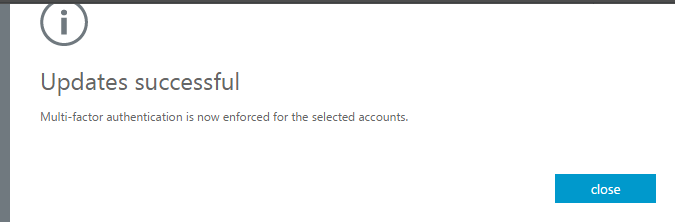
Wait couple of seconds, until you get a confirmation message
with the update that has been done on the user:
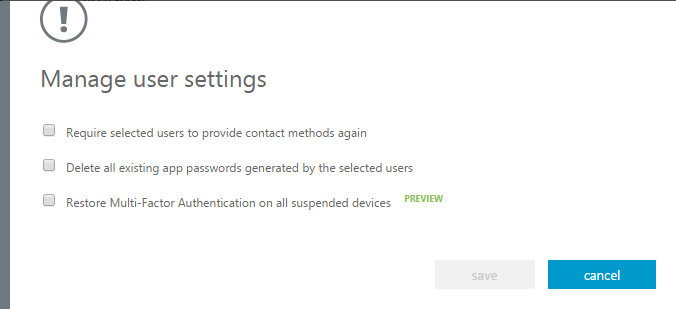
The last step you can do on the user account is on the “Manage
User Settings”, like the following snapshot:
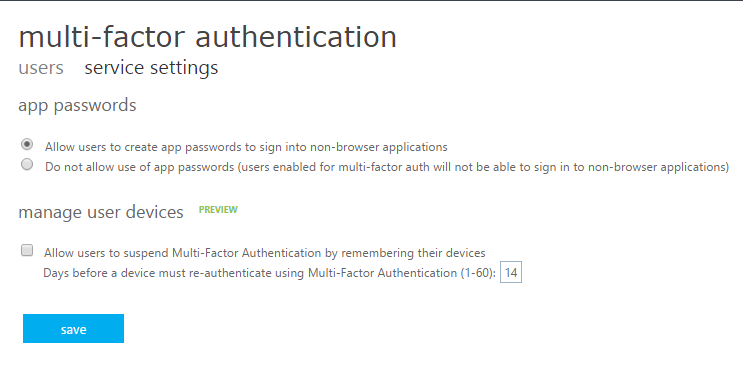
At the top of the page, let’s go to the Service setting, this
is where you as a Global administrator for your AD Premium and the MFA, this is
where you can allow the user to have App passwords for non-browser applications
or disable this functionalities. You also
have the capability to allow the user to stop receiving MFA notifications for a
certain period of time defined by the global administrator.