Out of Bounds
Several years ago, I stumbled across the concept of Out of Bounds Photography (OoB - that's with a B, not a weird alien from Dr Who) and thought this was great stuff. Some people in the lab here had contributed some technology to the (now discontinued) Digital Image suite of tools, including some clever image segmentation work which made extracting the foreground object really easy compared to the laborious and very fiddly process of manual segmentation.
We decided we'd do a little investigation in the area of OoB to see what else we could do, resulting in a 2009 paper which talked about assisting the user further and creating more realistic frames and shadows - there's a snapshot of a tool we created on the third page of that paper. Unfortunately, there were too many other calls on our time to actually get round to polishing the tool sufficiently to make it generally available. At pretty much the same time, Office 2010 hit the market - and this includes the next generation of the segmentation techniques that went into Digital Image. PowerPoint turns out to be a fairly slick picture editing tool (yes, really) and, with this new foreground segmentation (or "background removal" as it's referred to within the Office applications), basic OoB is almost as easy within PowerPoint as it was in our less than robust tool.
If you like the idea of playing with OoB, but don't like the idea of having to work too hard at it, here's the easy way get started...
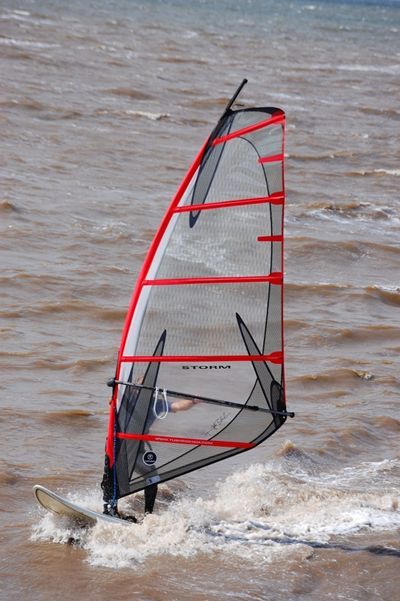
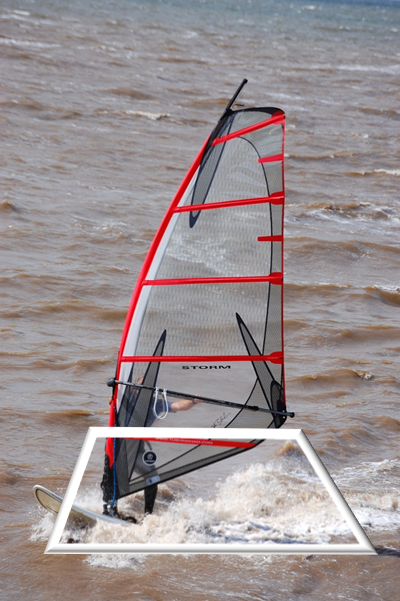
Step one: find a picture which has a strong background in one plane and a strong foreground in a perpendicular-ish one - for example, a landscape (horizontal "background") with a building in it (vertical "foreground"); or someone coming through a door (vertical background in the plane of the page, say, and vertical foreground but in the plane out of the page). It's good to have this separation because there's a "space" in which to inject the frame between the two planes without looking too artificial. Of course, it's really all thoroughly artificial and just fooling our eyes, and you can create some amazing OoB images without following those rules of thumb - see the Flickr group for many fine examples. I'm going to start off with the wind surfer below.
Paste that into a blank PowerPoint slide and draw a closed polygon roughly where you want the frame to be. Make the frame nice and fat and 3d, via right click, format shape - you can tweak the shape by using Edit Points.
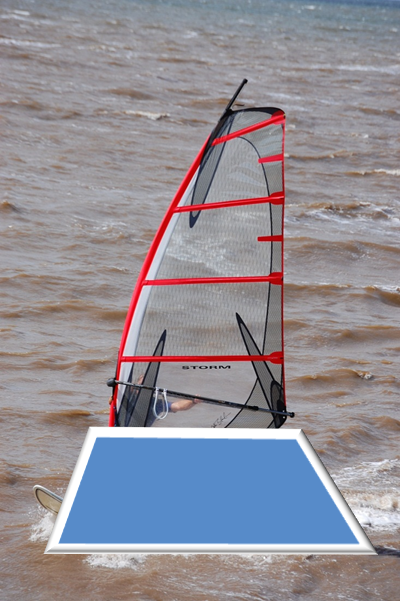
Set the shape fill to be the same image: to begin with it won't be properly aligned or sized, and that's the next job to tackle in this workflow. There are two approaches:
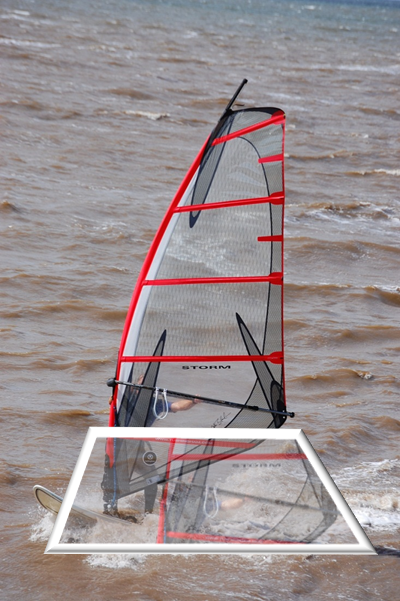
The first is to and set the image fill to tile mode (which removes the image scaling, i.e. , the image is now the same size as the original, and only the offset is wrong). I find it simplifies things to make the frame polygon translucent temporarily, then set the horizontal and vertical offsets in the picture layout properties dialog box such that the frame contents align with the background image. (Note that if you change the polygon shape or position, you'll almost certainly have to realign the frame fill.)
Another approach is to leave the image as stretched but engage "crop mode" - from there you can manipulate the image by dragging the image handles. (Thanks to Tucker Hatfield for that suggestion.) The crop button is in Picture Tools, on the Format tab: clicking it gives something like the image below:
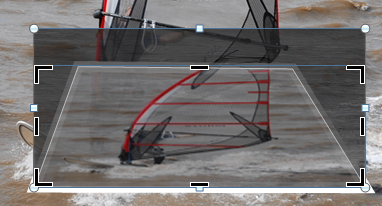
Dragging the black lines adjusts the frame independently of the contained image; dragging the light spots adjusts the image independently of the frame - it's these ones you want here.
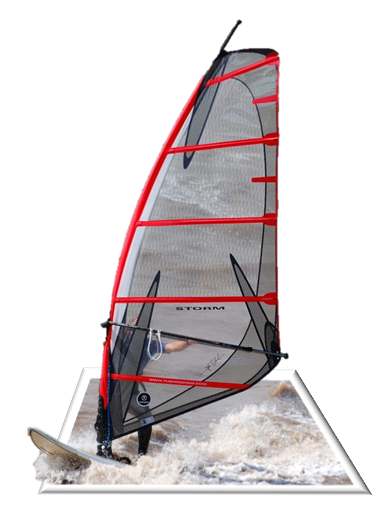
Whichever approach you take, you should end up with something like below. (I find it helps to do the final alignment when zoomed in quite a bit.)
The next step is to remove the unwanted background. Bring the full image to the front (or send the frame to the back) and use the background removal tool to get rid of everything you don't want to have showing outside of the frame space - it doesn't matter if the segmentation is good inside the frame since that will show through from the frame component beneath when you're finished; just concentrate on stuff that happens outside. Because you can't see the frame component while you're working on background removal, it might be worth creating a copy of the frame alongside this or in another window, so you can remind yourself what is actually in the frame.
Viola!
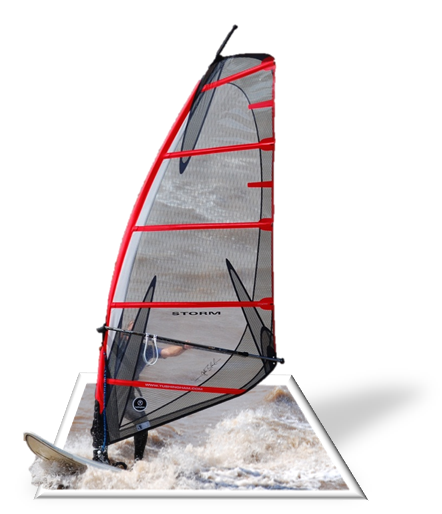
You can add shadows and other effects easily in PowerPoint, to emphasise the 3d-ness of the result too.
That's it. Fairly basic stuff compared to, say, some of the pictures in the Flickr group, but have fun.